
【精通篇】打造React Native鸿蒙跨平台开发高级复合组件库开发系列:Overlay 遮罩层(创建一个遮罩层)
摘要:本文介绍了在React Native项目中为华为鸿蒙系统开发Overlay遮罩层功能的具体方法。通过创建原生模块桥接鸿蒙API,详细说明了Java原生代码实现和JavaScript调用的完整流程,并提供了兼容性优化建议。文章包含一个完整的Overlay组件代码示例,演示了动画效果、关闭控制等核心功能实现,强调需在鸿蒙设备上进行充分测试以确保功能正常。
在React Native项目中开发针对华为鸿蒙(HarmonyOS)的特定功能,如Overlay(遮罩层),你需要考虑一些特定的适配步骤和注意事项,因为鸿蒙操作系统有其独特的开发环境和API。以下是一些步骤和技巧,帮助你在React Native项目中实现Overlay遮罩层:
- 了解鸿蒙操作系统
首先,确保你了解鸿蒙操作系统的一些基本概念和开发环境。鸿蒙操作系统是基于Android的,但有一些特定的API和框架差异。例如,华为提供了自己的开发工具和框架,如HUAWEI DevEco Studio。
- 使用原生模块
React Native主要通过JavaScript和原生代码的桥接来实现功能。对于需要使用鸿蒙特定API的功能,如Overlay,你可以通过创建一个原生模块来实现。
步骤:
-
创建原生模块:
使用Java或Kotlin(对于Android部分)编写原生代码,实现Overlay功能。 -
桥接至React Native:
使用React Native的NativeModules或NativeEventEmitter将原生代码的功能暴露给JavaScript。
示例:
Java (Android):
import com.facebook.react.bridge.ReactApplicationContext;
import com.facebook.react.bridge.ReactContextBaseJavaModule;
import com.facebook.react.bridge.ReactMethod;
import android.app.Activity;
import android.view.WindowManager;
import android.view.WindowManager.LayoutParams;

public class OverlayModule extends ReactContextBaseJavaModule {
    private Activity activity;
    private WindowManager windowManager;
    private View overlayView;

    public OverlayModule(ReactApplicationContext reactContext) {
        super(reactContext);
        this.activity = getCurrentActivity();
        this.windowManager = (WindowManager) activity.getSystemService(Context.WINDOW_SERVICE);
    }

    @ReactMethod
    public void showOverlay() {
        if (overlayView == null) {
            overlayView = new View(activity);
            // 设置Overlay的样式和内容
            overlayView.setBackgroundColor(Color.parseColor("80000000")); // 半透明背景
            windowManager.addView(overlayView, getWindowLayoutParams());
        }
    }

    @ReactMethod
    public void hideOverlay() {
        if (overlayView != null) {
            windowManager.removeView(overlayView);
            overlayView = null;
        }
    }

    private LayoutParams getWindowLayoutParams() {
        LayoutParams params = new LayoutParams(
            LayoutParams.MATCH_PARENT,
            LayoutParams.MATCH_PARENT,
            0, 0, 0, 0);
        params.type = LayoutParams.TYPE_APPLICATION_OVERLAY; // 设置Overlay类型
        params.flags = LayoutParams.FLAG_NOT_FOCUSABLE; // 不占用事件焦点,允许其他窗口事件传递
        return params;
    }
}
JavaScript:
import { NativeModules } from 'react-native';
const { OverlayModule } = NativeModules;

export function showOverlay() {
  OverlayModule.showOverlay();
}

export function hideOverlay() {
  OverlayModule.hideOverlay();
}
-
测试和调试
在开发过程中,确保在鸿蒙设备或模拟器上进行充分的测试。使用华为提供的工具和模拟器进行测试,以确保Overlay功能在鸿蒙系统上正常工作。 -
考虑兼容性和性能问题
由于Overlay可能涉及到系统级别的权限和资源管理,确保在实现时考虑到应用的性能和兼容性。例如,避免在主线程中执行长时间运行的操作。 -
文档和社区支持
利用华为开发者论坛、官方文档和社区资源来获取更多关于鸿蒙开发的最佳实践和问题解决方案。
通过上述步骤,你可以在React Native项目中实现针对鸿蒙操作系统的Overlay遮罩层功能。
实际案列组件代码演示:
import React, { useState } from 'react';
import { View, Text, StyleSheet, ScrollView, Dimensions, TouchableOpacity, Modal, Animated, Easing } from 'react-native';
// Simple Icon Component using Unicode symbols
interface IconProps {
name: string;
size?: number;
color?: string;
style?: object;
}
const Icon: React.FC<IconProps> = ({
name,
size = 24,
color = '#333333',
style
}) => {
const getIconSymbol = () => {
switch (name) {
case 'close': return '✕';
case 'check': return '✓';
case 'info': return 'ℹ️';
case 'warning': return '⚠️';
case 'success': return '✅';
case 'error': return '❌';
case 'lock': return '🔒';
case 'unlock': return '🔓';
case 'shield': return '🛡️';
case 'key': return '🗝️';
default: return '●';
}
};
return (
<View style={[{ width: size, height: size, justifyContent: 'center', alignItems: 'center' }, style]}>
<Text style={{ fontSize: size * 0.8, color, includeFontPadding: false, textAlign: 'center' }}>
{getIconSymbol()}
</Text>
</View>
);
};
// Overlay Component
interface OverlayProps {
visible: boolean;
onClose: () => void;
children: React.ReactNode;
closable?: boolean;
maskClosable?: boolean;
overlayStyle?: object;
maskStyle?: object;
animationType?: 'fade' | 'slide-up' | 'slide-down' | 'zoom';
}
const Overlay: React.FC<OverlayProps> = ({
visible,
onClose,
children,
closable = true,
maskClosable = true,
overlayStyle = {},
maskStyle = {},
animationType = 'fade'
}) => {
const [fadeAnim] = useState(new Animated.Value(0));
const [slideAnim] = useState(new Animated.Value(animationType === 'slide-up' ? Dimensions.get('window').height : -Dimensions.get('window').height));
const [scaleAnim] = useState(new Animated.Value(0.8));
React.useEffect(() => {
if (visible) {
showOverlay();
} else {
hideOverlay();
}
}, [visible]);
const showOverlay = () => {
switch (animationType) {
case 'fade':
Animated.timing(fadeAnim, {
toValue: 1,
duration: 300,
easing: Easing.out(Easing.ease),
useNativeDriver: true
}).start();
break;
case 'slide-up':
Animated.timing(slideAnim, {
toValue: 0,
duration: 300,
easing: Easing.out(Easing.ease),
useNativeDriver: true
}).start();
break;
case 'slide-down':
Animated.timing(slideAnim, {
toValue: 0,
duration: 300,
easing: Easing.out(Easing.ease),
useNativeDriver: true
}).start();
break;
case 'zoom':
Animated.parallel([
Animated.timing(scaleAnim, {
toValue: 1,
duration: 300,
easing: Easing.out(Easing.ease),
useNativeDriver: true
}),
Animated.timing(fadeAnim, {
toValue: 1,
duration: 300,
useNativeDriver: true
})
]).start();
break;
}
};
const hideOverlay = () => {
switch (animationType) {
case 'fade':
Animated.timing(fadeAnim, {
toValue: 0,
duration: 200,
useNativeDriver: true
}).start(() => onClose());
break;
case 'slide-up':
Animated.timing(slideAnim, {
toValue: Dimensions.get('window').height,
duration: 200,
useNativeDriver: true
}).start(() => onClose());
break;
case 'slide-down':
Animated.timing(slideAnim, {
toValue: -Dimensions.get('window').height,
duration: 200,
useNativeDriver: true
}).start(() => onClose());
break;
case 'zoom':
Animated.parallel([
Animated.timing(scaleAnim, {
toValue: 0.8,
duration: 200,
useNativeDriver: true
}),
Animated.timing(fadeAnim, {
toValue: 0,
duration: 200,
useNativeDriver: true
})
]).start(() => onClose());
break;
}
};
const handleMaskPress = () => {
if (maskClosable) {
hideOverlay();
}
};
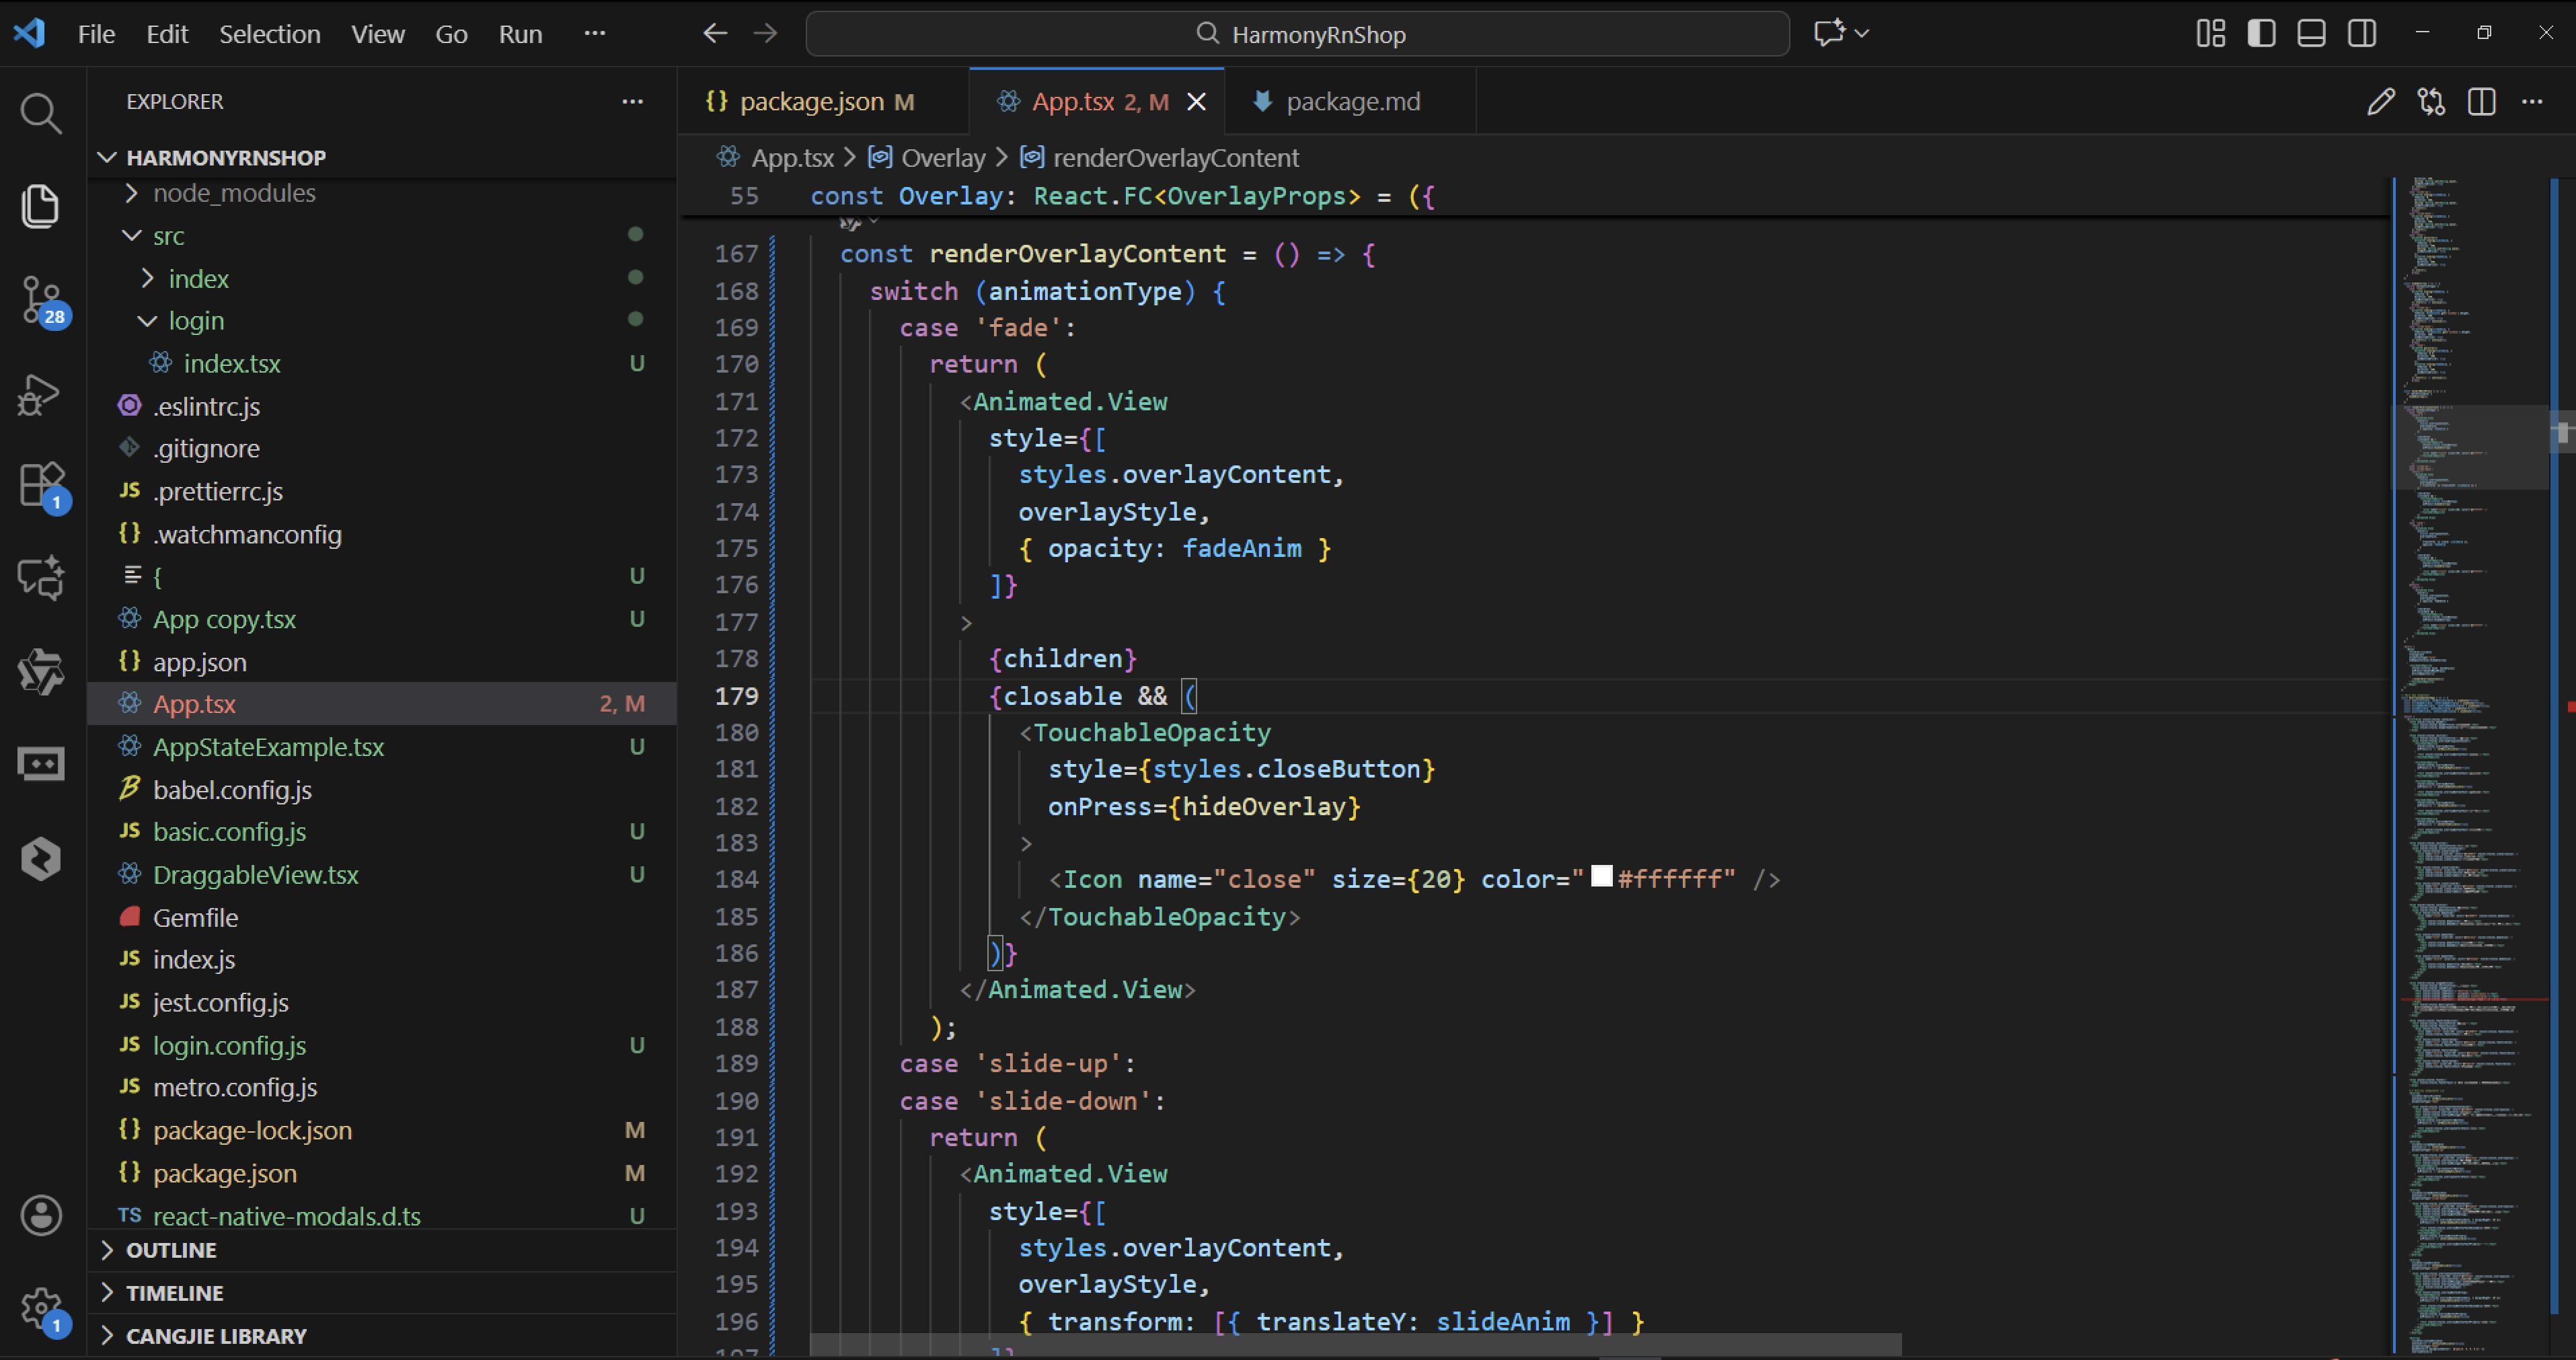
const renderOverlayContent = () => {
switch (animationType) {
case 'fade':
return (
<Animated.View
style={[
styles.overlayContent,
overlayStyle,
{ opacity: fadeAnim }
]}
>
{children}
{closable && (
<TouchableOpacity
style={styles.closeButton}
onPress={hideOverlay}
>
<Icon name="close" size={20} color="#ffffff" />
</TouchableOpacity>
)}
</Animated.View>
);
case 'slide-up':
case 'slide-down':
return (
<Animated.View
style={[
styles.overlayContent,
overlayStyle,
{ transform: [{ translateY: slideAnim }] }
]}
>
{children}
{closable && (
<TouchableOpacity
style={styles.closeButton}
onPress={hideOverlay}
>
<Icon name="close" size={20} color="#ffffff" />
</TouchableOpacity>
)}
</Animated.View>
);
case 'zoom':
return (
<Animated.View
style={[
styles.overlayContent,
overlayStyle,
{
transform: [{ scale: scaleAnim }],
opacity: fadeAnim
}
]}
>
{children}
{closable && (
<TouchableOpacity
style={styles.closeButton}
onPress={hideOverlay}
>
<Icon name="close" size={20} color="#ffffff" />
</TouchableOpacity>
)}
</Animated.View>
);
default:
return (
<Animated.View
style={[
styles.overlayContent,
overlayStyle,
{ opacity: fadeAnim }
]}
>
{children}
{closable && (
<TouchableOpacity
style={styles.closeButton}
onPress={hideOverlay}
>
<Icon name="close" size={20} color="#ffffff" />
</TouchableOpacity>
)}
</Animated.View>
);
}
};
return (
<Modal
visible={visible}
transparent
animationType="none"
onRequestClose={hideOverlay}
>
<TouchableOpacity
style={[styles.mask, maskStyle]}
onPress={handleMaskPress}
activeOpacity={1}
>
{renderOverlayContent()}
</TouchableOpacity>
</Modal>
);
};
// Main App Component
const OverlayComponentApp = () => {
const [basicVisible, setBasicVisible] = useState(false);
const [slideUpVisible, setSlideUpVisible] = useState(false);
const [slideDownVisible, setSlideDownVisible] = useState(false);
const [zoomVisible, setZoomVisible] = useState(false);
const [customVisible, setCustomVisible] = useState(false);
return (
<ScrollView style={styles.container}>
<View style={styles.header}>
<Text style={styles.headerTitle}>遮罩层组件</Text>
<Text style={styles.headerSubtitle}>美观实用的遮罩层控件</Text>
</View>
<View style={styles.section}>
<Text style={styles.sectionTitle}>基础用法</Text>
<View style={styles.overlayGroupsContainer}>
<TouchableOpacity
style={styles.overlayButton}
onPress={() => setBasicVisible(true)}
>
<Text style={styles.overlayButtonText}>淡入淡出</Text>
</TouchableOpacity>
<TouchableOpacity
style={styles.overlayButton}
onPress={() => setSlideUpVisible(true)}
>
<Text style={styles.overlayButtonText}>向上滑入</Text>
</TouchableOpacity>
<TouchableOpacity
style={styles.overlayButton}
onPress={() => setSlideDownVisible(true)}
>
<Text style={styles.overlayButtonText}>向下滑入</Text>
</TouchableOpacity>
<TouchableOpacity
style={styles.overlayButton}
onPress={() => setZoomVisible(true)}
>
<Text style={styles.overlayButtonText}>缩放效果</Text>
</TouchableOpacity>
<TouchableOpacity
style={styles.overlayButton}
onPress={() => setCustomVisible(true)}
>
<Text style={styles.overlayButtonText}>自定义样式</Text>
</TouchableOpacity>
</View>
</View>
<View style={styles.section}>
<Text style={styles.sectionTitle}>应用场景</Text>
<View style={styles.scenariosContainer}>
<View style={styles.scenarioCard}>
<Icon name="lock" size={32} color="#1890ff" style={styles.scenarioIcon} />
<Text style={styles.scenarioTitle}>安全验证</Text>
<Text style={styles.scenarioDesc}>身份认证弹窗</Text>
</View>
<View style={styles.scenarioCard}>
<Icon name="shield" size={32} color="#52c41a" style={styles.scenarioIcon} />
<Text style={styles.scenarioTitle}>隐私保护</Text>
<Text style={styles.scenarioDesc}>敏感操作确认</Text>
</View>
<View style={styles.scenarioCard}>
<Icon name="key" size={32} color="#722ed1" style={styles.scenarioIcon} />
<Text style={styles.scenarioTitle}>权限申请</Text>
<Text style={styles.scenarioDesc}>系统权限请求</Text>
</View>
</View>
</View>
<View style={styles.section}>
<Text style={styles.sectionTitle}>功能演示</Text>
<View style={styles.demosContainer}>
<View style={styles.demoItem}>
<Icon name="close" size={24} color="#1890ff" style={styles.demoIcon} />
<View>
<Text style={styles.demoTitle}>多种动画</Text>
<Text style={styles.demoDesc}>支持淡入淡出、滑动、缩放等多种动画效果</Text>
</View>
</View>
<View style={styles.demoItem}>
<Icon name="lock" size={24} color="#52c41a" style={styles.demoIcon} />
<View>
<Text style={styles.demoTitle}>自定义样式</Text>
<Text style={styles.demoDesc}>支持自定义遮罩层和内容样式</Text>
</View>
</View>
<View style={styles.demoItem}>
<Icon name="shield" size={24} color="#722ed1" style={styles.demoIcon} />
<View>
<Text style={styles.demoTitle}>灵活控制</Text>
<Text style={styles.demoDesc}>支持遮罩层关闭和内容关闭</Text>
</View>
</View>
</View>
</View>
<View style={styles.usageSection}>
<Text style={styles.sectionTitle}>使用方法</Text>
<View style={styles.codeBlock}>
<Text style={styles.codeText}>{'<Overlay'}</Text>
<Text style={styles.codeText}> visible={'{isVisible}'}</Text>
<Text style={styles.codeText}> onClose={'{setVisible}'}</Text>
<Text style={styles.codeText}> animationType="fade"{'\n'}/>'}</Text>
</View>
<Text style={styles.description}>
Overlay组件提供了完整的遮罩层功能,包括多种动画效果、自定义样式和灵活控制。
通过visible控制显示状态,onClose处理关闭事件,支持自定义遮罩层和内容样式。
</Text>
</View>
<View style={styles.featuresSection}>
<Text style={styles.sectionTitle}>功能特性</Text>
<View style={styles.featuresList}>
<View style={styles.featureItem}>
<Icon name="close" size={20} color="#1890ff" style={styles.featureIcon} />
<Text style={styles.featureText}>多种动画</Text>
</View>
<View style={styles.featureItem}>
<Icon name="lock" size={20} color="#52c41a" style={styles.featureIcon} />
<Text style={styles.featureText}>自定义样式</Text>
</View>
<View style={styles.featureItem}>
<Icon name="shield" size={20} color="#722ed1" style={styles.featureIcon} />
<Text style={styles.featureText}>灵活控制</Text>
</View>
<View style={styles.featureItem}>
<Icon name="key" size={20} color="#fa8c16" style={styles.featureIcon} />
<Text style={styles.featureText}>状态管理</Text>
</View>
</View>
</View>
<View style={styles.footer}>
<Text style={styles.footerText}>© 2023 遮罩层组件 | 现代化UI组件库</Text>
</View>
{/* Overlay Components */}
<Overlay
visible={basicVisible}
onClose={() => setBasicVisible(false)}
animationType="fade"
>
<View style={styles.overlayContentContainer}>
<Icon name="info" size={48} color="#1890ff" style={styles.overlayIcon} />
<Text style={styles.overlayTitle}>信息提示</Text>
<Text style={styles.overlayMessage}>这是一个基础的遮罩层,使用淡入淡出动画效果。</Text>
<TouchableOpacity
style={styles.overlayConfirmButton}
onPress={() => setBasicVisible(false)}
>
<Text style={styles.overlayConfirmText}>确定</Text>
</TouchableOpacity>
</View>
</Overlay>
<Overlay
visible={slideUpVisible}
onClose={() => setSlideUpVisible(false)}
animationType="slide-up"
>
<View style={styles.overlayContentContainer}>
<Icon name="success" size={48} color="#52c41a" style={styles.overlayIcon} />
<Text style={styles.overlayTitle}>操作成功</Text>
<Text style={styles.overlayMessage}>操作已完成,感谢您的使用!</Text>
<TouchableOpacity
style={styles.overlayConfirmButton}
onPress={() => setSlideUpVisible(false)}
>
<Text style={styles.overlayConfirmText}>确定</Text>
</TouchableOpacity>
</View>
</Overlay>
<Overlay
visible={slideDownVisible}
onClose={() => setSlideDownVisible(false)}
animationType="slide-down"
>
<View style={styles.overlayContentContainer}>
<Icon name="warning" size={48} color="#faad14" style={styles.overlayIcon} />
<Text style={styles.overlayTitle}>警告提示</Text>
<Text style={styles.overlayMessage}>请注意您的操作可能存在风险!</Text>
<View style={styles.overlayButtonGroup}>
<TouchableOpacity
style={[styles.overlayButtonSecondary, { marginRight: 10 }]}
onPress={() => setSlideDownVisible(false)}
>
<Text style={styles.overlayButtonTextSecondary}>取消</Text>
</TouchableOpacity>
<TouchableOpacity
style={styles.overlayButtonPrimary}
onPress={() => setSlideDownVisible(false)}
>
<Text style={styles.overlayButtonTextPrimary}>继续</Text>
</TouchableOpacity>
</View>
</View>
</Overlay>
<Overlay
visible={zoomVisible}
onClose={() => setZoomVisible(false)}
animationType="zoom"
>
<View style={styles.overlayContentContainer}>
<Icon name="lock" size={48} color="#722ed1" style={styles.overlayIcon} />
<Text style={styles.overlayTitle}>安全验证</Text>
<Text style={styles.overlayMessage}>请输入您的密码以继续操作</Text>
<View style={styles.overlayInputContainer}>
<View style={styles.overlayInput} />
</View>
<View style={styles.overlayButtonGroup}>
<TouchableOpacity
style={[styles.overlayButtonSecondary, { marginRight: 10 }]}
onPress={() => setZoomVisible(false)}
>
<Text style={styles.overlayButtonTextSecondary}>取消</Text>
</TouchableOpacity>
<TouchableOpacity
style={styles.overlayButtonPrimary}
onPress={() => setZoomVisible(false)}
>
<Text style={styles.overlayButtonTextPrimary}>确认</Text>
</TouchableOpacity>
</View>
</View>
</Overlay>
<Overlay
visible={customVisible}
onClose={() => setCustomVisible(false)}
animationType="fade"
maskStyle={{ backgroundColor: 'rgba(0, 0, 0, 0.8)' }}
overlayStyle={{
backgroundColor: '#2c3e50',
borderRadius: 20,
padding: 30
}}
>
<View style={styles.overlayContentContainer}>
<Icon name="shield" size={48} color="#3498db" style={styles.overlayIcon} />
<Text style={[styles.overlayTitle, { color: '#ecf0f1' }]}>自定义样式</Text>
<Text style={[styles.overlayMessage, { color: '#bdc3c7' }]}>这是一个自定义样式的遮罩层,背景更深,圆角更大。</Text>
<TouchableOpacity
style={[styles.overlayConfirmButton, { backgroundColor: '#3498db' }]}
onPress={() => setCustomVisible(false)}
>
<Text style={[styles.overlayConfirmText, { color: '#ecf0f1' }]}>确定</Text>
</TouchableOpacity>
</View>
</Overlay>
</ScrollView>
);
};
const { width, height } = Dimensions.get('window');
const styles = StyleSheet.create({
container: {
flex: 1,
backgroundColor: '#2c3e50',
},
header: {
backgroundColor: '#34495e',
paddingVertical: 30,
paddingHorizontal: 20,
marginBottom: 10,
borderBottomWidth: 1,
borderBottomColor: '#2c3e50',
},
headerTitle: {
fontSize: 28,
fontWeight: '700',
color: '#ecf0f1',
textAlign: 'center',
marginBottom: 5,
},
headerSubtitle: {
fontSize: 16,
color: '#bdc3c7',
textAlign: 'center',
},
section: {
marginBottom: 25,
},
sectionTitle: {
fontSize: 20,
fontWeight: '700',
color: '#ecf0f1',
paddingHorizontal: 20,
paddingBottom: 15,
},
overlayGroupsContainer: {
backgroundColor: '#34495e',
marginHorizontal: 15,
borderRadius: 12,
padding: 20,
elevation: 3,
shadowColor: '#000',
shadowOffset: { width: 0, height: 2 },
shadowOpacity: 0.2,
shadowRadius: 4,
marginBottom: 10,
},
overlayButton: {
backgroundColor: '#2c3e50',
borderRadius: 8,
paddingVertical: 15,
paddingHorizontal: 20,
marginBottom: 15,
borderWidth: 1,
borderColor: '#3498db',
},
overlayButtonLast: {
marginBottom: 0,
},
overlayButtonText: {
fontSize: 16,
color: '#3498db',
fontWeight: '500',
textAlign: 'center',
},
scenariosContainer: {
flexDirection: 'row',
justifyContent: 'space-between',
paddingHorizontal: 15,
},
scenarioCard: {
backgroundColor: '#34495e',
borderRadius: 12,
padding: 20,
width: (width - 60) / 3,
alignItems: 'center',
elevation: 3,
shadowColor: '#000',
shadowOffset: { width: 0, height: 2 },
shadowOpacity: 0.2,
shadowRadius: 4,
},
scenarioIcon: {
marginBottom: 15,
},
scenarioTitle: {
fontSize: 16,
fontWeight: '600',
color: '#ecf0f1',
marginBottom: 5,
},
scenarioDesc: {
fontSize: 14,
color: '#bdc3c7',
textAlign: 'center',
},
demosContainer: {
backgroundColor: '#34495e',
marginHorizontal: 15,
borderRadius: 15,
padding: 20,
elevation: 3,
shadowColor: '#000',
shadowOffset: { width: 0, height: 2 },
shadowOpacity: 0.2,
shadowRadius: 4,
},
demoItem: {
flexDirection: 'row',
alignItems: 'center',
marginBottom: 20,
},
demoItemLast: {
marginBottom: 0,
},
demoIcon: {
marginRight: 15,
},
demoTitle: {
fontSize: 16,
fontWeight: '600',
color: '#ecf0f1',
marginBottom: 3,
},
demoDesc: {
fontSize: 14,
color: '#bdc3c7',
},
usageSection: {
backgroundColor: '#34495e',
marginHorizontal: 15,
borderRadius: 15,
padding: 20,
marginBottom: 20,
elevation: 3,
shadowColor: '#000',
shadowOffset: { width: 0, height: 2 },
shadowOpacity: 0.2,
shadowRadius: 4,
},
codeBlock: {
backgroundColor: '#1a2530',
borderRadius: 8,
padding: 15,
marginBottom: 15,
},
codeText: {
fontFamily: 'monospace',
color: '#95a5a6',
fontSize: 14,
lineHeight: 22,
},
description: {
fontSize: 15,
color: '#bdc3c7',
lineHeight: 22,
},
featuresSection: {
backgroundColor: '#34495e',
marginHorizontal: 15,
borderRadius: 15,
padding: 20,
marginBottom: 20,
elevation: 3,
shadowColor: '#000',
shadowOffset: { width: 0, height: 2 },
shadowOpacity: 0.2,
shadowRadius: 4,
},
featuresList: {
paddingLeft: 10,
},
featureItem: {
flexDirection: 'row',
alignItems: 'center',
marginBottom: 15,
},
featureIcon: {
marginRight: 15,
},
featureText: {
fontSize: 16,
color: '#ecf0f1',
},
footer: {
paddingVertical: 20,
alignItems: 'center',
},
footerText: {
color: '#7f8c8d',
fontSize: 14,
},
// Overlay Styles
mask: {
flex: 1,
backgroundColor: 'rgba(0, 0, 0, 0.6)',
justifyContent: 'center',
alignItems: 'center',
padding: 20,
},
overlayContent: {
backgroundColor: '#ffffff',
borderRadius: 12,
padding: 25,
width: '100%',
maxWidth: 350,
elevation: 10,
shadowColor: '#000',
shadowOffset: { width: 0, height: 5 },
shadowOpacity: 0.3,
shadowRadius: 10,
},
closeButton: {
position: 'absolute',
top: 15,
right: 15,
width: 30,
height: 30,
borderRadius: 15,
backgroundColor: '#95a5a6',
justifyContent: 'center',
alignItems: 'center',
},
overlayContentContainer: {
alignItems: 'center',
},
overlayIcon: {
marginBottom: 20,
},
overlayTitle: {
fontSize: 22,
fontWeight: '700',
color: '#2c3e50',
marginBottom: 15,
textAlign: 'center',
},
overlayMessage: {
fontSize: 16,
color: '#7f8c8d',
textAlign: 'center',
lineHeight: 24,
marginBottom: 25,
},
overlayInputContainer: {
width: '100%',
marginBottom: 25,
},
overlayInput: {
height: 50,
borderWidth: 1,
borderColor: '#bdc3c7',
borderRadius: 8,
paddingHorizontal: 15,
backgroundColor: '#f8f9fa',
},
overlayButtonGroup: {
flexDirection: 'row',
width: '100%',
},
overlayButtonSecondary: {
flex: 1,
paddingVertical: 15,
borderRadius: 8,
borderWidth: 1,
borderColor: '#bdc3c7',
alignItems: 'center',
},
overlayButtonPrimary: {
flex: 1,
paddingVertical: 15,
borderRadius: 8,
backgroundColor: '#3498db',
alignItems: 'center',
},
overlayButtonTextSecondary: {
fontSize: 16,
color: '#7f8c8d',
fontWeight: '500',
},
overlayButtonTextPrimary: {
fontSize: 16,
color: '#ffffff',
fontWeight: '500',
},
overlayConfirmButton: {
backgroundColor: '#2c3e50',
borderRadius: 8,
paddingVertical: 15,
paddingHorizontal: 30,
alignItems: 'center',
},
overlayConfirmText: {
fontSize: 16,
color: '#ffffff',
fontWeight: '500',
},
});
export default OverlayComponentApp;
从鸿蒙ArkUI开发角度分析,这段React Native Overlay组件的代码逻辑体现了鸿蒙模态交互的核心架构设计。Overlay组件通过visible状态控制显示与隐藏,这与鸿蒙的@State装饰器管理组件可见性的机制完全对应。当visible状态变更时,触发useEffect中的动画控制逻辑,这与鸿蒙的aboutToAppear和aboutToDisappear生命周期函数的作用相似。
动画系统采用Animated API实现多种动画效果,通过三个独立的Animated.Value分别管理不同的动画属性:fadeAnim控制透明度变化,实现淡入淡出效果;slideAnim控制垂直位移,根据animationType参数初始化为不同的位置值,slide-up类型初始化为屏幕高度,slide-down类型初始化为负的屏幕高度;scaleAnim控制缩放变换,初始值为0.8。这种多动画值管理机制对应鸿蒙动画系统中的属性动画配置。
在鸿蒙开发中,Overlay组件的动画类型映射到不同的动画策略:fade对应透明度动画,slide-up对应从底部向上滑入,slide-down对应从顶部向下滑入,zoom对应缩放组合动画。Animated.parallel实现多个动画的同步执行,确保视觉效果的协调统一。
事件处理机制通过handleMaskPress函数实现遮罩层点击关闭功能,当maskClosable为true时允许通过点击背景区域关闭覆盖层。这种交互模式在鸿蒙中通过CustomDialogController的事件绑定实现。
组件结构采用Modal作为根容器,创建独立的渲染层级。Animated.View作为动画承载组件,通过transform和opacity样式属性绑定动画值,实现流畅的视觉过渡。closable属性控制是否显示关闭按钮,为用户提供多种关闭方式。
在鸿蒙架构中,这种覆盖层组件通常用于弹窗、菜单、对话框等场景,通过zIndex属性控制层级关系,确保始终显示在其他组件之上。
打包
接下来通过打包命令npn run harmony将reactNative的代码打包成为bundle,这样可以进行在开源鸿蒙OpenHarmony中进行使用。

打包之后再将打包后的鸿蒙OpenHarmony文件拷贝到鸿蒙的DevEco-Studio工程目录去:
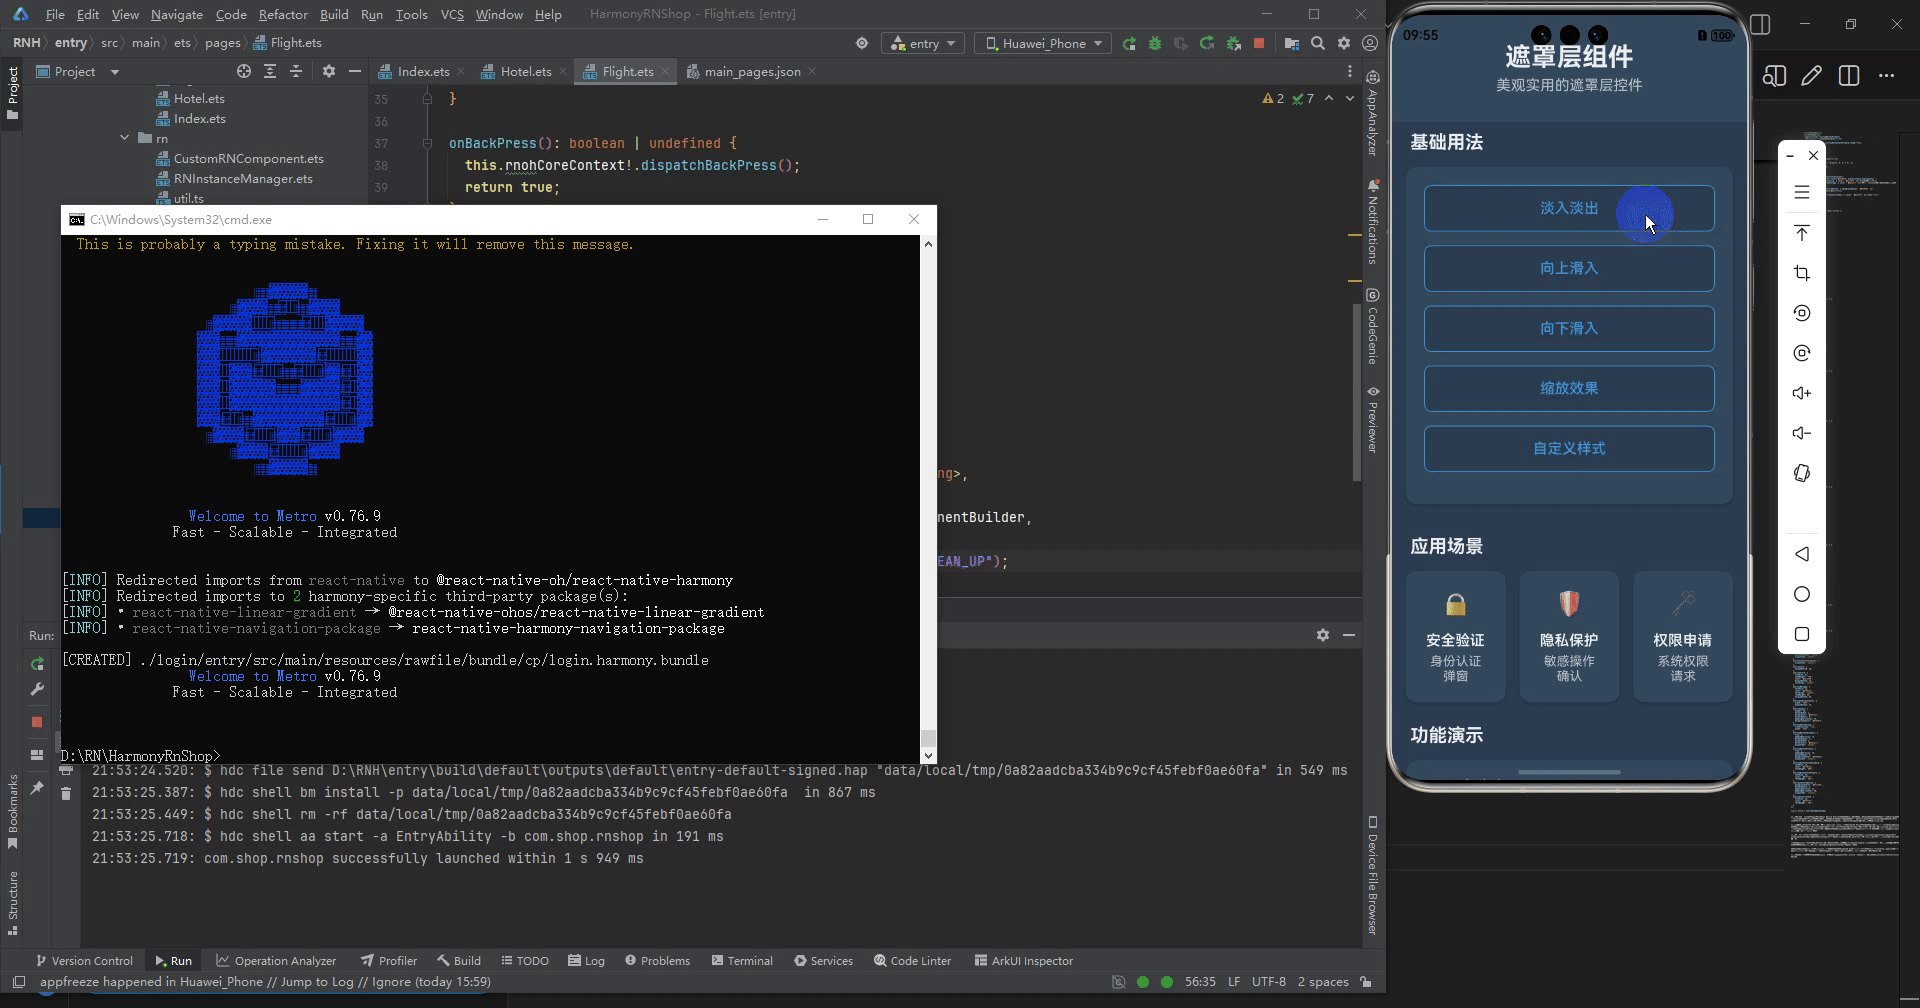
最后运行效果图如下显示:

作为“人工智能6S店”的官方数字引擎,为AI开发者与企业提供一个覆盖软硬件全栈、一站式门户。
更多推荐
 7
7 0
0- 0


 已为社区贡献11条内容

所有评论(0)