
Flutter 三方库 local_notifier 的鸿蒙适配教程
Flutter 三方库 local_notifier 的鸿蒙适配教程
本文配套仓库:https://atomgit.com/oh-flutter/local_notifier(TAG:
0.1.6-ohos-1.0.0-beta.1,分支:feat/ohos_local_notifier_0.1.6)。插件的接口用法、真机效果与业务侧最佳实践,见配套的《local_notifier 的鸿蒙使用指南》;本文解决的是另一件事:从上游 GitHub 仓库开始,把 local_notifier 完整适配到 OpenHarmony / HarmonyOS 平台,并在真机上验证。
local_notifier 是 pub.dev 上的一个本地通知 Flutter 插件(作者 leanflutter,MIT 协议,0.1.6),用于在 Flutter 应用中显示系统本地通知:构造 LocalNotification 后调用 show() 即可发布,支持标题、副标题、正文与最多两个操作按钮,并提供 onShow / onClose / onClick / onClickAction 四个回调。它原本支持 Windows、macOS、Linux 三端,唯独没有鸿蒙;而鸿蒙 Flutter 应用要发本地通知,得自己对接 @kit.NotificationKit 的 notificationManager,再逐一处理运行时授权、点击回传、通知取消这些细节。本文完整走一遍社区三方库适配的标准流程:把上游仓库同步到 AtomGit,拉到宿主机,建适配分支,用命令自动补全 ohos 目录,补全 Dart 与 ArkTS 两侧实现,补齐适配说明文件后提交分支,最后用仓库自带的 example 在真机上验证。
一、环境搭建
鸿蒙 Flutter 开发环境(ohos 版 SDK、DevEco Studio、签名配置)的完整搭建步骤,官方指南已经写得很细,直接照做即可:
适配工作比单纯使用多一项要求:终端里 flutter 命令必须指向 ohos 版 SDK,因为后文自动补全 ohos 目录靠的是它提供的 flutter create --platforms ohos 能力。环境装好后用 flutter devices 确认能识别鸿蒙真机。本文实测使用的环境:
| 项 | 版本 |
|---|---|
| Flutter(ohos 版) | 3.41.10-ohos-1.0.1 |
| 编译 SDK | 5.1.0(18) |
| 实测真机 | HUAWEI nova 12 Ultra(ADA-AL10,HarmonyOS 6.1.0.135 / API 24) |
二、适配过程
2.1 将上游仓库同步到 AtomGit
鸿蒙 Flutter 三方库社区(oh-flutter 组织)托管在 AtomGit,上游项目在 GitHub,适配的第一步是把上游代码完整迁入 AtomGit 上为它新建的目标仓库 oh-flutter/local_notifier。做法是把上游克隆下来,添加 AtomGit 远端后整库推送,保留全部 commit 历史与 TAG,后续上游发新版时也能用同样的方式增量同步:
# 克隆上游仓库,目录名与目标仓库保持一致
git clone https://github.com/leanflutter/local_notifier.git local_notifier
cd local_notifier

# 关联 AtomGit 目标仓库
git remote add atomgit https://atomgit.com/oh-flutter/local_notifier.git

# 推送全部分支与 TAG
git push atomgit --all
git push atomgit --tags
推送完成后,打开 AtomGit 上目标仓库的页面,能看到与上游一致的提交历史和源码目录:
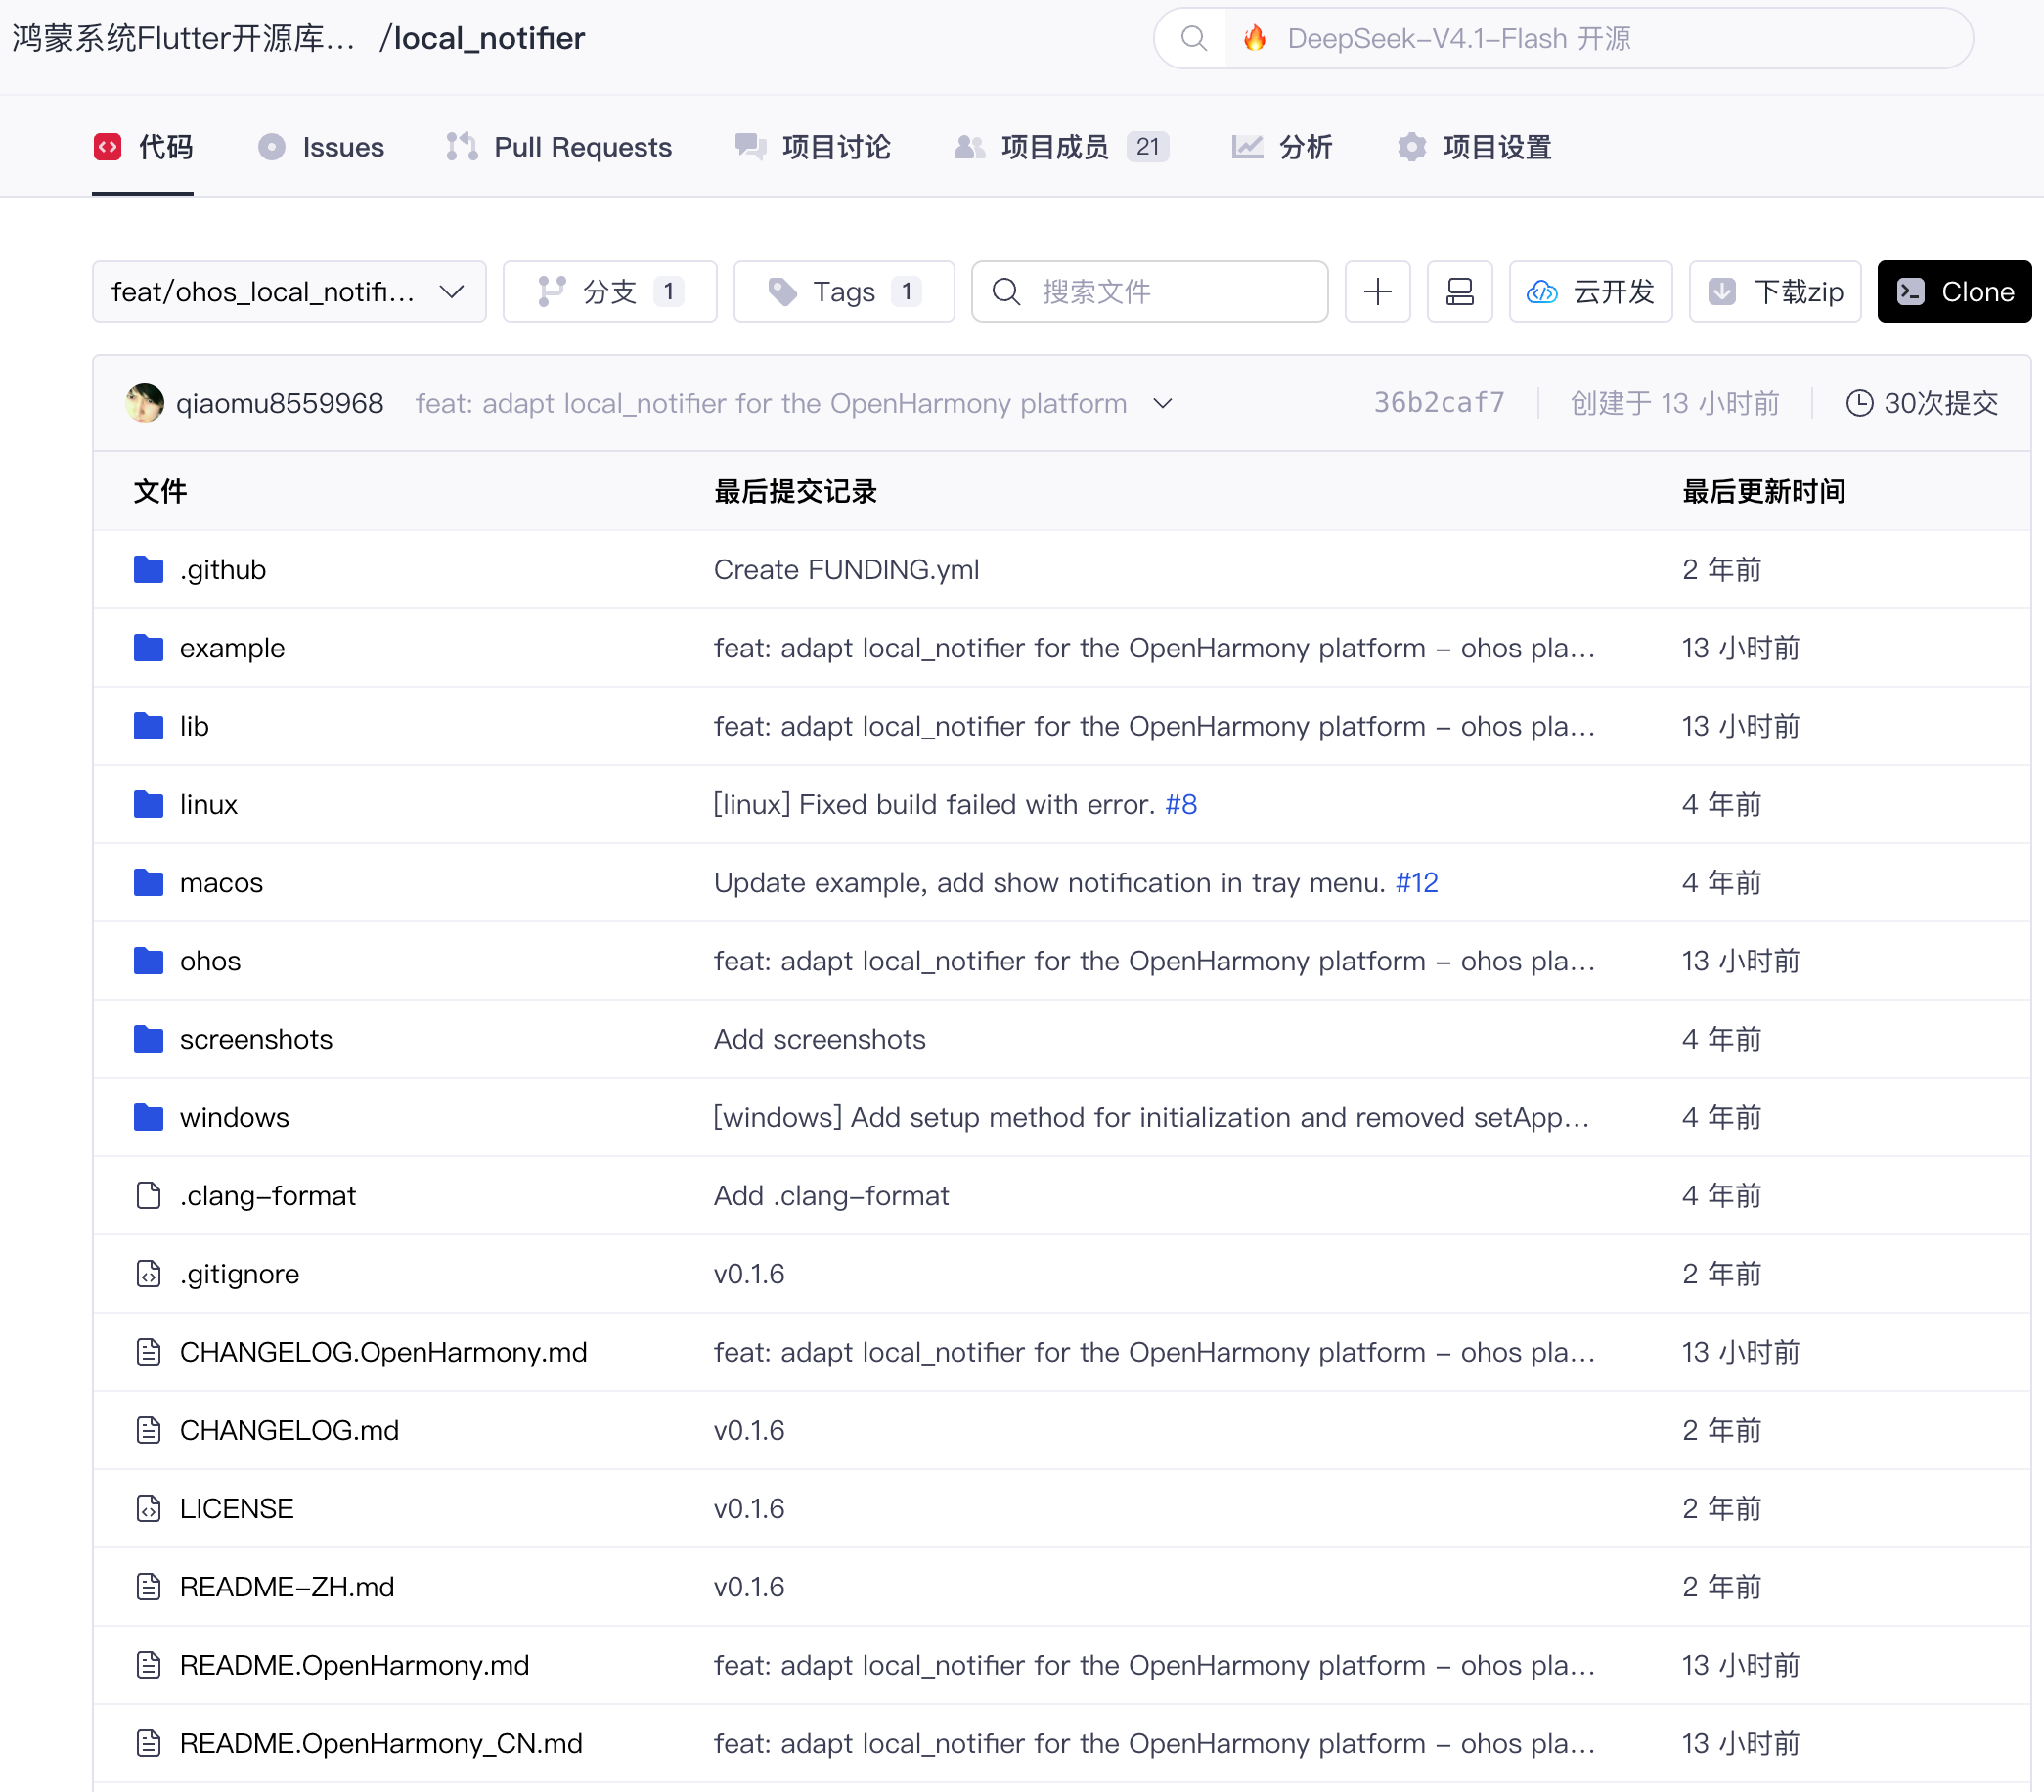
图一:同步完成后 AtomGit 目标仓库的代码页
2.2 拉取代码到宿主机
从目标仓库把代码拉到本地,后续所有操作都在这份代码上进行:
git clone https://atomgit.com/oh-flutter/local_notifier.git
cd local_notifier
此时的目录还是上游的原始结构,只有 Windows、macOS、Linux 等桌面平台实现,没有 ohos 目录:
local_notifier/
├── windows/          # Windows 平台实现(C++ 插件 + wintoastlib)
├── macos/            # macOS 平台实现(Swift 插件)
├── linux/            # Linux 平台实现(C 插件)
├── lib/              # Dart 接口(src 下共 6 个文件)
├── example/          # 上游自带示例工程(桌面三端宿主)
├── screenshots/      # 上游桌面端演示截图
├── pubspec.yaml      # 插件描述与平台注册
└── ...
lib/src 下的 6 个文件各司其职:local_notifier.dart 是通道与初始化实现,local_notification.dart 是通知模型,local_notification_action.dart 与 local_notification_close_reason.dart 是操作按钮与关闭原因枚举,local_notification_listener.dart 是回调监听接口,shortcut_policy.dart 是 Windows 专属的快捷方式策略。
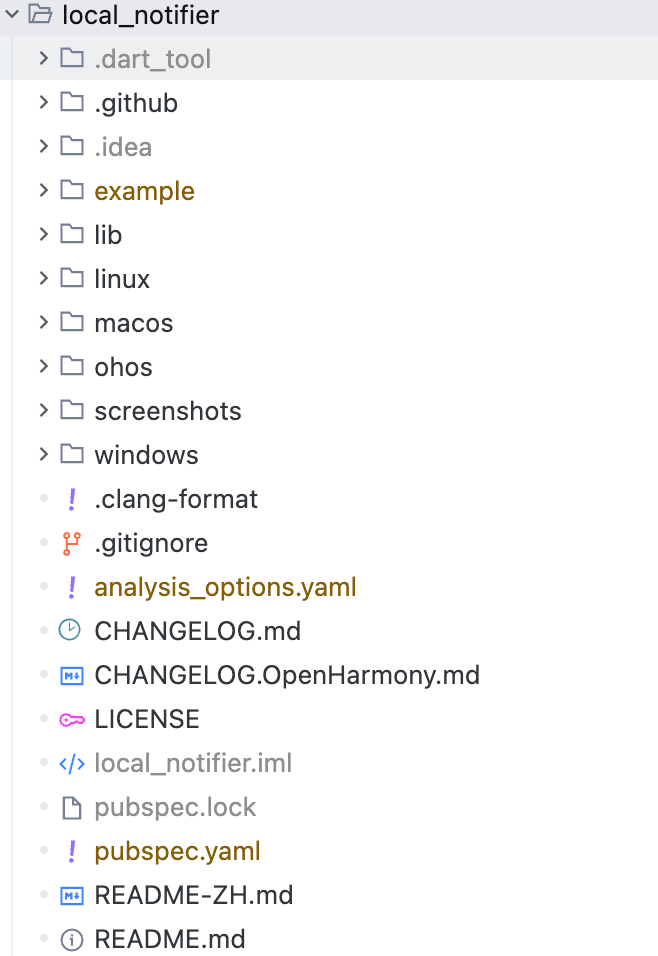
图二:clone 完成后的仓库目录
2.3 创建适配分支并补全 ohos 目录结构
社区约定适配分支统一以 feat/ohos_库名称_版本号 命名,local_notifier 适配的上游版本是 0.1.6(取自上游 pubspec.yaml 的 version),分支名就是 feat/ohos_local_notifier_0.1.6。先建分支:
git checkout -b feat/ohos_local_notifier_0.1.6
然后在插件根目录执行一条命令,自动完成 ohos 适配结构的补全:
flutter create --platforms ohos .
这条命令由 ohos 版 Flutter SDK 提供,它读取 pubspec.yaml 里的插件名,自动生成完整的 ohos/ 目录,并在 pubspec.yaml 的 plugin.platforms 下追加 ohos 注册节点:
flutter:
  plugin:
    platforms:
      # ... linux、macos、windows 等原有节点保持不变
      ohos:
        pluginClass: LocalNotifierPlugin
除了 plugin.platforms 下新增的 ohos 注册节点,pubspec.yaml 顶层的 platforms: 声明列表也补上了 ohos:,与 linux、macos、windows 并列。注意本库的 ohos 节点只需要 pluginClass 一行,不需要 package 行。
生成的 ohos/ 目录结构:
ohos/
├── index.ets                          # 插件导出入口
├── oh-package.json5                   # ohpm 包配置(main 指向 index.ets)
├── build-profile.json5                # hvigor 构建配置
├── hvigorfile.ts                      # hvigor 构建脚本
├── BuildProfile.ets                   # 构建信息(自动生成)
└── src/main/
    ├── module.json5                   # 模块配置(har 类型)
    └── ets/components/plugin/
        └── LocalNotifierPlugin.ets    # 插件模板(空实现,待补全)
几个文件的角色需要分清:oh-package.json5 声明了对 @ohos/flutter_ohos 的依赖(Flutter 鸿蒙嵌入层),index.ets 负责把插件类导出给宿主工程,src/main/ets/components/plugin/LocalNotifierPlugin.ets 是 flutter 工具按包名生成的插件模板——此时里面只有空的生命周期方法,这就是 2.4 要补全的文件。
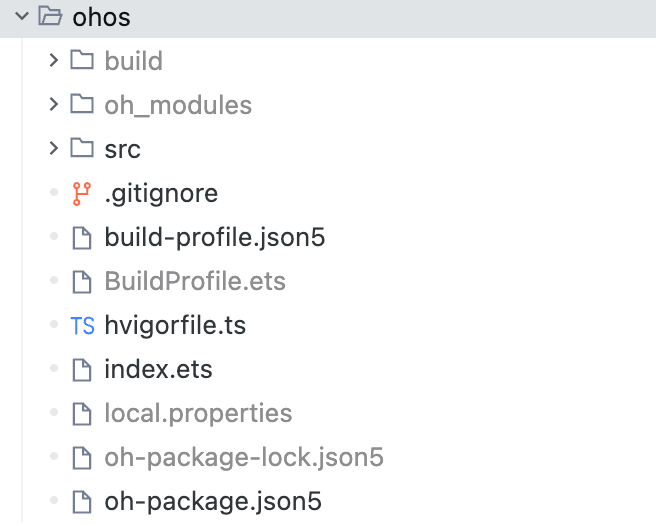
图三:命令执行输出与生成的 ohos 目录
2.4 在插件文件中补全 ohos 实现
适配遵循"只做加法"的原则:LocalNotification 的字段、四个回调与 show / close / destroy 的签名不变,Windows、macOS、Linux 的实现路径一行不动,所有改动都是新增。改动集中在两个文件:
| 文件 | 改动 |
|---|---|
lib/src/local_notifier.dart | setup 增加 ohos 平台分支;回调入口增加空值保护;notify 的未初始化守卫覆盖 ohos |
ohos/src/main/ets/components/plugin/LocalNotifierPlugin.ets | 把模板补全为完整实现:授权检查、publish 发布、wantAgent 点击回传、cancel 取消 |
先说 Dart 侧为什么要动,以及为什么动得这么少。 上游 Dart 已经有 const MethodChannel('local_notifier')(Windows 端一直在用),这是适配的关键前提:鸿蒙插件只要注册同名通道,Dart 侧的调用与回调分发路径就天然可用,不需要新增任何通道常量。改动集中在三处。
第一处是 setup 的平台分支。上游只在 Windows 上真正调用通道(macOS、Linux 无需初始化),鸿蒙需要像 Windows 一样拿到真实的授权结果:
if (Platform.isWindows) {
  _isInitialized = await _channel.invokeMethod('setup', arguments) as bool;
} else if (!kIsWeb && Platform.operatingSystem == 'ohos') {
  _isInitialized = await _channel.invokeMethod('setup', arguments) as bool;
} else {
  _isInitialized = true;
}
平台判据用 !kIsWeb && Platform.operatingSystem == 'ohos':鸿蒙版 Flutter 引擎在 dart:io 的 Platform.operatingSystem 里返回 'ohos',这是官方预留的平台标识,配合 kIsWeb 排除 Web 端(Platform 在 Web 上不可用)。
第二处是回调入口的空值保护。上游的 _methodCallHandler 假定 _notifications 映射里一定有对应实例,但热重启后映射会清空,点击通知冷启动时进程是新建的、映射本来就没注册过,直接取值会抛异常导致回调崩溃。适配在回调入口加了一道静默保护:
String notificationId = call.arguments['notificationId'] as String;
LocalNotification? localNotification = _notifications[notificationId];

// The notification instance may no longer exist, for example after a
// hot restart or when the app is launched by clicking a notification.
if (localNotification == null) {
  return;
}
第三处是 notify 的未初始化守卫。上游在 Linux、Windows 上检查 _isInitialized,未调用 setup 就 show() 会抛出明确异常;鸿蒙的行为与它们对齐,把 ohos 加入同一组判断:
if ((Platform.isLinux ||
        Platform.isWindows ||
        (!kIsWeb && Platform.operatingSystem == 'ohos')) &&
    !_isInitialized) {
  throw Exception(
    'Not initialized, please call `localNotifier.setup` first to initialize',
  );
}
再看 ArkTS 侧。 打开模板文件 ohos/src/main/ets/components/plugin/LocalNotifierPlugin.ets,补全为完整实现。先看类骨架与生命周期:
export default class LocalNotifierPlugin implements FlutterPlugin, MethodCallHandler, AbilityAware {
  private static readonly CHANNEL_NAME: string = 'local_notifier';
  private static readonly CLICK_ACTION: string = 'local_notifier.click';

  private channel: MethodChannel | null = null;
  private ability: UIAbility | null = null;
  // ... 其余字段与构造方法见仓库源码

  onAttachedToEngine(binding: FlutterPluginBinding): void {
    this.channel = new MethodChannel(
      binding.getBinaryMessenger(),
      LocalNotifierPlugin.CHANNEL_NAME,
      StandardMethodCodec.INSTANCE
    );
    this.channel.setMethodCallHandler(this);
  }

  onAttachedToAbility(binding: AbilityPluginBinding): void {
    this.abilityBinding = binding;
    this.ability = binding.getAbility();
    const listener: NewWantListener = {
      onNewWant: (want: Want, launchParams: AbilityConstant.LaunchParam): void => {
        this.handleNewWant(want);
      }
    };
    this.newWantListener = listener;
    binding.addOnNewWantListener(listener);
  }

  // ... onDetachedFromEngine / onDetachedFromAbility 见仓库源码
}
生命周期上有两个要点:onAttachedToEngine 里创建与 Dart 侧同名的 local_notifier 通道并注册自己,这一步让上游已有的 MethodChannel 通路直接接通;onAttachedToAbility 里除了持有 UIAbility 引用(授权弹窗、wantAgent 都依赖它的 context),还注册了 onNewWant 监听——这是通知点击回传的入口,后文会展开。
setup 的实现是授权检查加弹窗:
private handleSetup(result: MethodResult): void {
  let replied: boolean = false;
  const replyOnce = (granted: boolean): void => {
    if (!replied) {
      replied = true;
      result.success(granted);
    }
  };

  const requestIfNeeded = (): void => {
    const ability: UIAbility | null = this.ability;
    if (ability == null) {
      replyOnce(false);
      return;
    }
    notificationManager.requestEnableNotification(ability.context)
      .then(() => {
        replyOnce(true);
      })
      .catch(() => {
        // 用户拒绝授权或弹窗拉起失败
        replyOnce(false);
      });
  };

  notificationManager.isNotificationEnabled()
    .then((enabled: boolean) => {
      if (enabled) {
        replyOnce(true);
      } else {
        requestIfNeeded();
      }
    })
    .catch(() => {
      // 查询异常(如通知服务未就绪),退回授权弹窗路径
      requestIfNeeded();
    });
}
这里藏着适配里最容易踩的坑:isNotificationEnabled 的查询回调与 requestEnableNotification 的弹窗回调是两条异步路径,先后都可能触发,而 MethodResult 只允许回复一次、回复两次会崩溃。代码用 replyOnce 标志位双向互斥,保证无论哪条路径先回来都只有第一次结果生效;查询本身异常时(如通知服务未就绪)不直接判失败,而是退回弹窗路径由用户决定。
notify 的实现是参数组装加发布:
private async handleNotify(call: MethodCall, result: MethodResult): Promise<void> {
  const ability: UIAbility | null = this.ability;
  if (ability == null) {
    result.error('error', 'UIAbility is not attached', null);
    return;
  }
  const context: common.UIAbilityContext = ability.context;

  const identifier: string = call.argument('identifier') ?? '';
  const title: string = call.argument('title') ?? '';
  const subtitle: string = call.argument('subtitle') ?? '';
  const body: string = call.argument('body') ?? '';

  // 操作按钮:鸿蒙 actionButtons 上限为 2,与上游桌面端一致截断
  const buttonTitles: string[] = [];
  const rawActions: ESObject = call.argument('actions');
  if (Array.isArray(rawActions)) {
    const list: Array<ESObject> = rawActions as Array<ESObject>;
    for (let i = 0; i < list.length && buttonTitles.length < 2; i++) {
      const item: ESObject = list[i];
      const text: string | undefined = item?.text as string | undefined;
      if (text !== undefined && text.length > 0) {
        buttonTitles.push(text);
      }
    }
  }

  try {
    const mainAgent: WantAgent =
      await this.buildWantAgent(context, identifier, null);

    const request: notificationManager.NotificationRequest = {
      id: LocalNotifierPlugin.hashNotificationId(identifier),
      label: identifier,
      slotType: notification.SlotType.SOCIAL_COMMUNICATION,
      tapDismissed: true,
      content: this.buildContent(title, subtitle, body),
      wantAgent: mainAgent,
    };

    if (buttonTitles.length > 0) {
      const buttons: notificationManager.NotificationActionButton[] = [];
      for (let i = 0; i < buttonTitles.length; i++) {
        const buttonAgent: WantAgent =
          await this.buildWantAgent(context, identifier, i);
        buttons.push({
          title: buttonTitles[i],
          wantAgent: buttonAgent,
        });
      }
      request.actionButtons = buttons;
    }

    await notificationManager.publish(request);
    result.success(null);
    this.channel?.invokeMethod('onLocalNotificationShow', {
      'notificationId': identifier
    });
  } catch (err) {
    const e: BusinessError = err as BusinessError;
    result.error(
      'error',
      `Failed to publish notification (code: ${e.code}, message: ${e.message})`,
      null
    );
  }
}
内容构建是一个四分支函数,分界线是正文长度 46 字符:
private buildContent(
  title: string,
  subtitle: string,
  body: string
): notificationManager.NotificationContent {
  if (body.length > 46) {
    if (subtitle.length > 0) {
      return {
        notificationContentType: notificationManager.ContentType.NOTIFICATION_CONTENT_LONG_TEXT,
        longText: {
          title: title,
          text: body,
          additionalText: subtitle,
          longText: body,
          briefText: body,
          expandedTitle: title.length > 0 ? title : body,
        },
      };
    }
    return {
      notificationContentType: notificationManager.ContentType.NOTIFICATION_CONTENT_LONG_TEXT,
      longText: {
        title: title,
        text: body,
        longText: body,
        briefText: body,
        expandedTitle: title.length > 0 ? title : body,
      },
    };
  }
  if (subtitle.length > 0) {
    return {
      notificationContentType: notificationManager.ContentType.NOTIFICATION_CONTENT_BASIC_TEXT,
      normal: {
        title: title,
        text: body,
        additionalText: subtitle,
      },
    };
  }
  return {
    notificationContentType: notificationManager.ContentType.NOTIFICATION_CONTENT_BASIC_TEXT,
    normal: {
      title: title,
      text: body,
    },
  };
}
两个细节值得展开。其一,正文不超过 46 字符时映射 BASIC_TEXT,超长时自动映射 LONG_TEXT,避免长文本在通知中心被截断;上游的 subtitle 字段映射为鸿蒙的 additionalText。其二,additionalText 只能在非空时携带——显式传 undefined 会触发系统校验错误 “The type of additionalText must be string”,这是实测踩过的坑,代码里的两个 subtitle.length > 0 分支就是为此而写。
点击回传是这套适配里链路最长的一段。发布时为通知主体与每个操作按钮各挂一个 wantAgent,点击后由系统拉起宿主 UIAbility 并带回首发的参数:
private buildWantAgent(
  context: common.UIAbilityContext,
  identifier: string,
  actionIndex: number | null
): Promise<WantAgent> {
  const parameters: Record<string, Object> = {
    'notificationId': identifier,
    'action': LocalNotifierPlugin.CLICK_ACTION,
  };
  if (actionIndex !== null) {
    parameters['actionIndex'] = actionIndex;
  }
  const want: Want = {
    deviceId: '',
    bundleName: context.abilityInfo.bundleName,
    abilityName: context.abilityInfo.name,
    action: LocalNotifierPlugin.CLICK_ACTION,
    parameters: parameters,
  };
  const info: wantAgent.WantAgentInfo = {
    wants: [want],
    operationType: wantAgent.OperationType.START_ABILITY,
    requestCode: 0,
    wantAgentFlags: [wantAgent.WantAgentFlags.UPDATE_PRESENT_FLAG],
  };
  return wantAgent.getWantAgent(info);
}
主体点击的 wantAgent 不带 actionIndex,操作按钮的带(值为按钮下标)。应用收到 onNewWant 后(生命周期里注册的监听),插件按 action 识别出这是通知点击,再按参数里有没有 actionIndex 分发给 Dart 侧:
if (hasActionIndex) {
  args['actionIndex'] = actionIndex;
  channel.invokeMethod('onLocalNotificationClickAction', args);
} else {
  channel.invokeMethod('onLocalNotificationClick', args);
}
这样 LocalNotification 上的 onClick 与 onClickAction 回调就被点亮了,全程不需要 EventChannel,也不需要额外声明任何权限。
close 的实现按 (id, tag) 取消通知。鸿蒙 notificationManager.cancel 的 id 是 int32,而上游的 identifier 是 UUID v4 字符串,适配用 DJB2 哈希把字符串压进 int32,再以 identifier 本身作 tag 联合保证唯一:
private async handleClose(call: MethodCall, result: MethodResult): Promise<void> {
  const identifier: string = call.argument('identifier') ?? '';
  try {
    await notificationManager.cancel(
      LocalNotifierPlugin.hashNotificationId(identifier),
      identifier
    );
    result.success(null);
    this.channel?.invokeMethod('onLocalNotificationClose', {
      'notificationId': identifier,
      'closeReason': 'userCanceled',
    });
  } catch (err) {
    const e: BusinessError = err as BusinessError;
    result.error(
      'error',
      `Failed to cancel notification (code: ${e.code}, message: ${e.message})`,
      null
    );
  }
}

/** identifier(UUID v4)转 int32 通知 id:DJB2 哈希,label 联合保证唯一。 */
private static hashNotificationId(identifier: string): number {
  let hash: number = 0;
  for (let i = 0; i < identifier.length; i++) {
    hash = ((hash << 5) - hash) + identifier.charCodeAt(i);
    hash = hash & hash; // Convert to 32bit integer
  }
  return hash;
}
取消成功后主动回传 onLocalNotificationClose(closeReason 固定 userCanceled),对齐上游 Windows 端的 didDismiss 语义——比上游 macOS、Linux 端不触发该回调的行为更明确。
最后检查 index.ets,确保插件类被导出:
import LocalNotifierPlugin from './src/main/ets/components/plugin/LocalNotifierPlugin';
export default LocalNotifierPlugin;
宿主工程构建时按 pubspec.yaml 的 pluginClass: LocalNotifierPlugin 找到这个导出并自动注册。漏掉这一行的话,Dart 侧调用会收到 MissingPluginException,这也是排查"通道不通"的第一站。
2.5 补全适配说明文件并提交分支
代码之外,社区要求适配仓库补齐四份说明文件,方便使用者和入库审核了解适配情况:
| 文件 | 作用 |
|---|---|
README.OpenSource | 第三方开源组件声明:名称、协议、版本、上游地址 |
README.OpenHarmony_CN.md | 中文适配说明:简介、下载安装、约束与限制、接口说明、遗留问题、目录结构 |
README.OpenHarmony.md | 英文版适配说明,内容与中文版对应 |
CHANGELOG.OpenHarmony.md | 鸿蒙适配版本变更记录,每个 TAG 一节 |
README.OpenSource 是 JSON 格式,本文的实际内容:
[
  {
    "Name": "local_notifier",
    "License": "MIT License",
    "License File": "LICENSE",
    "Version Number": "0.1.6",
    "Owner": "qiaomu8559968@126.com",
    "Upstream URL": "https://github.com/leanflutter/local_notifier",
    "Description": "A Flutter plugin for displaying local notifications, adapted for the OpenHarmony platform."
  }
]
CHANGELOG.OpenHarmony.md 每个 TAG 一节,本次内容概括为三条:notify 经 notificationManager 发布(BASIC_TEXT,超 46 字符自动 LONG_TEXT 回退)、点击与按钮点击经 wantAgent + onNewWant 回传、close 按 DJB2 哈希 (id, tag) 取消且成功后回传 onClose(userCanceled)。
README.OpenHarmony_CN.md 按社区模板组织章节:简介、下载安装(给出 git 依赖写法与 TAG 对照表)、约束与限制(实测通过的框架与 SDK 版本、权限要求)、使用示例、使用说明、接口说明(表格列出每个接口的参数与返回值)、新增特性、遗留问题(onClose 仅覆盖主动关闭、silent 字段忽略、冷启动点击不分发、shortcutPolicy 忽略)、目录结构、贡献代码。
文件就绪后提交分支并打 TAG:
git add .
git commit -m "feat: adapt local_notifier for the OpenHarmony platform"
git push -u atomgit feat/ohos_local_notifier_0.1.6

# TAG 命名规则:原库版本-ohos-版本号-beta.x
git tag 0.1.6-ohos-1.0.0-beta.1
git push atomgit 0.1.6-ohos-1.0.0-beta.1
TAG 命名与分支命名保持同一套规则:TAG 里能看到原库版本与适配序号,分支名里能看到平台、库名与版本,使用方在 pubspec 里锁定 TAG 即可精确引用某个适配版本。
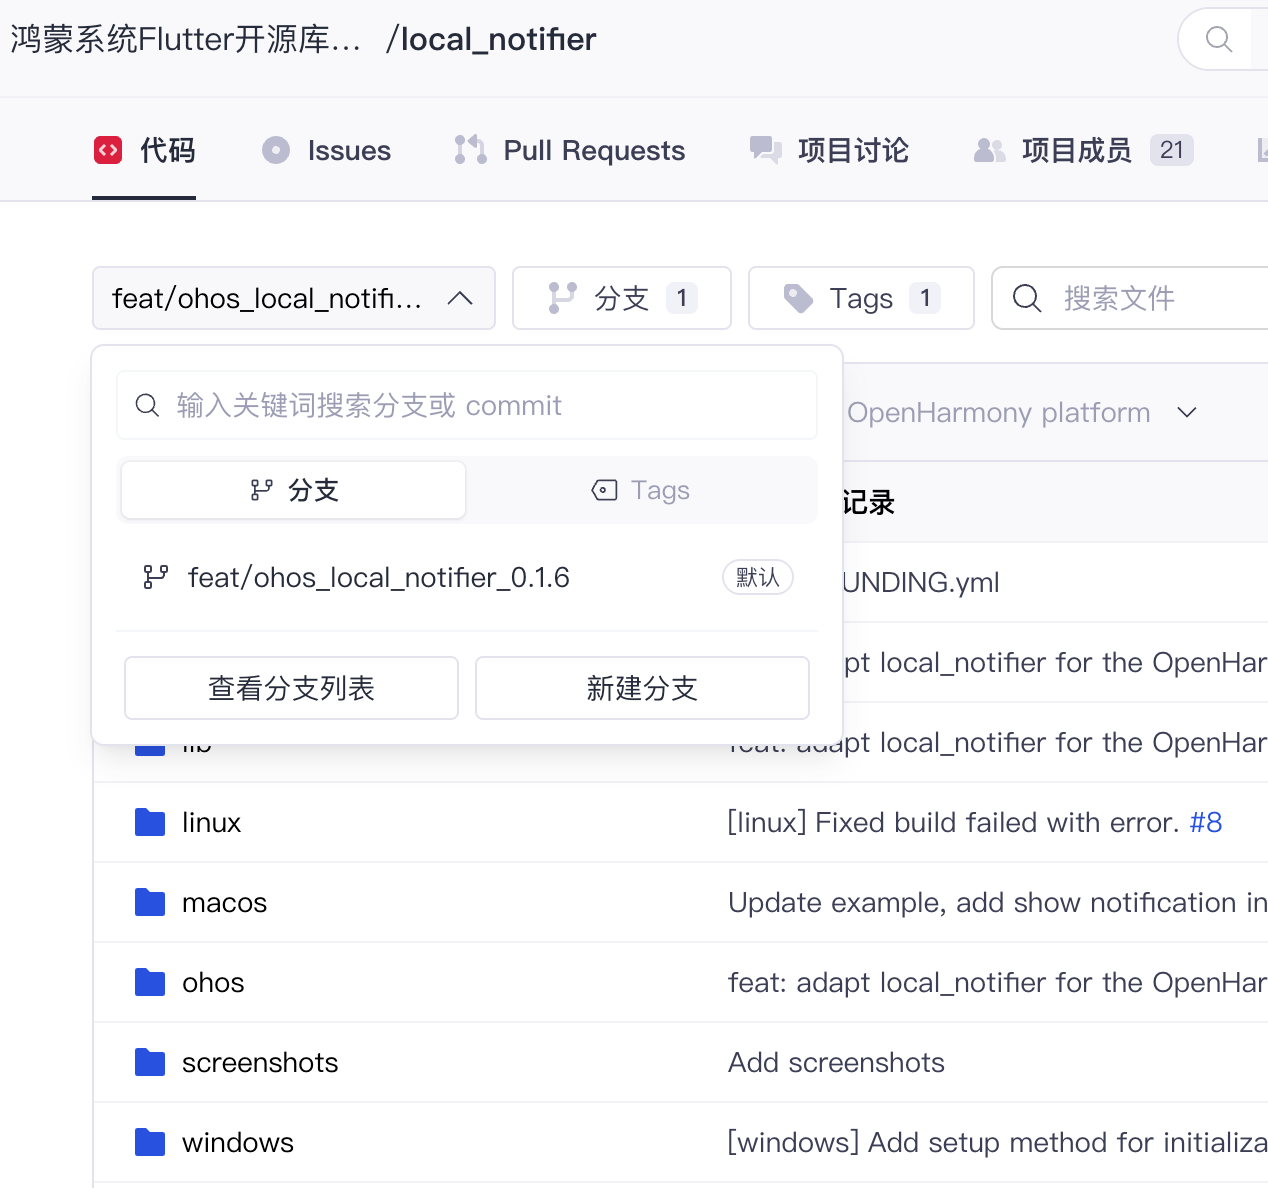
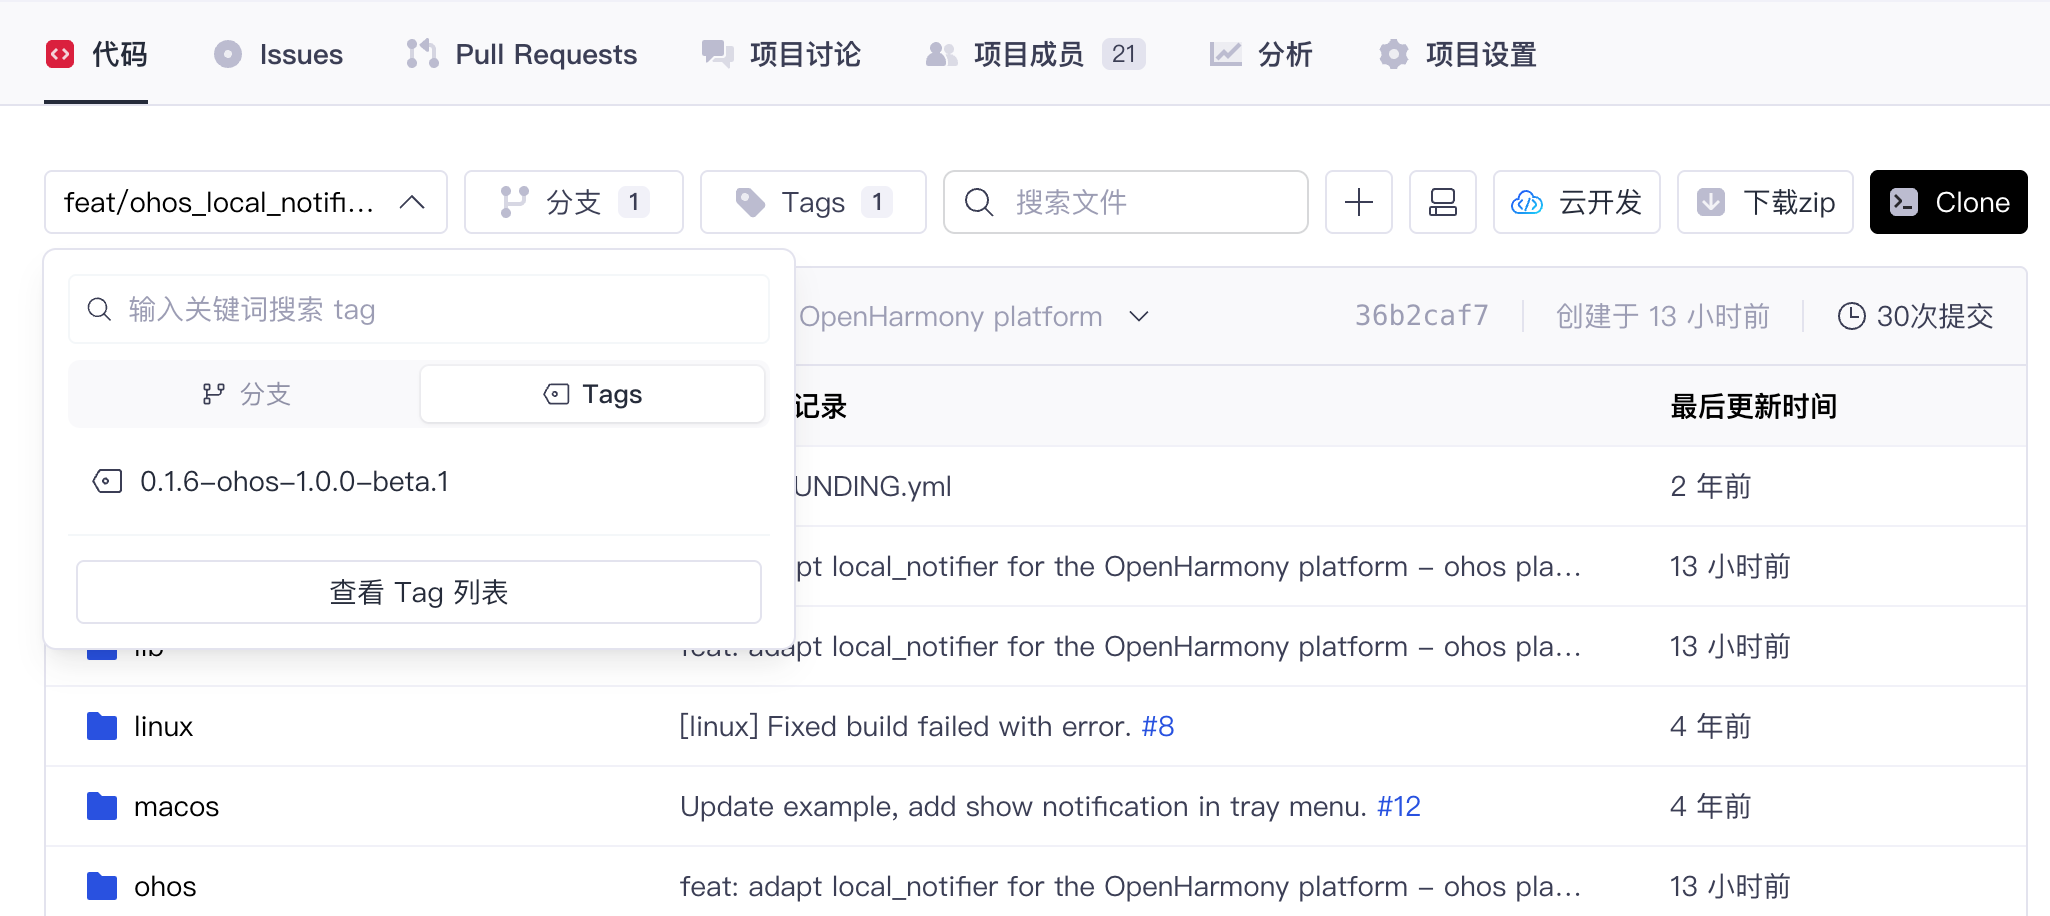
图四:AtomGit 仓库的分支与 TAG 页面
三、在 Demo 中验证适配效果
3.1 使用仓库自带的 example
上游仓库根目录自带 example 工程,适配时直接用它验证,不需要另建 Demo。example 的 pubspec.yaml 通过相对路径引用插件本身:
dependencies:
  local_notifier:
    path: ../
这种本地引用让 example 始终跑在当前目录的插件代码上,改完实现立刻可验。适配分支里 example 已经补好了 ohos 宿主目录(example/ohos),演示页沿用上游的三卡片布局:第一张是固定通知 _exampleNotification(标题 example、正文 hello flutter!、带 Yes / No 两个操作按钮),配 show / close / destroy 三个按钮;第二张是 New a notification,每次点击动态新建一条通知;第三张是 Event log,按时间倒序滚动显示触发的回调日志。
入口 main.dart 在启动前完成初始化:
await localNotifier.setup(
  appName: 'local_notifier_example',
  // The parameter shortcutPolicy only works on Windows
  shortcutPolicy: ShortcutPolicy.requireCreate,
);
构建并安装到真机:
cd example
flutter pub get
flutter build hap --release
hdc install build/app/outputs/default/entry-default-signed.hap
hdc shell aa start -b com.example.local_notifier_example -a EntryAbility
安装后应用出现在桌面(插件名较长,图标名显示为 local_notifier_… 截断):
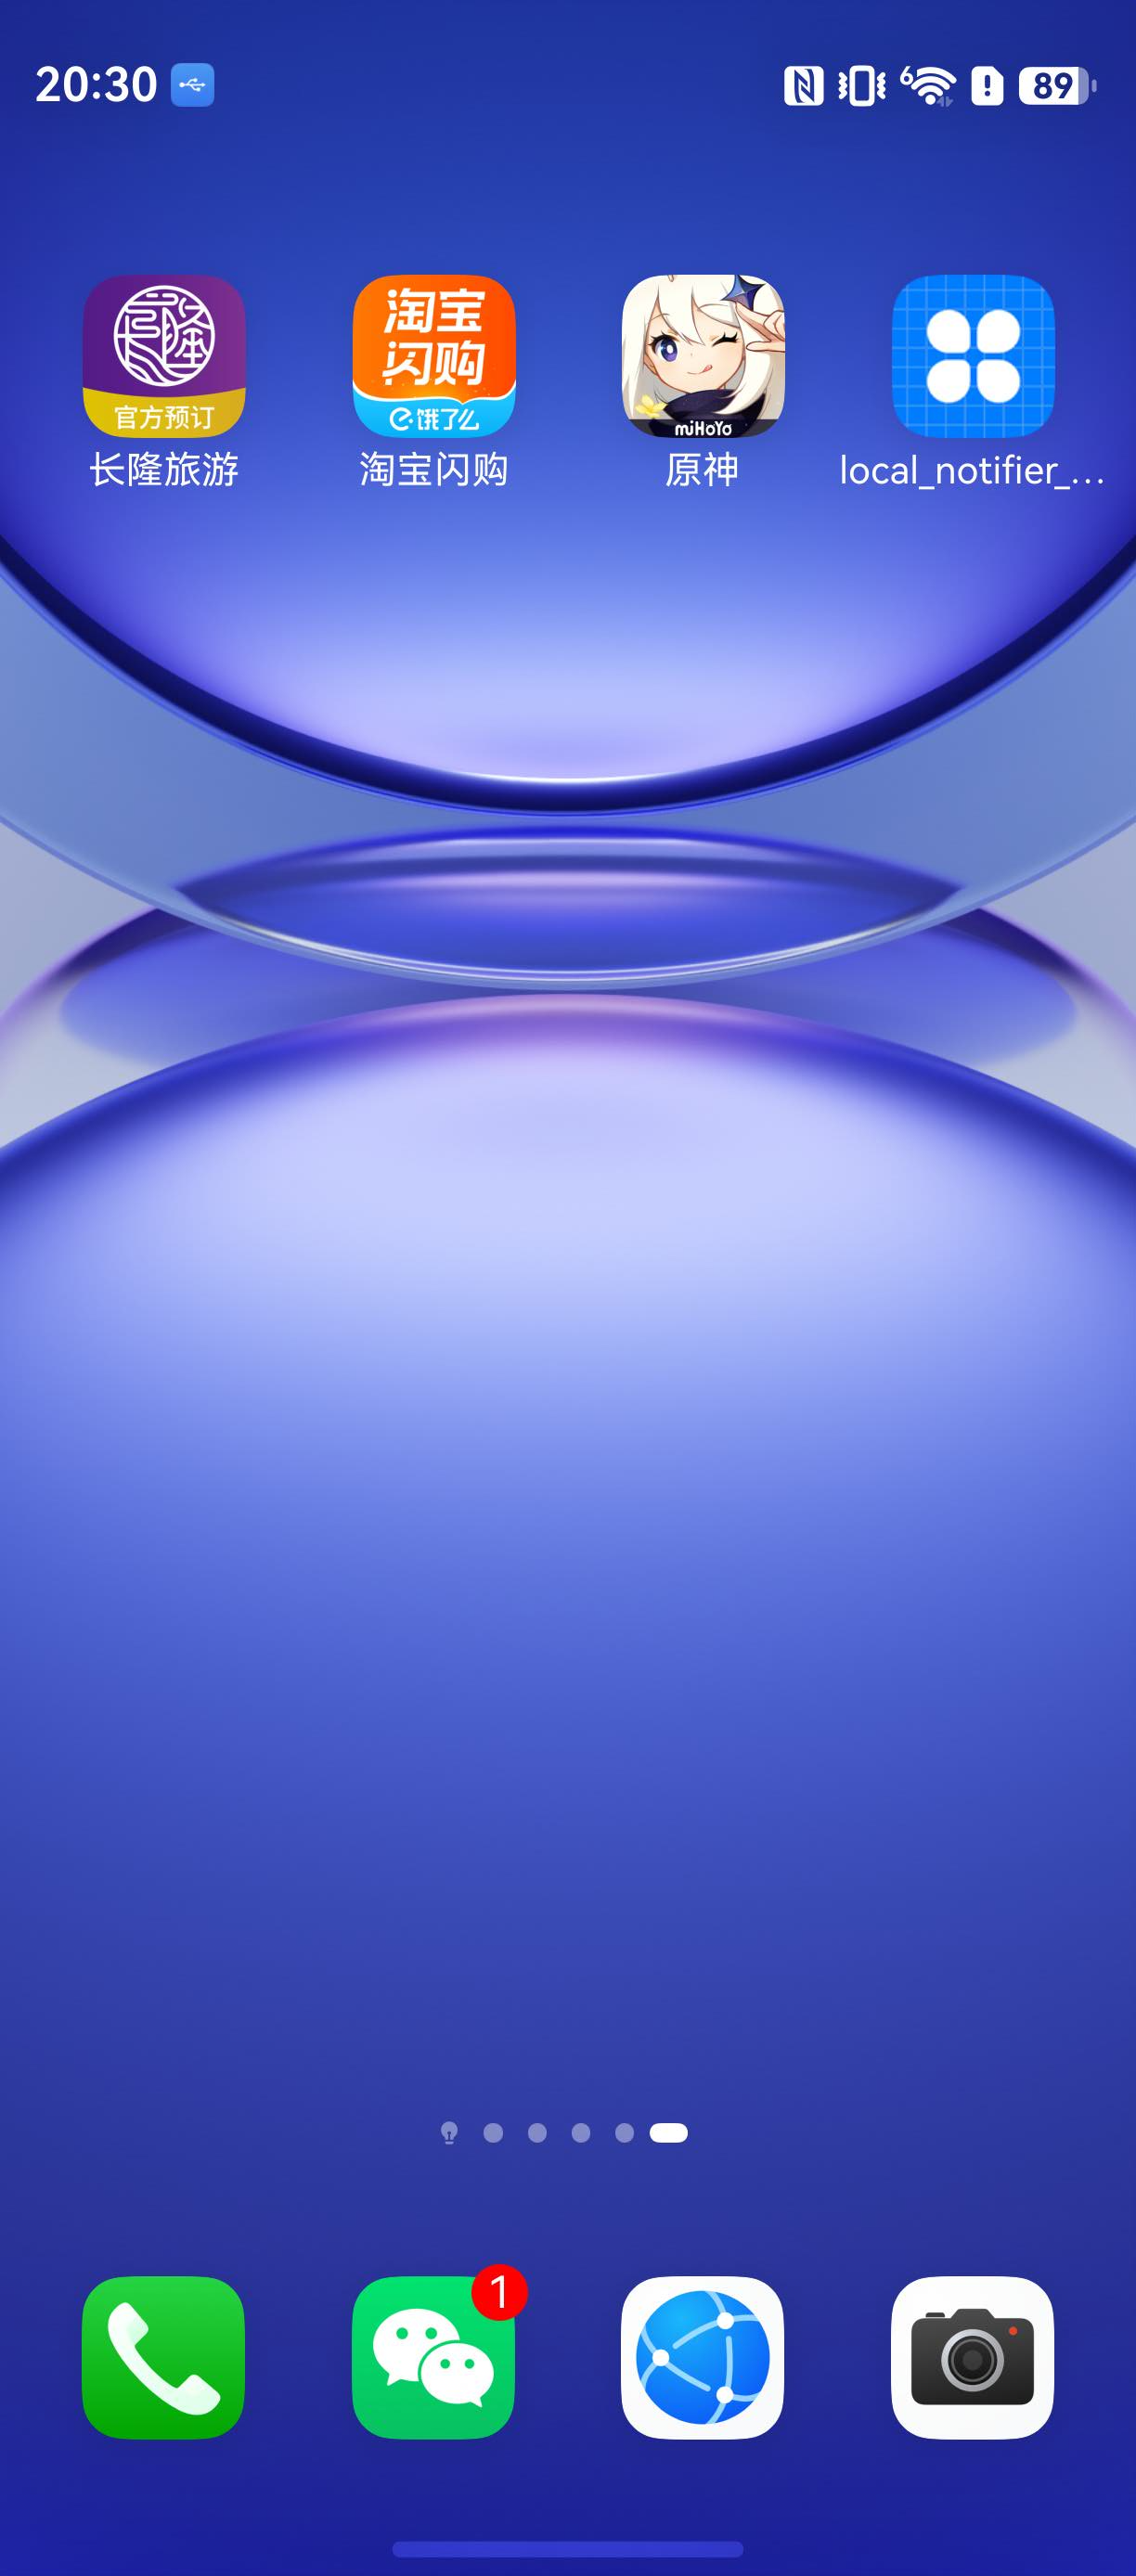
图五:example 安装后出现在 HUAWEI nova 12 Ultra 桌面
首次运行 setup 时若用户未开启本应用的通知开关,会先弹系统授权弹窗;截图设备此前已授权,所以直接进入演示页:
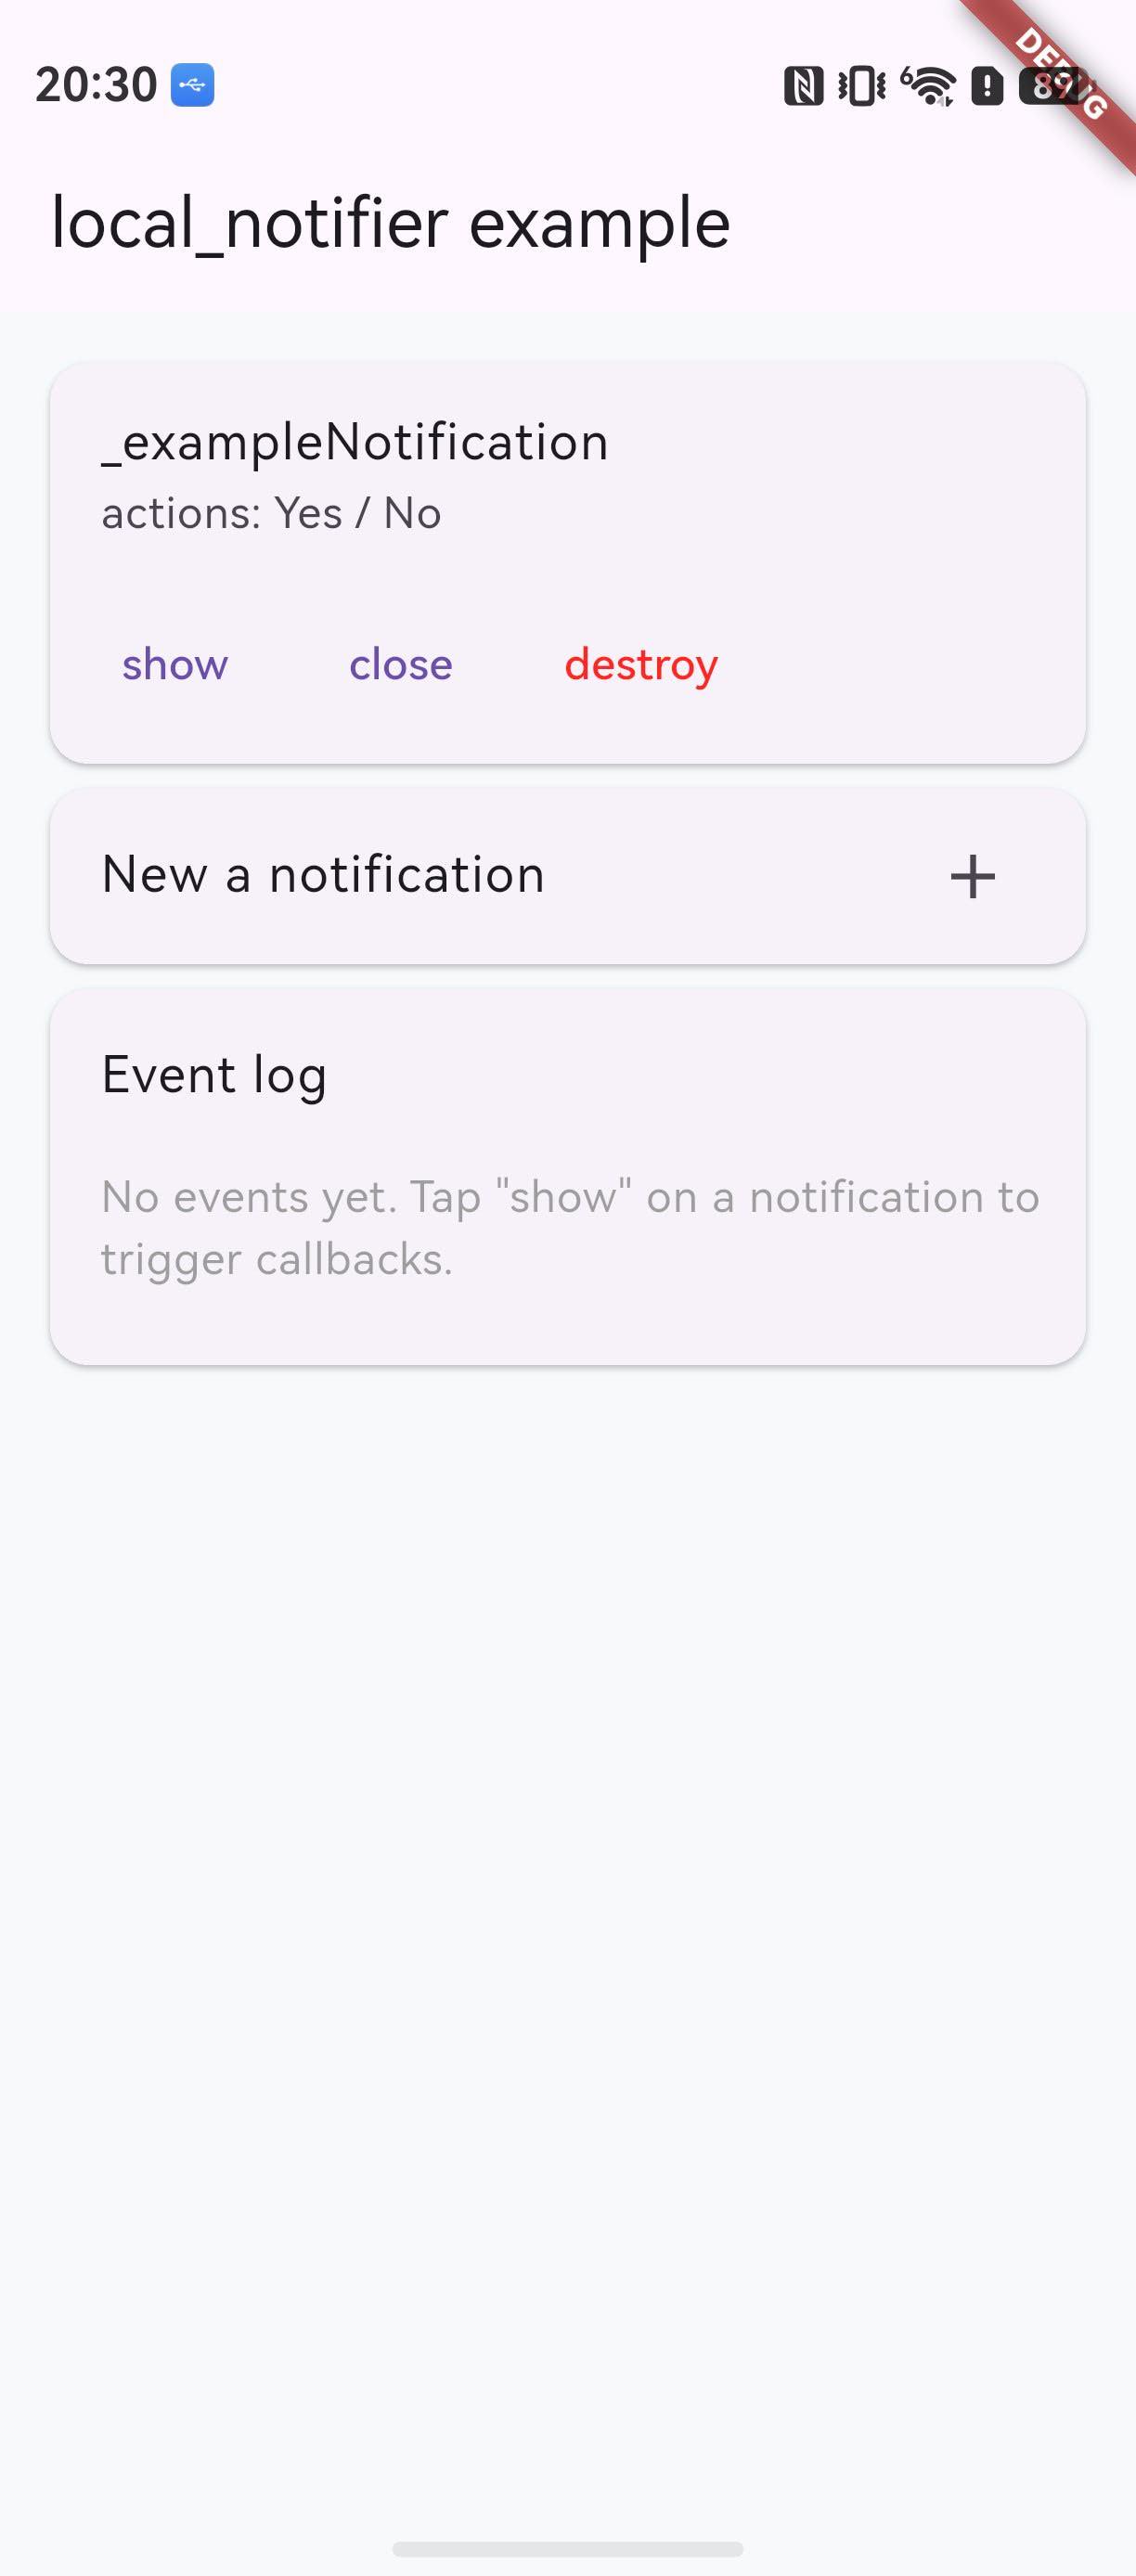
图六:example 启动后的演示页,三卡片布局与 Event log 初始状态
3.2 自建工程时以 AtomGit 链接方式引入
不用仓库自带 example、想在已有工程里验证时,在 pubspec.yaml 中以 AtomGit 仓库链接方式添加 git 依赖:
dependencies:
  local_notifier:
    git:
      url: https://atomgit.com/oh-flutter/local_notifier.git
      # ref: 根据下方表格选择不同框架适配的 TAG 版本
      ref: 0.1.6-ohos-1.0.0-beta.1
flutter pub get
TAG 命名规则是"原库版本-ohos-版本号-beta.x",不同框架版本的 TAG 对照表:
| Flutter 框架版本 | TAG 名称 | 分支名 |
|---|---|---|
| 3.41 | 0.1.6-ohos-1.0.0-beta.1 | feat/ohos_local_notifier_0.1.6 |
说明:该 TAG 已在 3.41 系 stable(
3.41.10-ohos-1.0.1)真机上实测通过,3.41 用户可直接使用;其他框架版本的适配 TAG 发布后在此表补充。
3.3 调用接口并观察真机运行效果
核心接口的调用方式与任何平台一致,先初始化,再构造通知、挂回调、发布:
import 'package:local_notifier/local_notifier.dart';

// 初始化(首次运行会弹出系统通知授权弹窗)
await localNotifier.setup(appName: 'my_app');

// 构造通知并挂回调
final notification = LocalNotification(
  title: 'example',
  body: 'hello flutter!',
);
notification.onShow = () {
  print('onShow ${notification.identifier}');
};
notification.onClick = () {
  print('onClick ${notification.identifier}');
};

// 发布
await notification.show();
点击演示页 _exampleNotification 卡片的 show 按钮,通知出现在系统通知中心顶部:
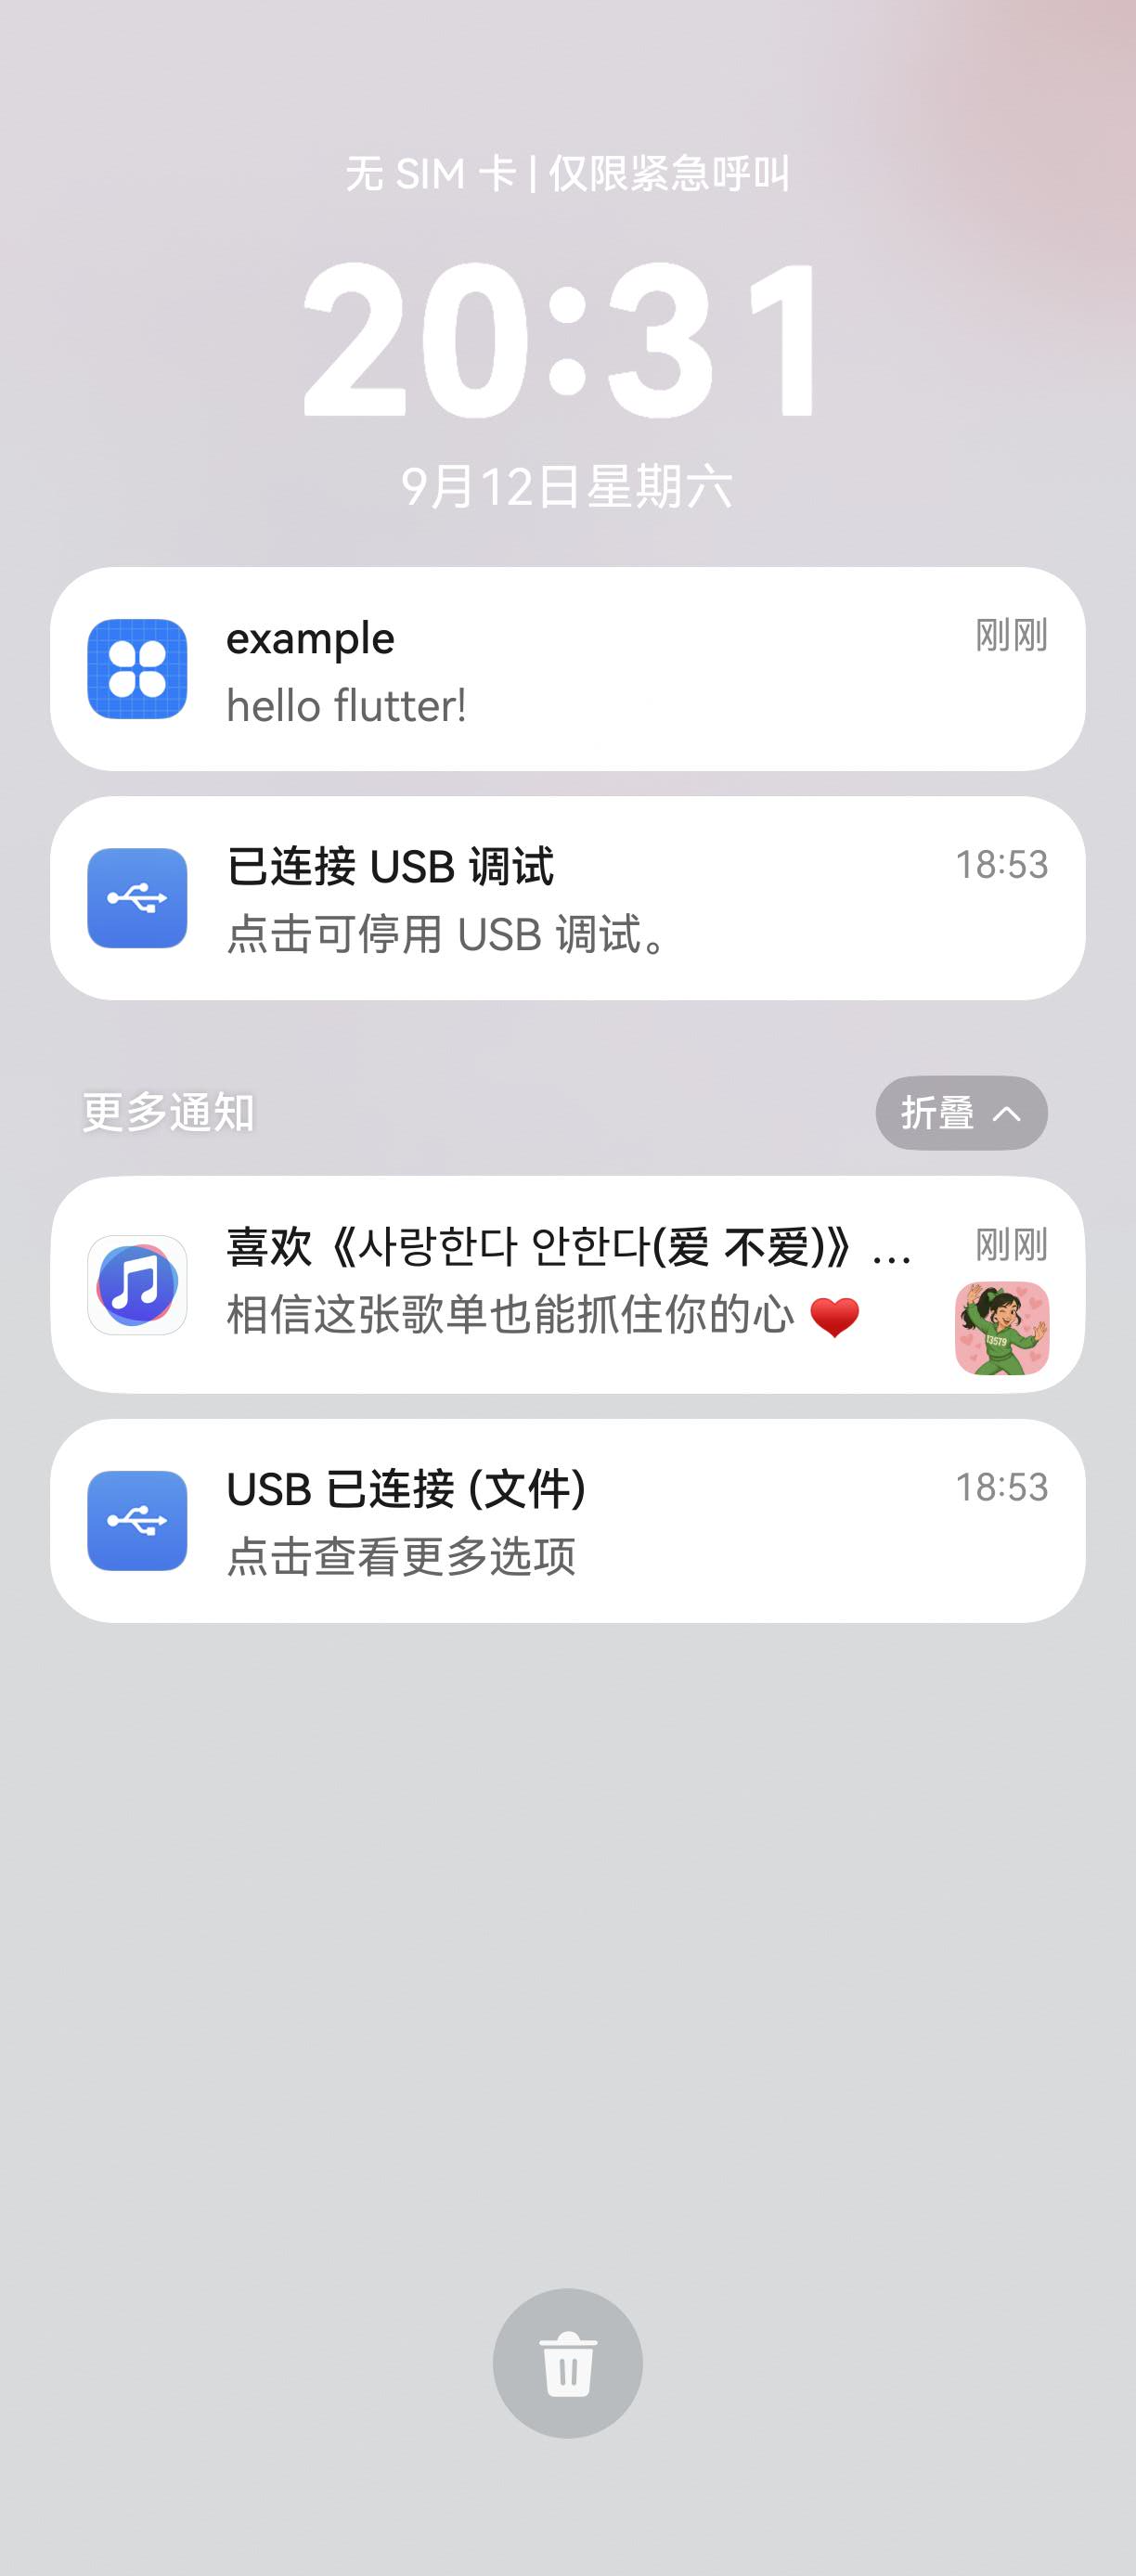
图七:show 后通知中心顶部出现"example / hello flutter!"通知
发布动作完成的瞬间,Event log 记录 onShow 回调:
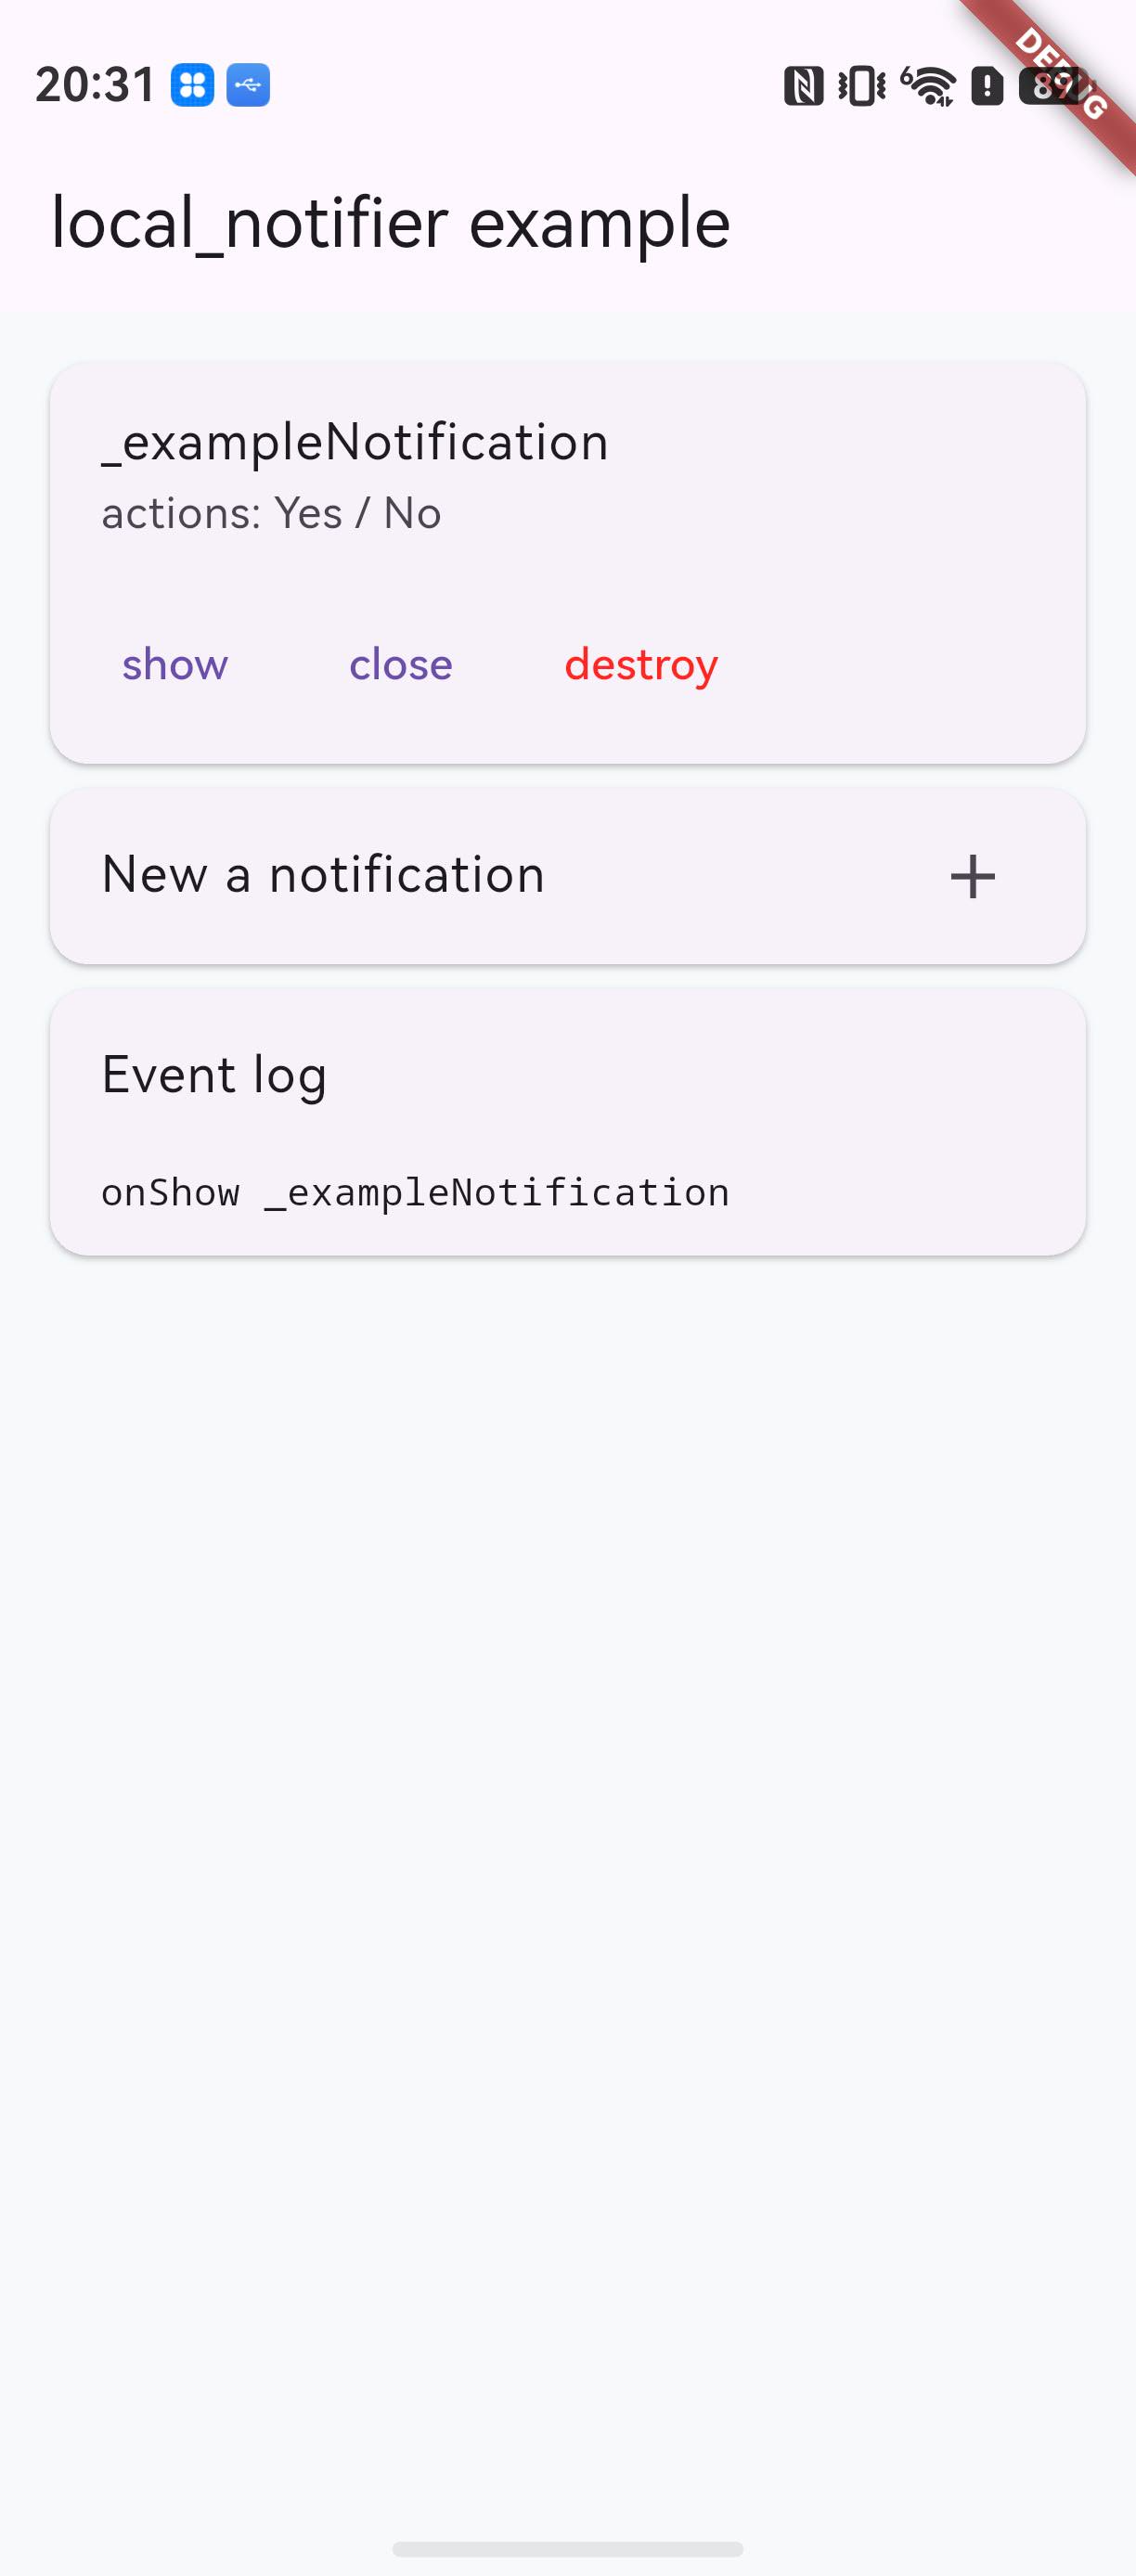
图八:Event log 记录 onShow _exampleNotification
在通知中心点击通知主体,应用回到前台,onClick 回调触发,页面同时弹出 SnackBar 提示:
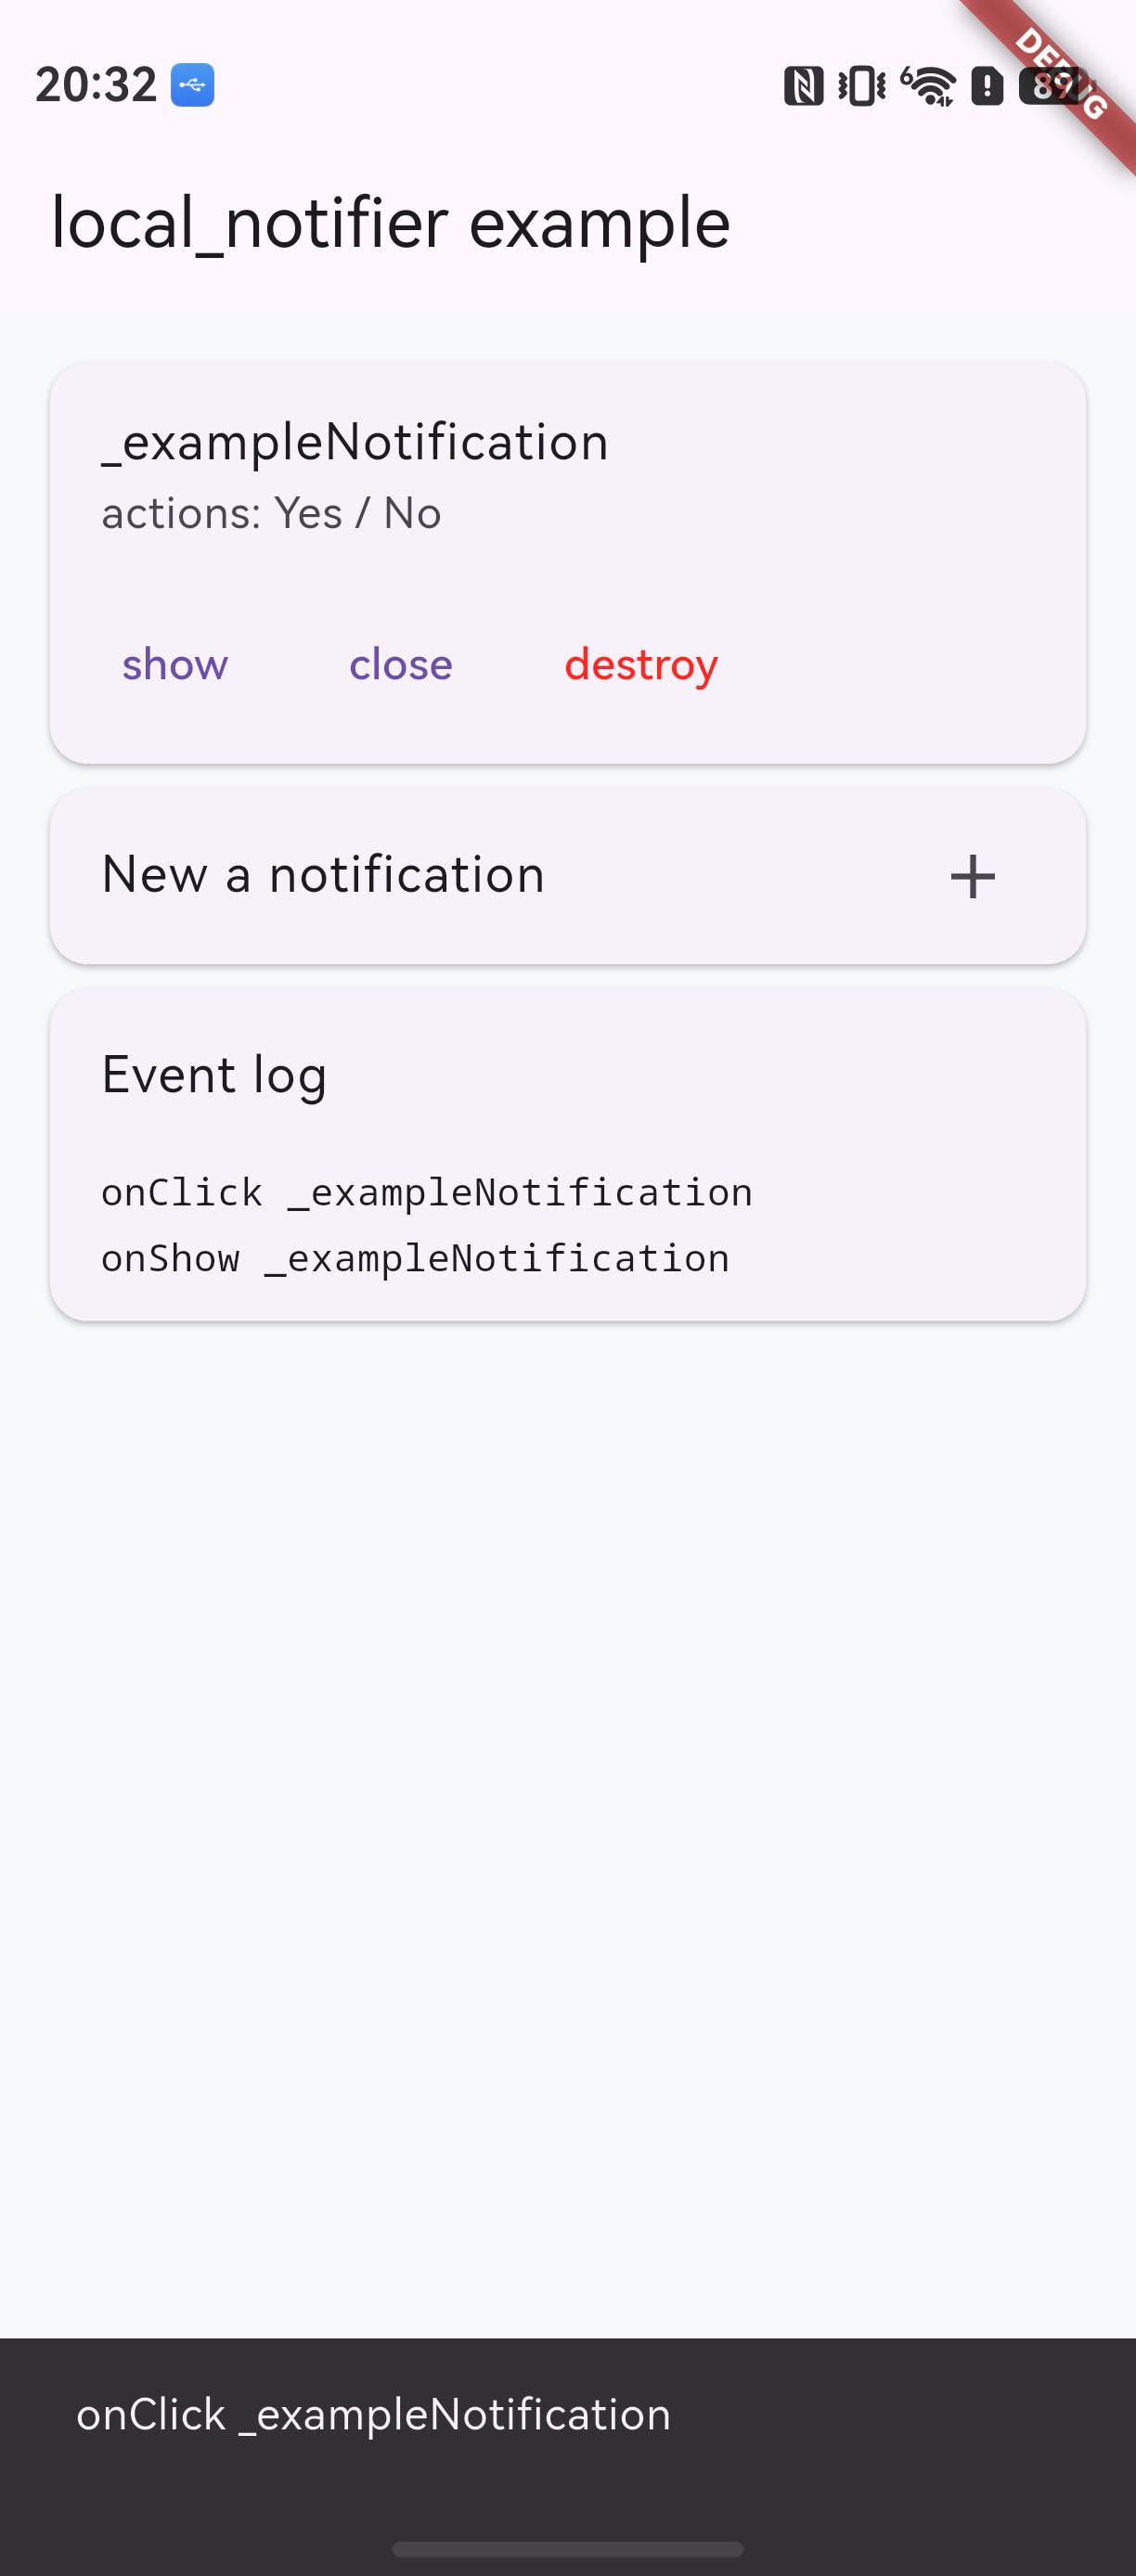
图九:点击通知主体后 Event log 记录 onClick,页面弹出 SnackBar
回到应用点击 close 按钮,通知被取消,onClose 回调携带 LocalNotificationCloseReason.userCanceled 触发:
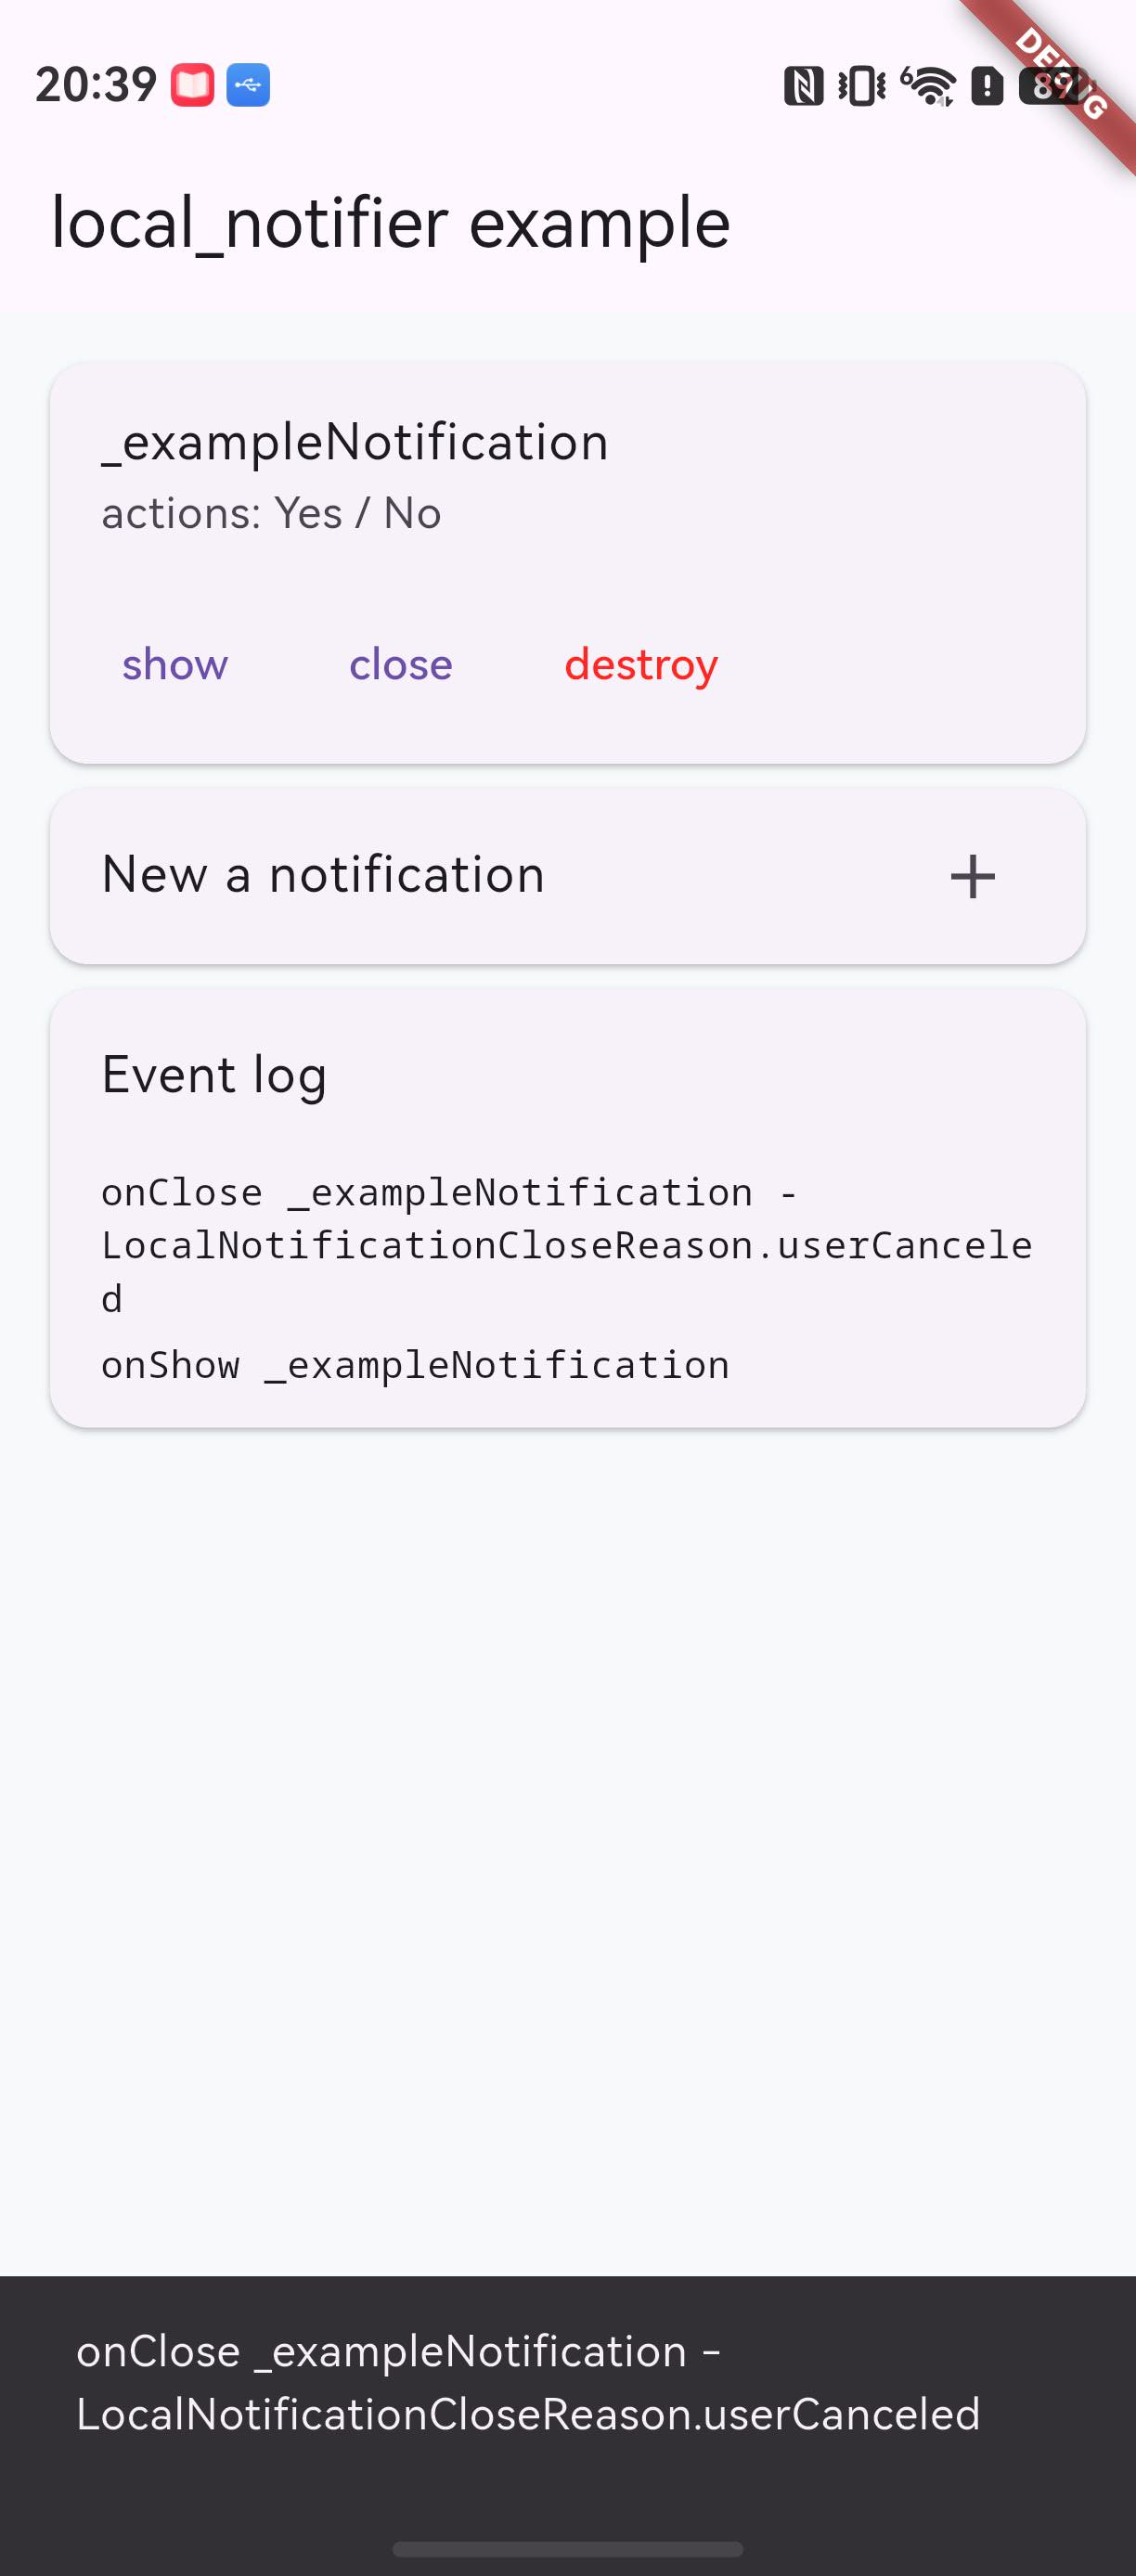
图十:close 后 Event log 记录 onClose 与 userCanceled 关闭原因
此时下拉通知中心,example 的通知已经消失:
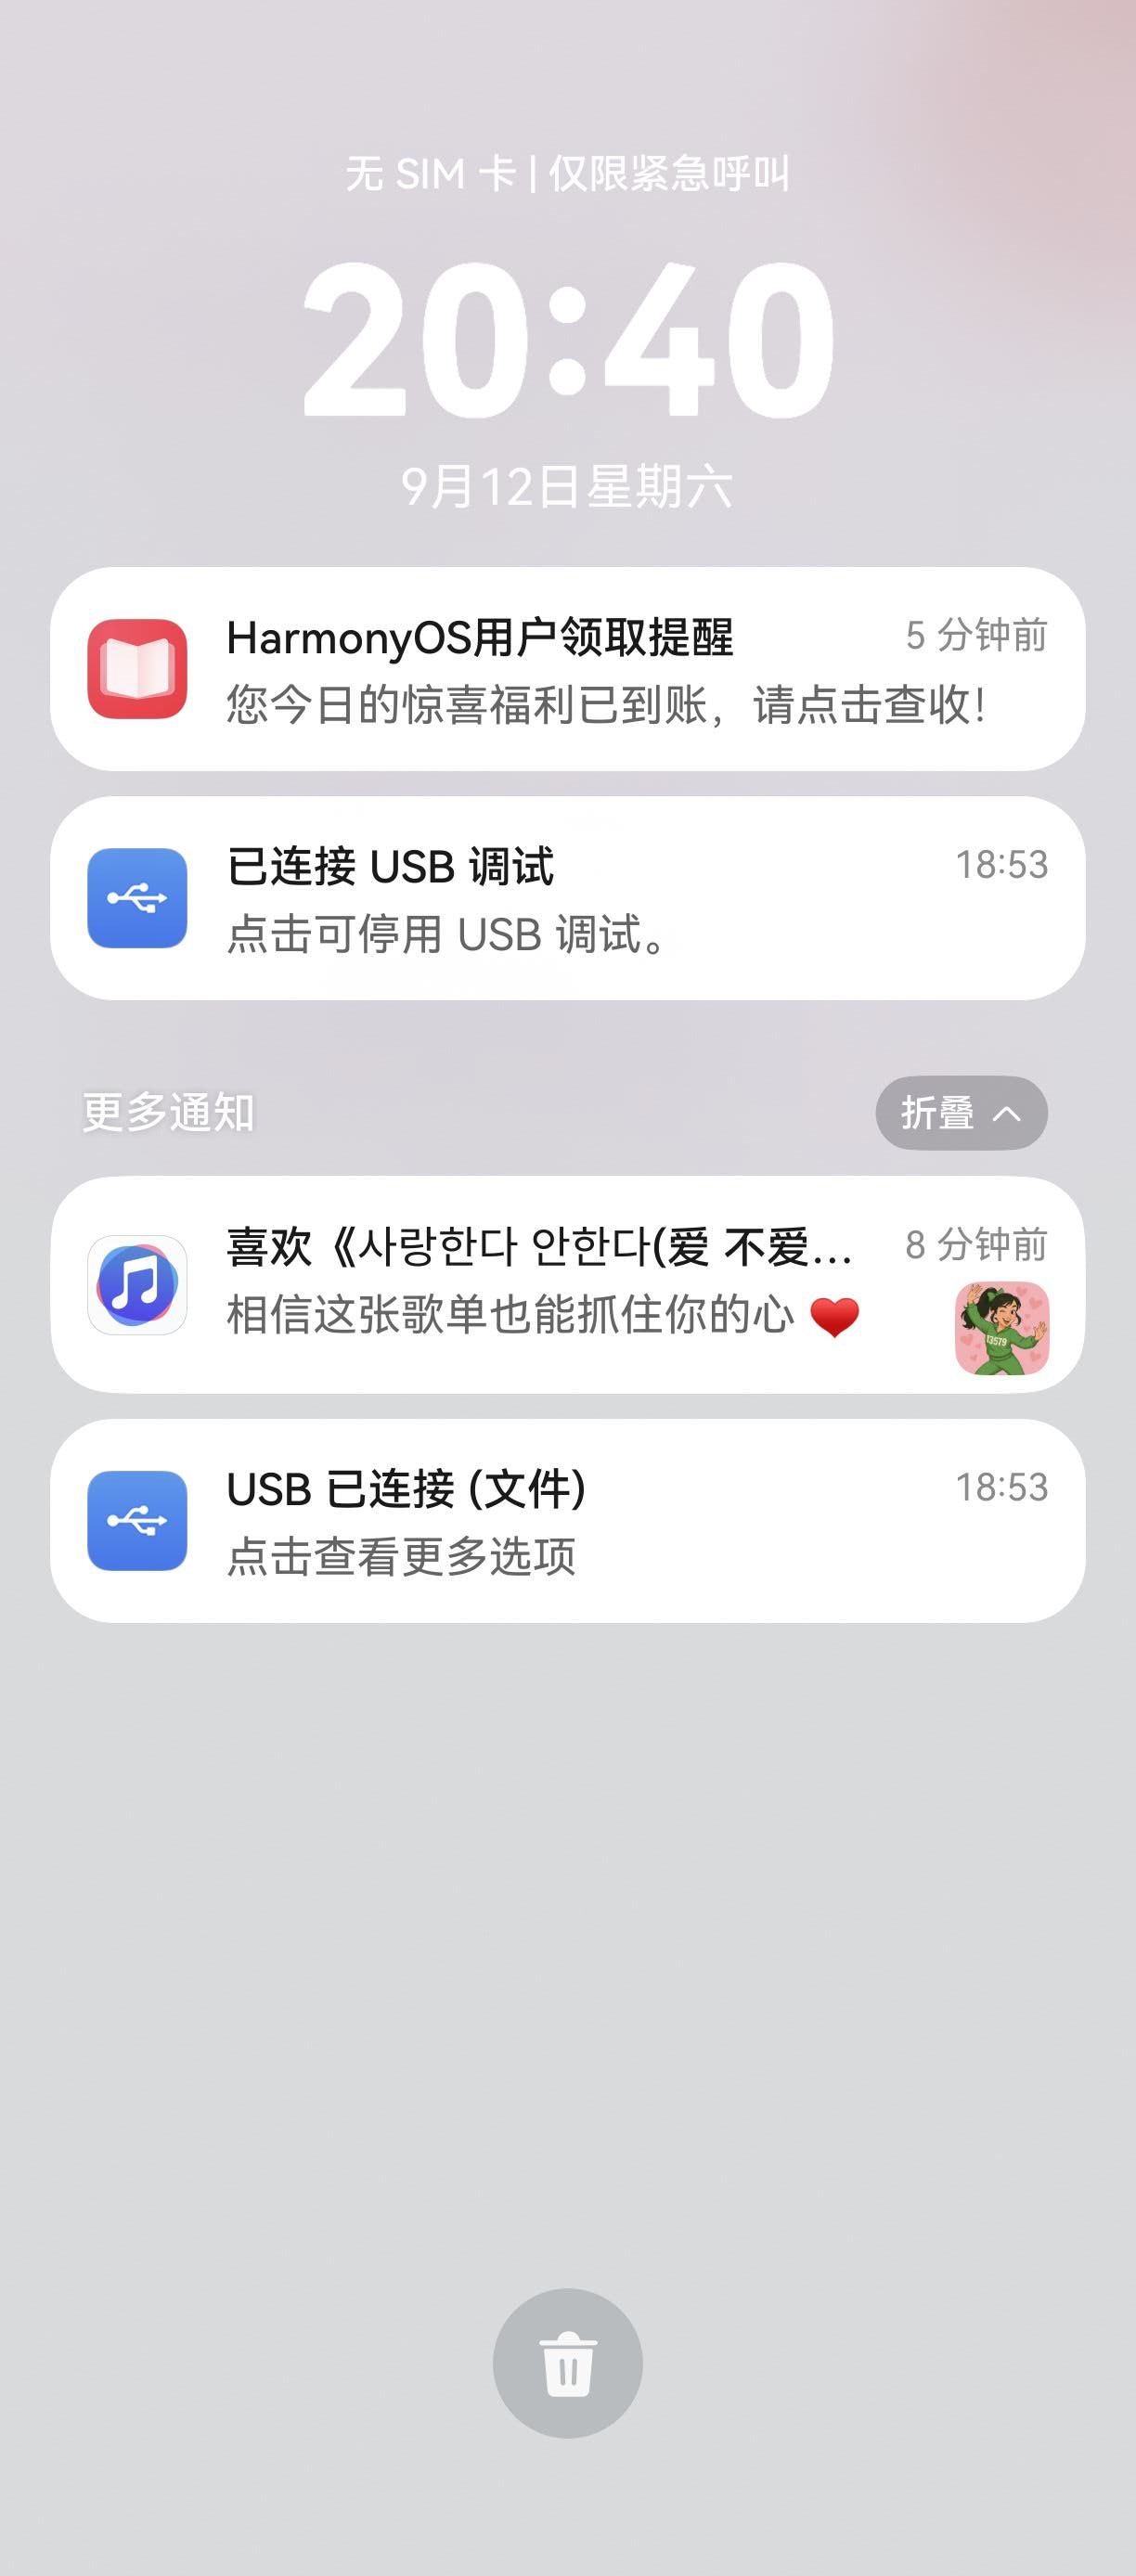
图十一:close 后通知中心已无 example 通知
再验证动态通知。点击 New a notification 卡片的加号,demo 会创建一条新的 LocalNotification(identifier 未传、自动生成 UUID v4,标题为 example - 0),演示页新增一张卡片展示它的 identifier 与操作按钮:
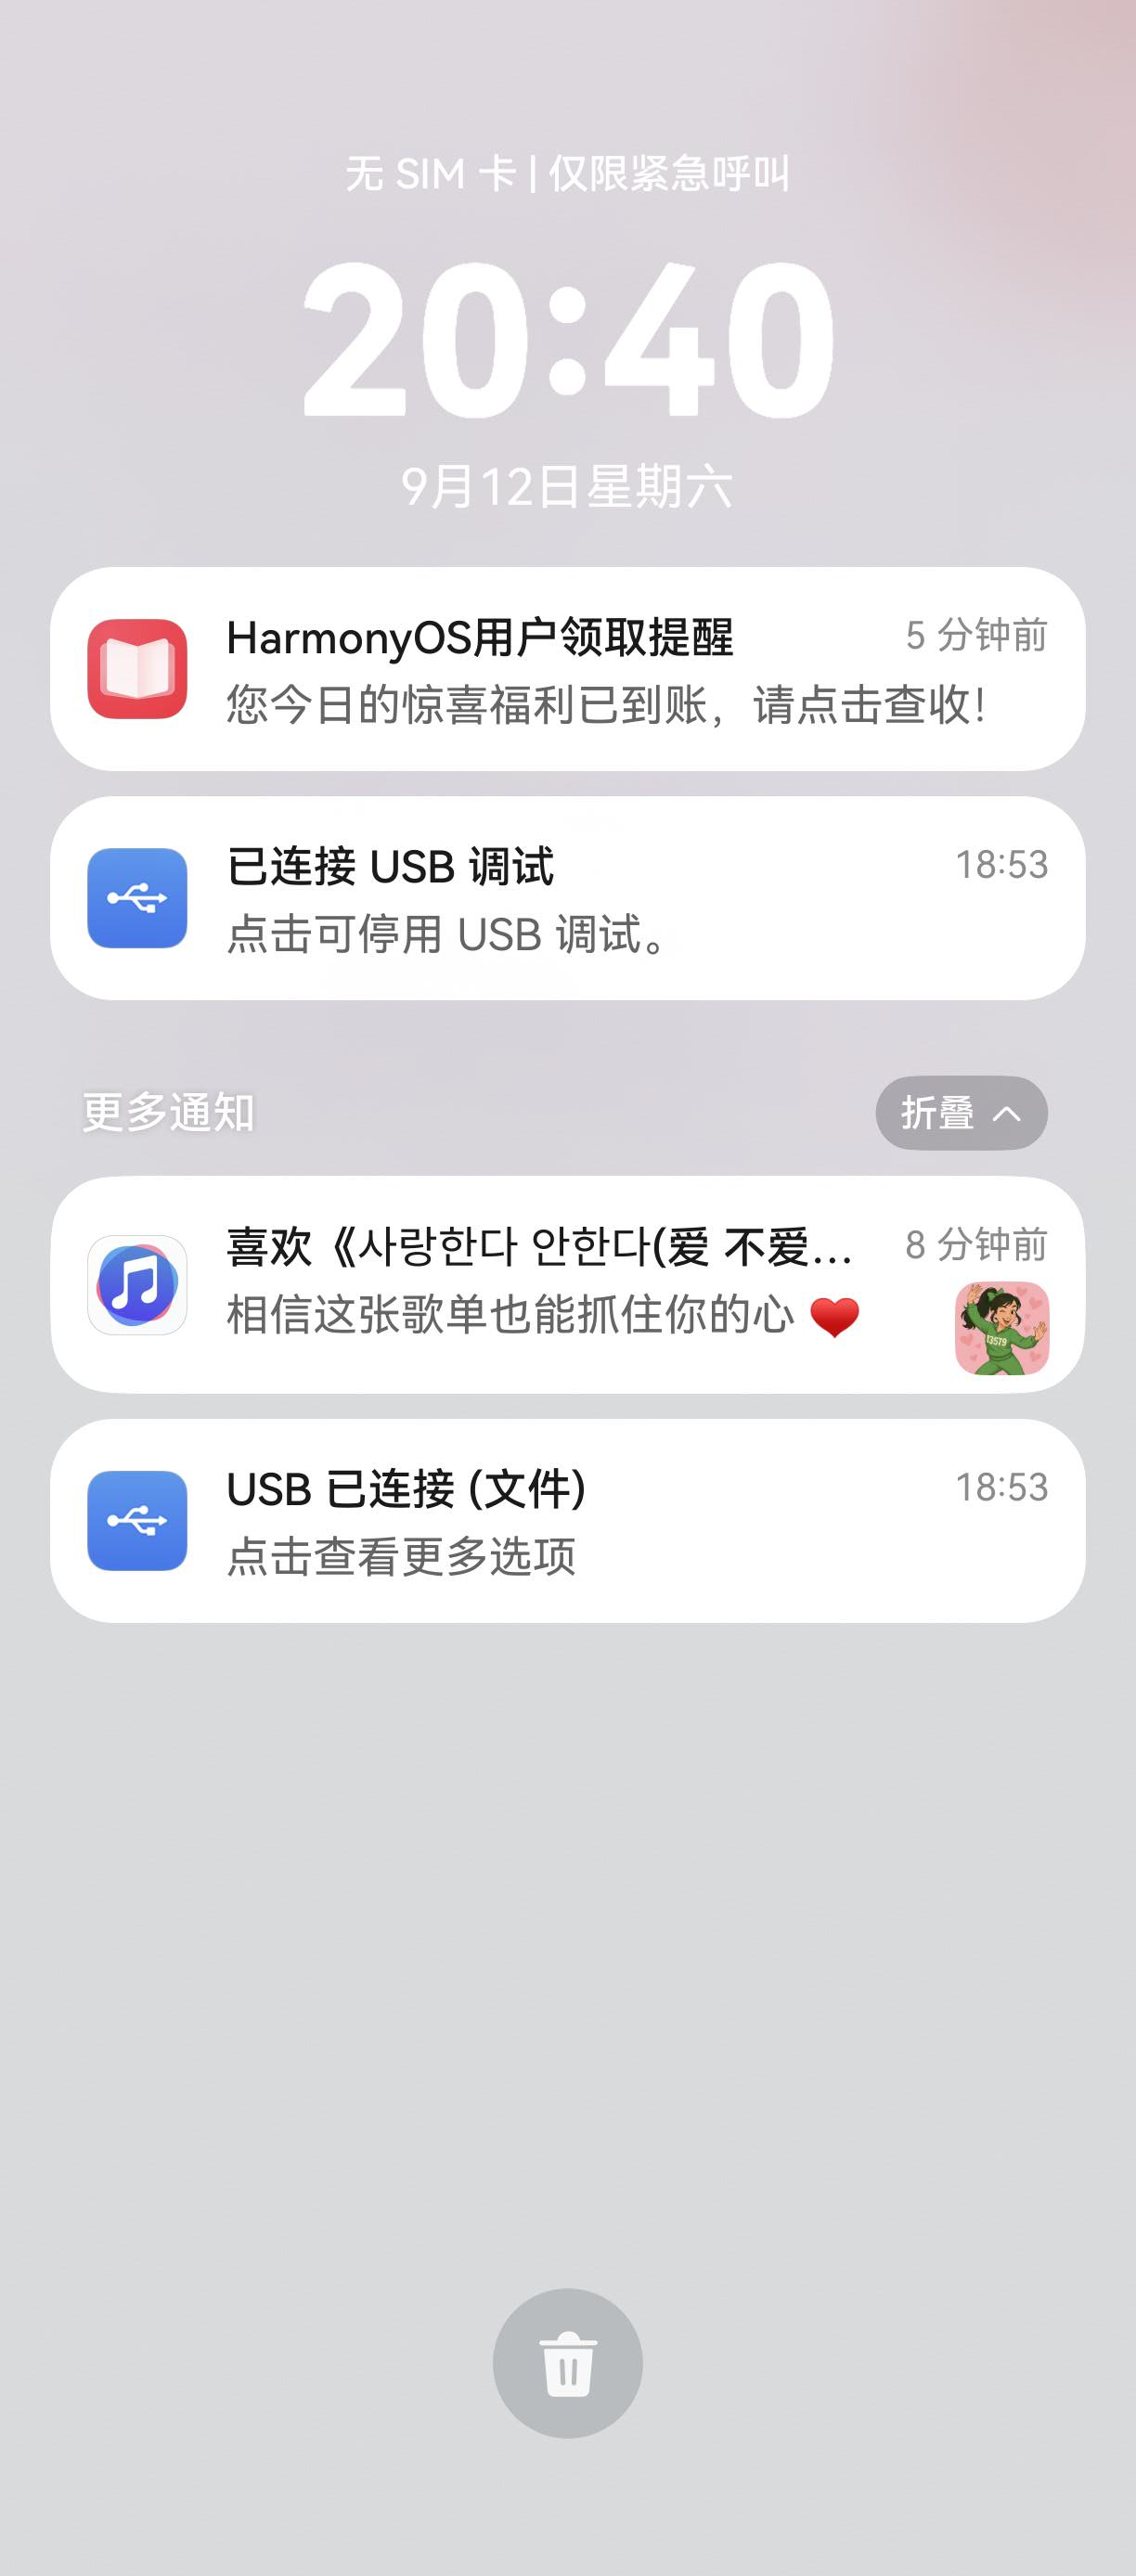
图十二:动态新建通知后演示页新增卡片,identifier 为自动生成的 UUID
对新通知调用 show,它同样出现在通知中心顶部:
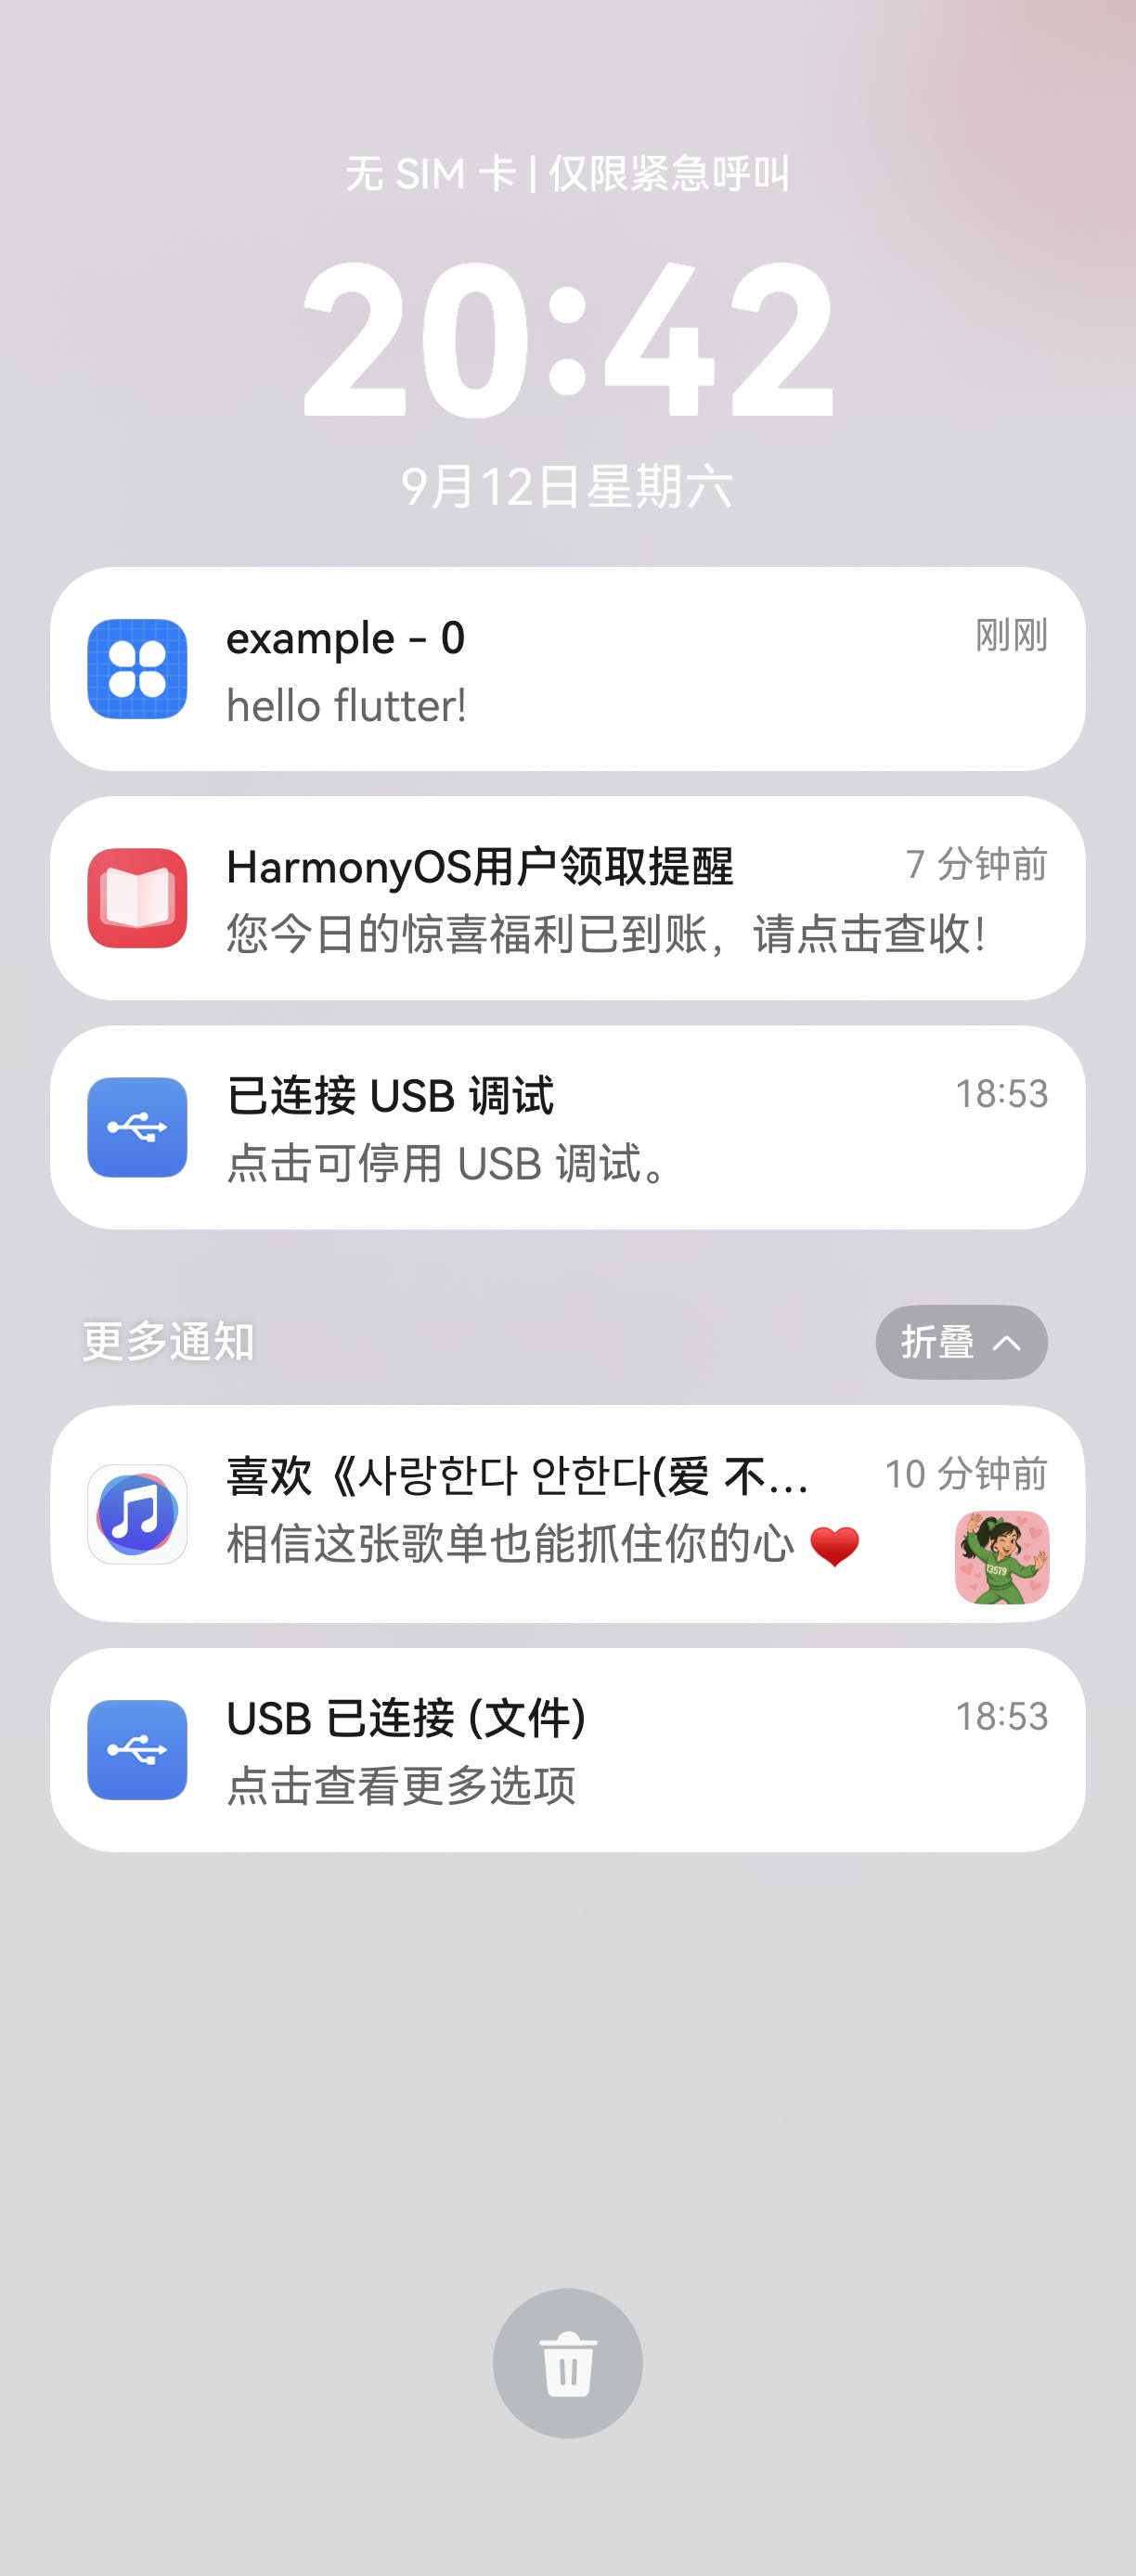
图十三:新建通知 show 后出现在通知中心顶部
最后验证 destroy:点击固定通知卡片的 destroy 按钮,通知被关闭并销毁,演示页上 _exampleNotification 卡片随之消失,Event log 保留 onClose 记录:
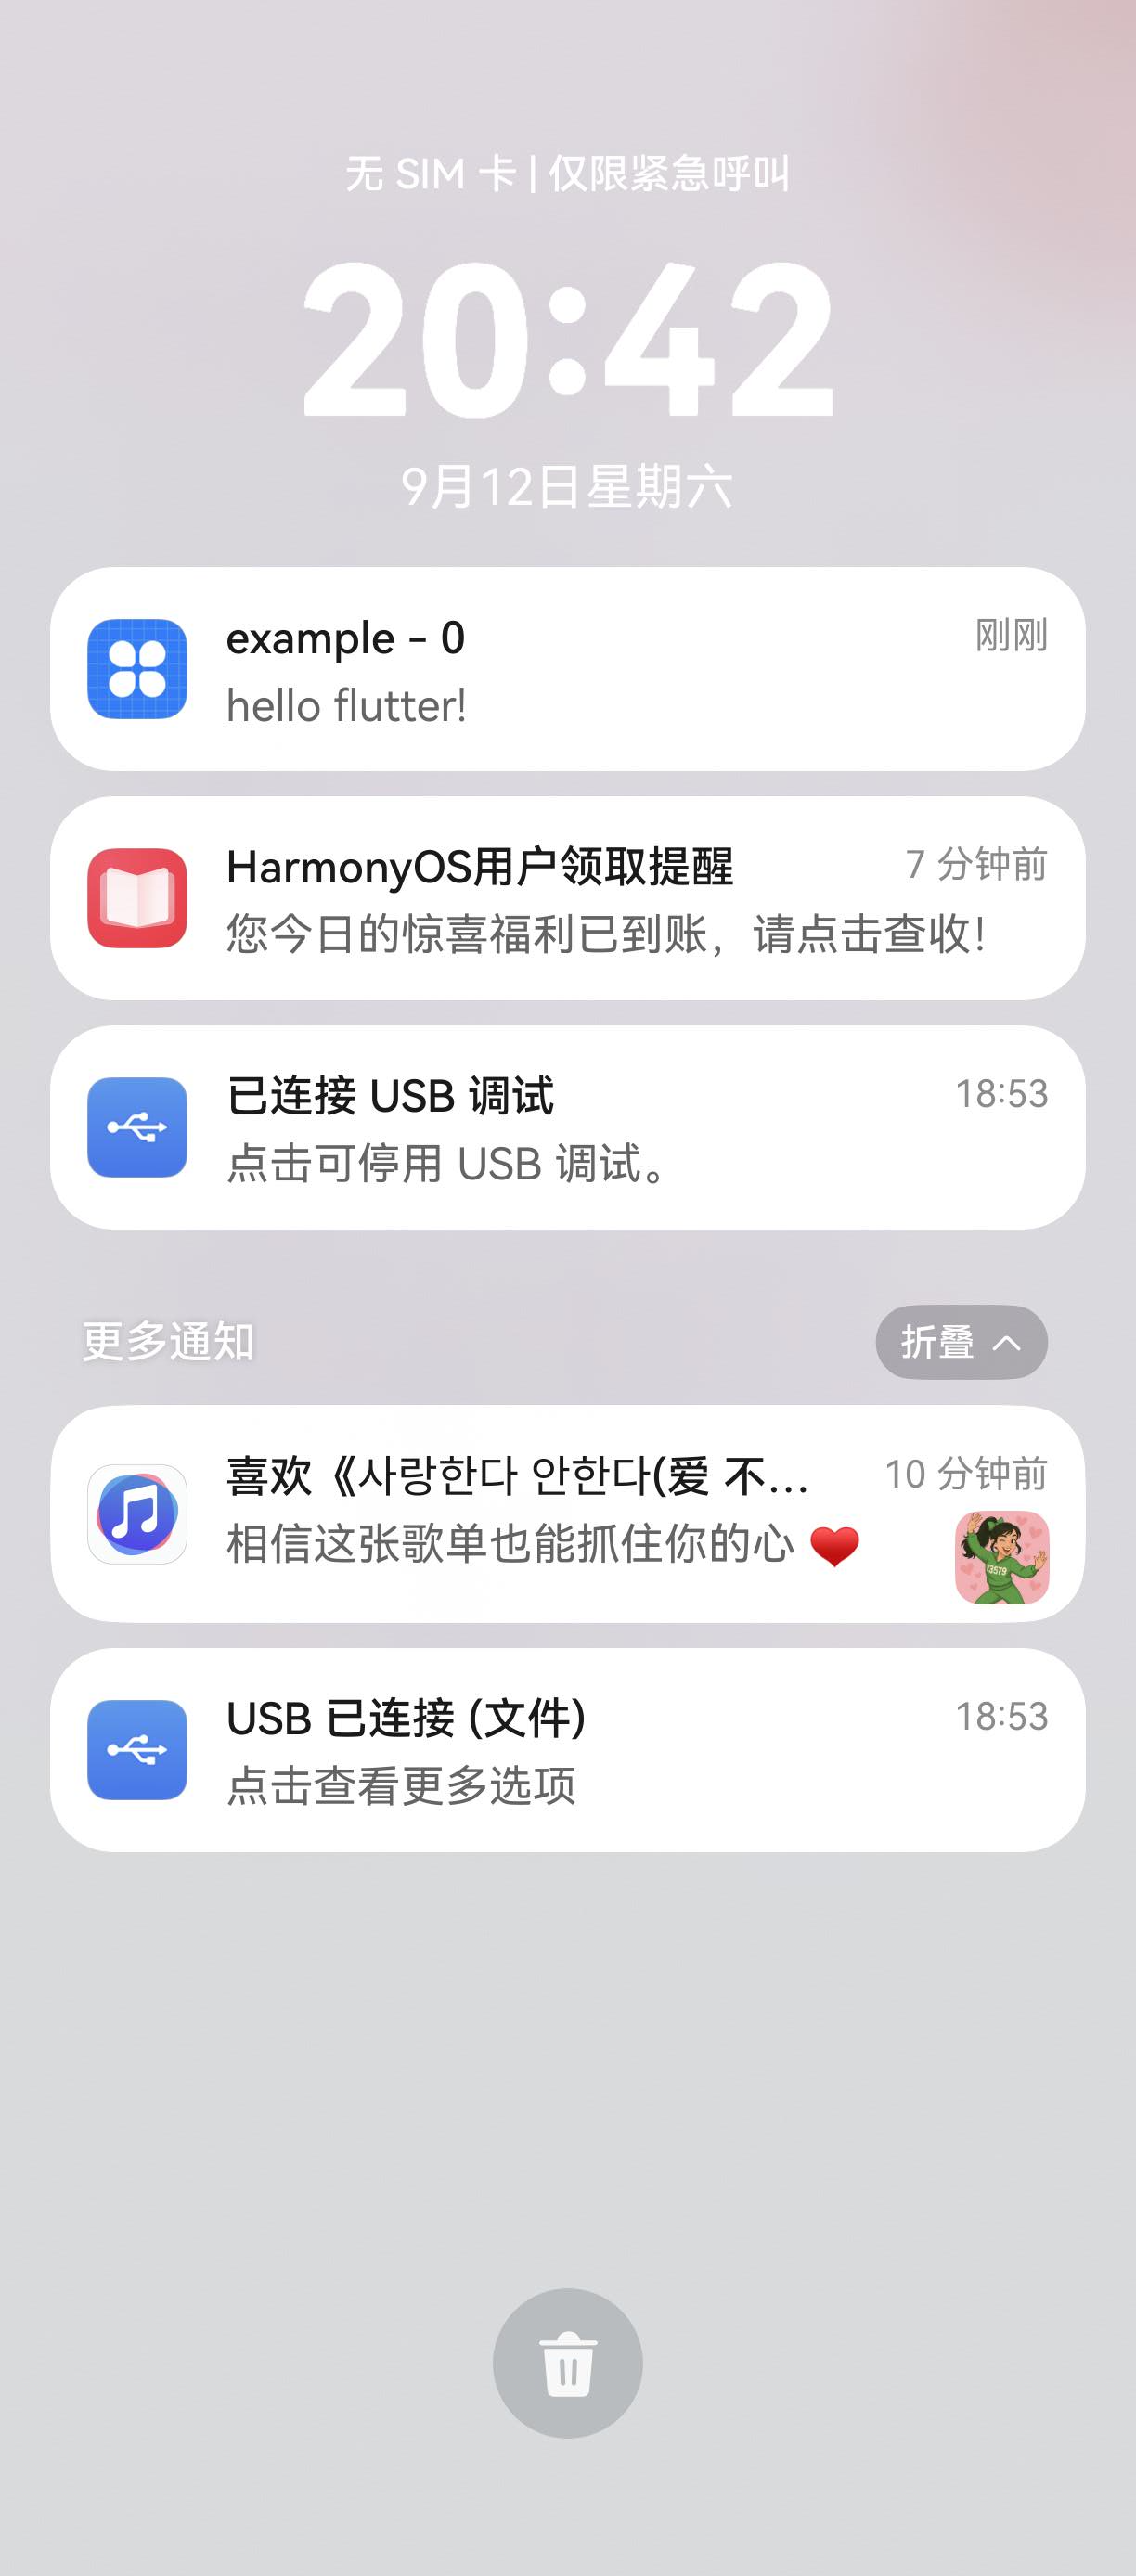
图十四:destroy 后演示页固定通知卡片消失,Event log 保留 onClose 记录
两类场景需要如实记录。一是操作按钮的 onClickAction 回调:机制上与主体点击共用 wantAgent + onNewWant 链路,仅多携带 actionIndex(见 2.4),接口已在真机构建中生效,但按钮位于通知的展开形态、自动化模拟点击受限,本文未留下按钮点击瞬间的截图,读者可在真机上展开通知后点击 Yes / No 按钮自行验证。二是用户在通知中心手动清除通知不会触发 onClose:监听系统侧通知删除事件需要 SUBSCRIBE_NOTIFICATION 系统权限,三方应用无法获取,onClose 仅覆盖 close / destroy 的主动关闭(closeReason 固定 userCanceled)。
到这里,适配完成度就有了真机背书:setup 的授权检查与授权弹窗、notify 发布(含 UUID identifier 的动态通知)、show / close / destroy 全链路可用;onShow / onClick / onClose 三个回调在真机完整走通;返回值与回调语义和上游各平台一致,onClose 比上游非 Windows 平台提供了更明确的生命周期信号。
四、常见问题
4.1 适配过程中的问题
Q1:flutter create --platforms ohos . 会不会改动我现有的代码?
只会新增 ohos/ 目录,并在 pubspec.yaml 的 plugin.platforms 下追加一个 ohos 节点,windows/、macos/、linux/、lib/ 等原有内容不会被改写。如果对生成的模板不满意,删掉 ohos/ 目录重新执行即可,pubspec 里多出的节点手动删掉也无碍。
Q2:Dart 侧调用报 MissingPluginException,通道没通?
按顺序排查三处:pubspec.yaml 是否有 ohos: 节点且 pluginClass 拼写正确(本库 ohos 节点只需 pluginClass 一行);ohos/index.ets 是否导出了插件类;插件类名与 pluginClass 是否一致。三者任一不符,宿主的自动注册都会静默失败。此外工程需要重新执行 flutter pub get 并全量构建,热重载不会触发插件重新注册。
Q3:发布通知时报 “The type of additionalText must be string”?
NotificationRequest 的 additionalText 字段显式传 undefined 会触发系统校验错误。构建 content 时只能在副标题非空时携带 additionalText 键,不能为图省事统一传 subtitle ?? undefined,参照 2.4 的 buildContent 用分支绕开即可。
Q4:ArkTS 侧 result.success 被调用两次导致崩溃?
setup 有两条异步路径:isNotificationEnabled 的查询回调与 requestEnableNotification 的授权弹窗回调,先后都可能触发,而 MethodResult 只允许回复一次。参照 2.4 的实现,用 replyOnce 标志位双向互斥,第一次结果生效后其余丢弃。
4.2 使用过程中的问题
Q1:在通知中心手动清除通知,为什么没有触发 onClose?
监听系统侧的通知删除事件需要 SUBSCRIBE_NOTIFICATION 系统权限,三方应用无法获取,所以鸿蒙侧只能感知主动关闭:close / destroy 成功取消后触发 onClose(closeReason 固定 userCanceled)。依赖其它 closeReason 分支(如 timedOut)的业务代码在鸿蒙平台不会执行,需要另行设计兜底逻辑。
Q2:setup 返回 false 是什么意思,怎么恢复?
false 表示用户在授权弹窗中拒绝了通知,或授权查询异常。恢复路径是引导用户到系统设置中打开本应用的通知开关,之后重新调用 setup 即可返回 true;在此之前调用 show() 会与上游桌面端一致,抛出未初始化异常。
Q3:点击通知冷启动应用,为什么没有触发 onClick?
点击通知冷启动时,进程是新建的,Dart 侧还没有注册任何 LocalNotification,回调映射为空。适配在回调入口做了空值保护(见 2.4),此时静默忽略这次点击,应用本身会正常被拉起;上游桌面端在同类场景下存在空断言崩溃风险,鸿蒙侧的处理更安全。如需感知冷启动来源,可在 want 参数中自行识别。
Q4:长正文会被通知中心截断吗?
不会。正文不超过 46 字符时映射 BASIC_TEXT 类型,超过 46 字符自动映射 LONG_TEXT 类型,通知中心展开后可看到全文;副标题(subtitle)始终映射为 additionalText 显示。字段映射关系详见仓库 README.OpenHarmony_CN.md 的使用说明。
五、结语
回顾整条适配链路:上游仓库同步进 AtomGit 保住历史,flutter create --platforms ohos . 一条命令补全目录结构,Dart 侧只动了 lib/src/local_notifier.dart 的三处分支与保护,ArkTS 侧把模板补全为授权、发布、点击回传、取消的完整实现,四份说明文件交代清楚适配行为,分支与 TAG 按社区规范提交发布。原库的接口签名、回调语义与各平台行为原封未动,这正是"只做加法"的适配给使用方的承诺。
适配过程中发现的问题欢迎到 local_notifier 鸿蒙仓库提 Issue(鸿蒙适配层)或 原库 GitHub 仓库提 Issue(原库行为),修复代码欢迎发 PR。接口的完整用法、参数说明与业务侧最佳实践,见姊妹篇《local_notifier 的鸿蒙使用指南》。
六、相关链接
欢迎加入 CPF-Flutter 鸿蒙社区,社区入口、环境搭建指南和本文相关链接统一放在这里:

作为“人工智能6S店”的官方数字引擎,为AI开发者与企业提供一个覆盖软硬件全栈、一站式门户。
更多推荐

 2
2 0
0- 0


 已为社区贡献23条内容

所有评论(0)