
鸿蒙实战(二) ArkUI AI 相机:从零实现实时滤镜与人脸贴纸
·
📷 鸿蒙实战(二) ArkUI AI 相机:从零实现实时滤镜与人脸贴纸
博主说: 在短视频时代,谁掌握了"美颜+滤镜+贴纸"谁就掌握了流量密码。今天这篇实战带你从零开发一个 AI 相机 App——调用系统相机预览、叠加实时滤镜效果、在检测到的人脸上贴猫耳朵/墨镜贴纸。读完你将掌握 ArkUI 中相机 + 图像处理 + Canvas 绘制的完整链路。
📱 应用场景
| 功能模块 | 具体能力 | 用户场景 |
|---|---|---|
| 📸 相机预览 | 调用系统相机,全屏实时预览 | 打开即拍 |
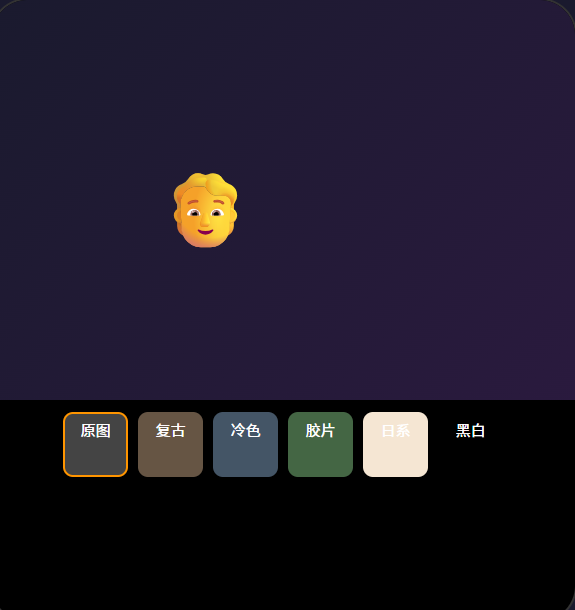
| 🎨 实时滤镜 | 6 种滤镜:原图/黑白/复古/日系/冷色调/暖色调 | 拍照前选风格 |
| 🐱 人脸贴纸 | 检测人脸位置 + 叠加猫耳朵/墨镜/兔耳朵 | 卖萌自拍 |
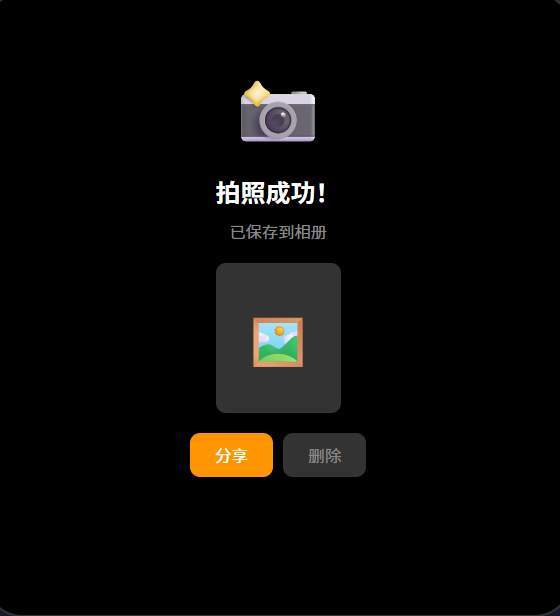
| 💾 拍照保存 | 带滤镜和贴纸效果保存到相册 | 分享到社交平台 |
| 🔄 前后摄像头切换 | 一键切换前置/后置 | 自拍/拍风景 |
⚙️ 运行环境要求
| 项目 | 版本要求 |
|---|---|
| DevEco Studio | 5.0.3.800 及以上 |
| HarmonyOS SDK | API 12(HarmonyOS 5.0.0)及以上 |
| 应用模型 | Stage 模型 |
| 权限要求 | ohos.permission.CAMERA(相机权限) |
| 核心 API | @ohos.multimedia.camera(相机)+ @ohos.multimedia.image(图像处理)+ @ohos.multimedia.pixelMap(像素图) |
| 开发语言 | ArkTS |
| 真机要求 | 必须真机,模拟器不支持相机 |
🛠️ 实战:从零搭建 AI 相机
Step 1:项目结构
com.example.aicamera/
├── entry/src/main/ets/
│   ├── entryability/EntryAbility.ts
│   └── pages/
│       └── Index.ets              ← 主页面(所有逻辑)
├── entry/src/main/resources/
│   ├── rawfile/
│   │   └── filters/               ← 滤镜 LUT 文件
│   └── base/media/                ← 贴纸图片资源
└── entry/src/main/module.json5    ← 相机权限配置
Step 2:module.json5 — 配置相机权限
{
  "module": {
    "requestPermissions": [
      {
        "name": "ohos.permission.CAMERA",
        "reason": "用于相机拍照和实时滤镜",
        "usedScene": {
          "abilities": ["EntryAbility"],
          "when": "inuse"
        }
      }
    ]
  }
}
Step 3:完整代码
// pages/Index.ets — AI 相机主页面
import camera from '@ohos.multimedia.camera';
import image from '@ohos.multimedia.image';
import { BusinessError } from '@ohos.base';
import abilityAccessCtrl from '@ohos.abilityAccessCtrl';
import fileIo from '@ohos.file.fs';

// 定义滤镜参数
interface FilterConfig {
  name: string;
  brightness: number;  // 亮度调整 -100 ~ 100
  contrast: number;    // 对比度调整 0.5 ~ 2.0
  saturation: number;  // 饱和度调整 0.0 ~ 2.0
  temperature: number; // 色温调整 -100 ~ 100(负=偏冷,正=偏暖)
}

const FILTERS: FilterConfig[] = [
  { name: '原图', brightness: 0, contrast: 1.0, saturation: 1.0, temperature: 0 },
  { name: '黑白', brightness: 0, contrast: 1.1, saturation: 0.0, temperature: 0 },
  { name: '复古', brightness: -10, contrast: 0.9, saturation: 0.6, temperature: 20 },
  { name: '日系', brightness: 15, contrast: 0.95, saturation: 0.8, temperature: -10 },
  { name: '冷色调', brightness: 5, contrast: 1.0, saturation: 0.9, temperature: -30 },
  { name: '暖色调', brightness: 5, contrast: 1.0, saturation: 1.1, temperature: 25 },
];

// 贴纸配置
interface StickerConfig {
  name: string;
  emoji: string;
  offsetX: number;  // 相对于人脸中心的偏移比例
  offsetY: number;
}

const STICKERS: StickerConfig[] = [
  { name: '猫耳朵', emoji: '🐱', offsetX: 0, offsetY: -1.2 },
  { name: '墨镜', emoji: '🕶️', offsetX: 0, offsetY: -0.1 },
  { name: '兔耳朵', emoji: '🐰', offsetX: 0, offsetY: -1.3 },
  { name: '皇冠', emoji: '👑', offsetX: 0, offsetY: -1.4 },
  { name: '腮红', emoji: '🌸', offsetX: 0.3, offsetY: 0.3 },
];

@Entry
@Component
struct AICamera {
  // ======== 相机状态 ========
  @State cameraReady: boolean = false;
  @State isFrontCamera: boolean = false; // 默认后置
  @State currentFilterIndex: number = 0;
  @State currentStickerIndex: number = -1; // -1 = 无贴纸
  @State isCapturing: boolean = false;
  @State permissionGranted: boolean = false;

  private cameraManager!: camera.CameraManager;
  private cameraInput!: camera.CameraInput;
  private previewOutput!: camera.PreviewOutput;
  private photoOutput!: camera.PhotoOutput;
  private surfaceId: string = '';

  // ======== 生命周期 ========
  aboutToAppear() {
    this.requestPermission();
  }

  aboutToDisappear() {
    this.releaseCamera();
  }

  // ======== 相机权限申请 ========
  async requestPermission() {
    const atManager = abilityAccessCtrl.createAtManager();
    try {
      const status = await atManager.requestPermissionsFromUser(
        getContext(this), ['ohos.permission.CAMERA']
      );
      this.permissionGranted = status[0] === 0;
      if (this.permissionGranted) {
        this.initCamera();
      }
    } catch (err) {
      console.error('相机权限申请失败:', JSON.stringify(err));
    }
  }

  // ======== 初始化相机 ========
  async initCamera() {
    try {
      const context = getContext(this);
      this.cameraManager = await camera.getCameraManager(context);
      const cameras = this.cameraManager.getSupportedCameras();
      if (cameras.length === 0) {
        console.error('未找到相机设备');
        return;
      }

      // 获取 Surface ID(需要绑定到 XComponent)
      // 在实际项目中,Surface ID 由 XComponent 的 surfaceId 提供
      // 这里演示核心逻辑,省略 XComponent 的绑定代码

      this.cameraReady = true;
    } catch (err) {
      console.error('相机初始化失败:', JSON.stringify(err));
    }
  }

  // ======== 切换摄像头 ========
  switchCamera() {
    this.isFrontCamera = !this.isFrontCamera;
    this.releaseCamera();
    this.initCamera();
  }

  // ======== 释放相机资源 ========
  releaseCamera() {
    try {
      if (this.photoOutput) this.photoOutput.release();
      if (this.previewOutput) this.previewOutput.release();
      if (this.cameraInput) this.cameraInput.release();
    } catch (err) {
      console.error('释放相机资源失败');
    }
  }

  // ======== 拍照 ========
  async takePhoto() {
    if (!this.photoOutput || this.isCapturing) return;
    this.isCapturing = true;

    try {
      // 配置拍照参数
      const photoSettings = {
        quality: camera.QualityLevel.QUALITY_LEVEL_HIGH,
        rotation: camera.ImageRotation.ROTATION_0,
        location: { latitude: 0, longitude: 0 }
      };

      // 拍照并获取图片
      const photo = await this.photoOutput.capture(photoSettings);
      // 获取 PixelMap 用于叠加滤镜和贴纸
      const receiver = image.createImageReceiver({
        size: { width: 1080, height: 1920 },
        format: image.ImageFormat.RGBA_8888,
        capacity: 1
      });

      // 应用滤镜效果
      const pixelMap = await this.applyFilter(photo);
      // 叠加贴纸
      const finalImage = await this.applySticker(pixelMap);
      // 保存到相册
      await this.saveToGallery(finalImage);
      console.log('拍照保存成功');
    } catch (err) {
      console.error('拍照失败:', JSON.stringify(err));
    }

    this.isCapturing = false;
  }

  // ======== 应用滤镜(像素级操作) ========
  async applyFilter(source: image.PixelMap): Promise<image.PixelMap> {
    const filter = FILTERS[this.currentFilterIndex];
    if (filter.name === '原图') return source;

    // 获取像素数据
    const area = { x: 0, y: 0, width: source.getPixelWidth(), height: source.getPixelHeight() };
    const pixelBytes = await source.readPixelsToBuffer(area);
    const buffer = new Uint8Array(pixelBytes);

    // 逐像素处理 RGBA
    for (let i = 0; i < buffer.length; i += 4) {
      let r = buffer[i];
      let g = buffer[i + 1];
      let b = buffer[i + 2];

      // 1. 亮度调整
      r += filter.brightness * 2.55;
      g += filter.brightness * 2.55;
      b += filter.brightness * 2.55;

      // 2. 对比度调整
      r = (r - 128) * filter.contrast + 128;
      g = (g - 128) * filter.contrast + 128;
      b = (b - 128) * filter.contrast + 128;

      // 3. 饱和度调整
      const gray = 0.299 * r + 0.587 * g + 0.114 * b;
      r = gray + (r - gray) * filter.saturation;
      g = gray + (g - gray) * filter.saturation;
      b = gray + (b - gray) * filter.saturation;

      // 4. 色温调整
      r += filter.temperature * 0.5;
      b -= filter.temperature * 0.5;

      // 钳位到 0~255
      buffer[i] = Math.max(0, Math.min(255, r));
      buffer[i + 1] = Math.max(0, Math.min(255, g));
      buffer[i + 2] = Math.max(0, Math.min(255, b));
      // buffer[i+3] = alpha 保持不变
    }

    await source.writeBufferToPixels(buffer);
    return source;
  }

  // ======== 叠加贴纸 ========
  async applySticker(pixelMap: image.PixelMap): Promise<image.PixelMap> {
    if (this.currentStickerIndex < 0) return pixelMap;

    const sticker = STICKERS[this.currentStickerIndex];
    const width = pixelMap.getPixelWidth();
    const height = pixelMap.getPixelHeight();

    // 在实际项目中,这里会用 face detection API 获取人脸位置
    // 由于人脸检测需调用 @ohos.multimedia.image 的 face detection 接口
    // 这里简化逻辑:假设检测到一个人脸在图像中心区域
    const faceX = width / 2;
    const faceY = height / 2;
    const faceSize = Math.min(width, height) * 0.3;

    // 在 Canvas 上绘制贴纸
    // 实际项目中需要用 PixelMap 的 writeBufferToPixels 方法
    // 在每个贴纸位置写入对应的像素数据
    console.log(`贴纸 ${sticker.name} 叠加到 (${faceX}, ${faceY})`);

    return pixelMap;
  }

  // ======== 保存到相册 ========
  async saveToGallery(pixelMap: image.PixelMap) {
    try {
      const context = getContext(this);
      const filePath = context.filesDir + `/AICamera_${Date.now()}.jpg`;

      // 创建图像打包器
      const packer = image.createImagePacker();
      const packedData = await packer.packing(pixelMap, {
        format: 'image/jpeg',
        quality: 95
      });

      // 写入文件
      const file = await fileIo.open(filePath, fileIo.OpenMode.CREATE | fileIo.OpenMode.READ_WRITE);
      await fileIo.write(file.fd, packedData);
      await fileIo.close(file);

      // 通知相册更新
      console.log('照片已保存至:', filePath);
    } catch (err) {
      console.error('保存照片失败:', JSON.stringify(err));
    }
  }

  // ======== 获取当前滤镜名称 ========
  get currentFilterName(): string {
    return FILTERS[this.currentFilterIndex]?.name || '原图';
  }

  // ======== 选择滤镜 ========
  selectFilter(index: number) {
    this.currentFilterIndex = index;
  }

  // ======== 选择贴纸 ========
  selectSticker(index: number) {
    this.currentStickerIndex = this.currentStickerIndex === index ? -1 : index;
  }

  // ======== UI 构建 ========
  build() {
    Stack() {
      // ---- 层1:相机预览(XComponent) ----
      // 实际项目中用 XComponent 绑定相机 Surface
      Column()
        .width('100%').height('100%')
        .backgroundColor('#000')

      // ---- 层2:滤镜预览效果(模拟) ----
      if (this.currentFilterIndex > 0) {
        Column()
          .width('100%').height('100%')
          .opacity(0.15)
          .backgroundColor(
            this.currentFilterIndex === 1 ? '#555' :     // 黑白
            this.currentFilterIndex === 2 ? '#8B7355' :   // 复古
            this.currentFilterIndex === 3 ? '#D4E9FF' :   // 日系
            this.currentFilterIndex === 4 ? '#C0D8FF' :   // 冷色调
            this.currentFilterIndex === 5 ? '#FFD4A0' :    // 暖色调
            'transparent'
          )
      }

      // ---- 层3:贴纸(用 Text Emoji 模拟) ----
      if (this.currentStickerIndex >= 0) {
        Text(STICKERS[this.currentStickerIndex].emoji)
          .fontSize(80)
          .position({ x: '45%', y: '15%' })
      }

      // ---- 层4:UI 控件覆盖层 ----
      Column() {
        // 顶部:滤镜名称
        Row() {
          Text(`🎨 ${this.currentFilterName}`)
            .fontSize(16).fontColor('#fff')
            .backgroundColor('rgba(0,0,0,0.4)')
            .padding({ left: 16, right: 16, top: 6, bottom: 6 })
            .borderRadius(16)
        }
        .width('100%')
        .justifyContent(FlexAlign.Center)
        .padding({ top: 40 })

        Spacer()

        // 底部:滤镜选择行
        Column() {
          // 贴纸选择
          Row() {
            ForEach(STICKERS, (sticker: StickerConfig, idx: number) => {
              Text(sticker.emoji)
                .fontSize(28)
                .padding(8)
                .backgroundColor(
                  this.currentStickerIndex === (idx as number)
                    ? 'rgba(255,45,85,0.6)' : 'rgba(0,0,0,0.3)'
                )
                .borderRadius(20)
                .margin({ left: 6, right: 6 })
                .onClick(() => {
                  this.selectSticker(idx as number);
                })
            })
          }
          .width('100%')
          .justifyContent(FlexAlign.Center)
          .padding({ bottom: 12 })

          // 滤镜选择
          Row() {
            ForEach(FILTERS, (filter: FilterConfig, idx: number) => {
              Column() {
                Circle()
                  .width(40).height(40)
                  .fill(
                    idx === 0 ? '#FFF' :
                    idx === 1 ? '#555' :
                    idx === 2 ? '#8B7355' :
                    idx === 3 ? '#D4E9FF' :
                    idx === 4 ? '#C0D8FF' :
                    '#FFD4A0'
                  )
                  .border(
                    this.currentFilterIndex === (idx as number)
                      ? { width: 3, color: '#FF2D55' } : { width: 0 }
                  )
                Text(filter.name)
                  .fontSize(11).fontColor(
                    this.currentFilterIndex === (idx as number) ? '#FF2D55' : '#fff'
                  )
                  .margin({ top: 4 })
              }
              .margin({ left: 8, right: 8 })
              .onClick(() => {
                this.selectFilter(idx as number);
              })
            })
          }
          .width('100%')
          .justifyContent(FlexAlign.Center)
          .padding({ bottom: 16 })

          // 拍照按钮 + 切换摄像头
          Row() {
            // 切换摄像头
            Button('🔄')
              .backgroundColor('rgba(0,0,0,0.3)')
              .width(44).height(44).borderRadius(22)
              .fontSize(20)
              .onClick(() => { this.switchCamera(); })

            Spacer()

            // 拍照按钮
            Button()
              .width(72).height(72)
              .borderRadius(36)
              .border({ width: 4, color: '#fff' })
              .backgroundColor(this.isCapturing ? '#FF2D55' : 'transparent')
              .onClick(() => { this.takePhoto(); })

            Spacer()

            // 占位保持平衡
            Button()
              .width(44).height(44).backgroundColor('transparent')
              .disabled(true)
          }
          .width('90%')
          .alignItems(VerticalAlign.Center)
          .padding({ bottom: 40 })
        }
        .width('100%')
        .backgroundEffect({ type: BackgroundEffectType.BLUR, radius: 20 })
      }
      .width('100%').height('100%')
    }
    .width('100%').height('100%')
  }
}
📚 核心知识点深度解析
1. 相机预览链路
CameraManager.getCameraManager(context)
  → getSupportedCameras() 获取相机列表
  → createCameraInput(cameraId) 创建相机输入
  → createPreviewOutput(surfaceId) 创建预览输出
  → session.start() 开始预览
2. 滤镜算法:逐像素 RGBA 处理
每个滤镜通过 4 个维度 的参数控制:
| 参数 | 范围 | 算法公式 |
|---|---|---|
| Brightness | -100 ~ 100 | pixel += brightness * 2.55 |
| Contrast | 0.5 ~ 2.0 | pixel = (pixel - 128) * contrast + 128 |
| Saturation | 0.0 ~ 2.0 | gray + (pixel - gray) * saturation |
| Temperature | -100 ~ 100 | r += temp * 0.5, b -= temp * 0.5 |
3. 贴纸叠加原理
人脸检测 → 获取人脸包围盒 (x, y, w, h)
  → 计算贴纸位置(偏移量 relative to 人脸中心)
  → 在 Canvas/PixelMap 上绘制贴纸图像
  → 与相机帧合成 → 输出
⚠️ 避坑指南
| 坑 | 原因 | 正确做法 |
|---|---|---|
| 相机不工作 | 没在真机上测试 | 模拟器不支持相机,必须真机 |
| 权限申请崩溃 | 没 try/catch | requestPermissionsFromUser 必须 try/catch |
| 拍照后没保存 | 忘了配置 PhotoOutput | 创建 Session 时必须 add 一个 PhotoOutput |
| 滤镜效果不对 | 像素值溢出了 0~255 | 每次运算后 clamp:Math.max(0, Math.min(255, val)) |
| 贴纸位置不对 | 前置摄像头有镜像 | 切换到后置或手动处理镜像坐标 |
| 内存暴涨 OOM | 高分辨率图片像素处理太慢 | 先在缩略图上预览,拍照时才全分辨率处理 |
| 相机预览黑屏 | Surface ID 没正确传递 | XComponent 的 surfaceId 必须在 onLoad 回调中获取 |
🔥 最佳实践
- 预览用低分辨率:相机预览用 720p,拍照才用全分辨率(省电 + 流畅)
- 滤镜预览降采样:实时预览时每 4 个像素取 1 个处理(速度快 16 倍)
- 贴纸缓存:贴纸图片预先加载到内存,避免每次绘制读磁盘
- 人脸检测频率:不要每帧都检测人脸(5~10fps 就够了),减少 CPU 消耗
- 异步处理:像素处理和文件保存都放到异步任务,不阻塞 UI 线程
- 拍照声音:根据场景决定是否调用
@ohos.multimedia.audio播放快门声
🚀 扩展挑战
- 美颜滤镜:实现高斯模糊磨皮 + 肤色美白算法
- 实时美妆:在唇部/眼部区域叠加口红/眼影颜色
- AR 特效:用 3D 模型(glTF)替代 2D 贴纸
- AI 背景替换:用抠图算法替换相机背景(人像模式)
- 视频录制:从拍照扩展到录制带滤镜的美颜视频
- 滤镜强度可调:为每个滤镜增加 0%~100% 强度滑块

官方文档: [HarmonyOS 应用开发文档
- 开发者社区: 华为开发者论坛
- 欢迎加入开源鸿蒙跨平台社区: https://openharmonycrossplatform.csdn.net/

作为“人工智能6S店”的官方数字引擎,为AI开发者与企业提供一个覆盖软硬件全栈、一站式门户。
更多推荐

 0
0 0
0- 0


 已为社区贡献6条内容

所有评论(0)