
鸿蒙Next实战开发(三):备忘录模块与笔记详情页完整实现
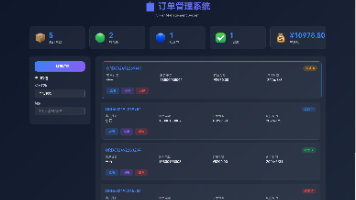
鸿蒙Next备忘录模块实现总结 本模块实现了备忘录应用的核心功能,包含: 分类浏览系统 自动提取笔记分类生成标签栏(含"全部"选项) 水平滚动标签+动态分类颜色标识 点击标签即时过滤对应笔记 笔记卡片展示 卡片式布局展示标题、摘要、分类和日期 内容过长自动省略(标题单行/内容两行) 分类标签采用不同颜色区分 交互功能 删除笔记功能 点击卡片跳转详情页(通过router.pushUrl传参) 详情页
鸿蒙Next实战开发(三):备忘录模块与笔记详情页完整实现
系列第三篇,我们来实现"智慧生活"App的备忘录模块——包含分类浏览、笔记卡片列表、查看详情/编辑双模式切换,以及页面路由传参。
一、功能设计
备忘录模块是本应用中交互最丰富的部分,涉及 页面跳转 和 路由传参 等进阶能力。功能拆分如下:
| 功能点 | 技术要点 |
|---|---|
| 📂 分类筛选 | 水平滚动标签 + 动态数据过滤 |
| 📋 笔记卡片 | 卡片式布局 + 分类色标 |
| 🗑️ 删除笔记 | 点击删除按钮 |
| 📄 查看详情 | router.pushUrl 页面跳转 + 参数传递 |
| ✏️ 编辑笔记 | 查看/编辑双模式切换 + TextArea |
1.1 页面关系
Index.ets (Tabs)
├── NotesContent     ← 备忘录列表(本篇重点)
├── NoteDetailPage   ← 笔记详情(通过 router 跳转)
└── SettingsPage     ← 设置页(后续篇章)
NotesContent 是 Index.ets 中第三个 Tab 的内容组件,点击笔记卡片触发路由跳转到 NoteDetailPage,并携带笔记数据参数。
二、数据模型
interface NoteItem {
  id: number;           // 唯一标识
  title: string;        // 标题
  content: string;      // 内容
  category: string;     // 分类:技术/生活/工作/学习
  date: string;         // 日期:YYYY-MM-DD
}
预置数据:
@Component
struct NotesContent {
  @State notes: NoteItem[] = [
    { id: 1, title: '鸿蒙开发笔记',
      content: '学习了Tabs组件的使用方法,可以实现底部导航栏的切换效果。',
      category: '技术', date: '2024-01-15' },
    { id: 2, title: '购物清单',
      content: '牛奶、面包、鸡蛋、水果、蔬菜、零食',
      category: '生活', date: '2024-01-14' },
    { id: 3, title: '会议记录',
      content: '讨论Q1产品规划,确定3个核心功能模块的开发时间表。',
      category: '工作', date: '2024-01-13' },
    { id: 4, title: '读书笔记',
      content: '《原子习惯》——每天进步1%,一年后你会强大37倍。',
      category: '学习', date: '2024-01-12' },
    { id: 5, title: '旅行计划',
      content: '目的地:杭州西湖,时间:下周末,注意事项:提前订酒店。',
      category: '生活', date: '2024-01-11' },
  ];
  @State currentCategory: string = '全部';
}
三、分类筛选功能
3.1 动态分类列表
从笔记数据中自动提取所有分类,加上"全部"选项:
get categories(): string[] {
  const catsSet = new Set<string>();
  for (let i = 0; i < this.notes.length; i++) {
    catsSet.add(this.notes[i].category);
  }
  const result: string[] = ['全部'];
  const arr = Array.from(catsSet);
  for (let i = 0; i < arr.length; i++) {
    result.push(arr[i]);
  }
  return result;
}
这里手动实现了 Set 遍历和数组构建,因为在 ArkTS 中,部分 ES6+ 语法的支持有限制。
3.2 分类过滤
get filteredNotes(): NoteItem[] {
  if (this.currentCategory === '全部') {
    return this.notes;
  }
  const result: NoteItem[] = [];
  for (let i = 0; i < this.notes.length; i++) {
    if (this.notes[i].category === this.currentCategory) {
      result.push(this.notes[i]);
    }
  }
  return result;
}
3.3 分类标签水平滚动
使用 Scroll + Row 实现水平滚动的分类标签栏:
Scroll() {
  Row({ space: 8 }) {
    ForEach(this.categories, (cat: string) => {
      this.buildCategoryTab(cat);
    });
  }
  .padding({ left: 16, right: 16, top: 12, bottom: 8 });
}
.scrollable(ScrollDirection.Horizontal)
.scrollBar(BarState.Off)
.width('100%');
关键属性:
scrollable(ScrollDirection.Horizontal):水平方向滚动scrollBar(BarState.Off):隐藏滚动条,保持UI简洁
3.4 分类标签 Builder
@Builder
buildCategoryTab(cat: string) {
  Text(cat)
    .fontSize(14)
    .fontColor(this.currentCategory === cat
      ? Color.White
      : $r('app.color.text_primary'))
    .padding({ left: 16, right: 16, top: 6, bottom: 6 })
    .backgroundColor(this.currentCategory === cat
      ? this.getCategoryColor(cat === '全部' ? '技术' : cat)
      : '#FFF3F4F6')
    .borderRadius(16)
    .onClick(() => {
      this.currentCategory = cat;
    });
}
选中的标签使用分类对应的颜色填充,实现视觉区分。分类色值定义:
getCategoryColor(category: string): string {
  if (category === '技术') return '#FF6B9CE3';    // 蓝色
  if (category === '生活') return '#FF10B981';    // 绿色
  if (category === '工作') return '#FFF59E0B';    // 橙色
  if (category === '学习') return '#FF8B5CF6';    // 紫色
  return '#FF9CA3AF';                              // 灰色(默认)
}
四、笔记卡片列表
4.1 卡片布局
每个笔记卡片展示:分类标签 + 日期 + 标题 + 摘要 + 操作按钮:
@Builder
buildNoteCard(item: NoteItem) {
  Column({ space: 8 }) {
    // 第一行:分类标签 + 日期
    Row() {
      Text(item.category)
        .fontSize(10).fontColor(Color.White)
        .padding({ left: 8, right: 8, top: 3, bottom: 3 })
        .backgroundColor(this.getCategoryColor(item.category))
        .borderRadius(4);
      Blank();
      Text(item.date)
        .fontSize(12)
        .fontColor($r('app.color.text_tertiary'));
    }
    .width('100%');

    // 标题(单行省略)
    Text(item.title)
      .fontSize(16).fontWeight(FontWeight.Medium)
      .fontColor($r('app.color.text_primary'))
      .maxLines(1)
      .textOverflow({ overflow: TextOverflow.Ellipsis })
      .width('100%');

    // 内容摘要(两行省略)
    Text(item.content)
      .fontSize(14)
      .fontColor($r('app.color.text_secondary'))
      .maxLines(2)
      .textOverflow({ overflow: TextOverflow.Ellipsis })
      .width('100%');

    // 操作按钮行
    Row() {
      Blank();
      Text('🗑️')
        .fontSize(16).margin({ right: 12 })
        .onClick(() => { this.deleteNote(item.id); });
      Text('查看详情 →')
        .fontSize(12)
        .fontColor($r('app.color.primary_color'));
    }
    .width('100%')
    .onClick(() => {
      // 点击跳转到详情页
      router.pushUrl({
        url: 'pages/NoteDetailPage',
        params: {
          noteId: item.id,
          noteTitle: item.title,
          noteContent: item.content,
          noteCategory: item.category,
          noteDate: item.date
        }
      });
    });
  }
  .width('100%').padding(16)
  .backgroundColor($r('app.color.card_background'))
  .borderRadius(16)
  .shadow({ radius: 4, color: '#0A000000', offsetY: 1 });
}
4.2 文字溢出处理
鸿蒙 ArkUI 的文字截断通过 maxLines + textOverflow 实现:
Text('这是一段很长的内容...')
  .maxLines(2)                                    // 最多显示2行
  .textOverflow({ overflow: TextOverflow.Ellipsis }); // 超出显示省略号
这与 CSS 中的 -webkit-line-clamp 效果一致。
4.3 笔记列表渲染
Scroll() {
  Column({ space: 10 }) {
    ForEach(this.filteredNotes, (item: NoteItem) => {
      this.buildNoteCard(item);
    });
    Blank().height(16);
  }
  .width('100%').padding({ left: 16, right: 16 });
}
.width('100%').layoutWeight(1);
这里 Scroll 使用 .layoutWeight(1) 占满父容器的剩余空间,这是 ArkTS 中实现弹性布局的常用方式。
五、页面路由与参数传递
5.1 路由配置
在 main_pages.json 中注册子页面:
{
  "src": [
    "pages/Index",
    "pages/NoteDetailPage",
    "pages/SettingsPage"
  ]
}
5.2 跳转传参
router.pushUrl 是鸿蒙页面路由的核心API:
import { router } from '@kit.ArkUI';

router.pushUrl({
  url: 'pages/NoteDetailPage',
  params: {
    noteId: item.id,
    noteTitle: item.title,
    noteContent: item.content,
    noteCategory: item.category,
    noteDate: item.date
  }
});
参数通过 params 对象传递,可以是任意 JSON 可序列化的值。
5.3 接收参数
在目标页面 NoteDetailPage.ets 中,使用 router.getParams() 接收:
@Entry
@Component
struct NoteDetailPage {
  @State noteTitle: string = '';
  @State noteContent: string = '';
  @State noteCategory: string = '';
  @State noteDate: string = '';
  @State isEditing: boolean = false;
  @State editTitle: string = '';
  @State editContent: string = '';

  aboutToAppear(): void {
    const params = router.getParams() as Record<string, Object>;
    if (params) {
      this.noteTitle = params['noteTitle'] as string || '';
      this.noteContent = params['noteContent'] as string || '';
      this.noteCategory = params['noteCategory'] as string || '';
      this.noteDate = params['noteDate'] as string || '';
      this.editTitle = this.noteTitle;
      this.editContent = this.noteContent;
    }
  }
}
⚠️ 注意:
router.getParams()在 API 23 中已标记为弃用,但功能正常。在 HarmonyOS Next 的后续版本中,推荐使用UIAbilityContext传递参数。
5.4 返回上一页
router.back();
调用 router.back() 即可返回到上一个页面。这会在导航栈中弹出当前页面。
六、笔记详情页 - 查看/编辑双模式
6.1 顶部导航栏
Row() {
  Text('← 返回')
    .fontSize(16)
    .fontColor($r('app.color.primary_color'))
    .onClick(() => { router.back(); });

  Blank();

  if (this.isEditing) {
    Text('保存')
      .fontSize(16)
      .fontColor($r('app.color.primary_color'))
      .fontWeight(FontWeight.Bold)
      .onClick(() => { this.saveEdit(); });
    Text('取消')
      .fontSize(16)
      .fontColor($r('app.color.text_tertiary'))
      .margin({ left: 16 })
      .onClick(() => {
        this.isEditing = false;
        this.editTitle = this.noteTitle;
        this.editContent = this.noteContent;
      });
  } else {
    Text('✏️ 编辑')
      .fontSize(16)
      .fontColor($r('app.color.primary_color'))
      .onClick(() => { this.isEditing = true; });
  }
}
.width('100%')
.padding({ left: 16, right: 16, top: 12, bottom: 12 })
.backgroundColor($r('app.color.card_background'))
.shadow({ radius: 2, color: '#0A000000', offsetY: 1 });
这里根据 isEditing 状态条件渲染不同按钮:
- 查看模式:显示"← 返回"和"✏️ 编辑"
- 编辑模式:显示"← 返回"、“保存"和"取消”
6.2 查看模式布局
Column({ space: 8 }) {
  // 分类和日期
  Row({ space: 12 }) {
    Text(this.noteCategory)
      .fontSize(12).fontColor(Color.White)
      .padding({ left: 10, right: 10, top: 4, bottom: 4 })
      .backgroundColor(this.getCategoryColor(this.noteCategory))
      .borderRadius(4);
    Text(this.noteDate)
      .fontSize(14).fontColor($r('app.color.text_tertiary'));
  }
  .width('100%');

  // 大标题
  Text(this.noteTitle)
    .fontSize(28).fontWeight(FontWeight.Bold)
    .fontColor($r('app.color.text_primary'))
    .width('100%');

  // 分割线
  Row().width('100%').height(1)
    .backgroundColor($r('app.color.divider_color'))
    .margin({ top: 8, bottom: 8 });

  // 正文
  Text(this.noteContent)
    .fontSize(16)
    .fontColor($r('app.color.text_secondary'))
    .lineHeight(26)
    .width('100%');
}
6.3 编辑模式布局
使用 TextInput 编辑标题,TextArea 编辑内容:
Column({ space: 12 }) {
  TextInput({ placeholder: '笔记标题', text: this.editTitle })
    .height(48)
    .fontSize(18).fontWeight(FontWeight.Bold)
    .backgroundColor('#FFF3F4F6')
    .borderRadius(12)
    .padding({ left: 12, right: 12 })
    .onChange((value: string) => { this.editTitle = value; });

  TextArea({ placeholder: '开始记录内容...', text: this.editContent })
    .height(300)
    .fontSize(16)
    .backgroundColor('#FFF3F4F6')
    .borderRadius(12)
    .padding({ left: 12, right: 12, top: 8, bottom: 8 })
    .onChange((value: string) => { this.editContent = value; });
}
6.4 保存逻辑
saveEdit(): void {
  if (this.editTitle.trim().length > 0) {
    this.noteTitle = this.editTitle.trim();
    this.noteContent = this.editContent.trim();
    this.isEditing = false;
  }
}
七、完整笔记详情页源码
NoteDetailPage.ets 完整代码结构:
aboutToAppear() {
  // 从路由参数初始化数据
  // 初始化编辑副本
}

build() {
  Column() {
    // 顶部导航栏(返回/编辑/保存/取消)
    // 内容区(查看模式 或 编辑模式)
  }
}

// 工具方法
getCategoryColor()
saveEdit()
整个页面约 180 行,麻雀虽小五脏俱全,覆盖了:
- 路由参数接收
- 页面返回
- 双模式状态切换
- 文本输入/文本区域组件
- 条件渲染
八、ArkTS 条件渲染技巧
在 ArkTS 的 build() 方法中,if/else 条件渲染有一些限制:
8.1 支持的用法
// ✅ 在 Column/Row 内直接使用
Column() {
  if (condition) {
    Text('A');
  } else {
    Text('B');
  }
}

// ✅ 在 @Builder 函数中使用
@Builder
myBuilder(flag: boolean) {
  if (flag) {
    Text('Yes');
  }
}

// ✅ 在 ForEach 的 builder 参数中使用
@Builder
myBuilder(item: MyType) {
  if (item.active) {
    Text('Active');
  }
}
8.2 不支持的用法
// ❌ 不能在链式调用中使用 if
Text().fontSize(16)
  .onClick(() => { if (x) { ... } })  // 回调内可以

// ❌ 不能在 return 中使用逗号表达式
return a, b;  // 不允许
九、本篇小结

本篇我们完整实现了:
- ✅ 备忘录列表:分类标签水平滚动 + 卡片式列表 + 删除
- ✅ 路由跳转与传参:
router.pushUrl+router.getParams+router.back - ✅ 笔记详情页:查看/编辑双模式切换 + TextInput + TextArea
- ✅ 分类颜色系统:四种分类各自对应的主题色
- ✅ 文字溢出处理:
maxLines+textOverflow
下篇将开发 个人中心 和 设置页面,涵盖头像、统计卡片、功能菜单和开关交互。

作为“人工智能6S店”的官方数字引擎,为AI开发者与企业提供一个覆盖软硬件全栈、一站式门户。
更多推荐


 1
1 0
0- 0


 已为社区贡献19条内容

所有评论(0)