
Flutter 三方库 device_info_plus 的鸿蒙化适配指南:精准获取鸿蒙设备参数,让你的应用更懂设备
嗨,亲爱的小伙伴们!今天要和大家分享一个超级实用的话题——如何在 Flutter 应用中精准获取 OpenHarmony(鸿蒙)设备的详细参数。你有没有遇到过这样的场景:开发了一款超棒的 Flutter 应用,想要针对不同设备做个性化适配,却发现自己连用户的设备是手机还是平板都分不清?别担心!库来啦,它就像设备的"身份证读取器",轻轻一扫,就能获取设备的"姓名"(型号)、“年龄”(系统版本)、“外
Flutter 三方库 device_info_plus 的鸿蒙化适配指南:精准获取鸿蒙设备参数,让你的应用更懂设备
欢迎加入开源鸿蒙跨平台社区:https://openharmonycrossplatform.csdn.net
前言:小小设备信息,大大应用价值
嗨,亲爱的小伙伴们!今天要和大家分享一个超级实用的话题——如何在 Flutter 应用中精准获取 OpenHarmony(鸿蒙)设备的详细参数。
你有没有遇到过这样的场景:开发了一款超棒的 Flutter 应用,想要针对不同设备做个性化适配,却发现自己连用户的设备是手机还是平板都分不清?别担心!device_info_plus 库来啦,它就像设备的"身份证读取器",轻轻一扫,就能获取设备的"姓名"(型号)、“年龄”(系统版本)、“外貌特征”(屏幕信息)等全方位资料!
特别是在鸿蒙生态日益壮大的今天,掌握设备信息的获取能力,已经成为 Flutter 开发者必备的技能之一。接下来,就让博主手把手教你们玩转这个强大的库吧!
一、为什么 device_info_plus 是鸿蒙开发者的得力助手?
1.1 认识这位"设备侦探"
device_info_plus 是 Flutter 生态中最权威的设备信息获取库,由 fluttercommunity.dev 官方维护。它就像一位经验丰富的"设备侦探",能够深入设备内部,探查出设备的"前世今生"。无论是 Android 的"身份证"、iOS 的"户口本",还是现在鸿蒙的"专属档案",它都能轻松搞定。
在鸿蒙开发中,这位"侦探"的价值尤为突出。想象一下,你的应用需要判断用户是在华为 Mate 60 Pro 手机上运行,还是在 MatePad Pro 平板上奔跑;是需要展示华丽的动效,还是需要照顾老设备的性能——这些决策,都离不开设备信息的支撑。
1.2 鸿蒙设备信息获取的特殊挑战
不过,话说回来,鸿蒙系统可不是一般的"对手"。它和 Android 虽然有些相似之处,但在 API 设计、权限模型、数据结构等方面都有着独特的个性。就像两个看起来相似的双胞胎,实际上有着完全不同的性格和习惯。
举个例子,同样是获取设备型号,Android 用的是 model,鸿蒙可能用的是 productModel;同样是唯一标识,Android 有 Android ID,鸿蒙则有 UDID(但获取难度嘛……嘿嘿,这里面的故事可多了)。所以,适配工作绝对不是简单的"复制粘贴"那么简单!
二、技术方案:双剑合璧——device_info_plus 与 device_info_plus_ohos
2.1 黄金搭档的默契配合
在鸿蒙平台上,我们需要"双剑合璧":标准版 device_info_plus 提供跨平台统一的接口,而专门的鸿蒙适配库 device_info_plus_ohos 则负责在底层与鸿蒙原生 API"打配合"。
前者是"前台接待员",负责接收你的请求并优雅地返回结果;后者是"技术工程师",负责钻进系统底层,调用真正的鸿蒙 API 获取数据。两者配合得天衣无缝,让你在不知不觉中就拿到了想要的设备信息。
2.2 核心 API 一览表
让我们来看看这对搭档能提供哪些强大功能吧:
| API 名称 | 描述 | 返回类型 | 鸿蒙支持 |
|---|---|---|---|
| ohosDeviceInfo | 获取鸿蒙设备完整信息 | OhosDeviceInfo | ✅ 完美支持 |
| ohosAccessUDIDInfo | 获取设备唯一标识(需权限) | OhosAccessUDIDInfo | ⚠️ 系统权限 |
| deviceInfo | 跨平台统一接口 | BaseDeviceInfo | ✅ 自动适配 |
2.3 OhosDeviceInfo 字段详解
这可是本文的干货部分啦!博主把鸿蒙设备信息的各个字段都给大家整理好了,建议收藏备用:
| 字段名 | 含义 | 实战价值 |
|---|---|---|
| marketName | 市场营销名称 | 展示给用户看的设备型号,如"HUAWEI Mate 60 Pro" |
| productModel | 产品型号 | 设备的产品代号 |
| osFullName | 操作系统全称 | 展示"纯血鸿蒙"身份 |
| deviceType | 设备类型 | 判断是手机、平板还是智慧屏 |
| sdkApiVersion | 系统 API 级别 | 判断是否支持特定鸿蒙功能 |
| displayVersion | 显示版本号 | 用户可见的系统版本 |
| hardwareModel | 硬件模型 | 可用于 GPU 型号推断 |
| buildRootHash | 版本特征值 | 区分不同系统分支 |
| brand | 品牌名称 | 设备厂商识别 |
| odid | 匿名设备标识符 | 可用于业务追踪(推荐) |
三、手把手实战:打造你的鸿蒙设备信息采集器
3.1 项目配置第一步
首先,我们需要在项目的 pubspec.yaml 中添加依赖。注意哦,鸿蒙环境下建议同时引入两个包:
dependencies:
  flutter:
    sdk: flutter
  device_info_plus: ^12.0.0
  device_info_plus_ohos: ^0.0.7
添加完依赖后,执行激动人心的时刻:
flutter pub get
如果一切顺利,你就会看到控制台输出一堆绿色的成功信息,那种感觉,就像拆快递时的期待感!
3.2 基础版:获取设备"体检报告"
让我们先从最基础的场景开始——获取一台鸿蒙设备的基本信息。这个场景适合大多数应用,比如展示"关于"页面、进行数据埋点等。
import 'package:flutter/material.dart';
import 'package:device_info_plus_ohos/device_info_plus_ohos.dart';
class DeviceInfoDemo extends StatefulWidget {
const DeviceInfoDemo({super.key});
State<DeviceInfoDemo> createState() => _DeviceInfoDemoState();
}
class _DeviceInfoDemoState extends State<DeviceInfoDemo> {
final DeviceInfoOhosPlugin _plugin = DeviceInfoOhosPlugin();
Map<String, dynamic> _deviceInfo = {};
bool _isLoading = true;
void initState() {
super.initState();
_loadDeviceInfo();
}
Future<void> _loadDeviceInfo() async {
try {
final info = await _plugin.ohosDeviceInfo;
setState(() {
_deviceInfo = {
'设备品牌': info.brand,
'市场名称': info.marketName,
'产品型号': info.productModel,
'操作系统': info.osFullName,
'设备类型': info.deviceType,
'API级别': info.sdkApiVersion,
'显示版本': info.displayVersion,
'硬件模型': info.hardwareModel,
};
_isLoading = false;
});
} catch (e) {
debugPrint('获取设备信息失败:$e');
setState(() => _isLoading = false);
}
}
Widget build(BuildContext context) {
return Scaffold(
appBar: AppBar(
title: const Text('鸿蒙设备信息'),
backgroundColor: const Color(0xFF1989FA),
foregroundColor: Colors.white,
),
body: _isLoading
? const Center(child: CircularProgressIndicator())
: ListView.builder(
padding: const EdgeInsets.all(16),
itemCount: _deviceInfo.length,
itemBuilder: (context, index) {
final key = _deviceInfo.keys.elementAt(index);
final value = _deviceInfo[key];
return Card(
margin: const EdgeInsets.only(bottom: 12),
child: ListTile(
leading: const Icon(Icons.phone_android, color: Color(0xFF1989FA)),
title: Text(key, style: const TextStyle(fontWeight: FontWeight.bold)),
subtitle: Text('$value', style: const TextStyle(fontSize: 16)),
),
);
},
),
);
}
}
这段代码虽然不长,但五脏俱全。它在 initState 时异步加载设备信息,加载完成后以卡片列表的形式展示出来。每个卡片都有一个小图标,看起来既专业又美观。
3.3 进阶版:GPU 型号采集用于动画性能调优
嘘!这是博主压箱底的技巧,一般人我不告诉他!
对于做动画性能调优的开发者来说,GPU 型号可是关键信息!不同的 GPU 意味着不同的渲染能力,需要采取不同的优化策略。虽然 device_info_plus_ohos 没有直接提供 GPU 字段,但我们可以通过 hardwareModel 结合设备型号来推断。
class GPUInfoCollector {
  final DeviceInfoOhosPlugin _plugin = DeviceInfoOhosPlugin();

  Future<Map<String, String>> collectGPUInfo() async {
    final info = await _plugin.ohosDeviceInfo;

    // 通过硬件模型推断 GPU 架构
    String gpuArchitecture = _inferGPUArchitecture(info.hardwareModel ?? '');
    String recommendedQuality = _getRecommendedQuality(info.deviceType ?? '');

    return {
      'hardwareModel': info.hardwareModel ?? '未知',
      'deviceType': info.deviceType ?? '未知',
      'gpuArchitecture': gpuArchitecture,
      'recommendedQuality': recommendedQuality,
      'apiLevel': '${info.sdkApiVersion}',
    };
  }

  String _inferGPUArchitecture(String hardwareModel) {
    // 这是一个简化的推断逻辑,实际开发中需要维护更完整的设备-GPU映射表
    if (hardwareModel.contains('kirin')) {
      return 'Mali-G系列(麒麟芯片集成)';
    } else if (hardwareModel.contains('snapdragon') || hardwareModel.contains('SM')) {
      return 'Adreno系列(骁龙芯片集成)';
    } else if (hardwareModel.contains('mt')) {
      return 'Mali系列(联发科芯片集成)';
    }
    return '未知GPU架构';
  }

  String _getRecommendedQuality(String deviceType) {
    switch (deviceType.toLowerCase()) {
      case 'phone':
        return '建议中档特效(保障流畅度)';
      case 'tablet':
        return '建议高档特效(大屏体验)';
      case 'tv':
      case 'smartvision':
        return '建议基础特效(性能优先)';
      default:
        return '建议自动调节';
    }
  }
}
使用起来也是超级简单:
// 在你的初始化逻辑中调用
final gpuCollector = GPUInfoCollector();
final gpuInfo = await gpuCollector.collectGPUInfo();

print('硬件型号:${gpuInfo['hardwareModel']}');
print('GPU架构:${gpuInfo['gpuArchitecture']}');
print('推荐画质:${gpuInfo['recommendedQuality']}');
这样,你就可以根据不同的设备性能,动态调整应用的动画复杂程度了!比如在低端设备上减少粒子效果,在高端设备上开启 HDR 渲染,给用户带来恰到好处的体验。
3.4 高级版:多设备类型兼容适配
真正的实战中,我们的应用往往需要运行在不同类型的鸿蒙设备上——手机、平板、智慧屏、车机等。每种设备都有其独特的交互方式和显示特点,怎么能让一套代码适配所有呢?
答案就是:让应用"认识"自己的运行环境,然后做针对性的调整。
enum DeviceCategory { phone, tablet, tv, smartVision, unknown }

class DeviceAdapter {
  final DeviceInfoOhosPlugin _plugin = DeviceInfoOhosPlugin();

  Future<DeviceProfile> getDeviceProfile() async {
    final info = await _plugin.ohosDeviceInfo;
    final category = _categorizeDevice(info.deviceType ?? '');
    final capabilities = _evaluateCapabilities(info, category);

    return DeviceProfile(
      deviceType: info.deviceType ?? 'unknown',
      marketName: info.marketName ?? '未知设备',
      category: category,
      capabilities: capabilities,
    );
  }

  DeviceCategory _categorizeDevice(String deviceType) {
    switch (deviceType.toLowerCase()) {
      case 'phone':
        return DeviceCategory.phone;
      case 'tablet':
        return DeviceCategory.tablet;
      case 'tv':
        return DeviceCategory.tv;
      case 'smartvision':
        return DeviceCategory.smartVision;
      default:
        return DeviceCategory.unknown;
    }
  }

  DeviceCapabilities _evaluateCapabilities(OhosDeviceInfo info, DeviceCategory category) {
    // 基于设备类型和 API 级别评估设备能力
    final apiLevel = info.sdkApiVersion ?? 0;
    final isHighPerformance = _isHighEndDevice(info.hardwareModel ?? '');

    return DeviceCapabilities(
      maxScreenDensity: _getMaxDensity(category, isHighPerformance),
      supportHarmonyFeatures: apiLevel >= 11,
      recommendedListLayout: category == DeviceCategory.tablet,
      supportMultiWindow: apiLevel >= 9,
      maxAnimationComplexity: isHighPerformance ? AnimationComplexity.high : AnimationComplexity.medium,
    );
  }

  bool _isHighEndDevice(String hardwareModel) {
    // 简化的判断逻辑
    final highEndPatterns = ['mate60', 'pura70', 'p70', 'matepad pro'];
    return highEndPatterns.any((pattern) => hardwareModel.toLowerCase().contains(pattern));
  }

  int _getMaxDensity(DeviceCategory category, bool isHighEnd) {
    if (category == DeviceCategory.tv || category == DeviceCategory.smartVision) {
      return 240; // 大屏设备不需要太高密度
    }
    return isHighEnd ? 480 : 320;
  }
}

class DeviceProfile {
  final String deviceType;
  final String marketName;
  final DeviceCategory category;
  final DeviceCapabilities capabilities;

  DeviceProfile({
    required this.deviceType,
    required this.marketName,
    required this.category,
    required this.capabilities,
  });
}

class DeviceCapabilities {
  final int maxScreenDensity;
  final bool supportHarmonyFeatures;
  final bool recommendedListLayout;
  final bool supportMultiWindow;
  final AnimationComplexity maxAnimationComplexity;

  DeviceCapabilities({
    required this.maxScreenDensity,
    required this.supportHarmonyFeatures,
    required this.recommendedListLayout,
    required this.supportMultiWindow,
    required this.maxAnimationComplexity,
  });
}

enum AnimationComplexity { low, medium, high }
然后,在你的应用入口处调用:
Future<void> initializeApp() async {
  final adapter = DeviceAdapter();
  final profile = await adapter.getDeviceProfile();

  // 根据设备类型调整应用行为
  if (profile.capabilities.recommendedListLayout) {
    // 平板设备启用双栏布局
    debugPrint('检测到平板设备,启用横屏双栏布局');
  }

  if (profile.capabilities.maxAnimationComplexity == AnimationComplexity.high) {
    // 高端设备开启华丽动效
    debugPrint('高端设备,启用高质量动画');
  }

  // 将 profile 传递给需要设备信息的组件
  runApp(MyApp(deviceProfile: profile));
}
看!通过这种方式,你的应用就像拥有了"火眼金睛",能够自动识别运行环境的"前世今生",并做出最优的适配决策。
四、避坑指南:那些年我们踩过的设备信息获取"地雷"
4.1 UDID 获取的"悲伤故事"
说到设备信息获取,怎么能不提 UDID 这个"磨人的小妖精"呢?
很多开发者一上来就想获取设备的唯一标识(UDID),想着"有了它,我就能精准追踪用户了"。但现实总是残酷的——在鸿蒙系统上,UDID 属于系统级权限,普通应用想拿到它?门都没有!
这不是 Bug,而是鸿蒙的安全机制在保护用户隐私。所以,博主建议大家:
- 业务追踪推荐使用
odid:这是匿名化后的设备标识符,不涉及隐私,可以放心使用 - 应用内生成 UUID:在首次启动时生成一个随机 UUID,存储到本地,卸载重装后会变化但单次生命周期内稳定
4.2 模拟器的"身份危机"
如果你在模拟器上测试,可能会遇到设备信息返回"冥冥之中"的数据,比如 brand 是"unknown",deviceType 是空字符串等。这不是你的代码有问题,而是模拟器本身就没有真实的硬件信息。
建议:最终的功能验证一定要在真实设备上进行!毕竟,用户的设备可不会"说谎"。
4.3 API 级别的"版本陷阱"
鸿蒙系统也在快速迭代,不同版本的系统在 API 能力上可能有差异。如果你的应用需要调用某些高级特性,记得先检查 sdkApiVersion,确保设备支持再使用,避免运行时崩溃。
Future<bool> checkFeatureSupport(String feature) async {
  final info = await _plugin.ohosDeviceInfo;
  final apiLevel = info.sdkApiVersion ?? 0;

  final featureRequirements = {
    'multiWindow': 9,
    'harmonyDistributed': 11,
    'advancedGraphics': 12,
  };

  return apiLevel >= (featureRequirements[feature] ?? 0);
}
五、完整示例:鸿蒙设备诊断中心
最后,博主给大家准备了一个"大礼包"——一个完整的鸿蒙设备诊断中心界面。这个界面可以展示几乎所有有用的设备信息,并且针对不同设备类型有不同的视觉提示。
import 'package:flutter/material.dart';
import 'package:device_info_plus_ohos/device_info_plus_ohos.dart';
class HarmonyDeviceDiagnosticCenter extends StatefulWidget {
const HarmonyDeviceDiagnosticCenter({super.key});
State<HarmonyDeviceDiagnosticCenter> createState() => _HarmonyDeviceDiagnosticCenterState();
}
class _HarmonyDeviceDiagnosticCenterState extends State<HarmonyDeviceDiagnosticCenter> {
final DeviceInfoOhosPlugin _plugin = DeviceInfoOhosPlugin();
OhosDeviceInfo? _deviceInfo;
bool _isLoading = true;
String? _errorMessage;
void initState() {
super.initState();
_initializeDeviceInfo();
}
Future<void> _initializeDeviceInfo() async {
try {
final info = await _plugin.ohosDeviceInfo;
setState(() {
_deviceInfo = info;
_isLoading = false;
});
} catch (e) {
setState(() {
_errorMessage = '设备信息获取失败:$e';
_isLoading = false;
});
}
}
Color _getDeviceTypeColor() {
switch (_deviceInfo?.deviceType?.toLowerCase()) {
case 'phone':
return const Color(0xFF07C160);
case 'tablet':
return const Color(0xFF10AEFF);
case 'tv':
return const Color(0xFFFF9F0A);
case 'smartvision':
return const Color(0xFF10BFC3);
default:
return const Color(0xFF8E8E93);
}
}
String _getDeviceTypeEmoji() {
switch (_deviceInfo?.deviceType?.toLowerCase()) {
case 'phone':
return '📱';
case 'tablet':
return '📱';
case 'tv':
return '📺';
case 'smartvision':
return '👁️';
default:
return '❓';
}
}
Widget build(BuildContext context) {
return Scaffold(
backgroundColor: const Color(0xFFF2F2F7),
appBar: AppBar(
title: const Text('鸿蒙设备诊断中心'),
centerTitle: true,
backgroundColor: const Color(0xFF001B75),
foregroundColor: Colors.white,
elevation: 0,
),
body: _buildBody(),
);
}
Widget _buildBody() {
if (_isLoading) {
return const Center(
child: Column(
mainAxisAlignment: MainAxisAlignment.center,
children: [
CircularProgressIndicator(color: Color(0xFF001B75)),
SizedBox(height: 16),
Text('正在读取设备信息...', style: TextStyle(color: Color(0xFF8E8E93))),
],
),
);
}
if (_errorMessage != null) {
return Center(
child: Column(
mainAxisAlignment: MainAxisAlignment.center,
children: [
const Icon(Icons.error_outline, size: 64, color: Color(0xFFFF3B30)),
const SizedBox(height: 16),
Text(_errorMessage!, textAlign: TextAlign.center),
const SizedBox(height: 24),
ElevatedButton(
onPressed: _initializeDeviceInfo,
child: const Text('重新获取'),
),
],
),
);
}
return SingleChildScrollView(
padding: const EdgeInsets.all(16),
child: Column(
crossAxisAlignment: CrossAxisAlignment.start,
children: [
_buildDeviceTypeCard(),
const SizedBox(height: 20),
_buildInfoSection('📋 设备标识', _buildIdentifierCards()),
const SizedBox(height: 20),
_buildInfoSection('💻 系统信息', _buildSystemCards()),
const SizedBox(height: 20),
_buildInfoSection('🎨 硬件配置', _buildHardwareCards()),
],
),
);
}
Widget _buildDeviceTypeCard() {
return Container(
width: double.infinity,
padding: const EdgeInsets.all(24),
decoration: BoxDecoration(
gradient: LinearGradient(
colors: [_getDeviceTypeColor(), _getDeviceTypeColor().withOpacity(0.7)],
begin: Alignment.topLeft,
end: Alignment.bottomRight,
),
borderRadius: BorderRadius.circular(20),
boxShadow: [
BoxShadow(
color: _getDeviceTypeColor().withOpacity(0.3),
blurRadius: 20,
offset: const Offset(0, 10),
),
],
),
child: Column(
children: [
Text(
_getDeviceTypeEmoji(),
style: const TextStyle(fontSize: 64),
),
const SizedBox(height: 12),
Text(
_deviceInfo?.marketName ?? '未知设备',
style: const TextStyle(
fontSize: 24,
fontWeight: FontWeight.bold,
color: Colors.white,
),
),
const SizedBox(height: 4),
Container(
padding: const EdgeInsets.symmetric(horizontal: 12, vertical: 4),
decoration: BoxDecoration(
color: Colors.white.withOpacity(0.2),
borderRadius: BorderRadius.circular(12),
),
child: Text(
_deviceInfo?.deviceType?.toUpperCase() ?? 'UNKNOWN',
style: const TextStyle(
fontSize: 12,
fontWeight: FontWeight.w600,
color: Colors.white,
),
),
),
],
),
);
}
Widget _buildInfoSection(String title, List<Widget> children) {
return Column(
crossAxisAlignment: CrossAxisAlignment.start,
children: [
Padding(
padding: const EdgeInsets.only(left: 4, bottom: 12),
child: Text(
title,
style: const TextStyle(
fontSize: 18,
fontWeight: FontWeight.bold,
color: Color(0xFF001B75),
),
),
),
...children,
],
);
}
List<Widget> _buildIdentifierCards() {
return [
_buildInfoCard('品牌', _deviceInfo?.brand ?? '未知'),
_buildInfoCard('产品型号', _deviceInfo?.productModel ?? '未知'),
_buildInfoCard('硬件模型', _deviceInfo?.hardwareModel ?? '未知'),
];
}
List<Widget> _buildSystemCards() {
return [
_buildInfoCard('操作系统', _deviceInfo?.osFullName ?? '未知'),
_buildInfoCard('显示版本', _deviceInfo?.displayVersion ?? '未知'),
_buildInfoCard('API 级别', '${_deviceInfo?.sdkApiVersion ?? '未知'}'),
_buildInfoCard('版本特征', _deviceInfo?.buildRootHash ?? '未知'),
];
}
List<Widget> _buildHardwareCards() {
return [
_buildInfoCard('匿名标识', _deviceInfo?.odid ?? '不支持'),
_buildInfoCard('设备类型', _deviceInfo?.deviceType ?? '未知'),
_buildInfoCard('安全补丁', _deviceInfo?.securityPatchTag ?? '未知'),
];
}
Widget _buildInfoCard(String label, String value) {
return Container(
width: double.infinity,
margin: const EdgeInsets.only(bottom: 8),
padding: const EdgeInsets.symmetric(horizontal: 16, vertical: 14),
decoration: BoxDecoration(
color: Colors.white,
borderRadius: BorderRadius.circular(12),
border: Border.all(color: const Color(0xFFE5E5EA)),
),
child: Row(
mainAxisAlignment: MainAxisAlignment.spaceBetween,
children: [
Text(
label,
style: const TextStyle(
fontSize: 15,
color: Color(0xFF8E8E93),
),
),
Flexible(
child: Text(
value,
textAlign: TextAlign.right,
style: const TextStyle(
fontSize: 15,
fontWeight: FontWeight.w500,
color: Color(0xFF1C1C1E),
),
overflow: TextOverflow.ellipsis,
),
),
],
),
);
}
}
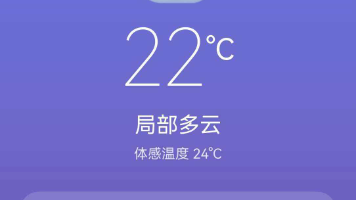
这个诊断中心界面采用了卡片式设计,顶部有一个醒目的设备类型展示区,用不同的颜色和 emoji 来区分设备类型。中下部则分为"设备标识"、“系统信息”、"硬件配置"三个模块,清晰展示各类信息。
这是我的运行截图:
六、总结与展望
好啦,今天的分享就到这里!通过本文,我们学会了:
- 如何配置 device_info_plus 和 device_info_plus_ohos 双依赖
- 如何获取鸿蒙设备的基本信息(品牌、型号、系统版本等)
- 如何采集 GPU 信息用于动画性能调优
- 如何实现多设备类型的兼容适配
- 如何规避 UDID 获取等常见的"坑"
设备信息获取是应用精细化运营的第一步,但绝不是最后一步。希望大家能够举一反三,将这些知识应用到实际项目中,打造出更加懂用户、懂设备的优质应用。
最后,如果你在实践过程中遇到任何问题,欢迎在评论区留言交流。也欢迎大家关注博主的其他文章,我们会持续带来更多 Flutter 鸿蒙化的实战技术分享!

作为“人工智能6S店”的官方数字引擎,为AI开发者与企业提供一个覆盖软硬件全栈、一站式门户。
更多推荐
 9
9 0
0- 0


 已为社区贡献17条内容

所有评论(0)