
【开源鸿蒙跨平台开发先锋训练营】创建Flutter应用来列表展示开发平台中的Pipelines
背景:
以前曾在某代码开发平台上创建了一些Pipeline来完成某些CI的操作,有时候想通过手机来查看执行的情况,只能通过浏览器来进行,而且有时候有些信息是隐含在pipeline的附件或者参数中,这时候查看起来就更为不便了。现在了解到通过Flutter可以很方便的为各种客户端创建UI体验一致的应用,这样拥有不同客户端的人们也可以很方便的去检查CI执行的结果了。
这里只是使用来作为一个列子,其实现应该也能相似的适配到其他代码开发平台。
创建项目
1. 如果使用的是鸿蒙适配版的Flutter SDK, 执行以下flutter create pipeline就可以默认包含大部分平台的支持了
PS D:\flutter\projects> flutter create pipeline
.......
Your application code is in pipeline\lib\main.dart.

PS D:\flutter\projects> ls .\flutter_app\

...
Mode                 LastWriteTime         Length Name
----                 -------------         ------ ----
...
d-----          2026/2/1      1:49                android
d-----          2026/2/1      1:50                build
d-----          2026/2/1      1:21                ios
d-----          2026/2/1      1:21                lib
d-----          2026/2/1      1:21                linux
d-----          2026/2/1      1:21                macos
d-----          2026/2/1      1:45                ohos
d-----          2026/2/1      1:21                test
d-----          2026/2/1      1:21                web
d-----          2026/2/1      1:21                windows
...
PS D:\flutter\projects>
2. 如果使用的是upstream的Flutter SDK,则还需要再单独执行flutter create . --platforms ohos以追加对鸿蒙的支持
> flutter create pipeline
> cd pipeline
> flutter create . --platforms ohos # 追加对鸿蒙平台的支持
业务逻辑实现
这里业务逻辑简单来说就是通过指定的验证口令来调用API链接获取输出,并将结果以列表的形式显示出来。
对于代码的编辑,我这里使用了VS Code,也是Flutter官方推荐的一个编辑工具。
1. 定义Module
先看一下默认提供的pipeline 信息都有哪些,然后将其中我们关注的信息提取出来,再在我们的应用显示出来。
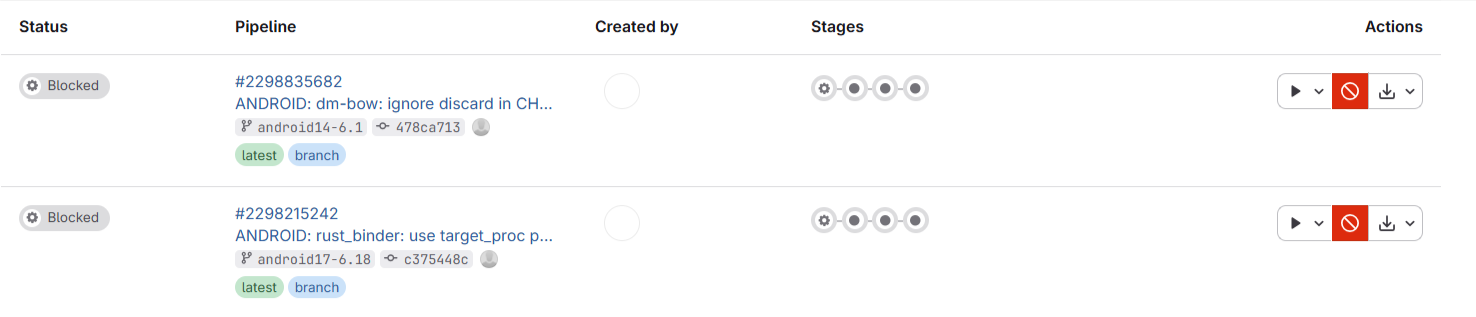
可以看到这里一个pipeline有status, pipeline id, branch, commit, create by等,那我们就先定义一个这样的Pipeline module。 因为会使用获取的json数据来初始化一个Pipeline实例,所以也同时定义了一个fromJson的方法。
class Pipeline{
  final int projectID;
  final String status;
  final String source;
  final String ref;
  final String sha;

  Pipeline({
    required this.projectID,
    required this.status,
    required this.source,
    required this.ref,
    required this.sha,
    required this.createdAt,
  });

  static fromJson(Map<String, dynamic> pipelineJson) {
    return Pipeline(
      projectID: pipelineJson['project_id'],
      status: pipelineJson['status'],
      source: pipelineJson['source'],
      ref: pipelineJson['ref'],
      sha: pipelineJson['sha'],
      createdAt: pipelineJson['created_at'],
    );
  }
}
2. 使用http来获得json数据
几点说明:
1. 引入http包
调用网络链接的方法有多种,这里使用的是http包,但是这个包并不是默认就包含在dart里面的,需要修改pubspec.yaml来追加依赖:
dependencies:
  ...

  http: ^1.6.0
然后执行 下面命令来更新:
> flutter clean
> flutter pub get
另外还需要lib/main.dart中加入import
import 'package:http/http.dart' as http;如果VS Code编辑器提示Target of URI doesn't exist: 'package:http/http.dart'报告import错误的话,可能还需要重启一下IDE。
2. 调用http的方法
这里涉及到了Dart语言的异步调用支持,与其他开发语言稍微有些不同, 要想深入理解的话,可以参考Asynchronous programming: futures, async, await。简单的说就是:
- 如果方法里面调用异步的方法,则这个方法也必须用sync声明为异步的
- 在调用异步方法时,必须前面使用await 关键字
- 异步方法的返回类型必须是Future类型的
代码如下:
Future<List> getHTTPJsonList(String url, String domain, String token) async {
  final response = await http.get(Uri.parse(url),
                                   headers: {
                                      'Content-Type': 'application/json',
                                      'PRIVATE-TOKEN': token,
                                   },
        );
  if (response.statusCode == 200) {
    // If the server did return a 200 OK response,
    // then parse the JSON.
    final List<dynamic> jsonList = jsonDecode(response.body) as List<dynamic>;
    return jsonList;
  } else {
    // If the server did not return a 200 OK response,
    // then throw an exception.
    throw Exception('Failed to load Gitlab Pipelines information: ${response.statusCode} ${response.body}: url: $url');
  }
}

Future<List<Pipeline>> getPipelines(String projectID, String domain, String token) async {
  var encodedProjectID = Uri.encodeComponent(projectID);
  // var url_project = 'https://$gitlabDomain/api/v4/projects/$project_id';
  var urlPipelines = 'https://$domain/api/v4/projects/$encodedProjectID/pipelines';

    Future< List<dynamic>> jsonList = getHTTPJsonList(urlPipelines, domain, token);
    List<Pipeline> pipelines = [];
    for (var pipelineJson in await jsonList){
      var pipeline = Pipeline.fromJson(pipelineJson);
      pipelines.add(pipeline);
    }
    return pipelines;
}
3. 列表展示
因为需要展示的pipeline实例列表最终是通过http.get的异步方法获取的,通过异步方法返回的是Future类型。对于使用Future类型数据进行UI生成的时候,需要使用FutureBuilder类。
从下面的代码中,可以看到FutureBuilder类帮助开发人员很好的处理了异常边界等各种情况,结构非常清晰。
详细代码如下:
class _MyHomePageState extends State<MyHomePage> {
final Future<List<Pipeline>> pipelines = getPipelines(projectID, domain, token);
@override
Widget build(BuildContext context) {
return Scaffold(
appBar: AppBar(
backgroundColor: Theme.of(context).colorScheme.inversePrimary,
title: Text(widget.title),
),
body: FutureBuilder<List<Pipeline>>(
future: pipelines,
builder: (context, snapshot) {
if (snapshot.connectionState == ConnectionState.waiting) {
return const Center(child: CircularProgressIndicator());
} else if (snapshot.hasError) {
return Center(child: Text('Error: ${snapshot.error}'));
} else if (!snapshot.hasData || snapshot.data!.isEmpty) {
return const Center(child: Text('No pipelines found'));
} else {
final pipelineList = snapshot.data!;
return DataTable(
columns: const [
DataColumn(label: Text('Index')),
DataColumn(label: Text('Project ID')),
DataColumn(label: Text('Status')),
DataColumn(label: Text('Ref')),
DataColumn(label: Text('SHA')),
],
rows: pipelineList.asMap().entries.map((entry) {
int index = entry.key;
Pipeline pipeline = entry.value;
return DataRow(cells: [
DataCell(Text((index + 1).toString())), // 1-based index
DataCell(Text(pipeline.projectID.toString())),
DataCell(Text(pipeline.status)),
DataCell(Text(pipeline.ref)),
DataCell(Text(pipeline.sha)),
]);
}).toList(),
);
}
},
),
);
}
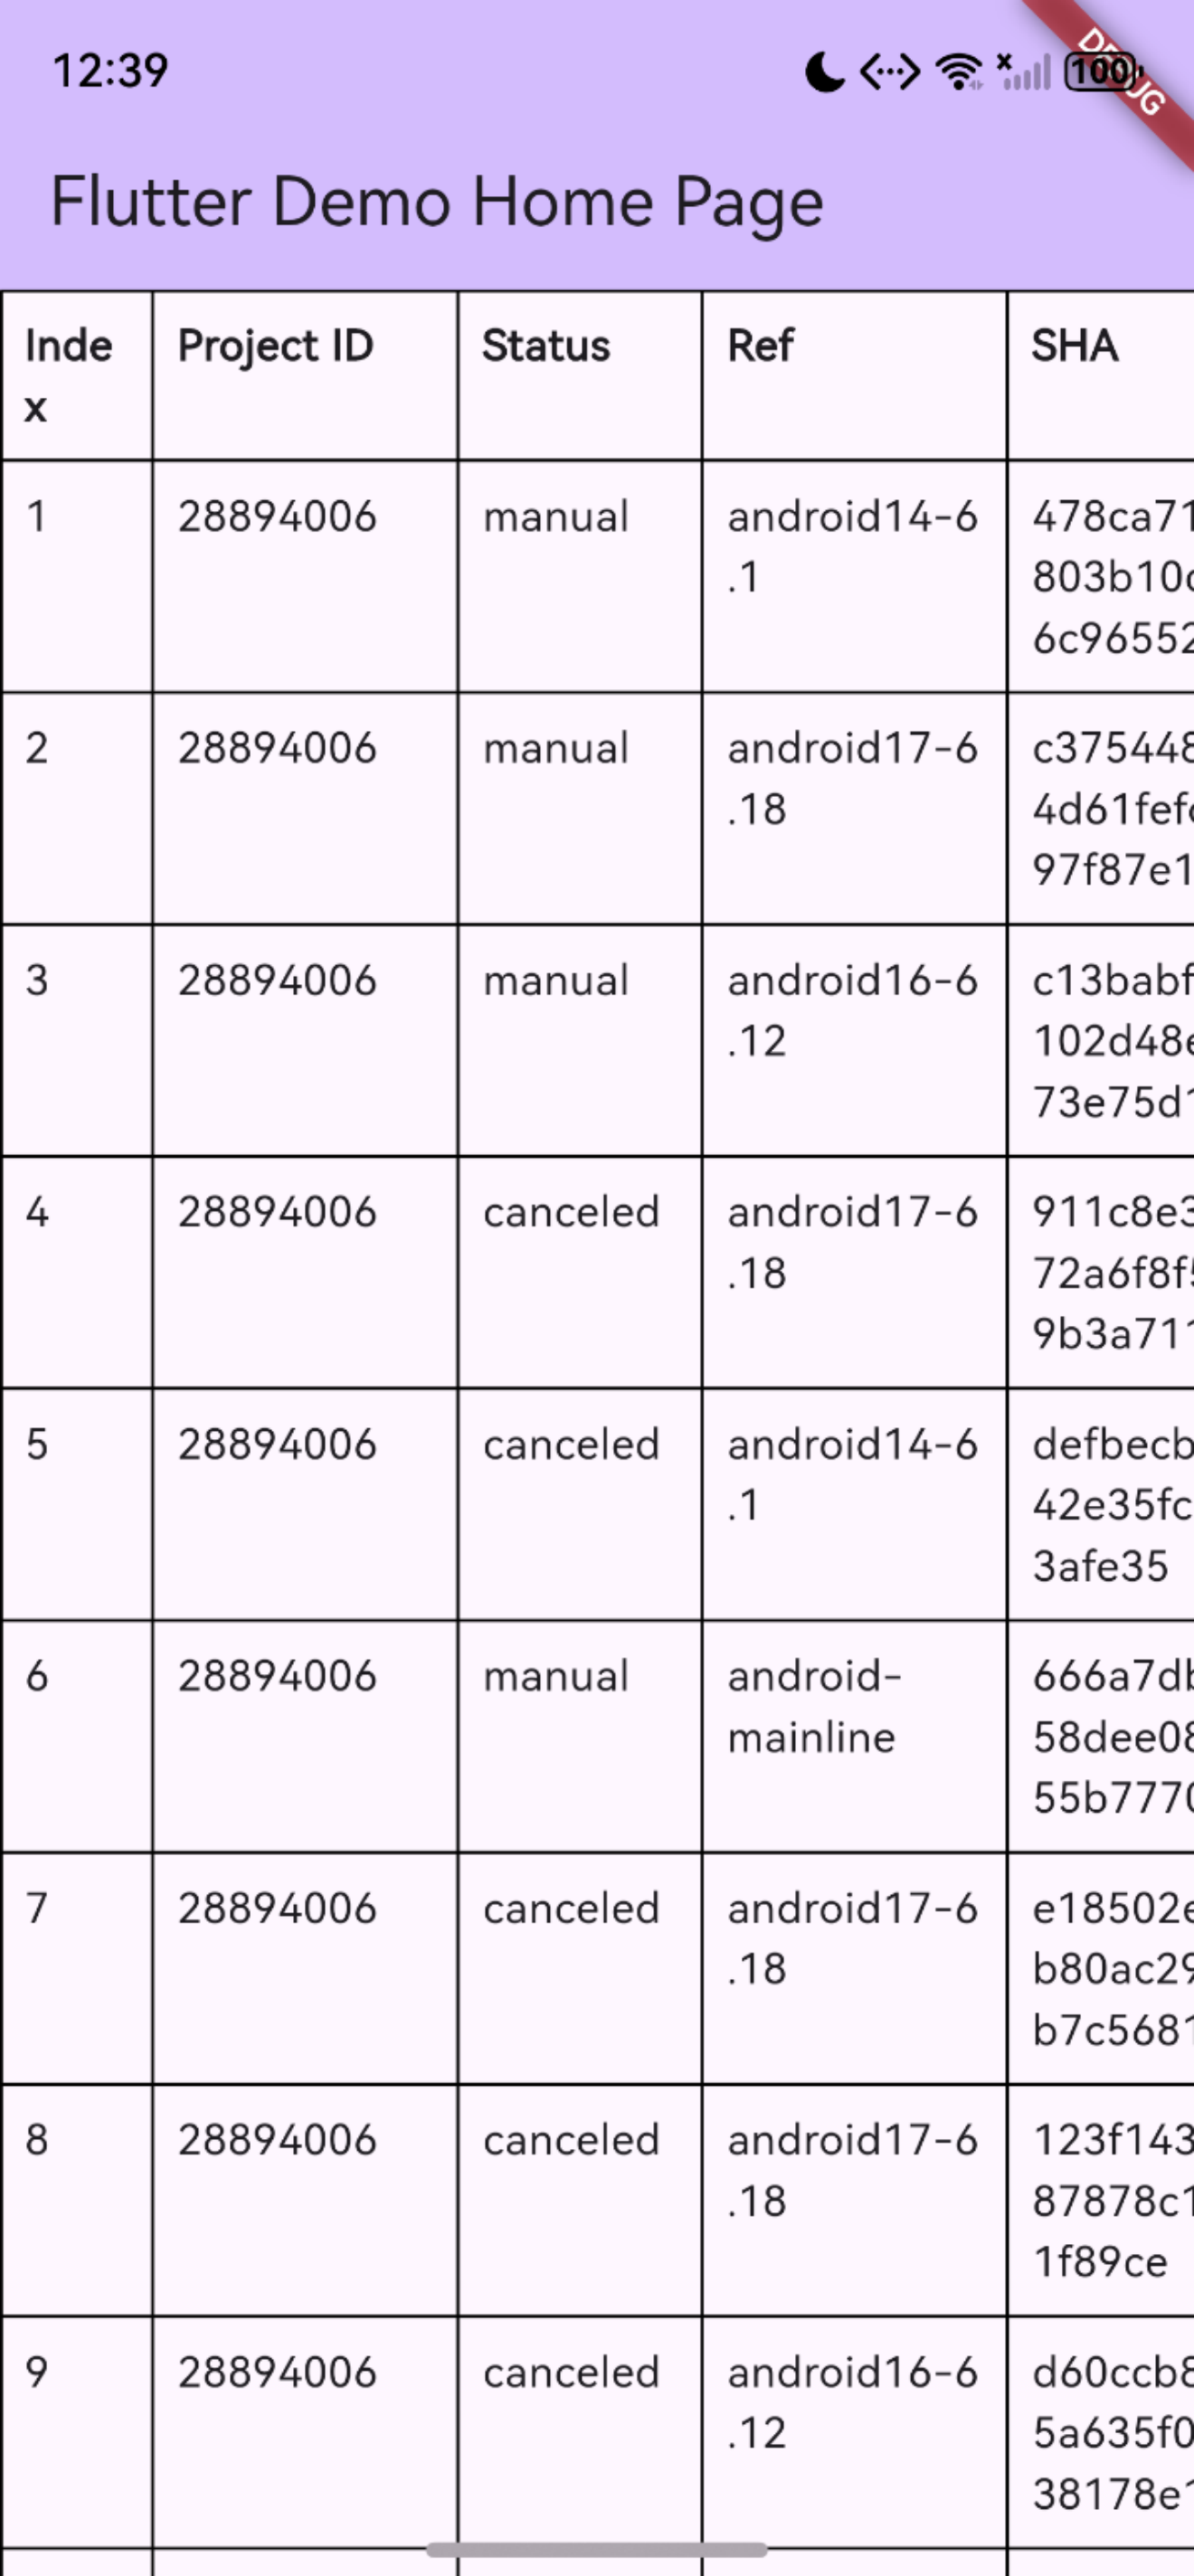
}4. 鸿蒙模拟器运行截图
其他需完善的功能
- 应用界面显示上,最好能够区分手机和桌面的显示,以便不同平台都获取最好的体验。
- 后期上拉加载下来刷新的功能。
- 当前为学习阶段,Token等信息被硬编码,不方便多人的使用,需要能够从应用界面输入,并保存在设备上,避免每次都输入。
- 看到好多同学说是需要添加ohos.permission.INTERNET网络访问权限,不过我这里并不需要,因为已经默认添加到文件里面了,不知道是不是我用的3.35.7版本的原因。
- 其他同学有使用dio和其他方法获取网络数据的,但是没看到有对FutureBuilder类的使用,这里还需要再学习了解下。
总结:
各种原因导致了进度很慢,没能跟上大家的脚步,后面继续努力。
欢迎加入开源鸿蒙跨平台社区:
https://openharmonycrossplatform.csdn.net

作为“人工智能6S店”的官方数字引擎,为AI开发者与企业提供一个覆盖软硬件全栈、一站式门户。
更多推荐

 5
5 0
0- 0


 已为社区贡献3条内容

所有评论(0)