
Flutter无状态和有状态组件在鸿蒙应用程序中的实战示例
Flutter组件开发指南:StatefulWidget与StatelessWidget详解 本文全面介绍Flutter中两种核心组件类型:StatefulWidget(有状态组件)和StatelessWidget(无状态组件)。StatelessWidget适用于静态内容展示,通过示例展示了基础用法、参数传递和组件组合;StatefulWidget则用于动态交互场景,详细讲解状态管理、参数初始化
📖 前言
StatefulWidget 和 StatelessWidget 是 Flutter 中所有组件的基类,它们是 Flutter 框架的核心概念。理解这两个组件的区别和使用场景,是掌握 Flutter 开发的基础。本教程将带你深入了解 StatefulWidget 和 StatelessWidget 的各种用法和生命周期。
🎯 什么是 StatefulWidget 和 StatelessWidget?
StatelessWidget(无状态组件)
StatelessWidget 是不可变的组件,一旦创建后,其属性就不会改变。它适用于展示静态内容,不需要维护状态。
StatefulWidget(有状态组件)
StatefulWidget 是可变的组件,可以在运行时改变其状态。它适用于需要响应用户交互、数据变化或动画的场景。
基本语法
// StatelessWidget
class MyStatelessWidget extends StatelessWidget {
Widget build(BuildContext context) {
return Text('Hello, World!');
}
}
// StatefulWidget
class MyStatefulWidget extends StatefulWidget {
State<MyStatefulWidget> createState() => _MyStatefulWidgetState();
}
class _MyStatefulWidgetState extends State<MyStatefulWidget> {
Widget build(BuildContext context) {
return Text('Hello, World!');
}
}
🚀 StatelessWidget 基础用法
1. 最简单的 StatelessWidget
class SimpleStatelessWidget extends StatelessWidget {
const SimpleStatelessWidget({super.key});
Widget build(BuildContext context) {
return Text('Hello, StatelessWidget!');
}
}
这是最基础的用法,直接继承 StatelessWidget 并实现 build 方法。

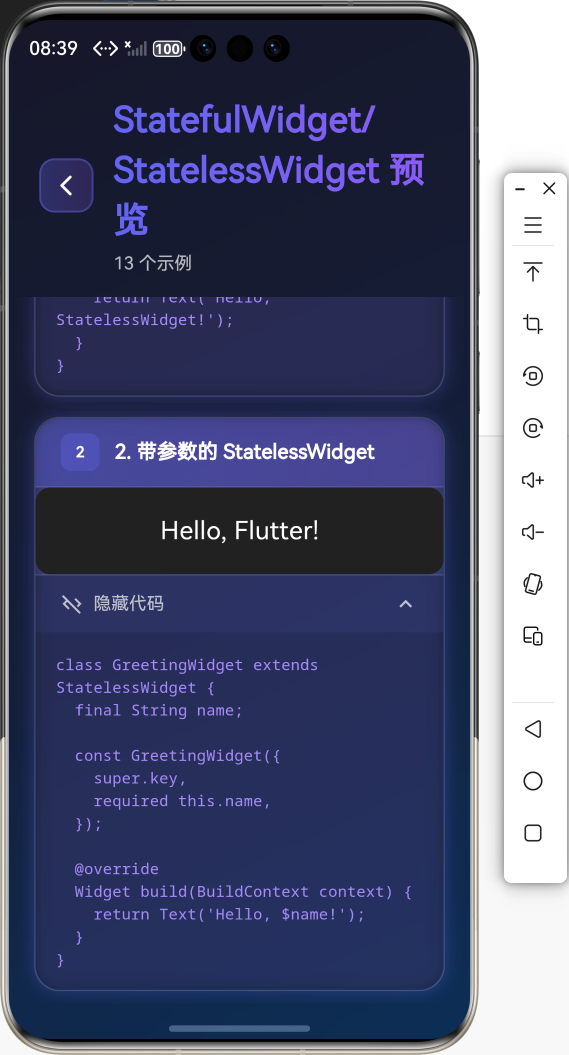
2. 带参数的 StatelessWidget
class GreetingWidget extends StatelessWidget {
final String name;
const GreetingWidget({
super.key,
required this.name,
});
Widget build(BuildContext context) {
return Text('Hello, $name!');
}
}
通过构造函数传递参数,使组件更加灵活。
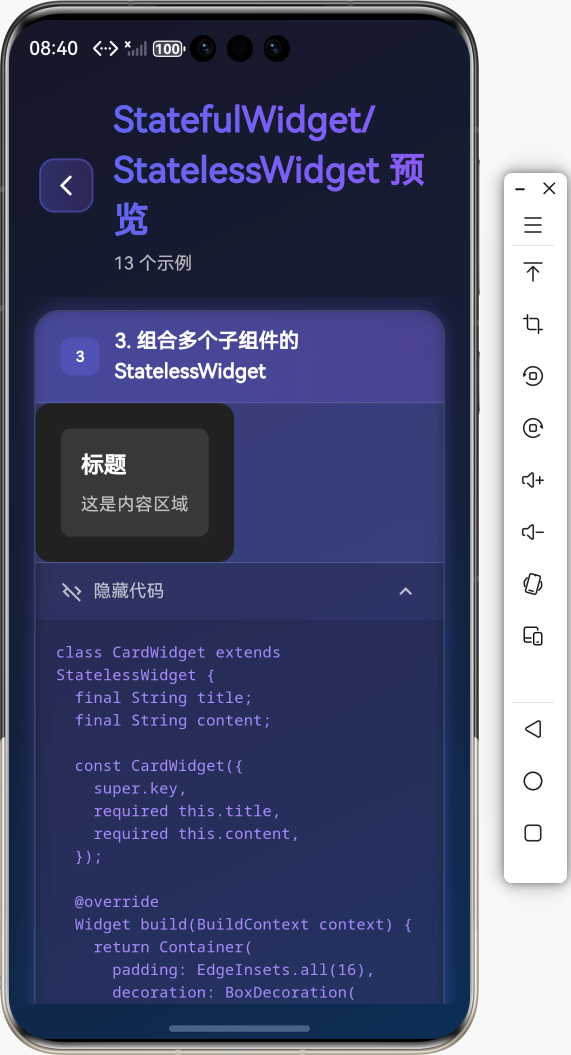
3. 组合多个子组件的 StatelessWidget
class CardWidget extends StatelessWidget {
final String title;
final String content;
const CardWidget({
super.key,
required this.title,
required this.content,
});
Widget build(BuildContext context) {
return Container(
padding: EdgeInsets.all(16),
decoration: BoxDecoration(
color: Colors.white,
borderRadius: BorderRadius.circular(8),
),
child: Column(
crossAxisAlignment: CrossAxisAlignment.start,
children: [
Text(title, style: TextStyle(fontSize: 18, fontWeight: FontWeight.bold)),
SizedBox(height: 8),
Text(content),
],
),
);
}
}
🔄 StatefulWidget 基础用法
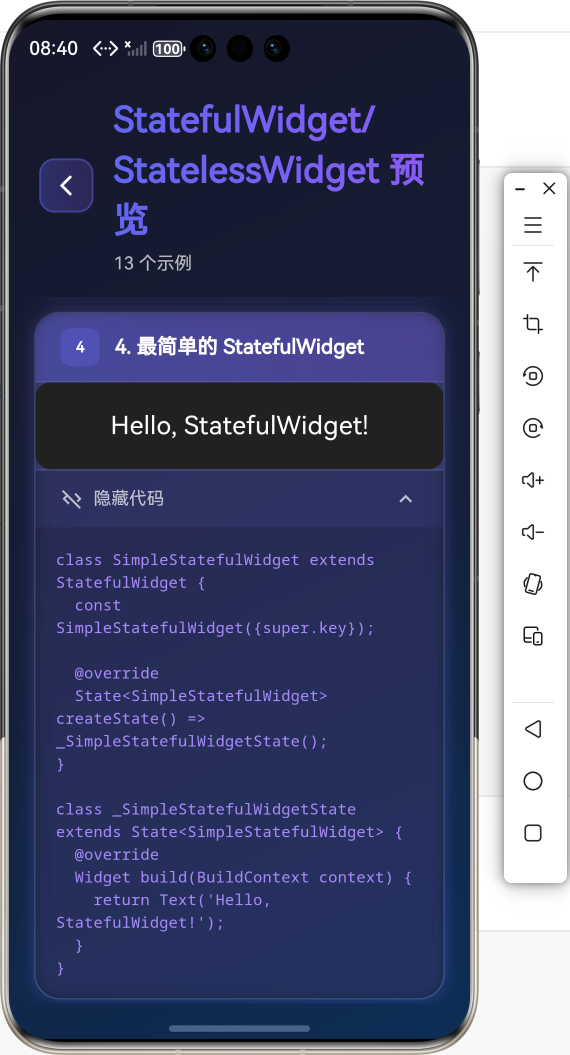
1. 最简单的 StatefulWidget
class SimpleStatefulWidget extends StatefulWidget {
const SimpleStatefulWidget({super.key});
State<SimpleStatefulWidget> createState() => _SimpleStatefulWidgetState();
}
class _SimpleStatefulWidgetState extends State<SimpleStatefulWidget> {
Widget build(BuildContext context) {
return Text('Hello, StatefulWidget!');
}
}
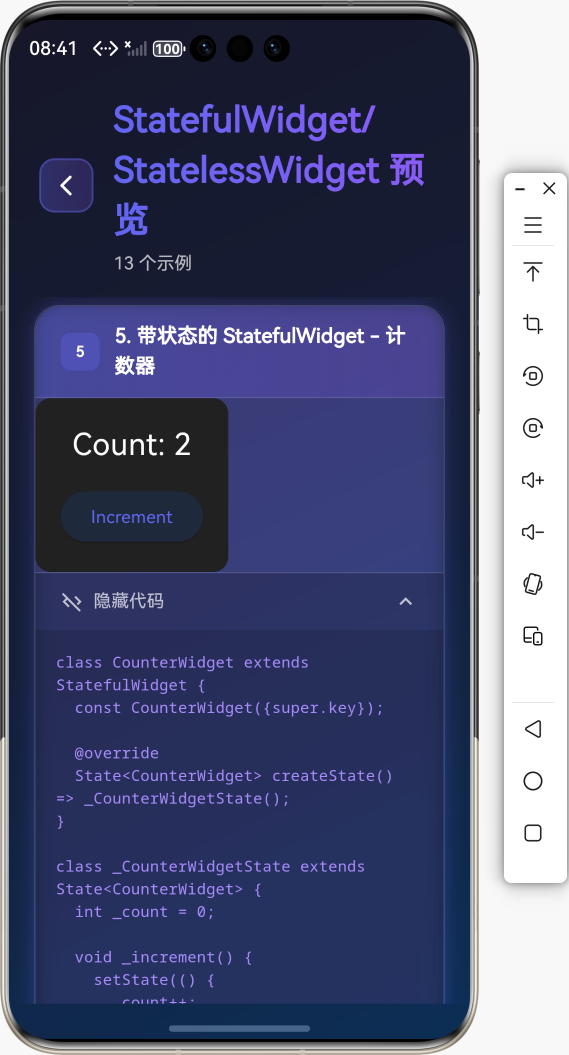
2. 带状态的 StatefulWidget
class CounterWidget extends StatefulWidget {
const CounterWidget({super.key});
State<CounterWidget> createState() => _CounterWidgetState();
}
class _CounterWidgetState extends State<CounterWidget> {
int _count = 0;
void _increment() {
setState(() {
_count++;
});
}
Widget build(BuildContext context) {
return Column(
children: [
Text('Count: $_count'),
ElevatedButton(
onPressed: _increment,
child: Text('Increment'),
),
],
);
}
}
使用 setState() 方法来更新状态,这会触发 build 方法重新执行。
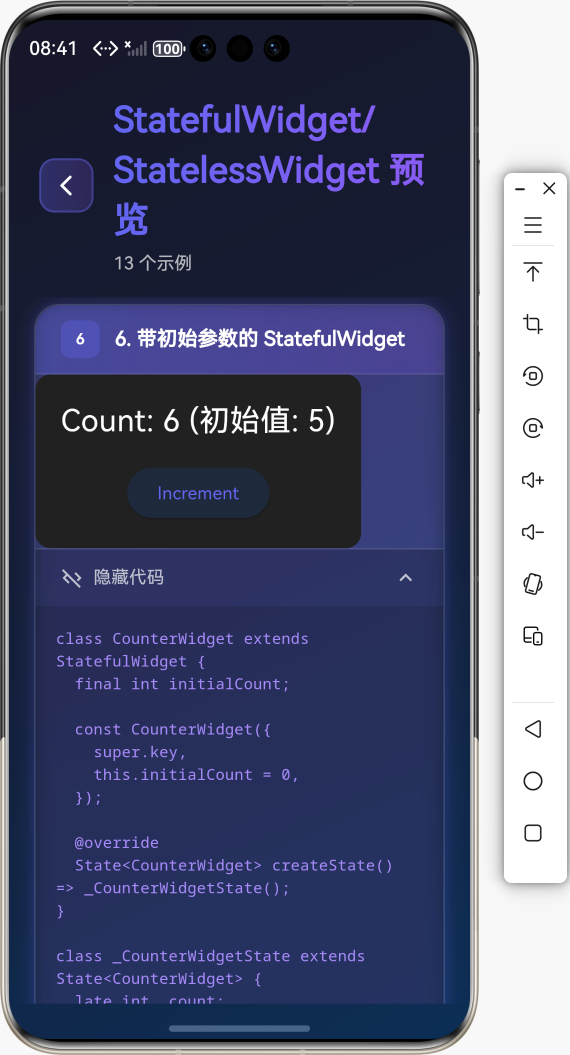
3. 带初始参数的 StatefulWidget
class CounterWidget extends StatefulWidget {
final int initialCount;
const CounterWidget({
super.key,
this.initialCount = 0,
});
State<CounterWidget> createState() => _CounterWidgetState();
}
class _CounterWidgetState extends State<CounterWidget> {
late int _count;
void initState() {
super.initState();
_count = widget.initialCount;
}
void _increment() {
setState(() {
_count++;
});
}
Widget build(BuildContext context) {
return Column(
children: [
Text('Count: $_count'),
ElevatedButton(
onPressed: _increment,
child: Text('Increment'),
),
],
);
}
}
🔄 StatefulWidget 生命周期
生命周期方法详解
StatefulWidget 的生命周期包含以下关键方法:
1. createState()
在 StatefulWidget 被创建时调用,用于创建对应的 State 对象。
State<MyWidget> createState() => _MyWidgetState();
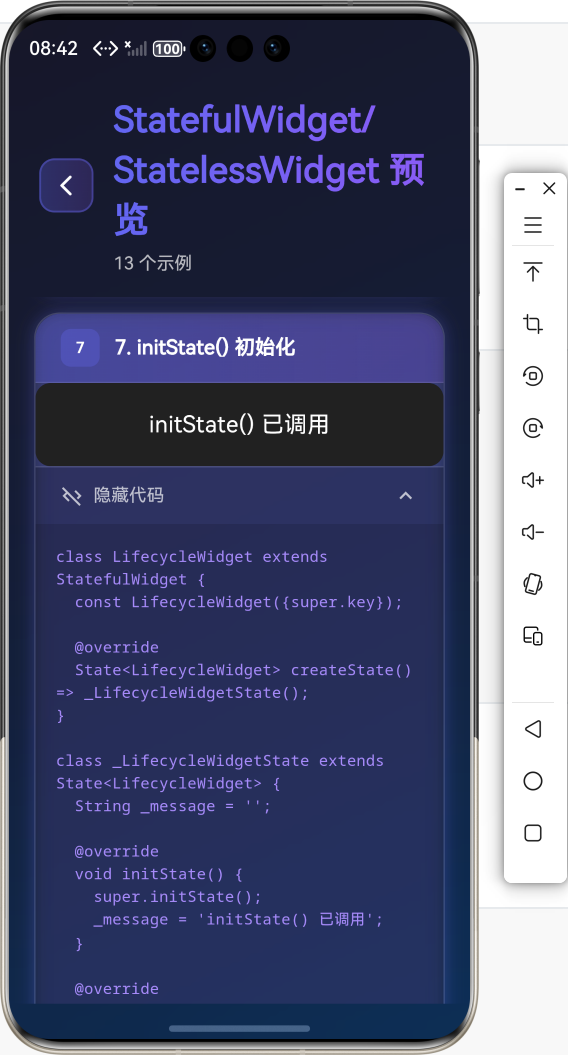
2. initState()
在 State 对象被插入到 widget 树时调用,只调用一次。适合进行初始化操作。
void initState() {
super.initState();
// 初始化操作
_controller = AnimationController(vsync: this);
_loadData();
}
3. didChangeDependencies()
在 initState() 之后调用,或者在依赖的 InheritedWidget 发生变化时调用。
void didChangeDependencies() {
super.didChangeDependencies();
// 依赖变化时的操作
}
4. build()
构建 widget 树,每次 setState() 调用后都会重新执行。
Widget build(BuildContext context) {
return Container(
child: Text('Hello'),
);
}
5. didUpdateWidget()
当 widget 的配置发生变化时调用(父组件重建时传入新的 widget)。
void didUpdateWidget(MyWidget oldWidget) {
super.didUpdateWidget(oldWidget);
// 对比新旧 widget,执行必要的更新
if (oldWidget.value != widget.value) {
_updateValue();
}
}

6. setState()
通知框架当前状态已改变,需要重新构建 widget。
void _updateCounter() {
  setState(() {
    _count++;
  });
}
7. deactivate()
当 State 对象从树中移除时调用,但可能还会被重新插入。
void deactivate() {
super.deactivate();
// 清理操作
}
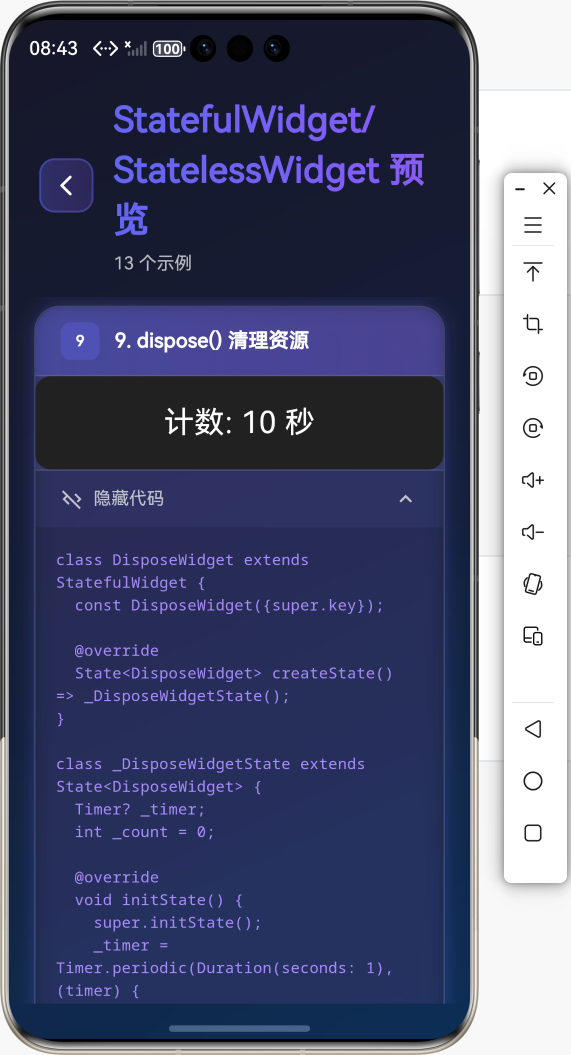
8. dispose()
当 State 对象被永久移除时调用,适合进行资源清理。
void dispose() {
_controller.dispose();
_subscription.cancel();
super.dispose();
}
完整生命周期示例
class LifecycleWidget extends StatefulWidget {
const LifecycleWidget({super.key});
State<LifecycleWidget> createState() => _LifecycleWidgetState();
}
class _LifecycleWidgetState extends State<LifecycleWidget> {
int _counter = 0;
late AnimationController _controller;
void initState() {
super.initState();
print('initState: 初始化');
_controller = AnimationController(vsync: this);
}
void didChangeDependencies() {
super.didChangeDependencies();
print('didChangeDependencies: 依赖变化');
}
Widget build(BuildContext context) {
print('build: 构建 widget');
return Column(
children: [
Text('Counter: $_counter'),
ElevatedButton(
onPressed: () {
setState(() {
_counter++;
});
},
child: Text('Increment'),
),
],
);
}
void didUpdateWidget(LifecycleWidget oldWidget) {
super.didUpdateWidget(oldWidget);
print('didUpdateWidget: widget 更新');
}
void deactivate() {
super.deactivate();
print('deactivate: 移除');
}
void dispose() {
print('dispose: 销毁');
_controller.dispose();
super.dispose();
}
}
💡 实际应用场景
场景1:静态展示组件(使用 StatelessWidget)
class ProductCard extends StatelessWidget {
final String name;
final double price;
final String imageUrl;
const ProductCard({
super.key,
required this.name,
required this.price,
required this.imageUrl,
});
Widget build(BuildContext context) {
return Card(
child: Column(
children: [
Image.network(imageUrl),
Text(name),
Text('\$$price'),
],
),
);
}
}
场景2:计数器(使用 StatefulWidget)
class Counter extends StatefulWidget {
const Counter({super.key});
State<Counter> createState() => _CounterState();
}
class _CounterState extends State<Counter> {
int _count = 0;
void _increment() {
setState(() {
_count++;
});
}
void _decrement() {
setState(() {
_count--;
});
}
Widget build(BuildContext context) {
return Row(
mainAxisAlignment: MainAxisAlignment.center,
children: [
IconButton(
icon: Icon(Icons.remove),
onPressed: _decrement,
),
Text('$_count', style: TextStyle(fontSize: 24)),
IconButton(
icon: Icon(Icons.add),
onPressed: _increment,
),
],
);
}
}
场景3:表单输入(使用 StatefulWidget)
class LoginForm extends StatefulWidget {
const LoginForm({super.key});
State<LoginForm> createState() => _LoginFormState();
}
class _LoginFormState extends State<LoginForm> {
final _formKey = GlobalKey<FormState>();
final _usernameController = TextEditingController();
final _passwordController = TextEditingController();
bool _isLoading = false;
void dispose() {
_usernameController.dispose();
_passwordController.dispose();
super.dispose();
}
Future<void> _handleSubmit() async {
if (_formKey.currentState!.validate()) {
setState(() {
_isLoading = true;
});
// 模拟登录
await Future.delayed(Duration(seconds: 2));
setState(() {
_isLoading = false;
});
}
}
Widget build(BuildContext context) {
return Form(
key: _formKey,
child: Column(
children: [
TextFormField(
controller: _usernameController,
decoration: InputDecoration(labelText: '用户名'),
validator: (value) {
if (value == null || value.isEmpty) {
return '请输入用户名';
}
return null;
},
),
TextFormField(
controller: _passwordController,
decoration: InputDecoration(labelText: '密码'),
obscureText: true,
validator: (value) {
if (value == null || value.isEmpty) {
return '请输入密码';
}
return null;
},
),
ElevatedButton(
onPressed: _isLoading ? null : _handleSubmit,
child: _isLoading
? CircularProgressIndicator()
: Text('登录'),
),
],
),
);
}
}

场景4:动画组件(使用 StatefulWidget)
class AnimatedBox extends StatefulWidget {
const AnimatedBox({super.key});
State<AnimatedBox> createState() => _AnimatedBoxState();
}
class _AnimatedBoxState extends State<AnimatedBox>
with SingleTickerProviderStateMixin {
late AnimationController _controller;
late Animation<double> _animation;
void initState() {
super.initState();
_controller = AnimationController(
duration: Duration(seconds: 1),
vsync: this,
);
_animation = Tween<double>(begin: 0, end: 1).animate(_controller);
_controller.repeat(reverse: true);
}
void dispose() {
_controller.dispose();
super.dispose();
}
Widget build(BuildContext context) {
return FadeTransition(
opacity: _animation,
child: Container(
width: 100,
height: 100,
color: Colors.blue,
),
);
}
}
🔧 常用属性和方法详解
StatelessWidget
build(BuildContext context)
构建 widget 树,每次父组件重建时都会调用。
Widget build(BuildContext context) {
return Container(
child: Text('Hello'),
);
}
StatefulWidget
createState()
创建对应的 State 对象。
State<MyWidget> createState() => _MyWidgetState();
State
widget
访问对应的 StatefulWidget 实例。
final value = widget.initialValue;
context
获取 BuildContext,用于访问主题、媒体查询等。
final theme = Theme.of(context);
final size = MediaQuery.of(context).size;
mounted
检查 State 对象是否还在 widget 树中。
if (mounted) {
  setState(() {
    _value = newValue;
  });
}
setState()
通知框架状态已改变,需要重新构建。
setState(() {
  _count++;
});
🎯 实战案例
案例1:开关切换组件
class ToggleSwitch extends StatefulWidget {
const ToggleSwitch({super.key});
State<ToggleSwitch> createState() => _ToggleSwitchState();
}
class _ToggleSwitchState extends State<ToggleSwitch> {
bool _isOn = false;
void _toggle() {
setState(() {
_isOn = !_isOn;
});
}
Widget build(BuildContext context) {
return GestureDetector(
onTap: _toggle,
child: Container(
width: 60,
height: 30,
decoration: BoxDecoration(
color: _isOn ? Colors.green : Colors.grey,
borderRadius: BorderRadius.circular(15),
),
child: Stack(
children: [
AnimatedPositioned(
duration: Duration(milliseconds: 200),
curve: Curves.easeInOut,
left: _isOn ? 30 : 0,
top: 0,
bottom: 0,
child: Container(
width: 30,
decoration: BoxDecoration(
color: Colors.white,
shape: BoxShape.circle,
),
),
),
],
),
),
);
}
}
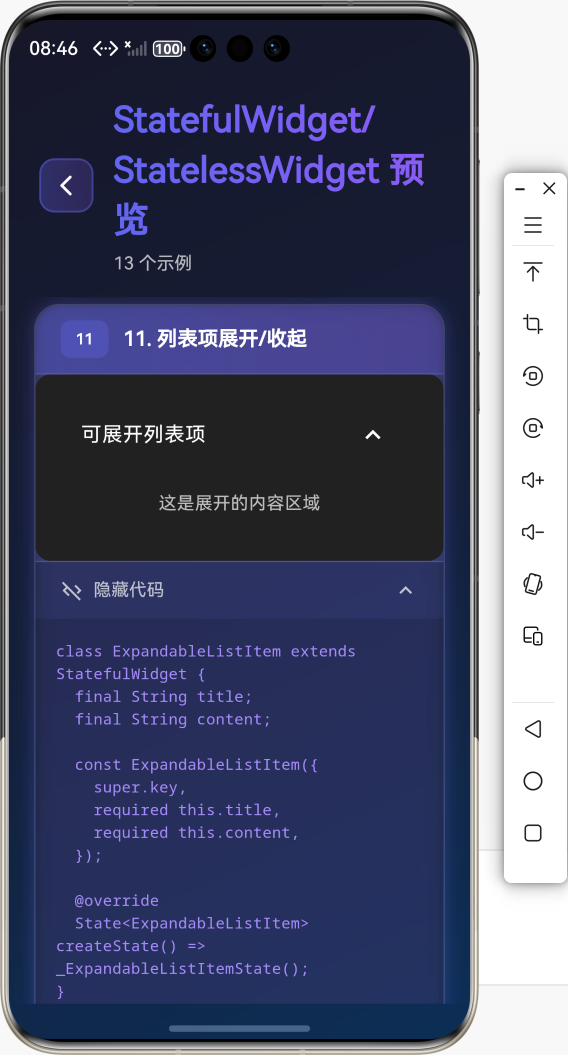
案例2:列表项展开/收起
class ExpandableListItem extends StatefulWidget {
final String title;
final String content;
const ExpandableListItem({
super.key,
required this.title,
required this.content,
});
State<ExpandableListItem> createState() => _ExpandableListItemState();
}
class _ExpandableListItemState extends State<ExpandableListItem> {
bool _isExpanded = false;
Widget build(BuildContext context) {
return Column(
children: [
ListTile(
title: Text(widget.title),
trailing: Icon(
_isExpanded ? Icons.expand_less : Icons.expand_more,
),
onTap: () {
setState(() {
_isExpanded = !_isExpanded;
});
},
),
if (_isExpanded)
Padding(
padding: EdgeInsets.all(16),
child: Text(widget.content),
),
],
);
}
}
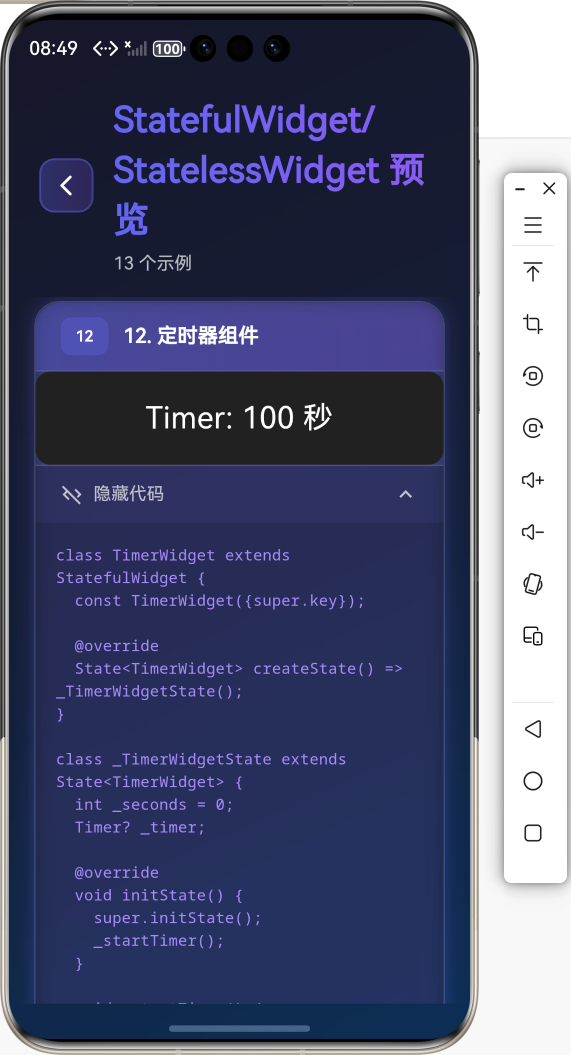
案例3:定时器组件
class TimerWidget extends StatefulWidget {
const TimerWidget({super.key});
State<TimerWidget> createState() => _TimerWidgetState();
}
class _TimerWidgetState extends State<TimerWidget> {
int _seconds = 0;
Timer? _timer;
void initState() {
super.initState();
_startTimer();
}
void _startTimer() {
_timer = Timer.periodic(Duration(seconds: 1), (timer) {
if (mounted) {
setState(() {
_seconds++;
});
}
});
}
void dispose() {
_timer?.cancel();
super.dispose();
}
Widget build(BuildContext context) {
return Text(
'Timer: $_seconds 秒',
style: TextStyle(fontSize: 24),
);
}
}
⚠️ 常见问题与解决方案
问题1:setState() called after dispose()
问题描述:在组件销毁后调用 setState() 导致错误。
解决方案:
if (mounted) {
  setState(() {
    _value = newValue;
  });
}
问题2:忘记释放资源
问题描述:在 dispose() 中忘记释放控制器、订阅等资源。
解决方案:
void dispose() {
_controller.dispose();
_subscription.cancel();
_timer?.cancel();
super.dispose();
}
问题3:不必要的重建
问题描述:频繁调用 setState() 导致性能问题。
解决方案:
- 合并多个状态更新
- 使用
const构造函数 - 使用
RepaintBoundary隔离重绘区域
// 合并更新
void _updateMultipleValues() {
  setState(() {
    _value1 = newValue1;
    _value2 = newValue2;
    _value3 = newValue3;
  });
}
问题4:StatelessWidget vs StatefulWidget 选择
问题描述:不知道应该使用哪个。
解决方案:
- StatelessWidget:用于静态展示,不需要状态管理
- StatefulWidget:需要响应用户交互、数据变化、动画等
📚 总结
通过本教程,我们学习了:
- ✅
StatelessWidget和StatefulWidget的基本概念和区别 - ✅
StatelessWidget的基础用法和最佳实践 - ✅
StatefulWidget的生命周期方法 - ✅
setState()的使用和注意事项 - ✅ 实际应用场景和案例
- ✅ 常见问题解决方案
StatefulWidget 和 StatelessWidget 是 Flutter 开发的基础,掌握它们的使用方法和生命周期,能够让你更好地构建 Flutter 应用!
🔗 相关资源
Happy Coding! 🎨✨
欢迎加入开源鸿蒙跨平台社区

作为“人工智能6S店”的官方数字引擎,为AI开发者与企业提供一个覆盖软硬件全栈、一站式门户。
更多推荐

 6
6 0
0- 0


 已为社区贡献24条内容

所有评论(0)