
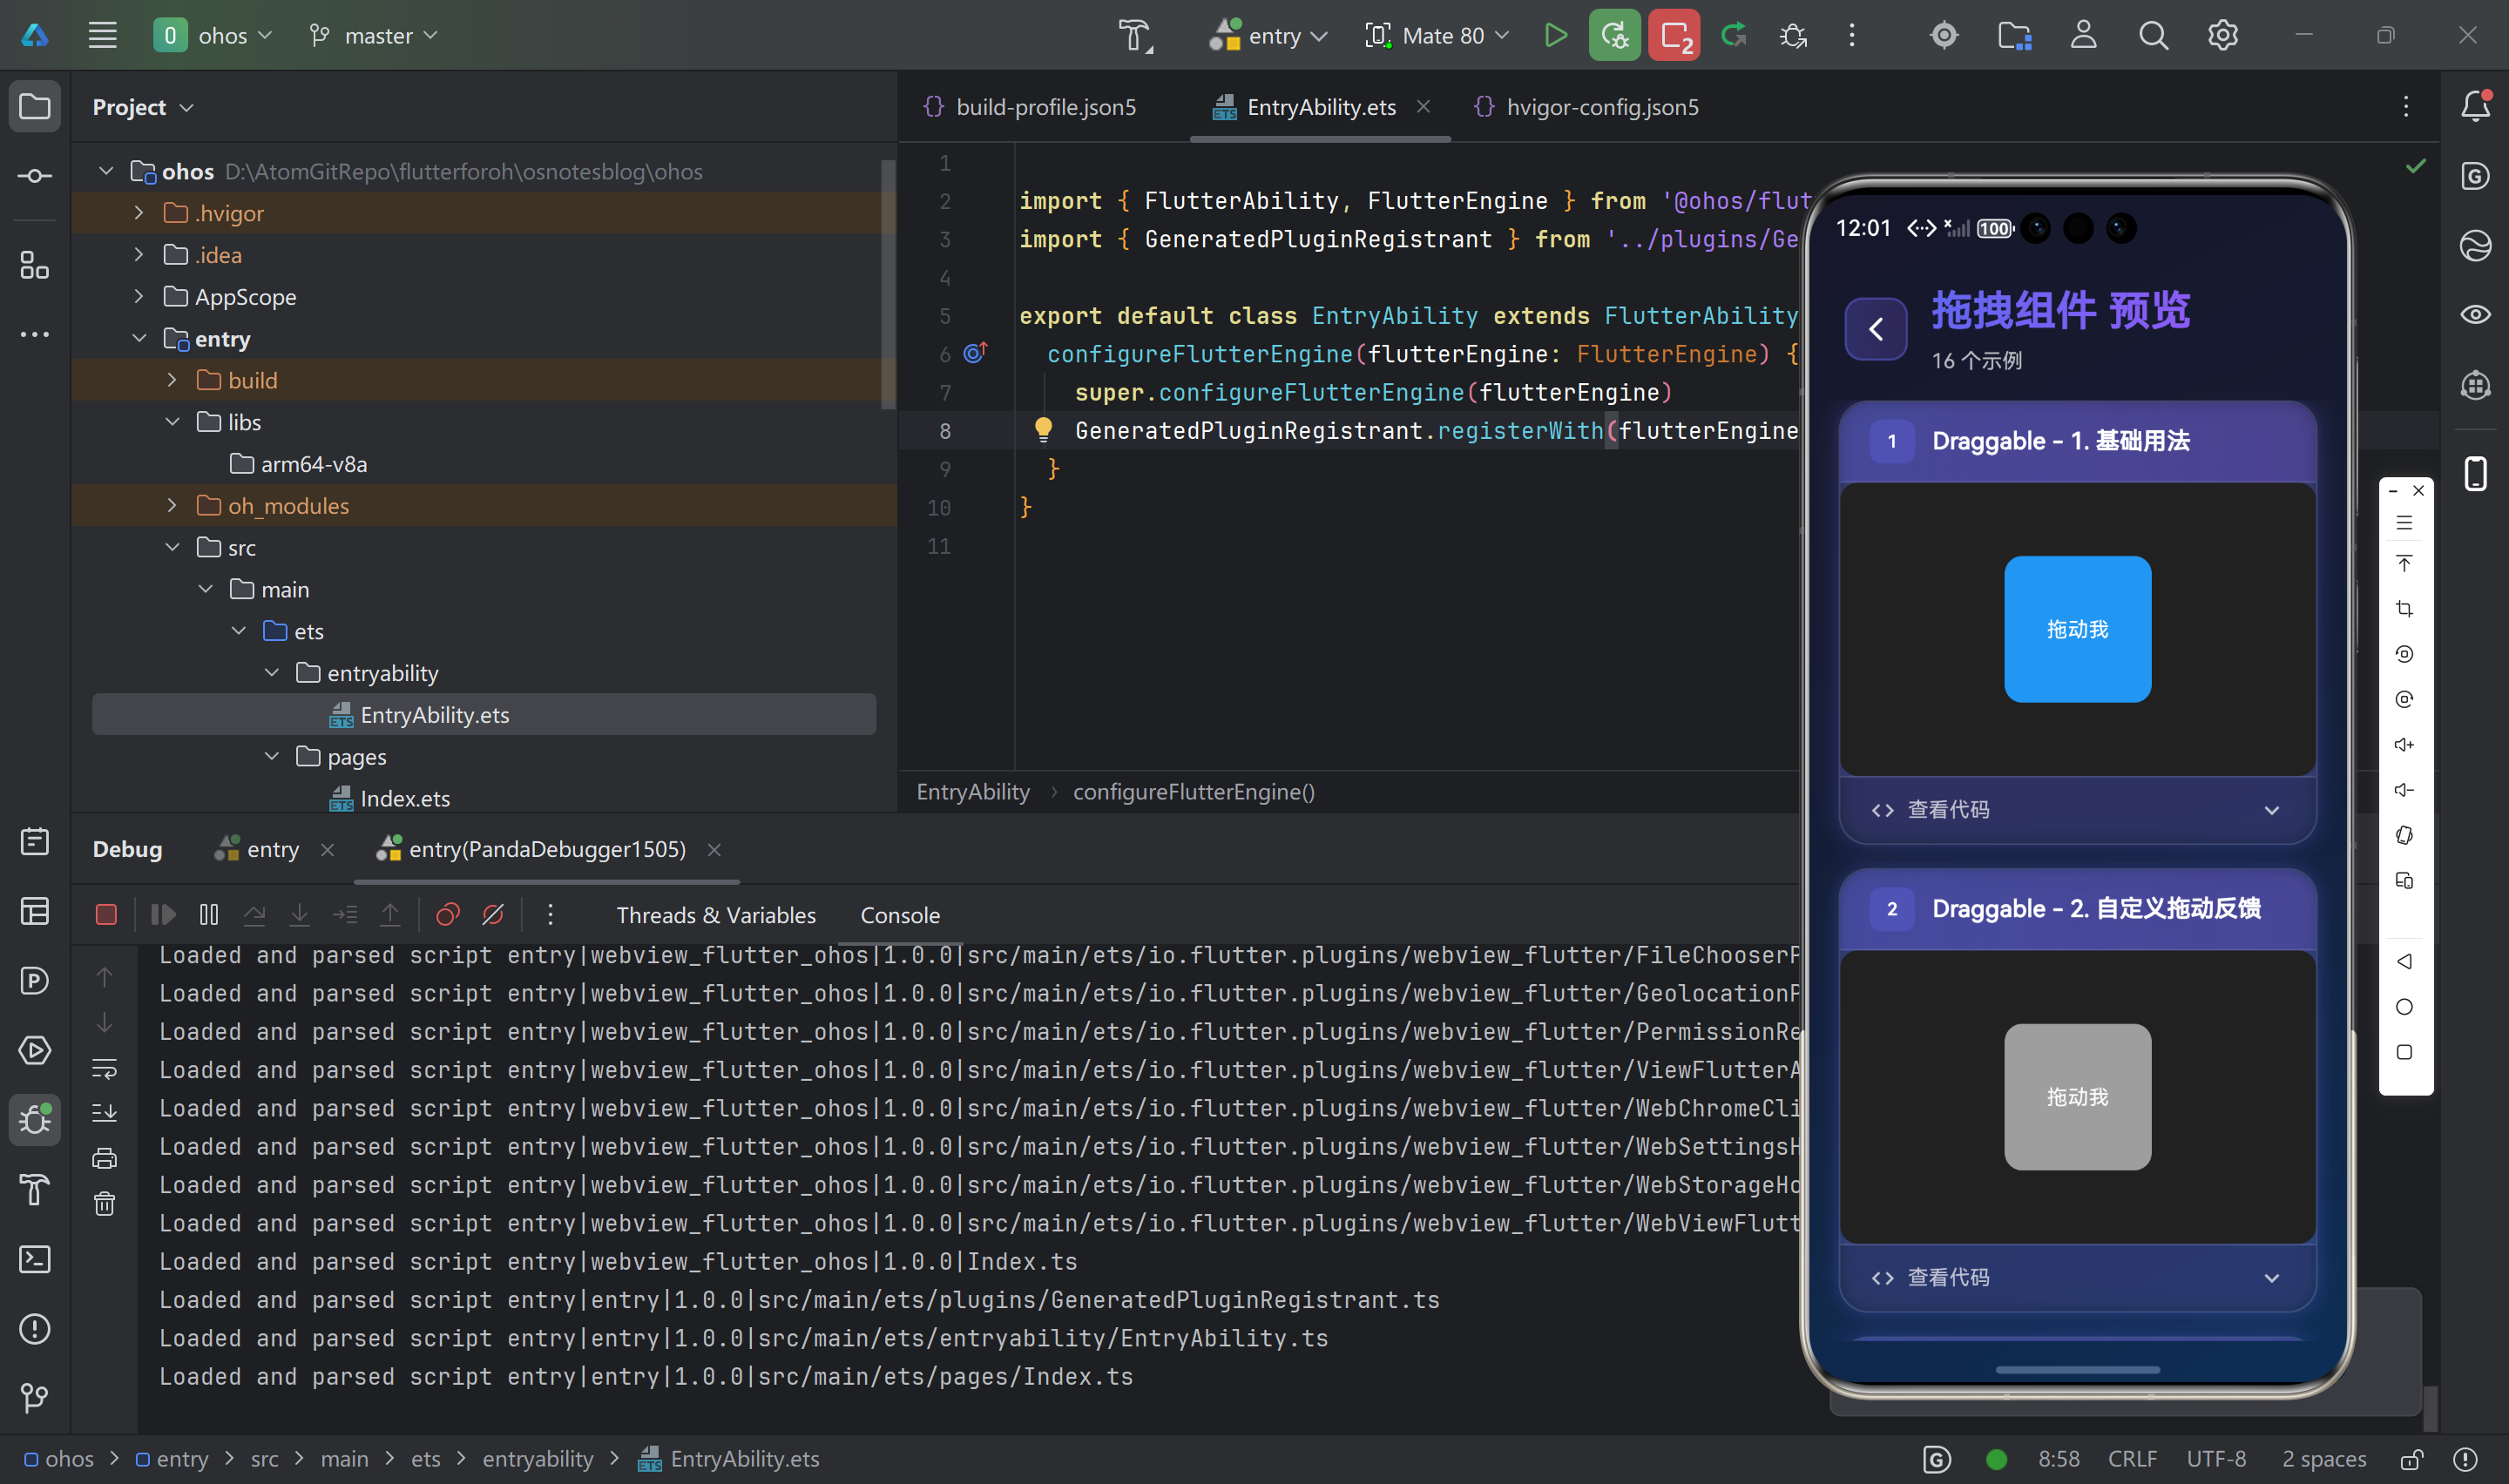
各种Flutter拖拽交互组件助力鸿蒙应用个性化
Flutter提供了丰富的拖拽交互组件,包括Draggable(基础拖动)、LongPressDraggable(长按拖动)和Dismissible(滑动删除)。Draggable支持自定义拖动反馈、占位符和方向限制;LongPressDraggable可防止误触;Dismissible能实现带确认提示的双向滑动删除功能。这些组件能有效提升移动应用的交互体验,适用于排序、删除等常见场景。
·
📖 前言
拖拽交互是现代移动应用中常见的交互方式,能够提供直观、流畅的用户体验。Flutter 提供了丰富的拖拽组件,包括 Draggable、LongPressDraggable、Dismissible 等,能够实现拖放、滑动删除、长按拖动等功能。
🎯 拖拽组件概览
Flutter 提供了以下拖拽组件:
| 组件名 | 功能说明 | 适用场景 |
|---|---|---|
Draggable |
可拖动组件 | 拖放操作、排序 |
LongPressDraggable |
长按拖动 | 需要长按才能拖动 |
Dismissible |
滑动删除 | 列表项删除、卡片删除 |
DragTarget |
拖放目标 | 接收拖放的数据 |
🎯 Draggable 组件
Draggable 允许用户拖动组件,通常与 DragTarget 配合使用实现拖放功能。
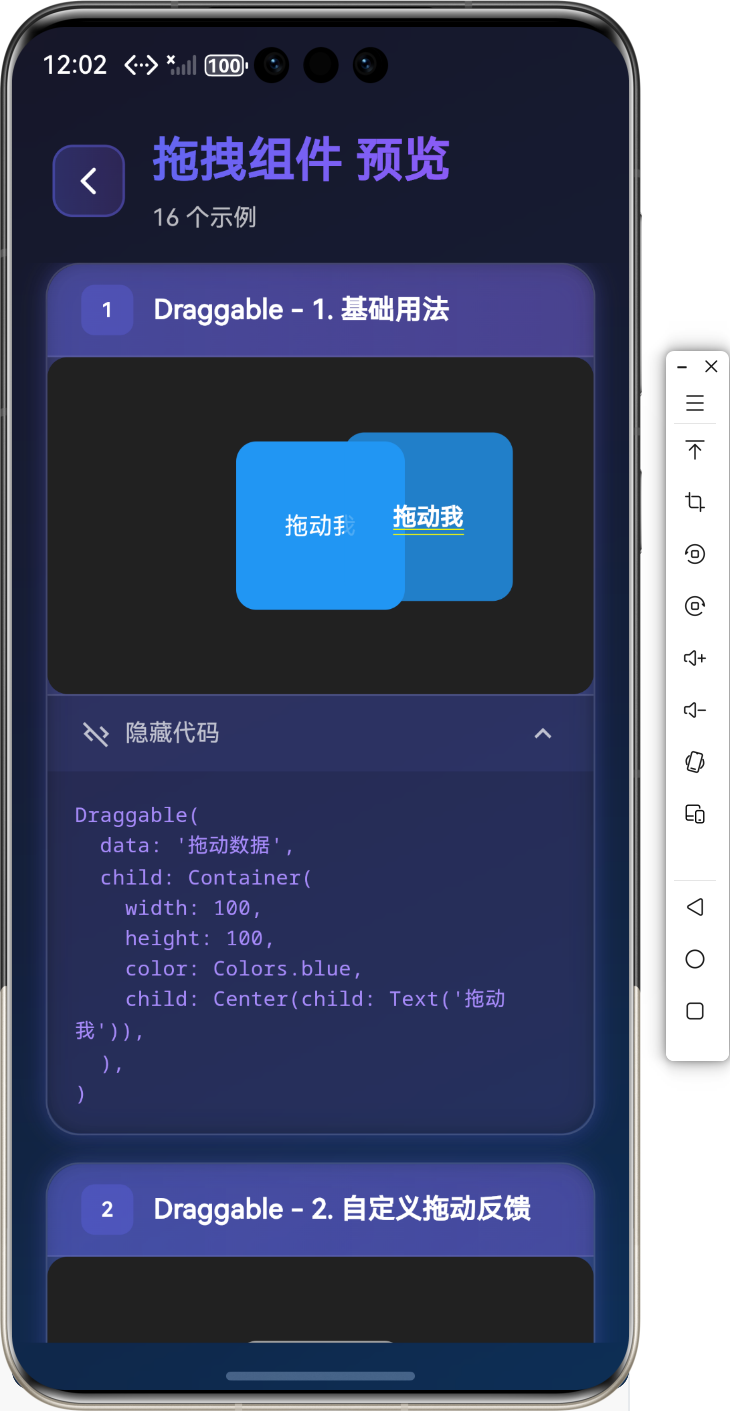
基础用法
Draggable(
  data: '拖动数据',
  child: Container(
    width: 100,
    height: 100,
    color: Colors.blue,
    child: Center(child: Text('拖动我')),
  ),
)
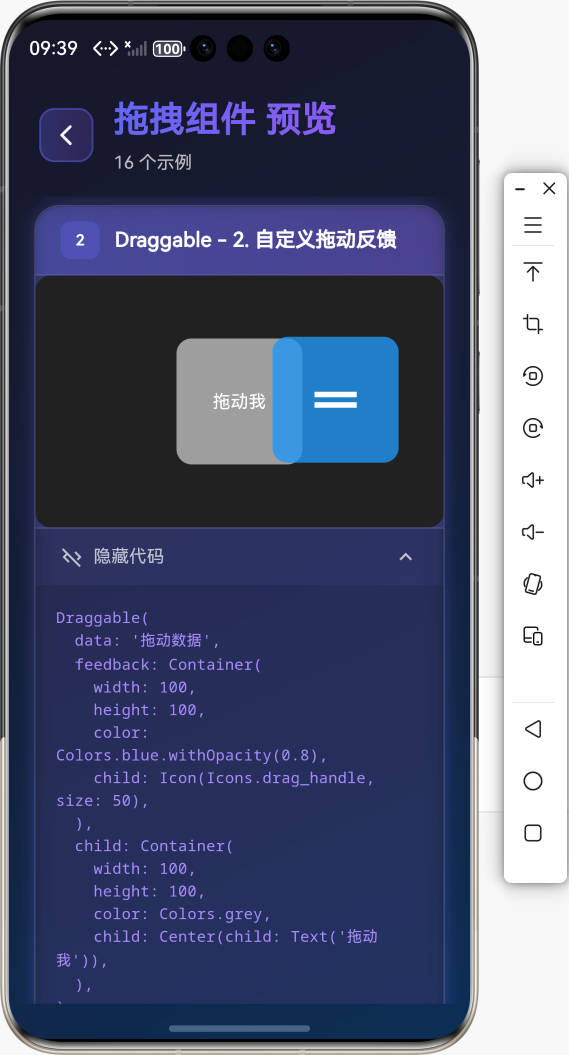
自定义拖动反馈
Draggable(
  data: '拖动数据',
  feedback: Container(
    width: 100,
    height: 100,
    color: Colors.blue.withOpacity(0.8),
    child: Icon(Icons.drag_handle, size: 50),
  ),
  child: Container(
    width: 100,
    height: 100,
    color: Colors.grey,
    child: Center(child: Text('拖动我')),
  ),
)
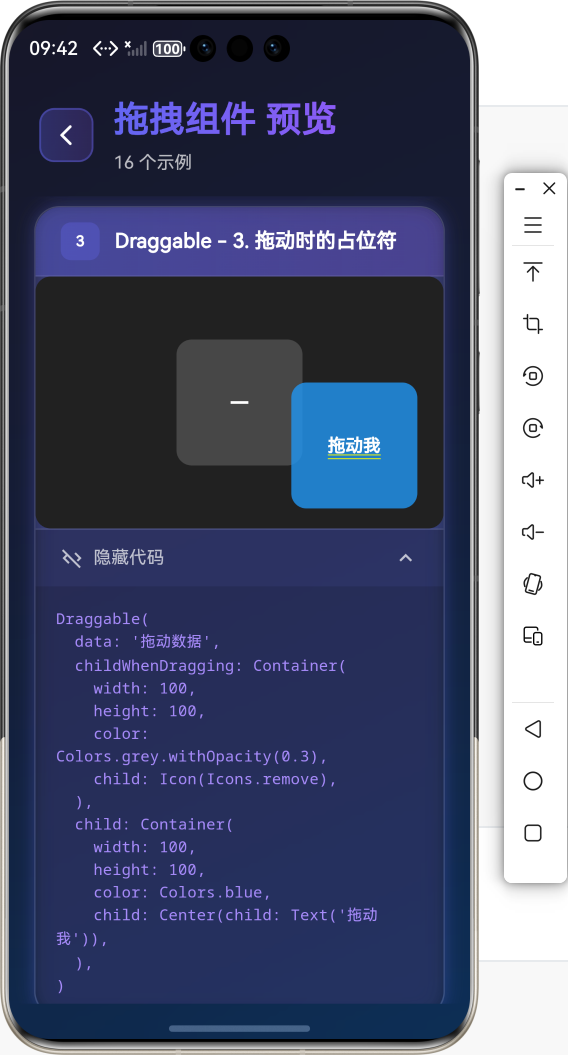
拖动时的占位符
Draggable(
  data: '拖动数据',
  childWhenDragging: Container(
    width: 100,
    height: 100,
    color: Colors.grey.withOpacity(0.3),
    child: Icon(Icons.remove),
  ),
  child: Container(
    width: 100,
    height: 100,
    color: Colors.blue,
    child: Center(child: Text('拖动我')),
  ),
)
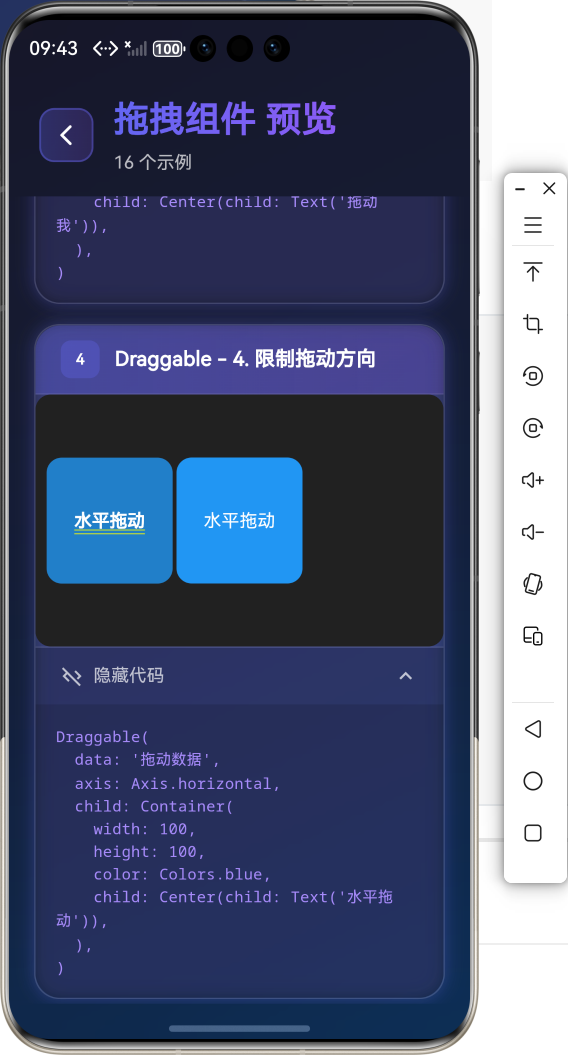
限制拖动方向
Draggable(
  data: '拖动数据',
  axis: Axis.horizontal,  // 只能水平拖动
  child: Container(
    width: 100,
    height: 100,
    color: Colors.blue,
    child: Center(child: Text('水平拖动')),
  ),
)
👆 LongPressDraggable 组件
LongPressDraggable 需要长按才能拖动,适合需要避免误触的场景。
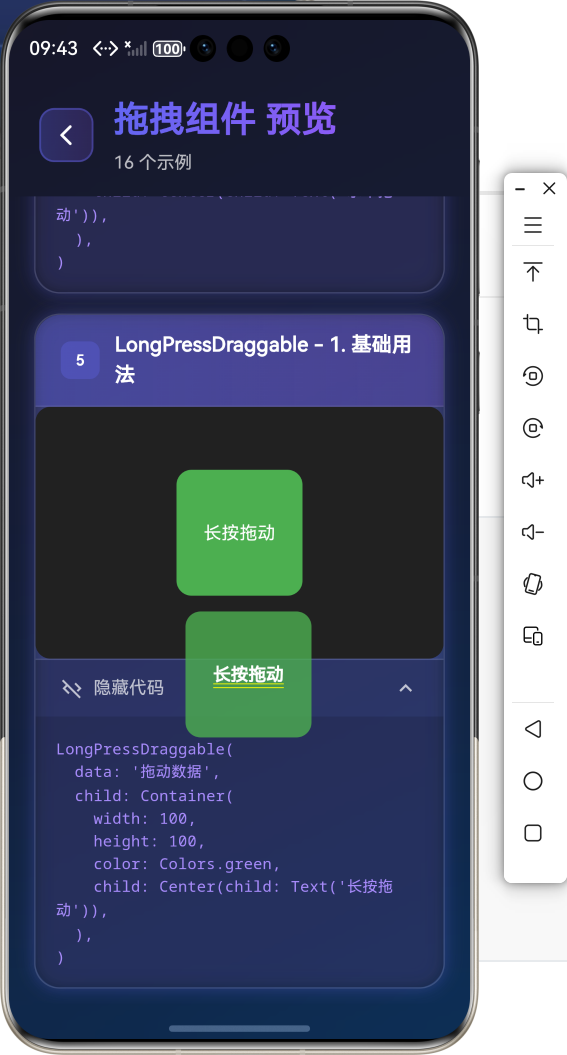
基础用法
LongPressDraggable(
  data: '拖动数据',
  child: Container(
    width: 100,
    height: 100,
    color: Colors.green,
    child: Center(child: Text('长按拖动')),
  ),
)
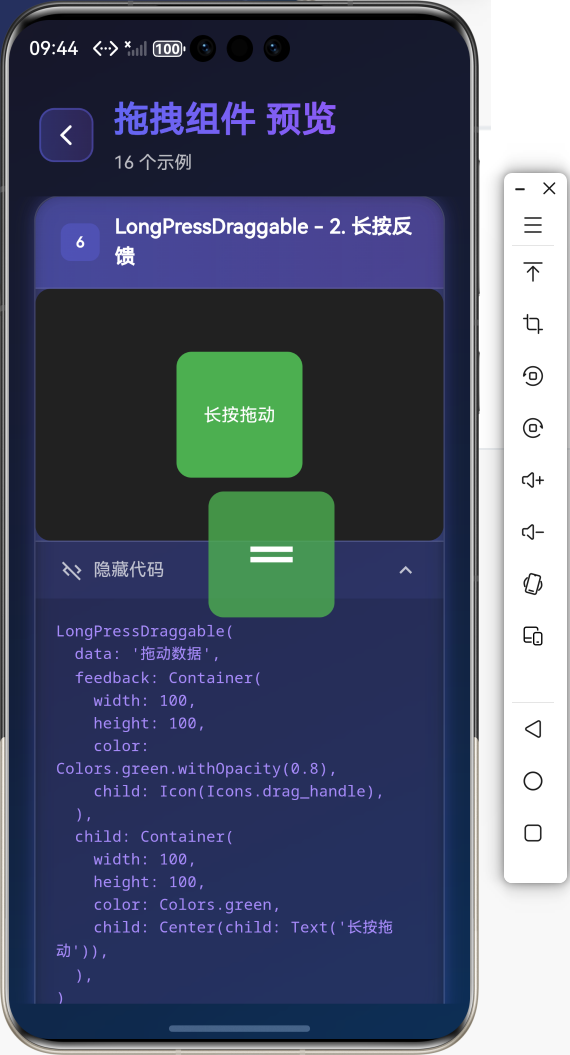
长按反馈
LongPressDraggable(
  data: '拖动数据',
  feedback: Container(
    width: 100,
    height: 100,
    color: Colors.green.withOpacity(0.8),
    child: Icon(Icons.drag_handle),
  ),
  child: Container(
    width: 100,
    height: 100,
    color: Colors.green,
    child: Center(child: Text('长按拖动')),
  ),
)
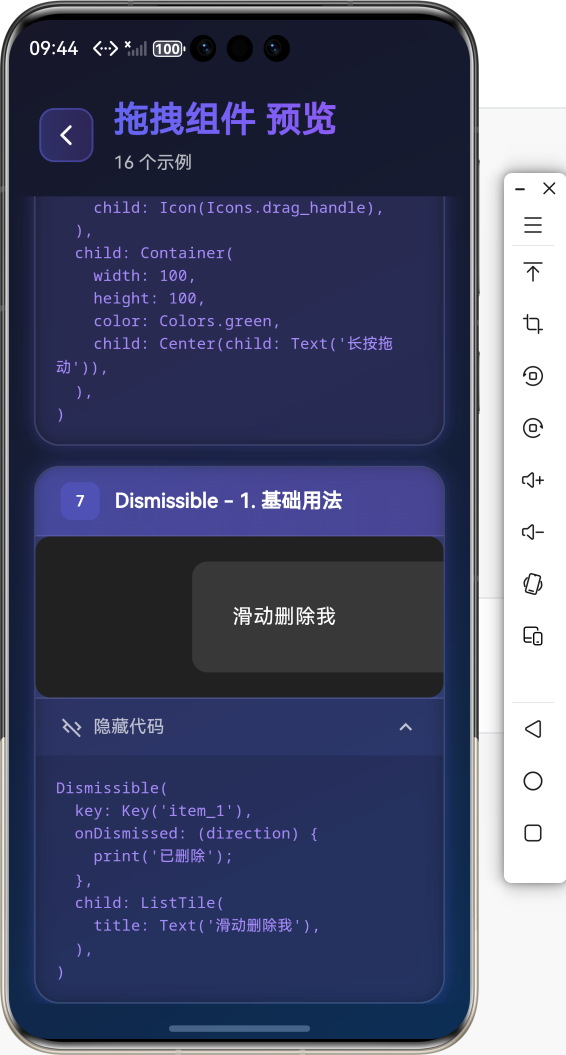
🗑️ Dismissible 组件
Dismissible 用于实现滑动删除功能,常用于列表项。
基础用法
Dismissible(
  key: Key('item_1'),
  onDismissed: (direction) {
    // 删除操作
    print('已删除');
  },
  child: ListTile(
    title: Text('滑动删除我'),
  ),
)
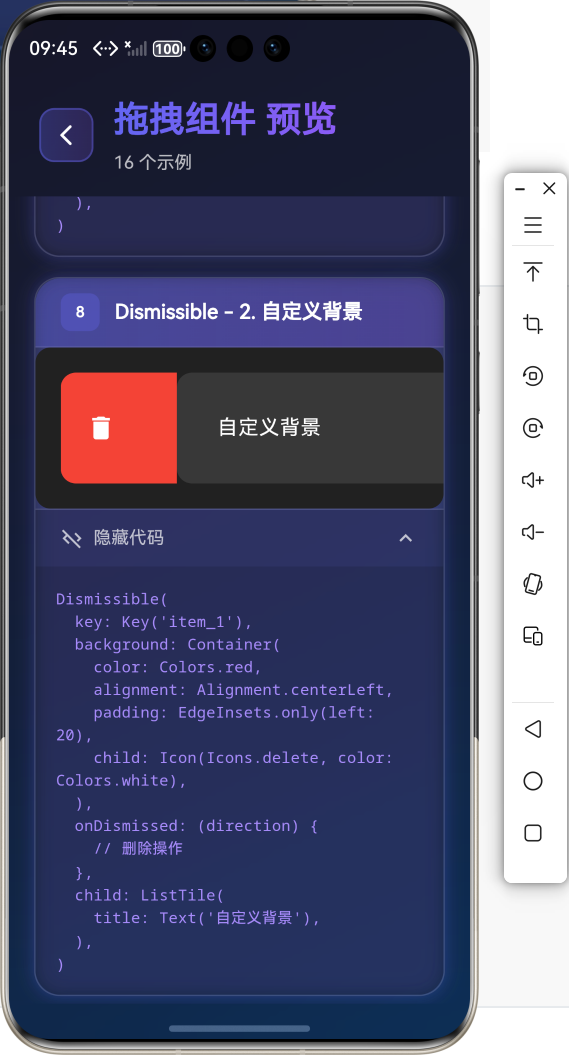
自定义背景
Dismissible(
  key: Key('item_1'),
  background: Container(
    color: Colors.red,
    alignment: Alignment.centerLeft,
    padding: EdgeInsets.only(left: 20),
    child: Icon(Icons.delete, color: Colors.white),
  ),
  onDismissed: (direction) {
    // 删除操作
  },
  child: ListTile(
    title: Text('自定义背景'),
  ),
)
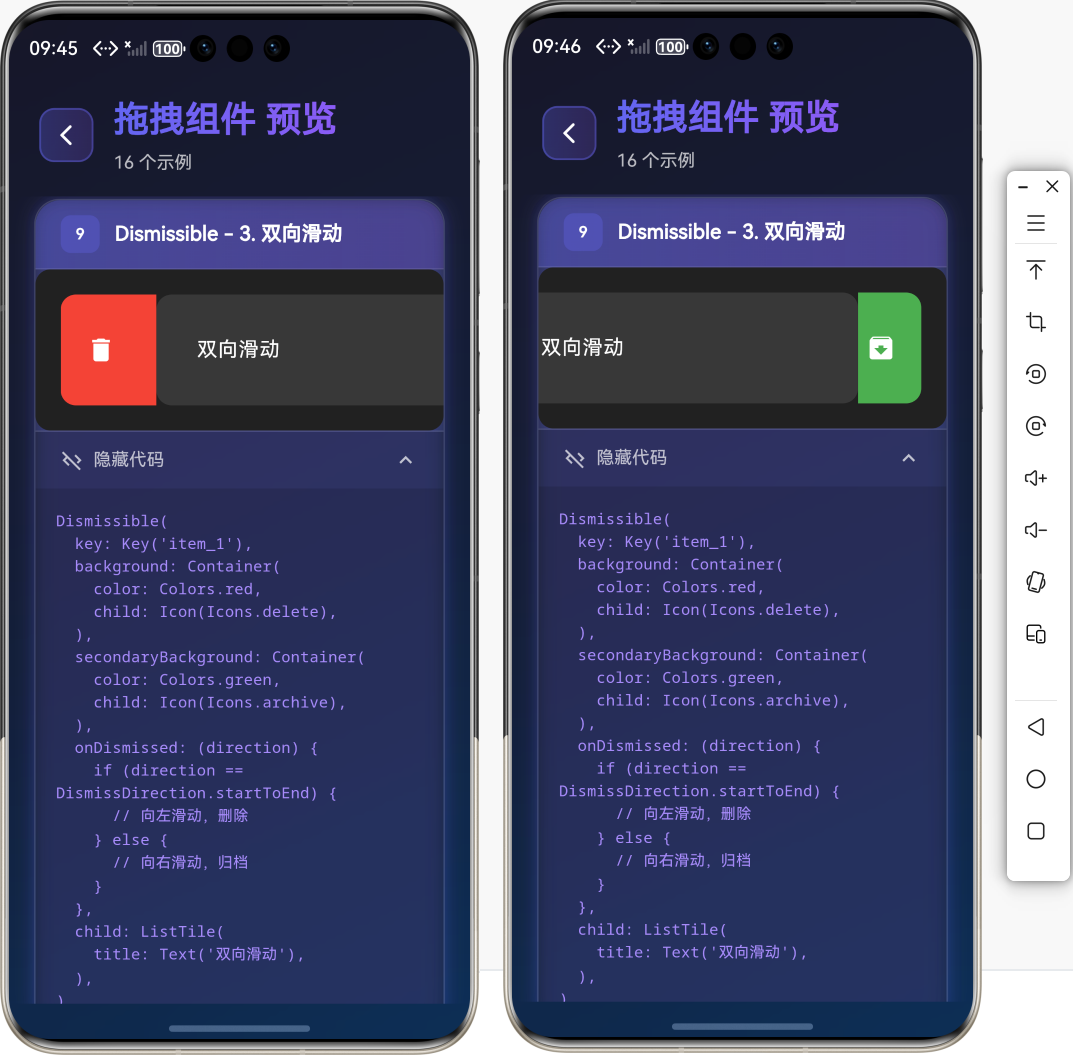
双向滑动
Dismissible(
  key: Key('item_1'),
  background: Container(
    color: Colors.red,
    child: Icon(Icons.delete),
  ),
  secondaryBackground: Container(
    color: Colors.green,
    child: Icon(Icons.archive),
  ),
  onDismissed: (direction) {
    if (direction == DismissDirection.startToEnd) {
      // 向左滑动,删除
    } else {
      // 向右滑动,归档
    }
  },
  child: ListTile(
    title: Text('双向滑动'),
  ),
)
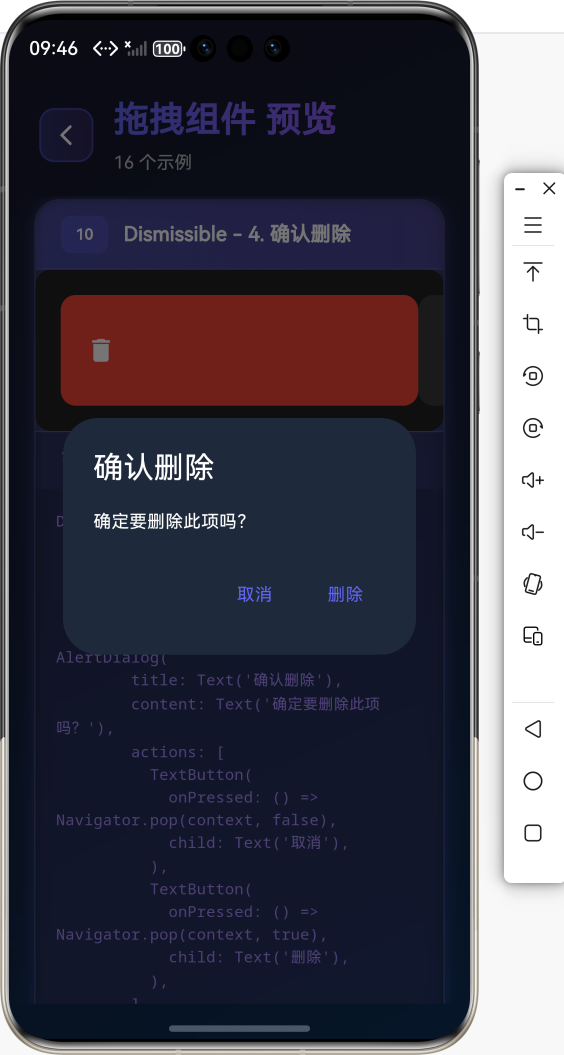
确认删除
Dismissible(
  key: Key('item_1'),
  confirmDismiss: (direction) async {
    return await showDialog(
      context: context,
      builder: (context) => AlertDialog(
        title: Text('确认删除'),
        content: Text('确定要删除此项吗?'),
        actions: [
          TextButton(
            onPressed: () => Navigator.pop(context, false),
            child: Text('取消'),
          ),
          TextButton(
            onPressed: () => Navigator.pop(context, true),
            child: Text('删除'),
          ),
        ],
      ),
    );
  },
  onDismissed: (direction) {
    // 删除操作
  },
  child: ListTile(
    title: Text('需要确认的删除'),
  ),
)
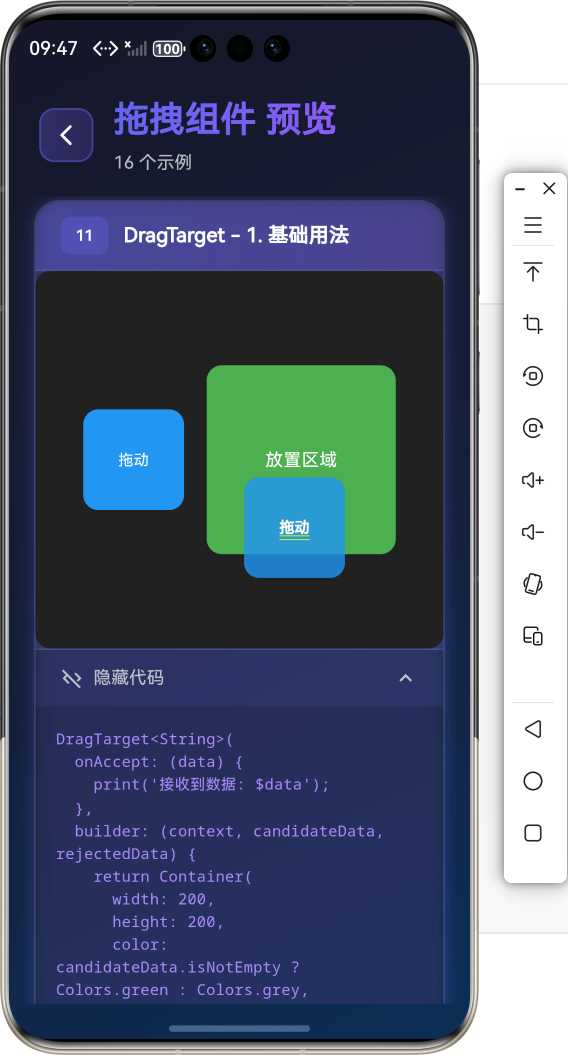
🎯 DragTarget 组件
DragTarget 是拖放目标,用于接收拖放的数据。
基础用法
DragTarget<String>(
  onAccept: (data) {
    print('接收到数据: $data');
  },
  builder: (context, candidateData, rejectedData) {
    return Container(
      width: 200,
      height: 200,
      color: candidateData.isNotEmpty ? Colors.green : Colors.grey,
      child: Center(child: Text('放置区域')),
    );
  },
)
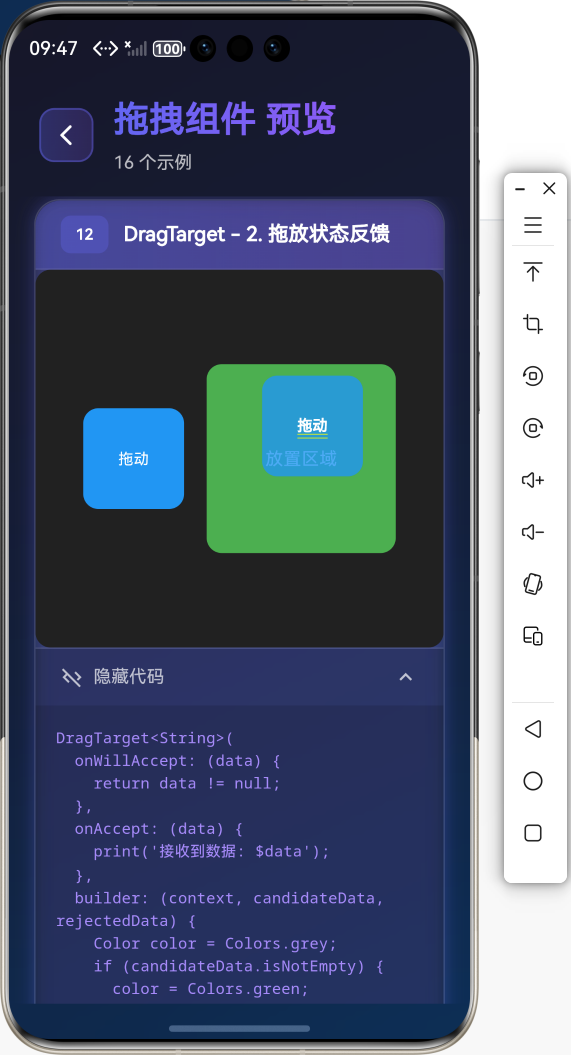
拖放状态反馈
DragTarget<String>(
  onWillAccept: (data) {
    return data != null;
  },
  onAccept: (data) {
    print('接收到数据: $data');
  },
  builder: (context, candidateData, rejectedData) {
    Color color = Colors.grey;
    if (candidateData.isNotEmpty) {
      color = Colors.green;
    } else if (rejectedData.isNotEmpty) {
      color = Colors.red;
    }

    return Container(
      width: 200,
      height: 200,
      color: color,
      child: Center(child: Text('放置区域')),
    );
  },
)
💡 实际应用场景
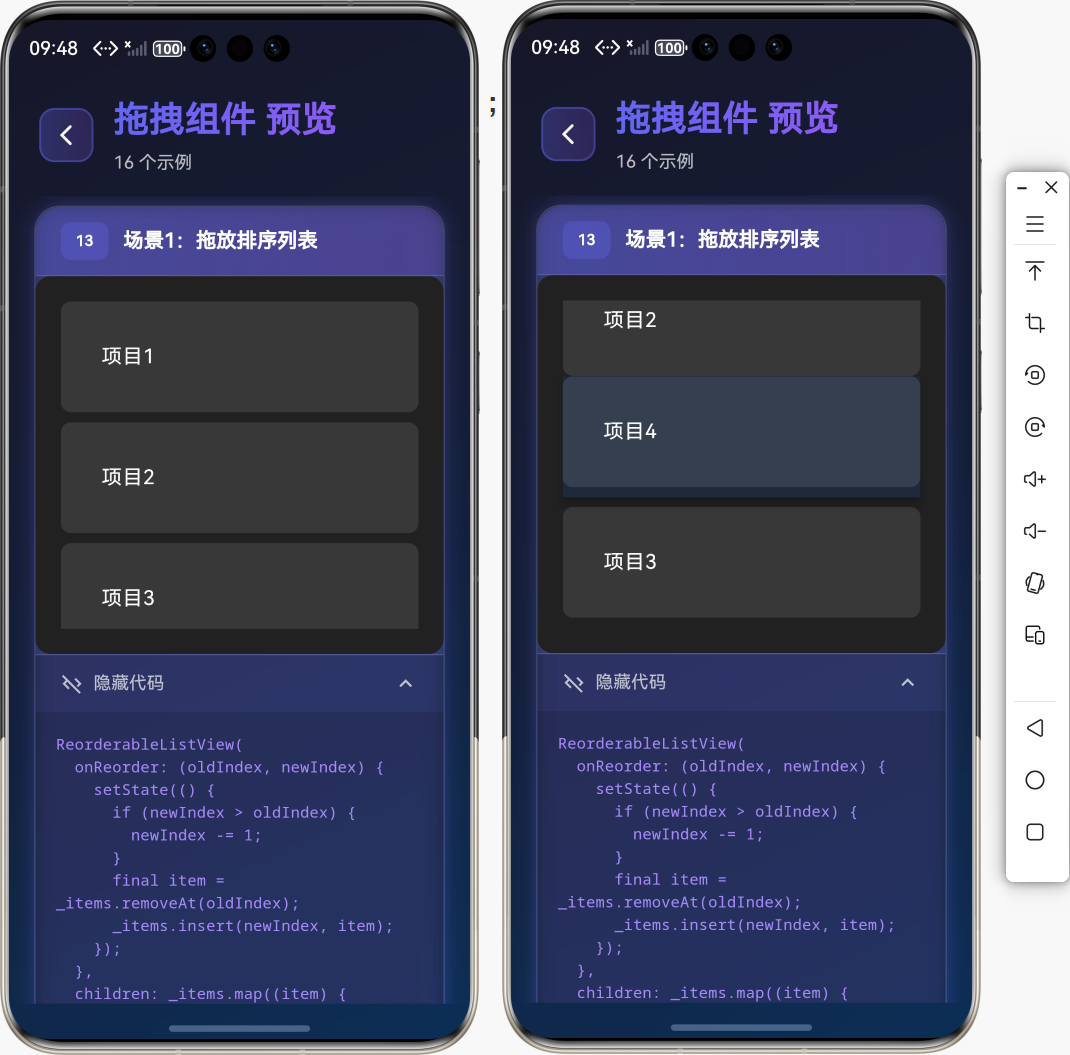
场景1:拖放排序列表
class DraggableList extends StatefulWidget {
_DraggableListState createState() => _DraggableListState();
}
class _DraggableListState extends State<DraggableList> {
List<String> _items = ['项目1', '项目2', '项目3', '项目4'];
Widget build(BuildContext context) {
return ReorderableListView(
onReorder: (oldIndex, newIndex) {
setState(() {
if (newIndex > oldIndex) {
newIndex -= 1;
}
final item = _items.removeAt(oldIndex);
_items.insert(newIndex, item);
});
},
children: _items.map((item) {
return ListTile(
key: Key(item),
title: Text(item),
);
}).toList(),
);
}
}
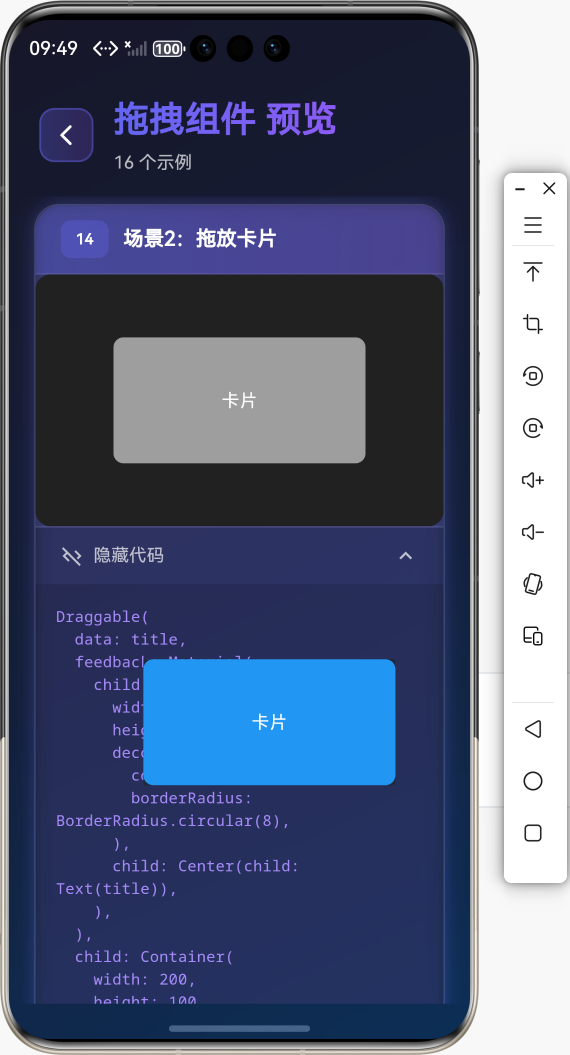
场景2:拖放卡片
class DragCard extends StatelessWidget {
final String title;
Widget build(BuildContext context) {
return Draggable(
data: title,
feedback: Material(
child: Container(
width: 200,
height: 100,
decoration: BoxDecoration(
color: Colors.blue,
borderRadius: BorderRadius.circular(8),
),
child: Center(child: Text(title)),
),
),
child: Container(
width: 200,
height: 100,
decoration: BoxDecoration(
color: Colors.grey,
borderRadius: BorderRadius.circular(8),
),
child: Center(child: Text(title)),
),
);
}
}
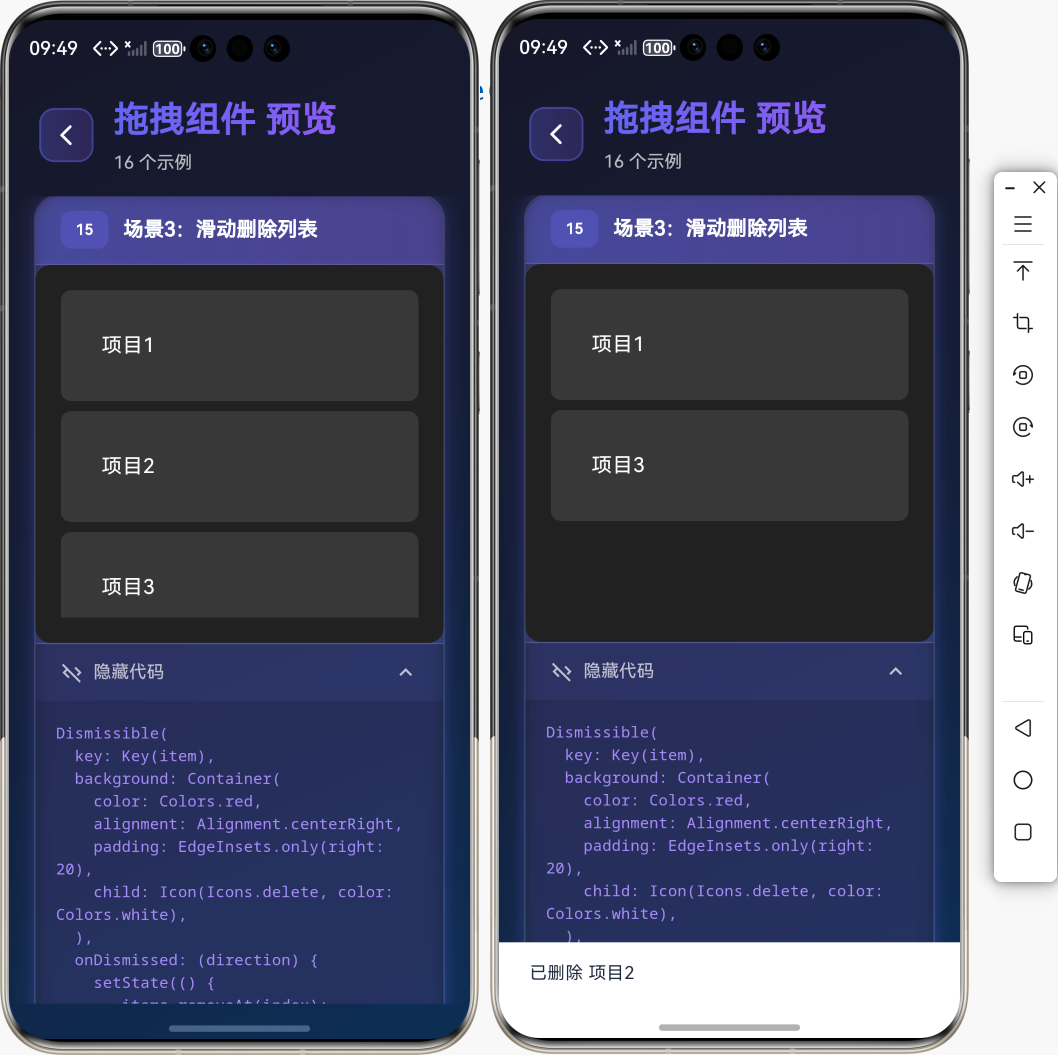
场景3:滑动删除列表
class SwipeableList extends StatefulWidget {
_SwipeableListState createState() => _SwipeableListState();
}
class _SwipeableListState extends State<SwipeableList> {
List<String> _items = ['项目1', '项目2', '项目3'];
Widget build(BuildContext context) {
return ListView.builder(
itemCount: _items.length,
itemBuilder: (context, index) {
final item = _items[index];
return Dismissible(
key: Key(item),
background: Container(
color: Colors.red,
alignment: Alignment.centerRight,
padding: EdgeInsets.only(right: 20),
child: Icon(Icons.delete, color: Colors.white),
),
onDismissed: (direction) {
setState(() {
_items.removeAt(index);
});
ScaffoldMessenger.of(context).showSnackBar(
SnackBar(content: Text('已删除 $item')),
);
},
child: ListTile(
title: Text(item),
),
);
},
);
}
}
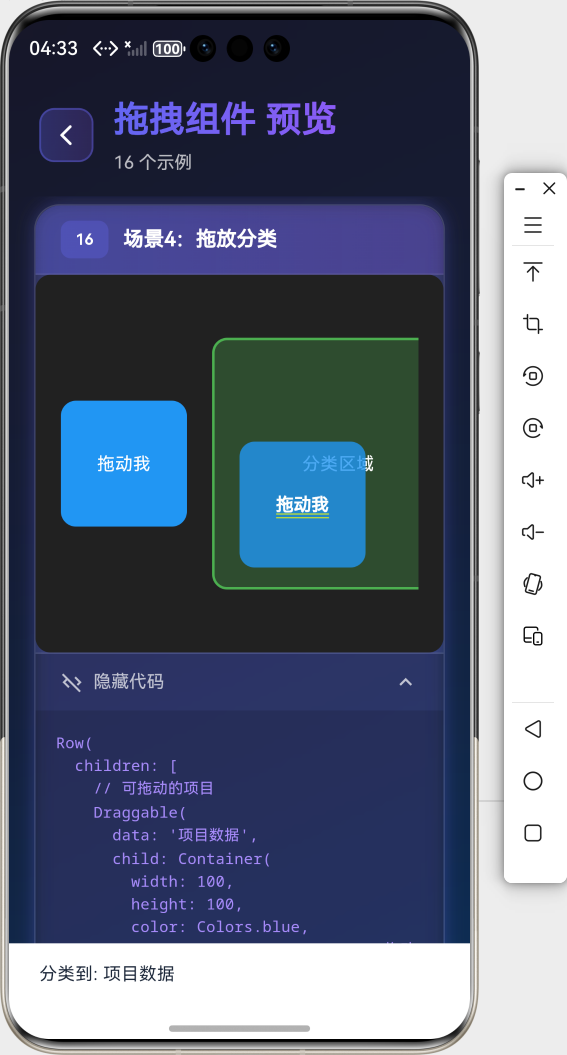
场景4:拖放分类
class DragCategory extends StatelessWidget {
Widget build(BuildContext context) {
return Row(
children: [
// 可拖动的项目
Draggable(
data: '项目数据',
child: Container(
width: 100,
height: 100,
color: Colors.blue,
child: Center(child: Text('拖动我')),
),
),
SizedBox(width: 50),
// 分类区域
DragTarget<String>(
onAccept: (data) {
print('分类到: $data');
},
builder: (context, candidateData, rejectedData) {
return Container(
width: 200,
height: 200,
decoration: BoxDecoration(
color: candidateData.isNotEmpty
? Colors.green.withOpacity(0.3)
: Colors.grey.withOpacity(0.1),
border: Border.all(
color: candidateData.isNotEmpty
? Colors.green
: Colors.grey,
width: 2,
),
),
child: Center(child: Text('分类区域')),
);
},
),
],
);
}
}
⚠️ 常见问题与解决方案
问题1:拖动时位置不准确
解决方案:
- 使用
feedback自定义拖动时的显示 - 确保
child和feedback的尺寸一致 - 使用
Transform调整拖动位置
问题2:Dismissible 删除后列表重建
解决方案:
- 确保每个
Dismissible有唯一的key - 在
onDismissed中正确更新列表 - 使用
setState更新状态
问题3:拖动冲突
解决方案:
- 使用
LongPressDraggable避免误触 - 设置合适的拖动阈值
- 使用
HitTestBehavior控制点击区域
💼 最佳实践
1. 拖放数据管理
class DragData {
  final String id;
  final String content;

  DragData({required this.id, required this.content});
}
2. 统一的拖放样式
class DragStyles {
  static Widget buildDragFeedback(String text) {
    return Material(
      child: Container(
        padding: EdgeInsets.all(16),
        decoration: BoxDecoration(
          color: Colors.blue,
          borderRadius: BorderRadius.circular(8),
        ),
        child: Text(text, style: TextStyle(color: Colors.white)),
      ),
    );
  }

  static Widget buildDragTarget(
    BuildContext context,
    Function(String) onAccept,
  ) {
    return DragTarget<String>(
      onAccept: onAccept,
      builder: (context, candidateData, rejectedData) {
        return Container(
          decoration: BoxDecoration(
            color: candidateData.isNotEmpty
                ? Colors.green.withOpacity(0.2)
                : Colors.grey.withOpacity(0.1),
            border: Border.all(
              color: candidateData.isNotEmpty ? Colors.green : Colors.grey,
            ),
          ),
          child: Center(child: Text('放置区域')),
        );
      },
    );
  }
}
📚 总结
通过本教程,我们学习了:
- ✅
Draggable组件的拖动功能 - ✅
LongPressDraggable组件的长按拖动 - ✅
Dismissible组件的滑动删除 - ✅
DragTarget组件的拖放目标 - ✅ 实际应用场景和最佳实践
拖拽组件是 Flutter 应用中实现高级交互的重要组件,掌握好这些组件的用法,能够让你的应用交互更加丰富和流畅!
🔗 相关资源
Happy Coding! 🎨✨
欢迎加入开源鸿蒙跨平台社区

作为“人工智能6S店”的官方数字引擎,为AI开发者与企业提供一个覆盖软硬件全栈、一站式门户。
更多推荐


 4
4 0
0- 0


 已为社区贡献22条内容

所有评论(0)