
Flutter 框架跨平台鸿蒙开发——Image Widget缓存策略
合理的缓存策略能够在性能和存储空间之间找到平衡,为用户提供最佳的使用体验。通过合理使用内存缓存、磁盘缓存和预加载技术,可以显著提升图片加载速度,减少网络请求。记住要根据应用特点和用户习惯调整缓存策略,在性能和资源消耗之间找到最佳平衡点。
·
Image Widget缓存策略
概述
合理的缓存策略能够显著提升图片加载性能,减少网络请求次数。Flutter的Image组件结合flutter_cache_manager插件可以轻松实现图片缓存。正确的缓存策略在性能和存储空间之间找到最佳平衡。
缓存类型
| 缓存类型 | 适用场景 | 优点 | 缺点 | 实现方式 |
|---|---|---|---|---|
| 内存缓存 | 频繁访问的图片 | 速度快 | 占用内存 | AutomaticKeepAliveMixin |
| 磁盘缓存 | 不常变化的图片 | 持久化 | 占用存储 | flutter_cache_manager |
| 不缓存 | 临时性图片 | 节省空间 | 重复请求 | Image.network |
| 自定义缓存 | 特定需求 | 灵活性高 | 实现复杂 | 自定义CacheManager |
Flutter默认缓存机制
内存缓存
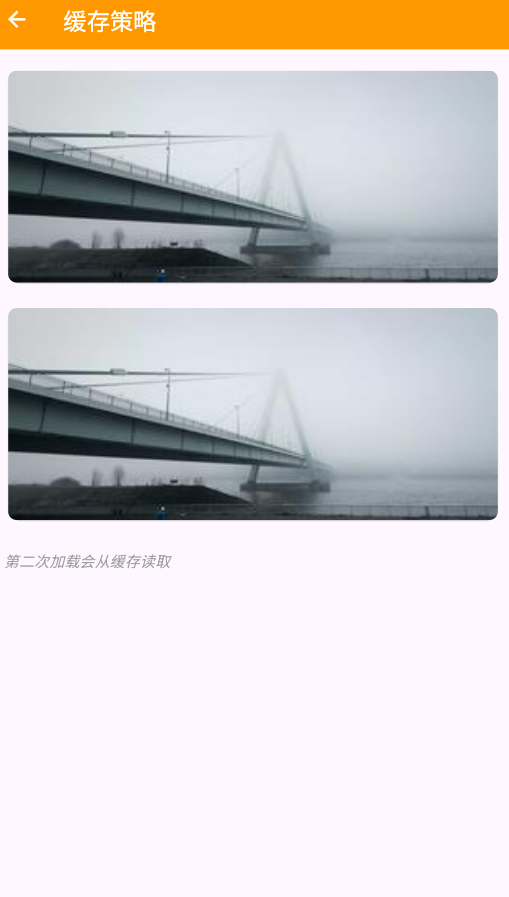
Flutter的Image组件会自动在内存中缓存已加载的图片:
// 相同的URL会自动从内存缓存读取
Image.network('https://example.com/image.jpg');
Image.network('https://example.com/image.jpg'); // 第二次会从缓存读取
磁盘缓存
使用cacheWidth和cacheHeight参数控制缓存图片的尺寸:
Image.network(
  'https://example.com/image.jpg',
  cacheWidth: 300,
  cacheHeight: 200,
)
缓存策略实现
1. 基础缓存控制
class CachedImage extends StatelessWidget {
final String imageUrl;
final int? maxWidth;
final int? maxHeight;
final bool enableCache;
const CachedImage({
super.key,
required this.imageUrl,
this.maxWidth,
this.maxHeight,
this.enableCache = true,
});
Widget build(BuildContext context) {
return Image.network(
imageUrl,
loadingBuilder: (context, child, loadingProgress) {
if (loadingProgress == null) {
return ClipRRect(
borderRadius: BorderRadius.circular(8),
child: child,
);
}
return _buildLoadingWidget();
},
errorBuilder: (context, error, stackTrace) {
return _buildErrorWidget();
},
fit: BoxFit.cover,
cacheWidth: enableCache ? maxWidth : null,
cacheHeight: enableCache ? maxHeight : null,
);
}
Widget _buildLoadingWidget() {
return Container(
decoration: BoxDecoration(
color: Colors.grey.shade200,
borderRadius: BorderRadius.circular(8),
),
child: const Center(
child: CircularProgressIndicator(),
),
);
}
Widget _buildErrorWidget() {
return Container(
decoration: BoxDecoration(
color: Colors.grey.shade300,
borderRadius: BorderRadius.circular(8),
),
child: const Center(
child: Column(
mainAxisAlignment: MainAxisAlignment.center,
children: [
Icon(Icons.error_outline, color: Colors.grey),
SizedBox(height: 8),
Text('加载失败', style: TextStyle(color: Colors.grey)),
],
),
),
);
}
}
2. 使用flutter_cache_manager
首先添加依赖:
dependencies:
  flutter:
    sdk: flutter
  flutter_cache_manager: ^3.3.1
实现带缓存的图片加载:
import 'package:flutter_cache_manager/flutter_cache_manager.dart';
class AdvancedCachedImage extends StatefulWidget {
final String imageUrl;
final int? maxWidth;
final int? maxHeight;
final Duration? cacheDuration;
final VoidCallback? onLoaded;
const AdvancedCachedImage({
super.key,
required this.imageUrl,
this.maxWidth,
this.maxHeight,
this.cacheDuration,
this.onLoaded,
});
State<AdvancedCachedImage> createState() => _AdvancedCachedImageState();
}
class _AdvancedCachedImageState extends State<AdvancedCachedImage> {
File? _cachedFile;
bool _isLoading = true;
bool _hasError = false;
void initState() {
super.initState();
_loadImage();
}
Future<void> _loadImage() async {
setState(() {
_isLoading = true;
_hasError = false;
});
try {
final cacheManager = CacheManager(
Config(
'custom_cache_key',
stalePeriod: widget.cacheDuration ?? const Duration(days: 7),
maxNrOfCacheObjects: 100,
),
);
final file = await cacheManager.getSingleFile(
widget.imageUrl,
);
if (mounted) {
setState(() {
_cachedFile = file;
_isLoading = false;
});
widget.onLoaded?.call();
}
} catch (e) {
debugPrint('图片加载失败: $e');
if (mounted) {
setState(() {
_hasError = true;
_isLoading = false;
});
}
}
}
void _clearCache() async {
final cacheManager = CacheManager(
Config(
'custom_cache_key',
stalePeriod: const Duration(days: 7),
),
);
await cacheManager.emptyCache();
_loadImage();
}
Widget build(BuildContext context) {
return Container(
height: 200,
child: switch (_isLoading, _hasError, _cachedFile) {
(true, _, _) => _buildLoadingWidget(),
(_, true, _) => _buildErrorWidget(),
(_, _, File file) => _buildImageWidget(file),
_ => const SizedBox(),
},
);
}
Widget _buildLoadingWidget() {
return Container(
decoration: BoxDecoration(
color: Colors.grey.shade200,
borderRadius: BorderRadius.circular(8),
),
child: const Center(
child: Column(
mainAxisAlignment: MainAxisAlignment.center,
children: [
CircularProgressIndicator(),
SizedBox(height: 8),
Text('从缓存加载...', style: TextStyle(color: Colors.grey)),
],
),
),
);
}
Widget _buildErrorWidget() {
return Container(
decoration: BoxDecoration(
color: Colors.grey.shade300,
borderRadius: BorderRadius.circular(8),
),
child: Center(
child: Column(
mainAxisAlignment: MainAxisAlignment.center,
children: [
const Icon(Icons.error_outline, color: Colors.red),
const SizedBox(height: 8),
const Text('加载失败', style: TextStyle(color: Colors.grey)),
const SizedBox(height: 8),
TextButton.icon(
onPressed: _loadImage,
icon: const Icon(Icons.refresh),
label: const Text('重试'),
),
TextButton.icon(
onPressed: _clearCache,
icon: const Icon(Icons.delete),
label: const Text('清除缓存'),
),
],
),
),
);
}
Widget _buildImageWidget(File file) {
return ClipRRect(
borderRadius: BorderRadius.circular(8),
child: Image.file(
file,
width: widget.maxWidth?.toDouble(),
height: widget.maxHeight?.toDouble(),
fit: BoxFit.cover,
),
);
}
}
3. 预加载缓存
class ImagePreloader {
  static final ImagePreloader _instance = ImagePreloader._internal();
  factory ImagePreloader() => _instance;
  ImagePreloader._internal();

  final Map<String, ImageProvider> _cache = {};

  Future<void> preloadImages(List<String> urls) async {
    for (final url in urls) {
      try {
        final imageProvider = NetworkImage(url);
        await precacheImage(imageProvider, navigatorKey.currentContext!);
        _cache[url] = imageProvider;
      } catch (e) {
        debugPrint('预加载失败: $url');
      }
    }
  }

  ImageProvider? getCachedImage(String url) {
    return _cache[url];
  }

  void clearCache() {
    _cache.clear();
  }
}
4. 智能缓存管理
class SmartCacheManager {
  static const _maxCacheSize = 50 * 1024 * 1024; // 50MB
  static const _maxCacheCount = 200;
  static const _cacheExpireDuration = Duration(days: 7);

  static final CacheManager _instance = CacheManager(
    Config(
      'smart_cache',
      stalePeriod: _cacheExpireDuration,
      maxNrOfCacheObjects: _maxCacheCount,
      repo: JsonCacheInfoRepository(databaseName: 'smart_cache'),
      fileService: HttpFileService(),
    ),
  );

  static Future<File> getImage(String url) async {
    try {
      return await _instance.getSingleFile(url);
    } catch (e) {
      debugPrint('获取缓存图片失败: $e');
      rethrow;
    }
  }

  static Future<void> clearOldCache() async {
    try {
      await _instance.emptyCache();
    } catch (e) {
      debugPrint('清理缓存失败: $e');
    }
  }

  static Future<FileInfo?> getCacheInfo(String url) async {
    try {
      return await _instance.getFileFromCache(url);
    } catch (e) {
      debugPrint('获取缓存信息失败: $e');
      return null;
    }
  }

  static Future<void> removeImage(String url) async {
    try {
      await _instance.removeFile(url);
    } catch (e) {
      debugPrint('删除缓存失败: $e');
    }
  }
}
使用示例
class MyPage extends StatefulWidget {
const MyPage({super.key});
State<MyPage> createState() => _MyPageState();
}
class _MyPageState extends State<MyPage> {
final List<String> _images = [
'https://picsum.photos/300/200?random=1',
'https://picsum.photos/300/200?random=2',
'https://picsum.photos/300/200?random=3',
'https://picsum.photos/300/200?random=4',
];
void initState() {
super.initState();
_preloadImages();
}
Future<void> _preloadImages() async {
await ImagePreloader().preloadImages(_images);
}
Widget build(BuildContext context) {
return Scaffold(
appBar: AppBar(
title: const Text('缓存策略示例'),
actions: [
IconButton(
icon: const Icon(Icons.delete_sweep),
onPressed: () {
SmartCacheManager.clearOldCache();
ScaffoldMessenger.of(context).showSnackBar(
const SnackBar(content: Text('缓存已清理')),
);
},
),
],
),
body: ListView.builder(
padding: const EdgeInsets.all(16),
itemCount: _images.length,
itemBuilder: (context, index) {
return Padding(
padding: const EdgeInsets.only(bottom: 16),
child: Column(
crossAxisAlignment: CrossAxisAlignment.start,
children: [
Text(
'图片 ${index + 1}',
style: const TextStyle(fontSize: 16, fontWeight: FontWeight.bold),
),
const SizedBox(height: 8),
AdvancedCachedImage(
imageUrl: _images[index],
maxWidth: 300,
maxHeight: 200,
cacheDuration: const Duration(days: 7),
),
],
),
);
},
),
);
}
}
缓存优化策略
1. 分级缓存
class HierarchicalCache {
  // 内存缓存(最快)
  final Map<String, Uint8List> _memoryCache = {};

  // 磁盘缓存(次快)
  final CacheManager _diskCache = CacheManager(
    Config('hierarchical_cache'),
  );

  Future<Uint8List?> getImage(String url) async {
    // 先查内存
    if (_memoryCache.containsKey(url)) {
      return _memoryCache[url];
    }

    // 再查磁盘
    try {
      final file = await _diskCache.getSingleFile(url);
      final bytes = await file.readAsBytes();

      // 存入内存
      _memoryCache[url] = bytes;
      return bytes;
    } catch (e) {
      debugPrint('加载失败: $e');
      return null;
    }
  }

  void clearMemoryCache() {
    _memoryCache.clear();
  }
}
2. LRU缓存策略
class LRUCache<K, V> {
  final LinkedHashMap<K, V> _cache = LinkedHashMap();
  final int maxSize;

  LRUCache({required this.maxSize});

  V? get(K key) {
    final value = _cache.remove(key);
    if (value != null) {
      _cache[key] = value; // 移到末尾(最近使用)
    }
    return value;
  }

  void put(K key, V value) {
    if (_cache.containsKey(key)) {
      _cache.remove(key);
    } else if (_cache.length >= maxSize) {
      _cache.remove(_cache.keys.first); // 移除最久未使用的
    }
    _cache[key] = value;
  }

  void clear() {
    _cache.clear();
  }
}
最佳实践
- 合理的缓存时间:根据图片更新频率设置缓存时间
- 控制缓存大小:避免占用过多存储空间
- 定期清理:定期清理过期和未使用的缓存
- 预加载关键图片:提前加载重要图片提升体验
- 错误处理:缓存失败时降级到网络加载
- 内存管理:及时清理内存缓存,避免内存泄漏
- 监控缓存效果:跟踪缓存命中率,优化策略
总结
合理的缓存策略能够在性能和存储空间之间找到平衡,为用户提供最佳的使用体验。通过合理使用内存缓存、磁盘缓存和预加载技术,可以显著提升图片加载速度,减少网络请求。记住要根据应用特点和用户习惯调整缓存策略,在性能和资源消耗之间找到最佳平衡点。
欢迎加入开源鸿蒙跨平台社区:https://openharmonycrossplatform.csdn.net

作为“人工智能6S店”的官方数字引擎,为AI开发者与企业提供一个覆盖软硬件全栈、一站式门户。
更多推荐

 3
3 0
0- 0


 已为社区贡献17条内容

所有评论(0)