
Flutter从创项目到流体梯度网格实际效果-HAP包全流程(必看FAQ详细说明)
本文介绍了如何在鸿蒙系统上创建和运行Flutter项目。首先通过命令flutter create --platforms ohos创建鸿蒙原生项目,然后使用DevEco Studio打开项目并配置签名。文章详细说明了代码修改位置(lib下的dart文件),并提供了一个炫丽的流体梯度网格背景欢迎页示例代码。最后讲解了项目运行和打包流程,包括关闭安全防护工具等注意事项。全文为初学者提供了一套完整的Fl
前言
本篇文章给初学Flutter的程序员们准备的,fluter环境可以参考白老师的文章,超级细致https://blog.csdn.net/2301_80035882/article/details/155001657 ,所以我并没从初始环境搭建开始,从fluuter的创建与运行开始,这样可以发挥白老师这篇文章最大的价值。
正文的过程是创建项目、虚拟机运行项目、项目打包的过程,希望能给大家一套完整的提示。
前提条件
我所有的操作都使用的是 Windows PowerShell 管理员权限启动的对话框,让我们的操作拥有最高的权限。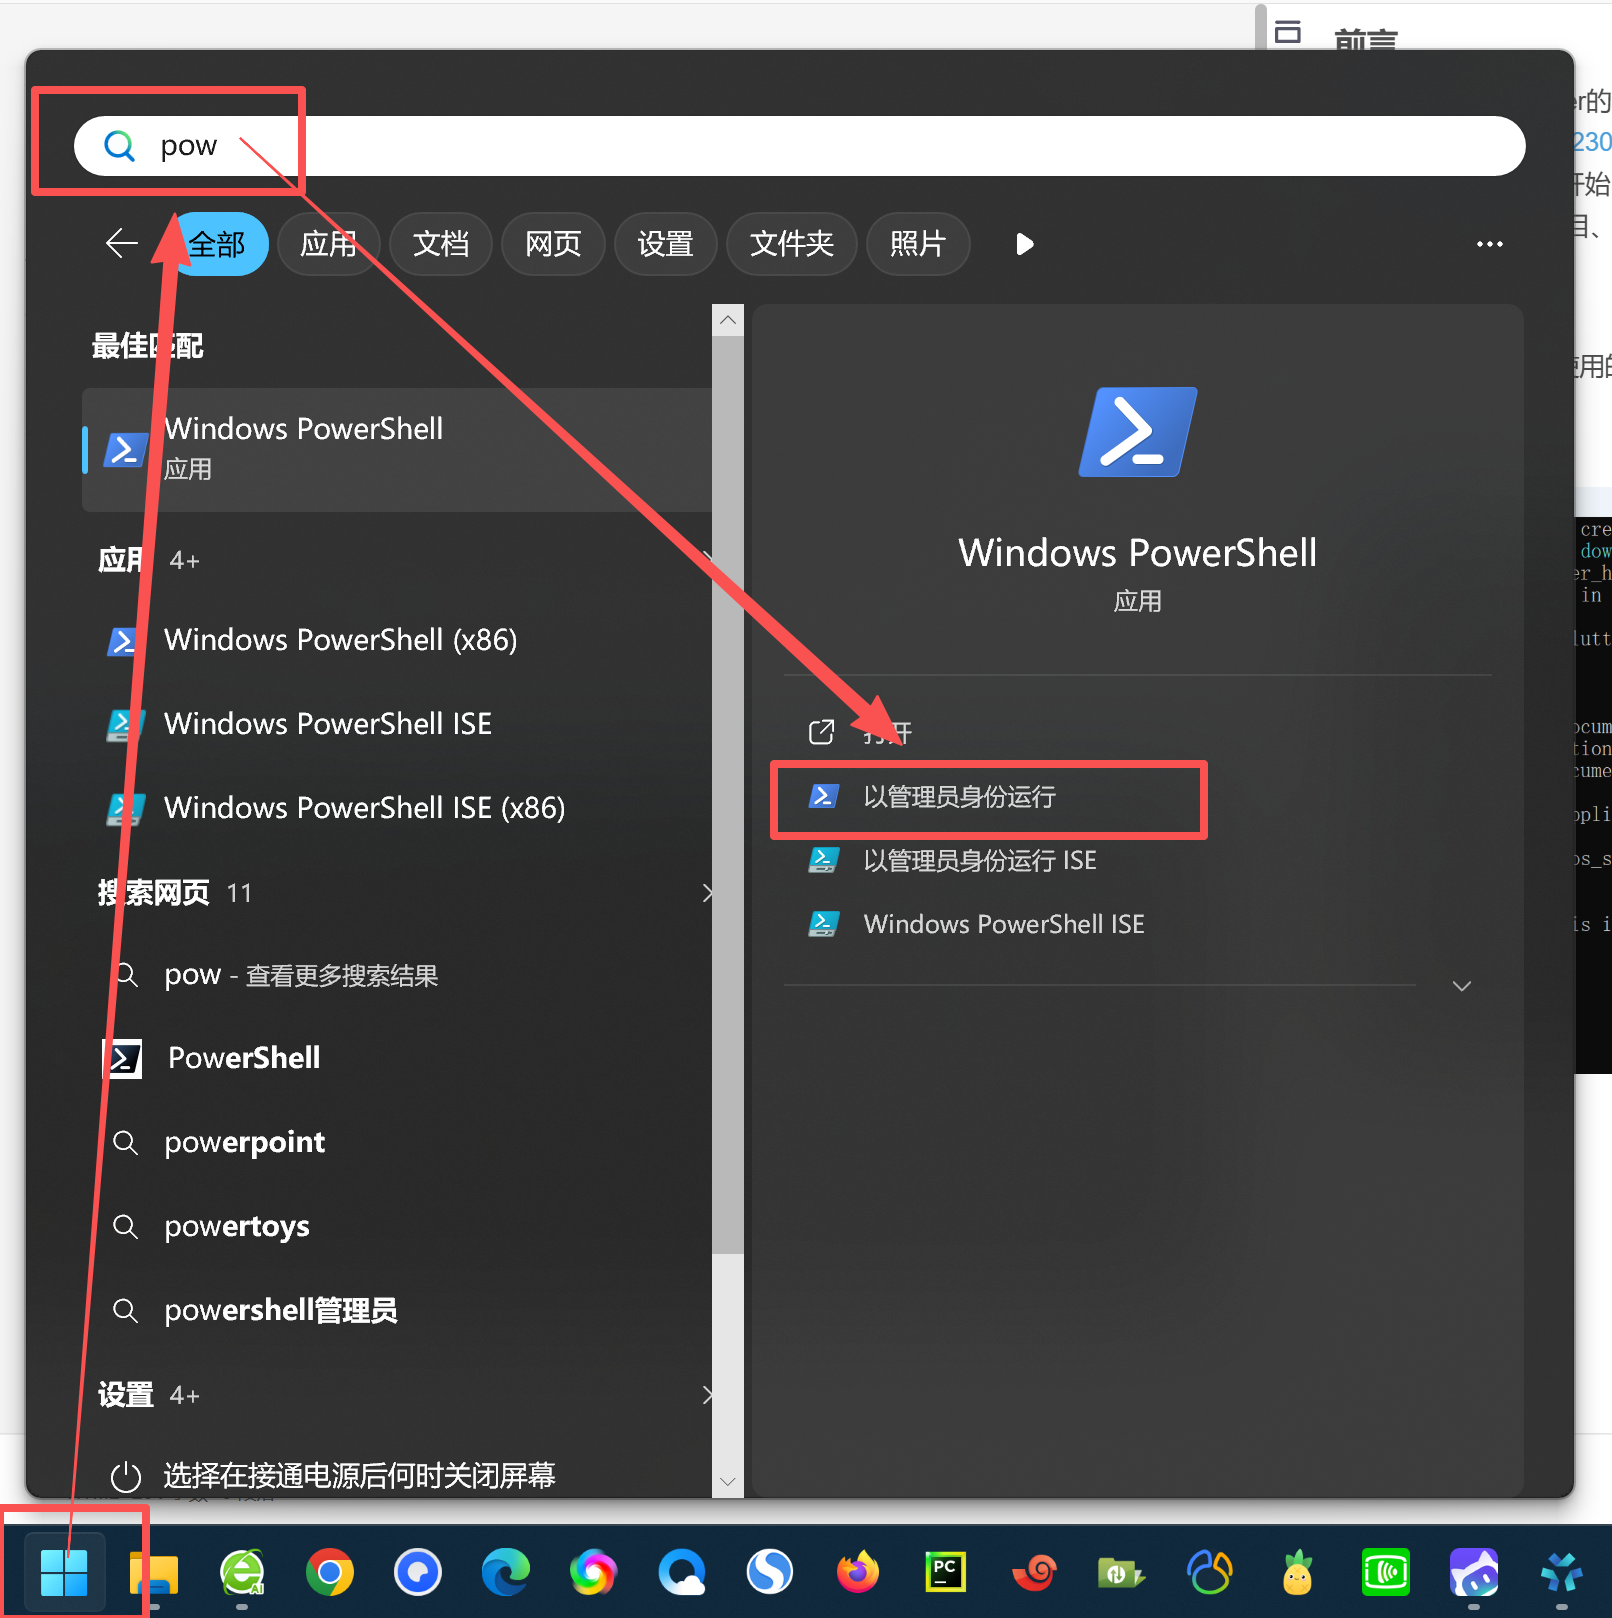
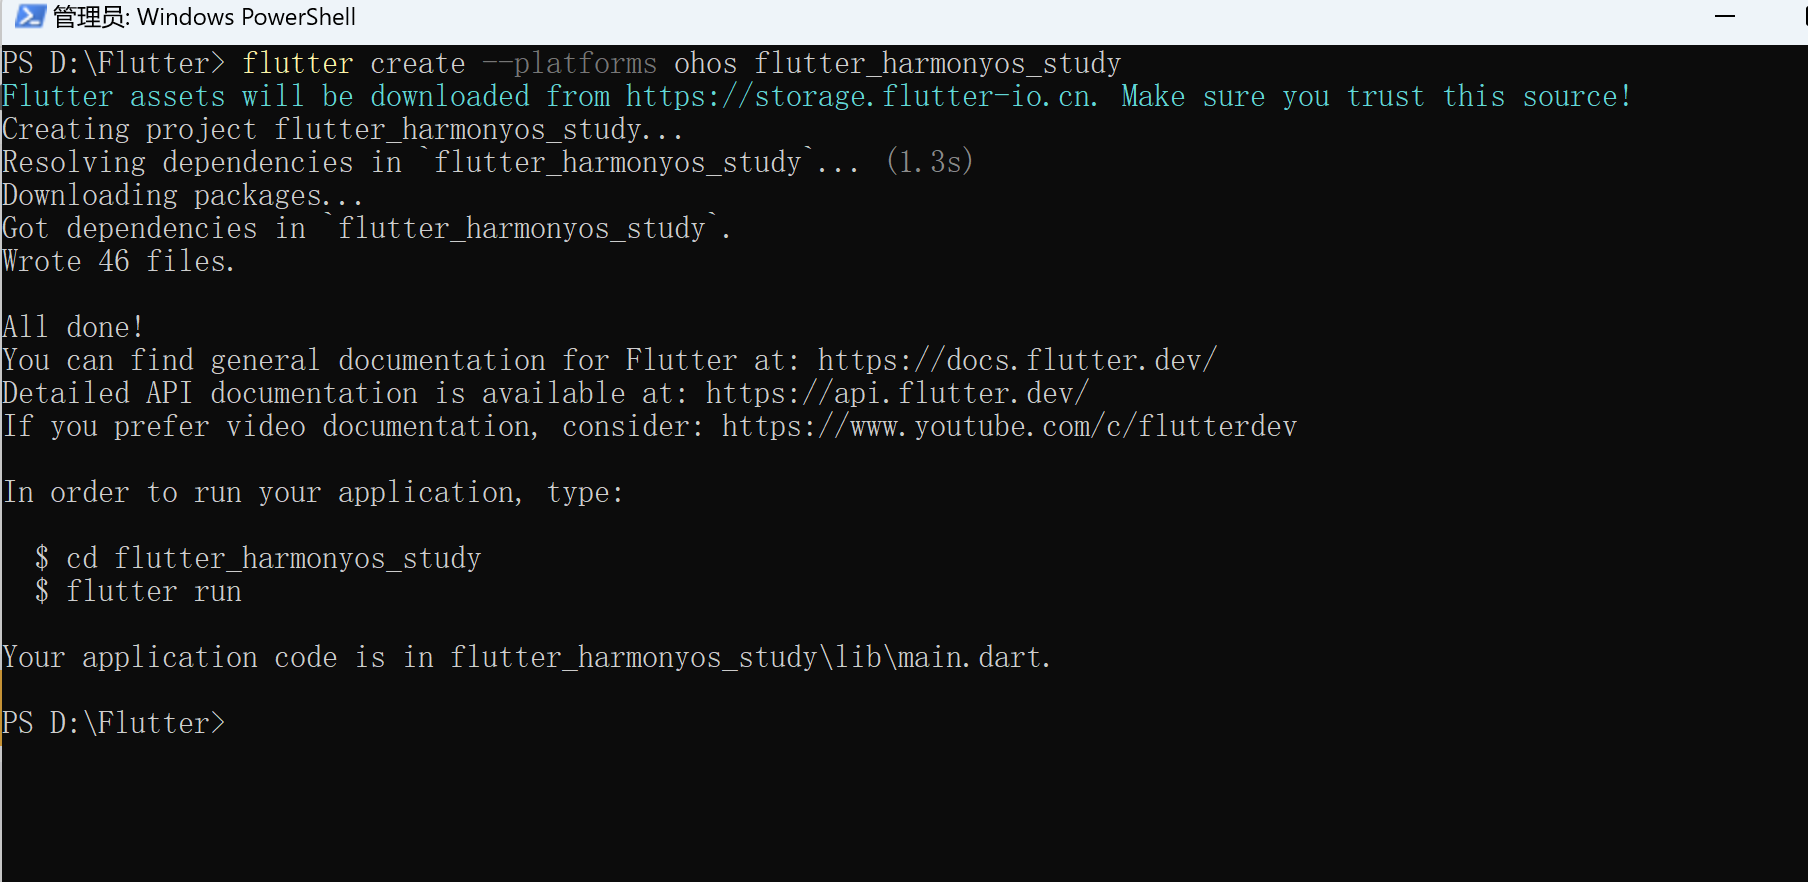
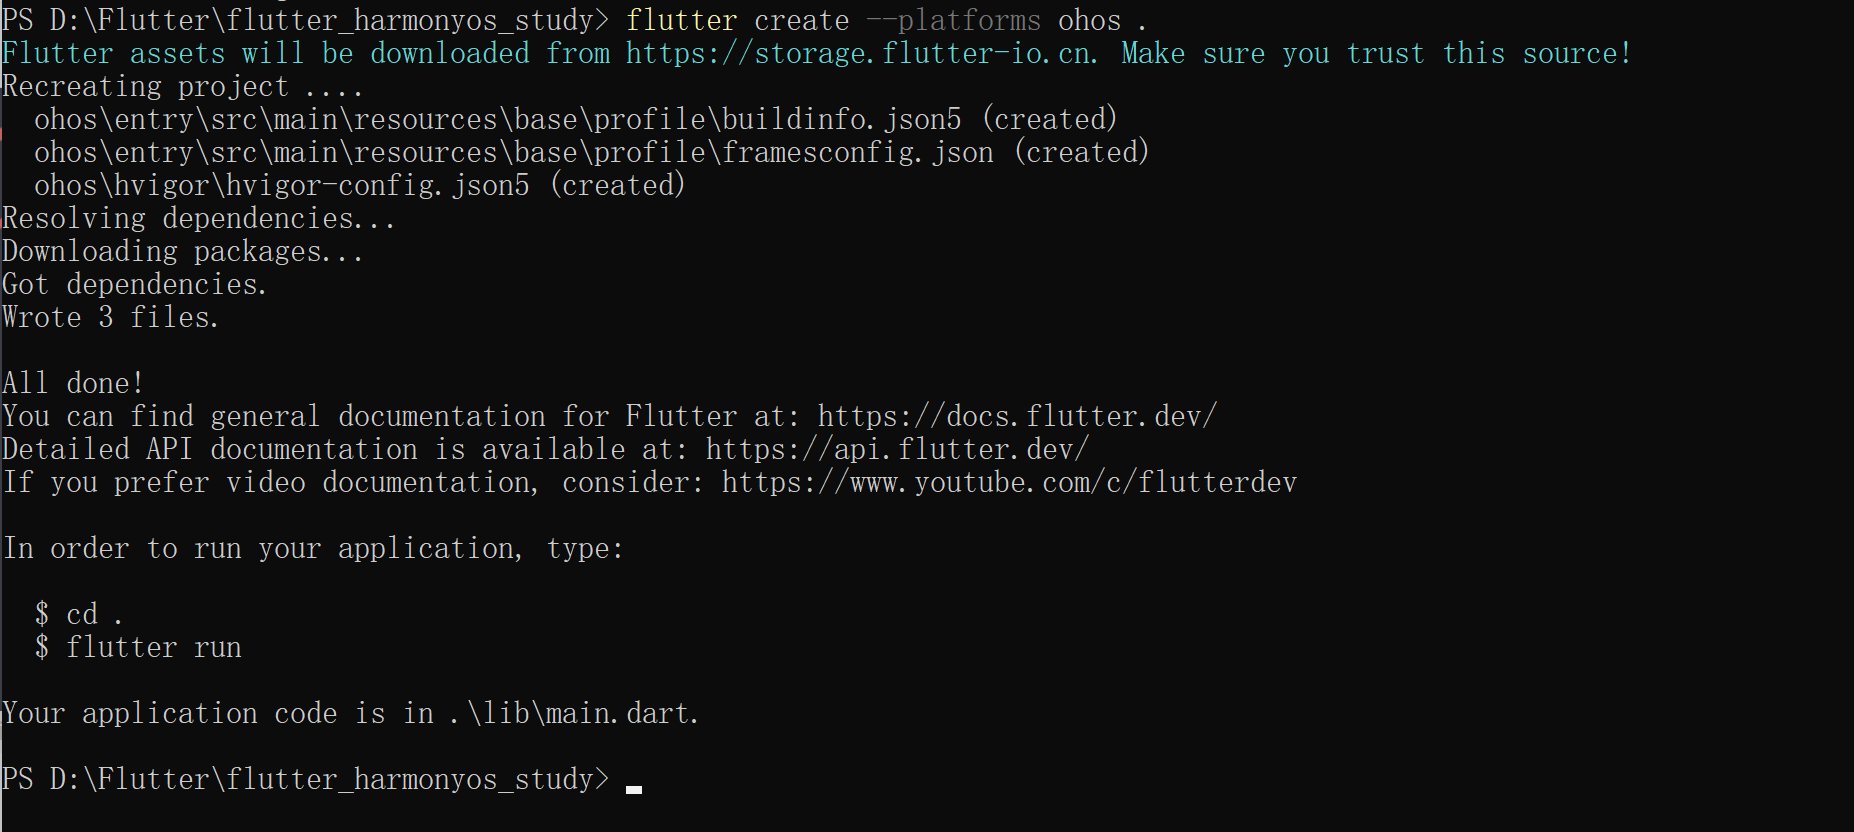
1、创建项目
使用命令如下:
flutter create --platforms ohos flutter_harmonyos_study
–platforms ohos:生成鸿蒙原生工程,直接编译为鸿蒙可执行文件(如 HAP 包),无安卓兼容层,性能和适配性更好。
flutter_harmonyos_study 是项目的名称。
打开虚拟机
我们使用【DevEco Studio】打开我们的虚拟机。
关掉可能影响编译的【安全防护】工具
例如某管家、某安全卫士,我这都关掉了。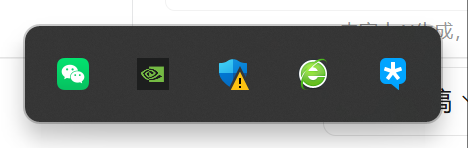
配置签名
打开项目的时候要看好路径,我们打开的是ohos的目录。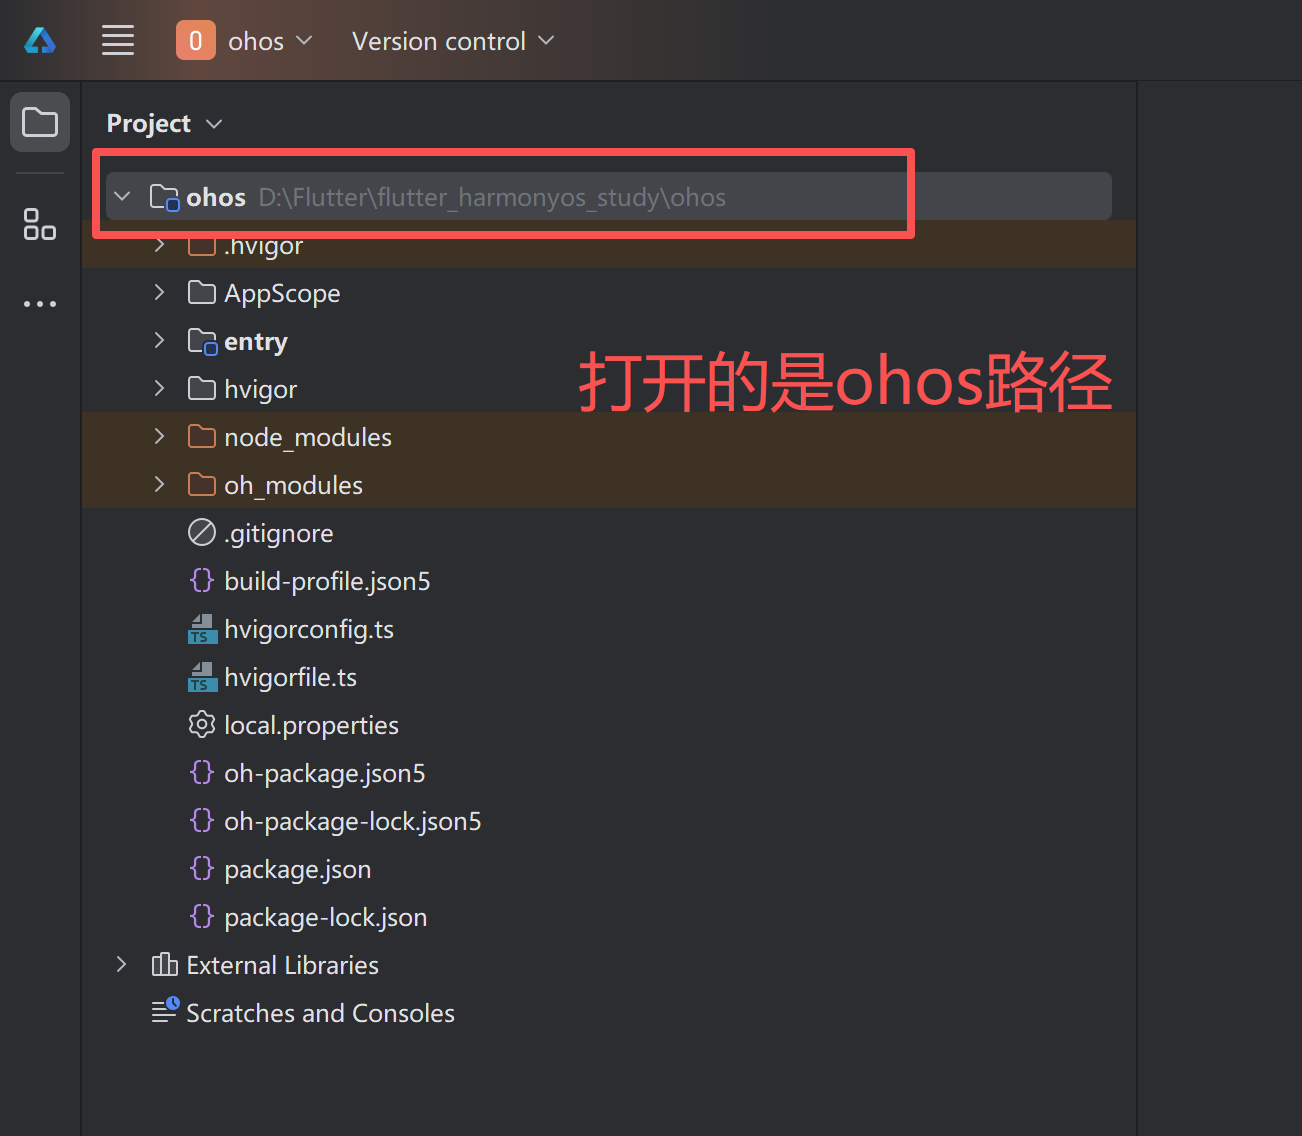
打开【Project Structure】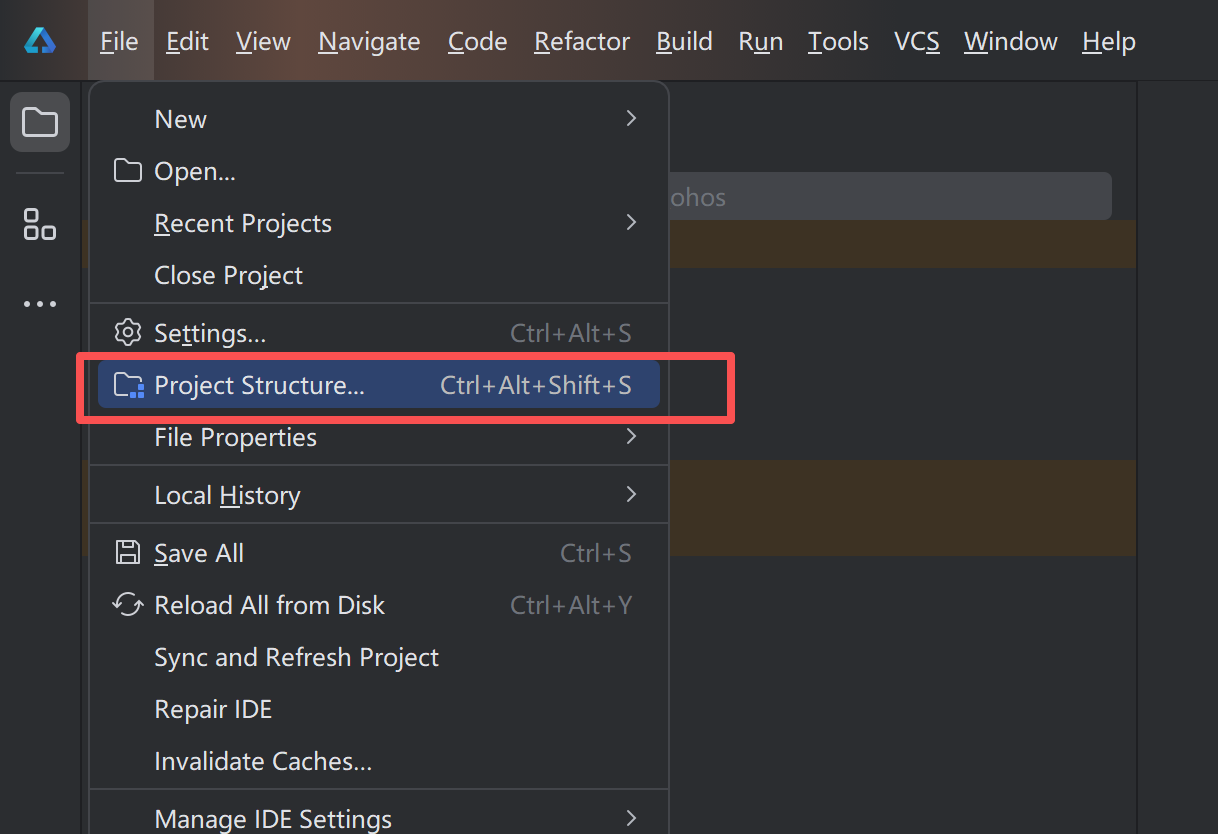
这里我们需要登录一下,使用default这个就行,等一会后我们点击应用OK即可。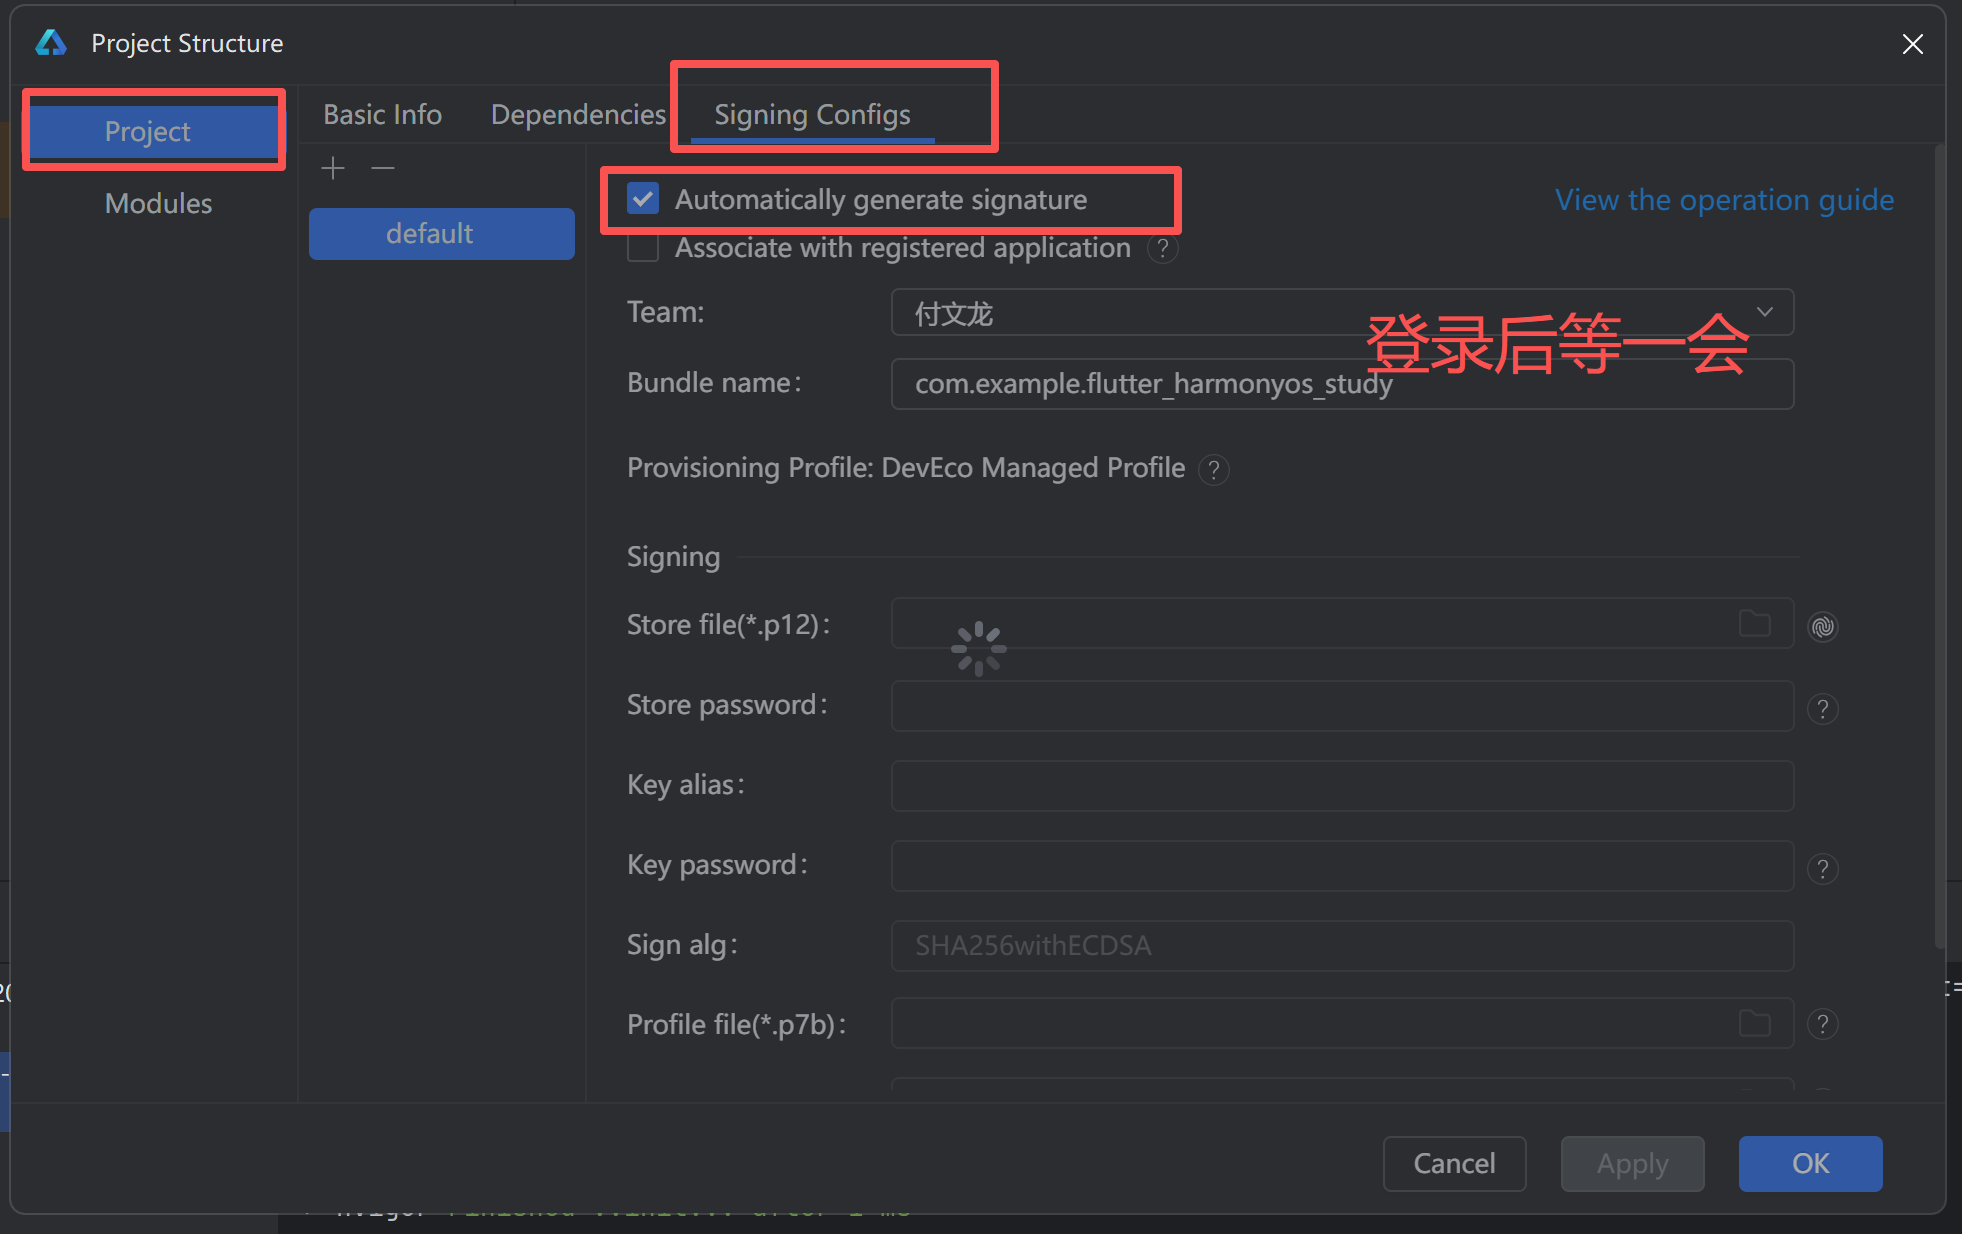
项目运行
我们创建的鸿蒙的项目,所以直接就能看到ohos的文件夹,但是代码不在这里。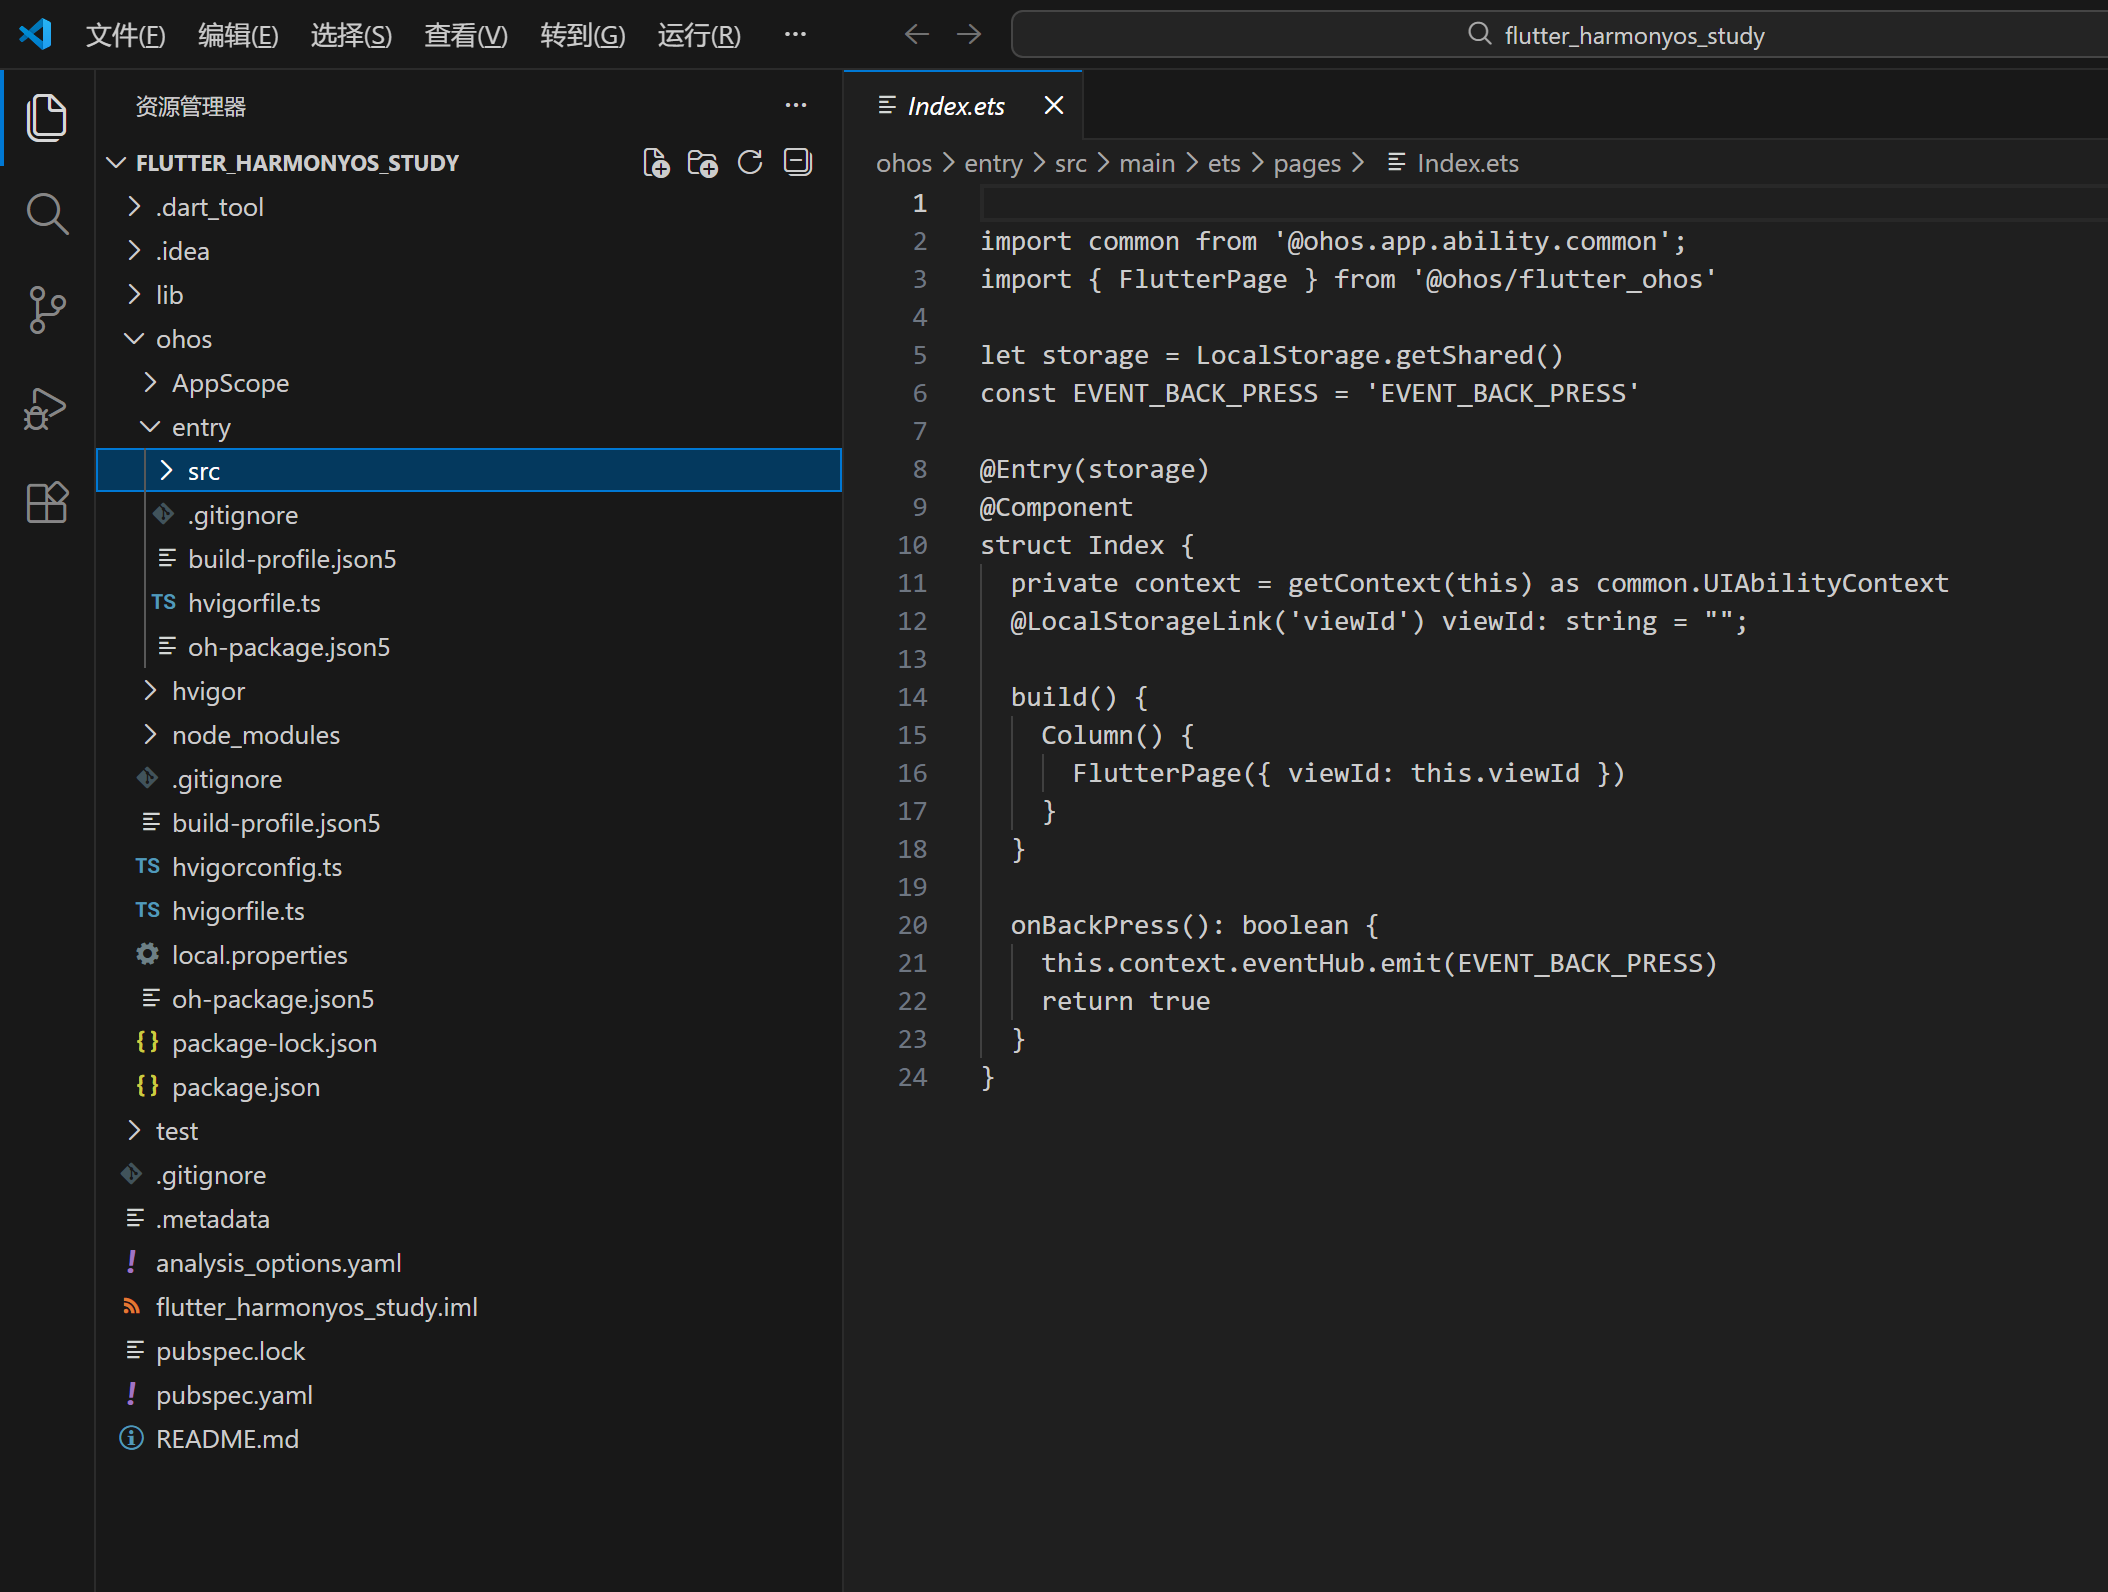
可以在Index.ets中看到有初始的面板,我们可以适当修改一下。
代码位置
我们编码都是lib下的dart文件。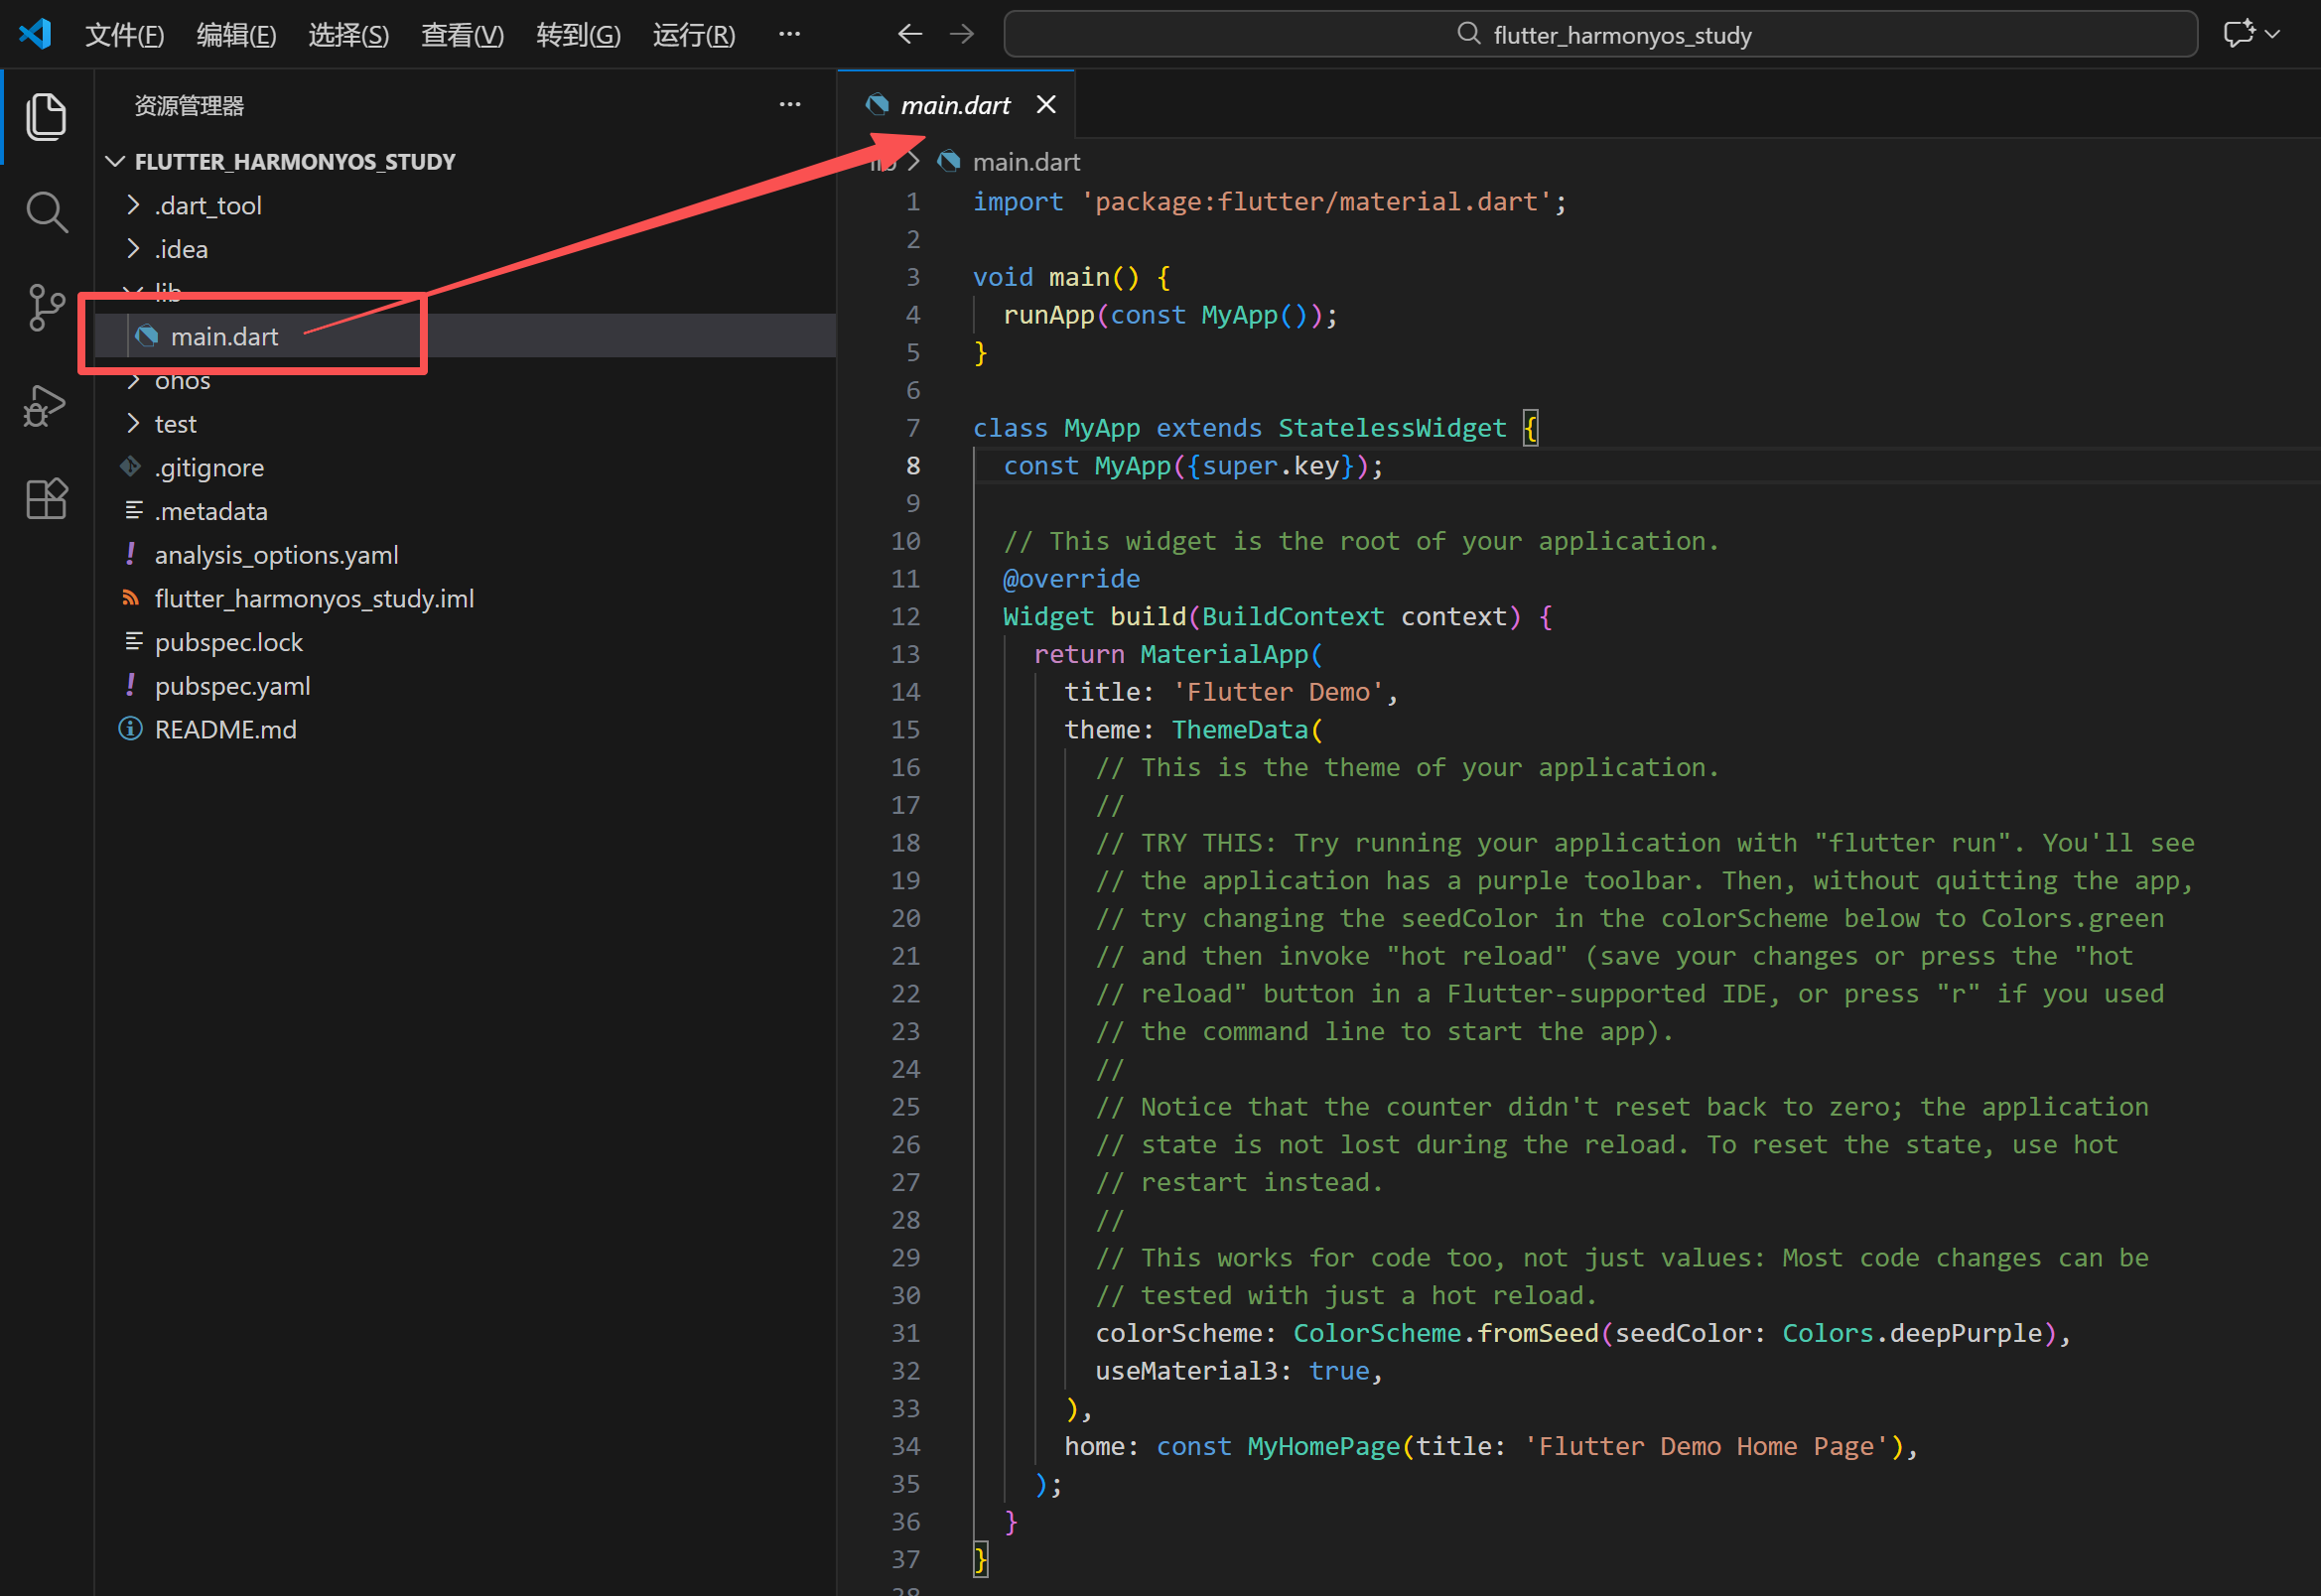
修改main.dart代码
我这里修改成了一个【流体梯度网格】背景效果的炫丽非常的欢迎页。
import 'dart:math' as math;
import 'dart:ui';
import 'package:flutter/material.dart';
void main() {
runApp(const LifeScienceApp());
}
/// [LifeScienceApp] 是应用的核心入口。
/// 采用了深色模式与现代化的 [ColorScheme] 设计,旨在为生命科学科研工作者提供专业的视觉体验。
class LifeScienceApp extends StatelessWidget {
const LifeScienceApp({super.key});
Widget build(BuildContext context) {
return MaterialApp(
title: 'BioMesh OS',
debugShowCheckedModeBanner: false,
theme: ThemeData(
colorScheme: ColorScheme.fromSeed(
seedColor: const Color(0xFF6366F1),
brightness: Brightness.dark,
),
useMaterial3: true,
),
home: const WelcomePage(),
);
}
}
/// [WelcomePage] 实现了一个带有“流体梯度网格”背景的炫丽欢迎页面。
/// 页面结构:
/// 1. 底层:动态流体梯度 (Fluid Gradient Background)
/// 2. 中层:高斯模糊层与网格线 (Blur & Mesh Grid Overlay)
/// 3. 上层:交互式 UI 内容 (Hero Section & Action Buttons)
class WelcomePage extends StatefulWidget {
const WelcomePage({super.key});
State<WelcomePage> createState() => _WelcomePageState();
}
class _WelcomePageState extends State<WelcomePage>
with TickerProviderStateMixin {
late AnimationController _contentFadeController;
late Animation<double> _contentFadeAnimation;
late AnimationController _floatController;
void initState() {
super.initState();
// 内容入场动画
_contentFadeController = AnimationController(
vsync: this,
duration: const Duration(milliseconds: 2000),
);
_contentFadeAnimation = CurvedAnimation(
parent: _contentFadeController,
curve: const Interval(0.4, 1.0, curve: Curves.easeOut),
);
_contentFadeController.forward();
// 背景装饰微动动画
_floatController = AnimationController(
vsync: this,
duration: const Duration(seconds: 4),
)..repeat(reverse: true);
}
void dispose() {
_contentFadeController.dispose();
_floatController.dispose();
super.dispose();
}
Widget build(BuildContext context) {
return Scaffold(
backgroundColor: const Color(0xFF020617),
body: Stack(
children: [
// 第一层:流体梯度背景
const FluidGradientBackground(),
// 第二层:网格叠加层 (Mesh Grid)
const MeshGridOverlay(),
// 第三层:交互内容
SafeArea(
child: FadeTransition(
opacity: _contentFadeAnimation,
child: Padding(
padding: const EdgeInsets.symmetric(horizontal: 40.0),
child: Column(
crossAxisAlignment: CrossAxisAlignment.start,
children: [
const SizedBox(height: 60),
_buildTopBar(),
const Spacer(),
_buildHeroContent(),
const SizedBox(height: 50),
_buildActionButtons(),
const SizedBox(height: 80),
],
),
),
),
),
// 装饰:浮动的分子结构图示
_buildFloatingDecoration(),
],
),
);
}
/// 构建顶部状态栏区域,包含品牌 Logo
Widget _buildTopBar() {
return Row(
children: [
Container(
padding: const EdgeInsets.all(10),
decoration: BoxDecoration(
color: Colors.white.withOpacity(0.1),
borderRadius: BorderRadius.circular(15),
border: Border.all(color: Colors.white.withOpacity(0.2)),
),
child: const Icon(Icons.auto_awesome_mosaic,
color: Color(0xFF818CF8), size: 28),
),
const SizedBox(width: 15),
const Column(
crossAxisAlignment: CrossAxisAlignment.start,
children: [
Text(
'BIOMESH',
style: TextStyle(
fontSize: 20,
fontWeight: FontWeight.w900,
letterSpacing: 2,
color: Colors.white,
),
),
Text(
'HarmonyOS Edition',
style: TextStyle(
fontSize: 10,
fontWeight: FontWeight.w500,
color: Color(0xFF818CF8),
letterSpacing: 1,
),
),
],
),
],
);
}
/// 构建核心英雄展示区域
Widget _buildHeroContent() {
return Column(
crossAxisAlignment: CrossAxisAlignment.start,
children: [
Container(
padding: const EdgeInsets.symmetric(horizontal: 12, vertical: 6),
decoration: BoxDecoration(
color: const Color(0xFF6366F1).withOpacity(0.2),
borderRadius: BorderRadius.circular(20),
border: Border.all(color: const Color(0xFF6366F1).withOpacity(0.3)),
),
child: const Text(
'Powered by Next-Gen Biotech',
style: TextStyle(
color: Color(0xFFA5B4FC),
fontSize: 12,
fontWeight: FontWeight.w600,
),
),
),
const SizedBox(height: 24),
RichText(
text: const TextSpan(
children: [
TextSpan(
text: '构建未来的\n',
style: TextStyle(
fontSize: 42,
fontWeight: FontWeight.w300,
color: Colors.white,
),
),
TextSpan(
text: '数字化实验室',
style: TextStyle(
fontSize: 52,
fontWeight: FontWeight.w900,
color: Colors.white,
height: 1.2,
),
),
],
),
),
const SizedBox(height: 20),
Text(
'利用流体梯度计算引擎与鸿蒙分布式能力,\n实现科研数据的多终端实时同步与可视化分析。',
style: TextStyle(
fontSize: 16,
color: Colors.white.withOpacity(0.6),
height: 1.6,
fontWeight: FontWeight.w400,
),
),
],
);
}
/// 构建底部操作按钮
Widget _buildActionButtons() {
return Row(
children: [
Expanded(
flex: 2,
child: Container(
height: 64,
decoration: BoxDecoration(
borderRadius: BorderRadius.circular(20),
gradient: const LinearGradient(
colors: [Color(0xFF6366F1), Color(0xFF8B5CF6)],
),
boxShadow: [
BoxShadow(
color: const Color(0xFF6366F1).withOpacity(0.4),
blurRadius: 20,
offset: const Offset(0, 10),
),
],
),
child: ElevatedButton(
onPressed: () {},
style: ElevatedButton.styleFrom(
backgroundColor: Colors.transparent,
shadowColor: Colors.transparent,
shape: RoundedRectangleBorder(
borderRadius: BorderRadius.circular(20)),
),
child: const Text(
'开始探索',
style: TextStyle(
fontSize: 18,
fontWeight: FontWeight.bold,
color: Colors.white),
),
),
),
),
const SizedBox(width: 20),
Expanded(
child: Container(
height: 64,
decoration: BoxDecoration(
borderRadius: BorderRadius.circular(20),
border: Border.all(color: Colors.white.withOpacity(0.2)),
),
child: IconButton(
onPressed: () {},
icon: const Icon(Icons.qr_code_scanner, color: Colors.white),
),
),
),
],
);
}
/// 浮动的装饰性 UI
Widget _buildFloatingDecoration() {
return AnimatedBuilder(
animation: _floatController,
builder: (context, child) {
return Positioned(
top: 150 + (math.sin(_floatController.value * 2 * math.pi) * 10),
right: 30,
child: Opacity(
opacity: 0.2,
child:
const Icon(Icons.bubble_chart, size: 120, color: Colors.white),
),
);
},
);
}
}
/// 流体梯度背景组件
class FluidGradientBackground extends StatefulWidget {
const FluidGradientBackground({super.key});
State<FluidGradientBackground> createState() =>
_FluidGradientBackgroundState();
}
class _FluidGradientBackgroundState extends State<FluidGradientBackground>
with SingleTickerProviderStateMixin {
late AnimationController _controller;
void initState() {
super.initState();
_controller = AnimationController(
vsync: this,
duration: const Duration(seconds: 15),
)..repeat();
}
void dispose() {
_controller.dispose();
super.dispose();
}
Widget build(BuildContext context) {
return AnimatedBuilder(
animation: _controller,
builder: (context, child) {
return Stack(
children: [
CustomPaint(
size: Size.infinite,
painter: FluidMeshPainter(_controller.value),
),
// 添加高斯模糊层,使渐变边缘更加柔和,形成“流体”感
Positioned.fill(
child: BackdropFilter(
filter: ImageFilter.blur(sigmaX: 80, sigmaY: 80),
child: Container(color: Colors.transparent),
),
),
],
);
},
);
}
}
/// 负责绘制流体动态梯度的画笔
class FluidMeshPainter extends CustomPainter {
final double progress;
FluidMeshPainter(this.progress);
void paint(Canvas canvas, Size size) {
final rect = Offset.zero & size;
// 绘制基础背景色
canvas.drawRect(rect, Paint()..color = const Color(0xFF020617));
// 定义多个梯度中心点,并随时间摆动
final List<GradientPoint> points = [
GradientPoint(
color: const Color(0xFF1E1B4B),
center: Offset(
size.width * (0.2 + 0.1 * math.sin(progress * 2 * math.pi)),
size.height * (0.3 + 0.15 * math.cos(progress * 2 * math.pi)),
),
radius: size.width * 1.2,
),
GradientPoint(
color: const Color(0xFF312E81),
center: Offset(
size.width * (0.8 + 0.2 * math.cos(progress * 2 * math.pi)),
size.height * (0.2 + 0.1 * math.sin(progress * 2 * math.pi)),
),
radius: size.width * 1.0,
),
GradientPoint(
color: const Color(0xFF4338CA),
center: Offset(
size.width * (0.5 + 0.2 * math.sin(progress * 2 * math.pi + 1)),
size.height * (0.7 + 0.2 * math.cos(progress * 2 * math.pi + 1)),
),
radius: size.width * 1.1,
),
GradientPoint(
color: const Color(0xFF581C87),
center: Offset(
size.width * (0.3 + 0.1 * math.cos(progress * 2 * math.pi + 2)),
size.height * (0.8 + 0.15 * math.sin(progress * 2 * math.pi + 2)),
),
radius: size.width * 0.9,
),
];
// 绘制每个渐变点
for (var p in points) {
final paint = Paint()
..shader = RadialGradient(
colors: [
p.color.withOpacity(0.5),
p.color.withOpacity(0.2),
Colors.transparent,
],
stops: const [0.0, 0.4, 1.0],
).createShader(Rect.fromCircle(center: p.center, radius: p.radius));
canvas.drawCircle(p.center, p.radius, paint);
}
}
bool shouldRepaint(covariant FluidMeshPainter oldDelegate) => true;
}
/// 辅助类:定义梯度点属性
class GradientPoint {
final Color color;
final Offset center;
final double radius;
GradientPoint(
{required this.color, required this.center, required this.radius});
}
/// 网格叠加层,增加科技感
class MeshGridOverlay extends StatelessWidget {
const MeshGridOverlay({super.key});
Widget build(BuildContext context) {
return CustomPaint(
size: Size.infinite,
painter: GridPainter(),
);
}
}
class GridPainter extends CustomPainter {
void paint(Canvas canvas, Size size) {
final paint = Paint()
..color = Colors.white.withOpacity(0.03)
..strokeWidth = 1.0;
const double step = 30.0;
for (double i = 0; i < size.width; i += step) {
canvas.drawLine(Offset(i, 0), Offset(i, size.height), paint);
}
for (double i = 0; i < size.height; i += step) {
canvas.drawLine(Offset(0, i), Offset(size.width, i), paint);
}
}
bool shouldRepaint(covariant CustomPainter oldDelegate) => false;
}
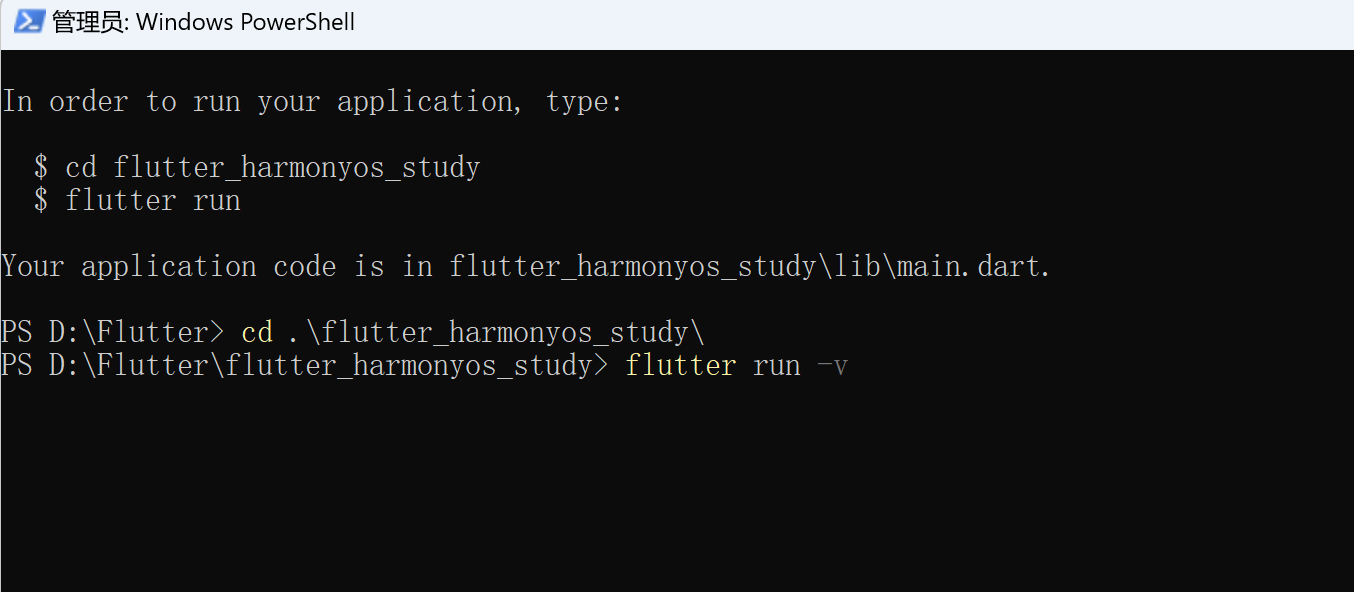
运行项目
运行命令
flutter run -v
在package_config.json出现的时候一般会卡一会,别急等等就过去了。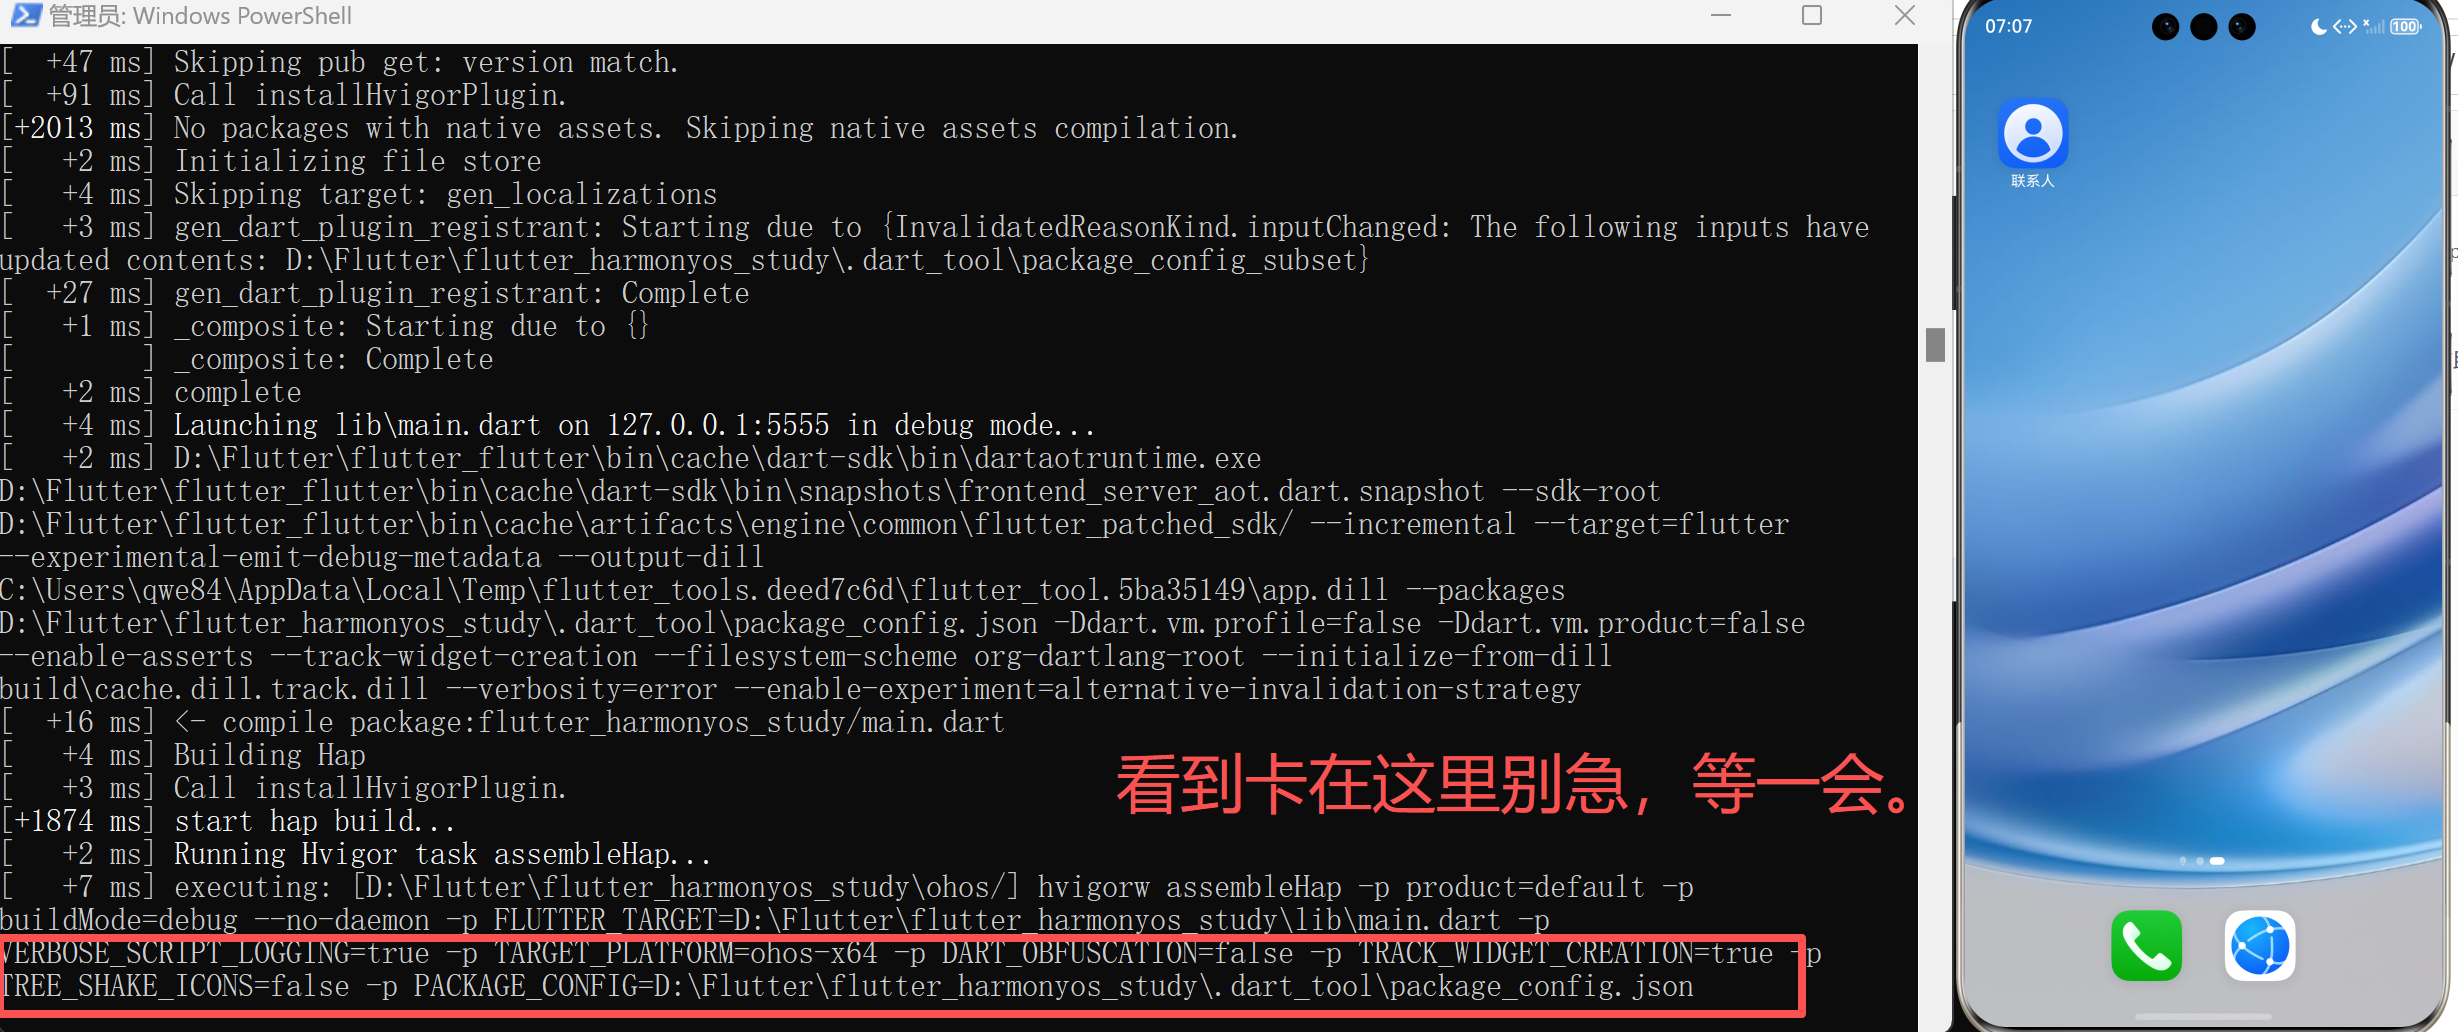
运行成功效果: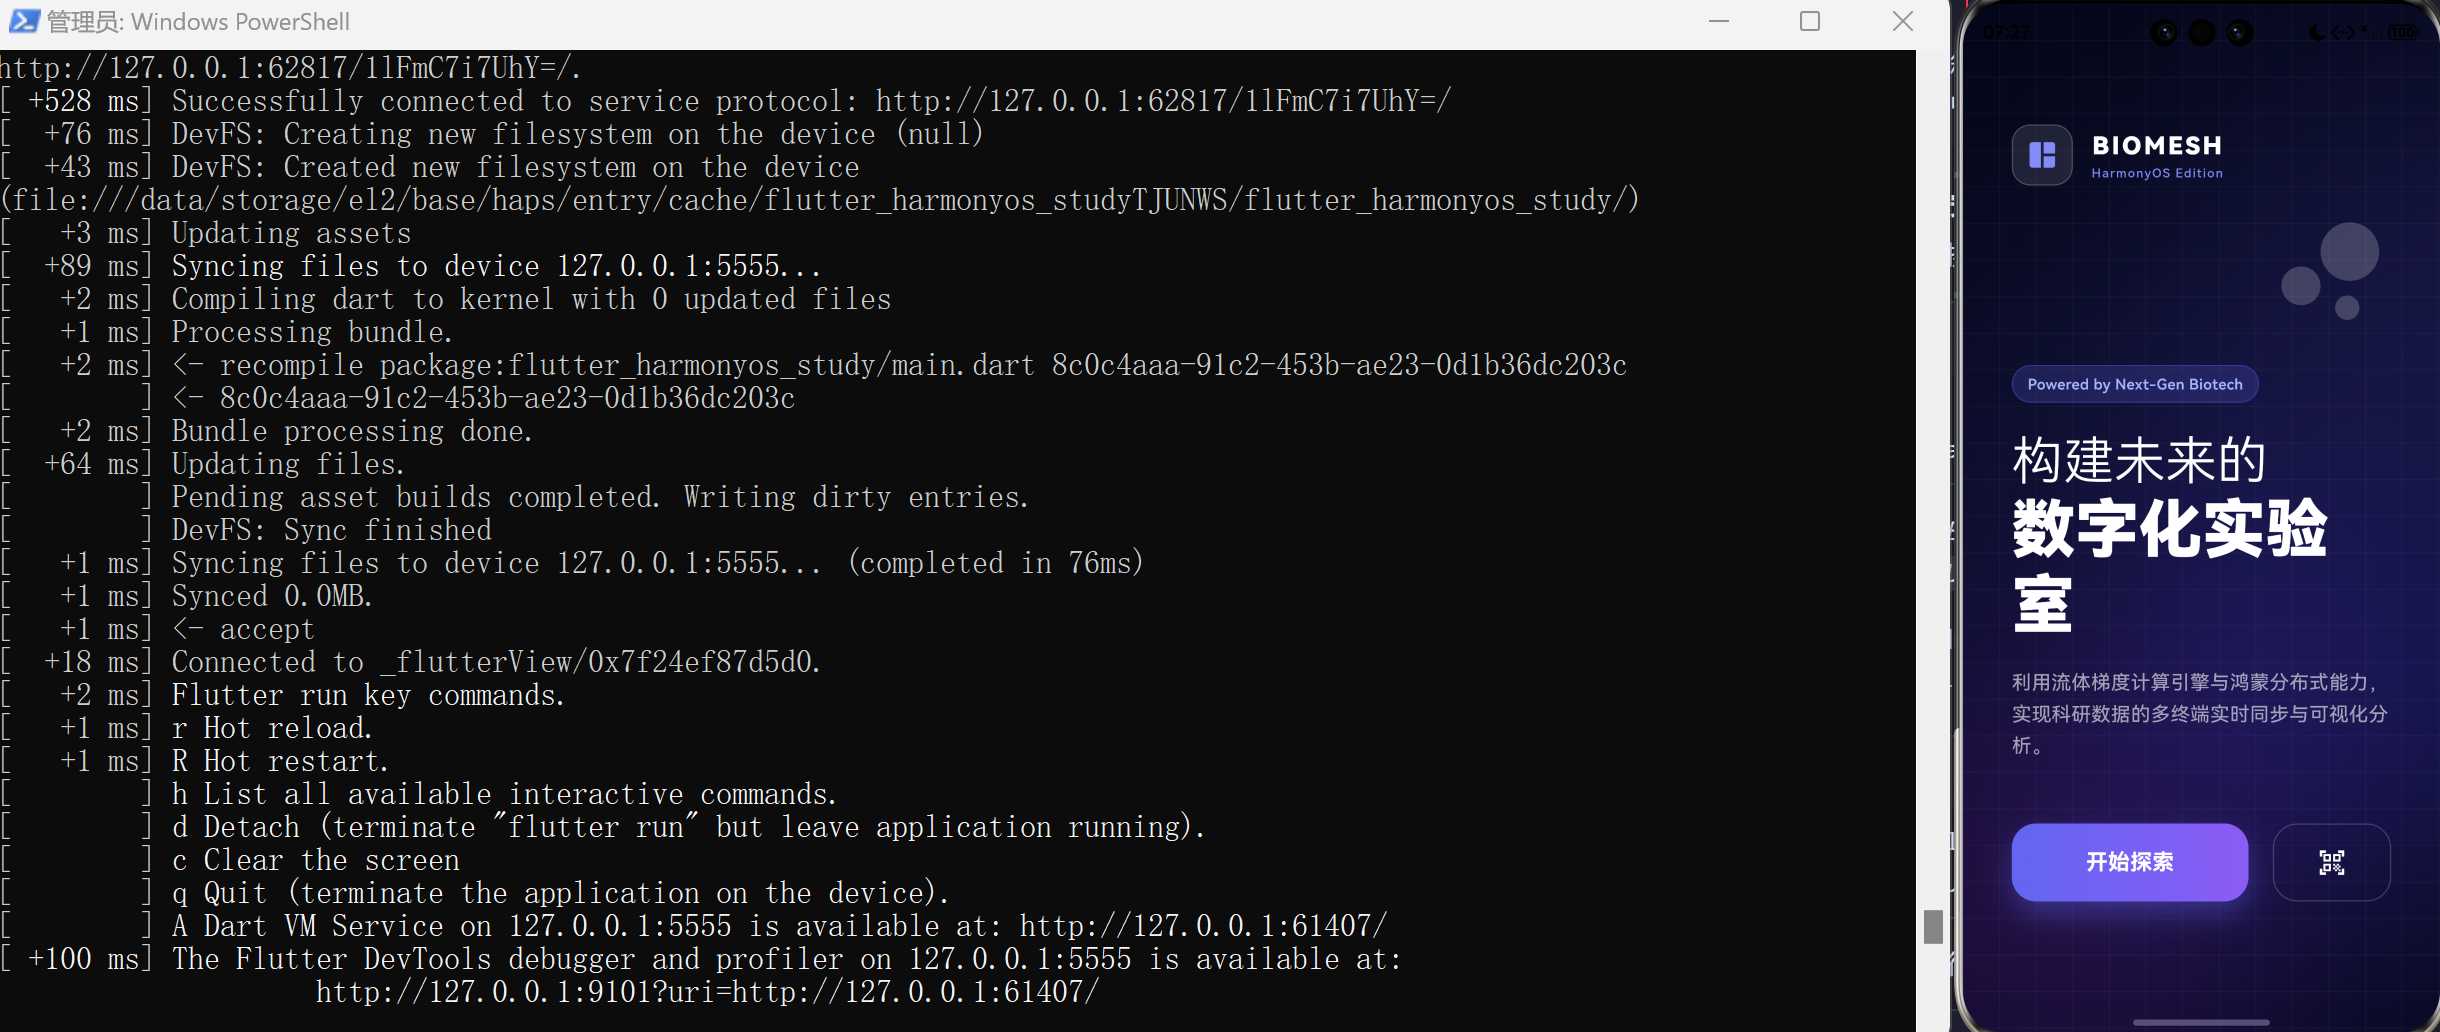
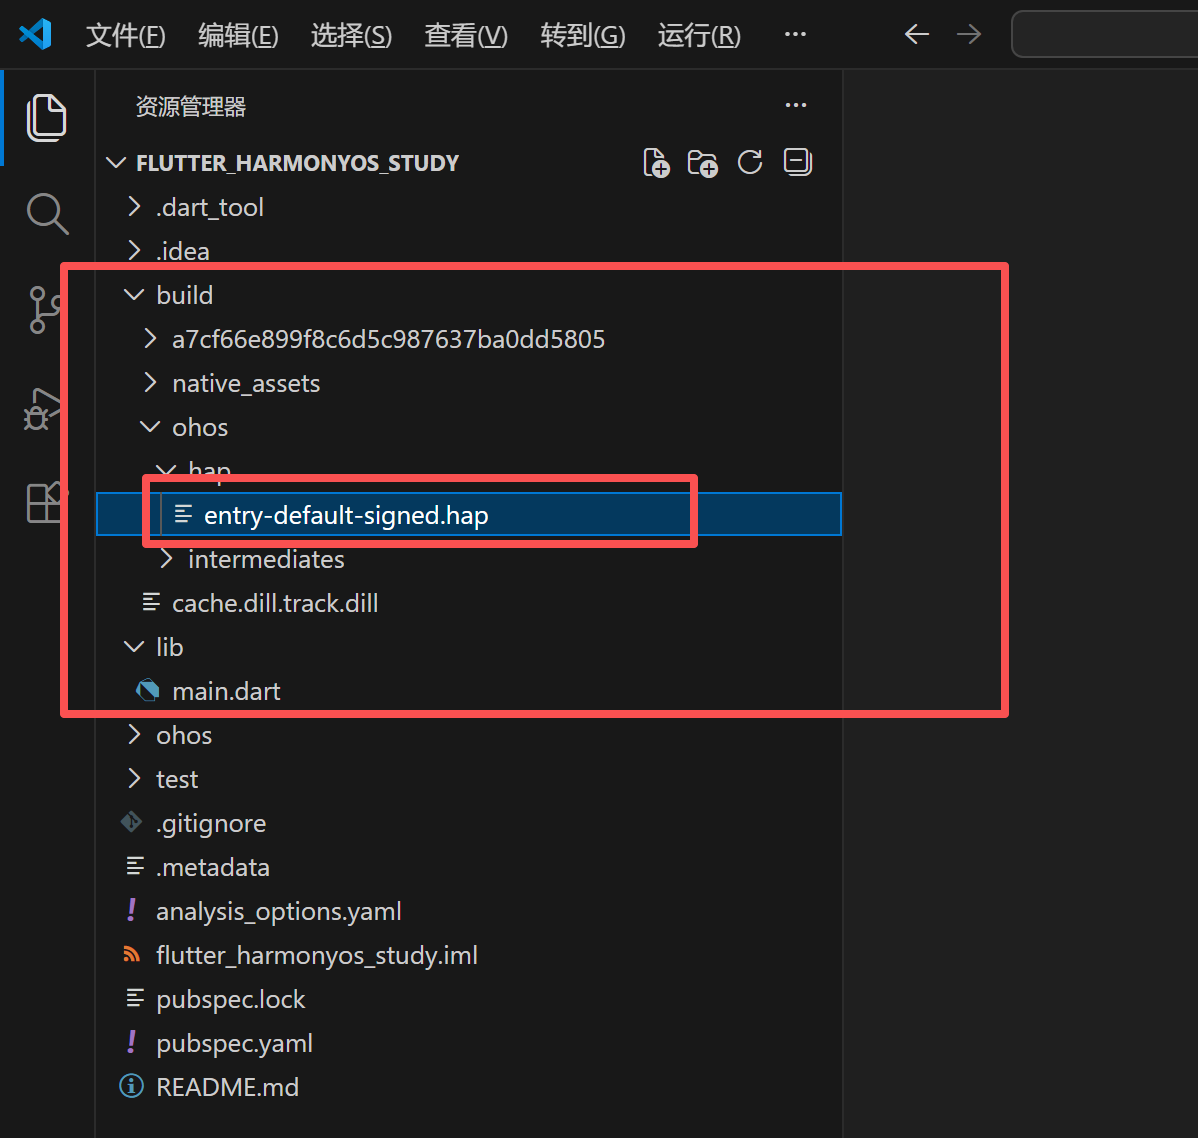
HAP包位置
我们每次运行也都会打一个hap包。
FAQ
下面是过程中可能遇到的所有问题。
1、未关闭360或其它管家
2、未进行签名操作
在使用 flutter run -v 运行后,我们如果看到下图就要知道我们没有进行签名操作。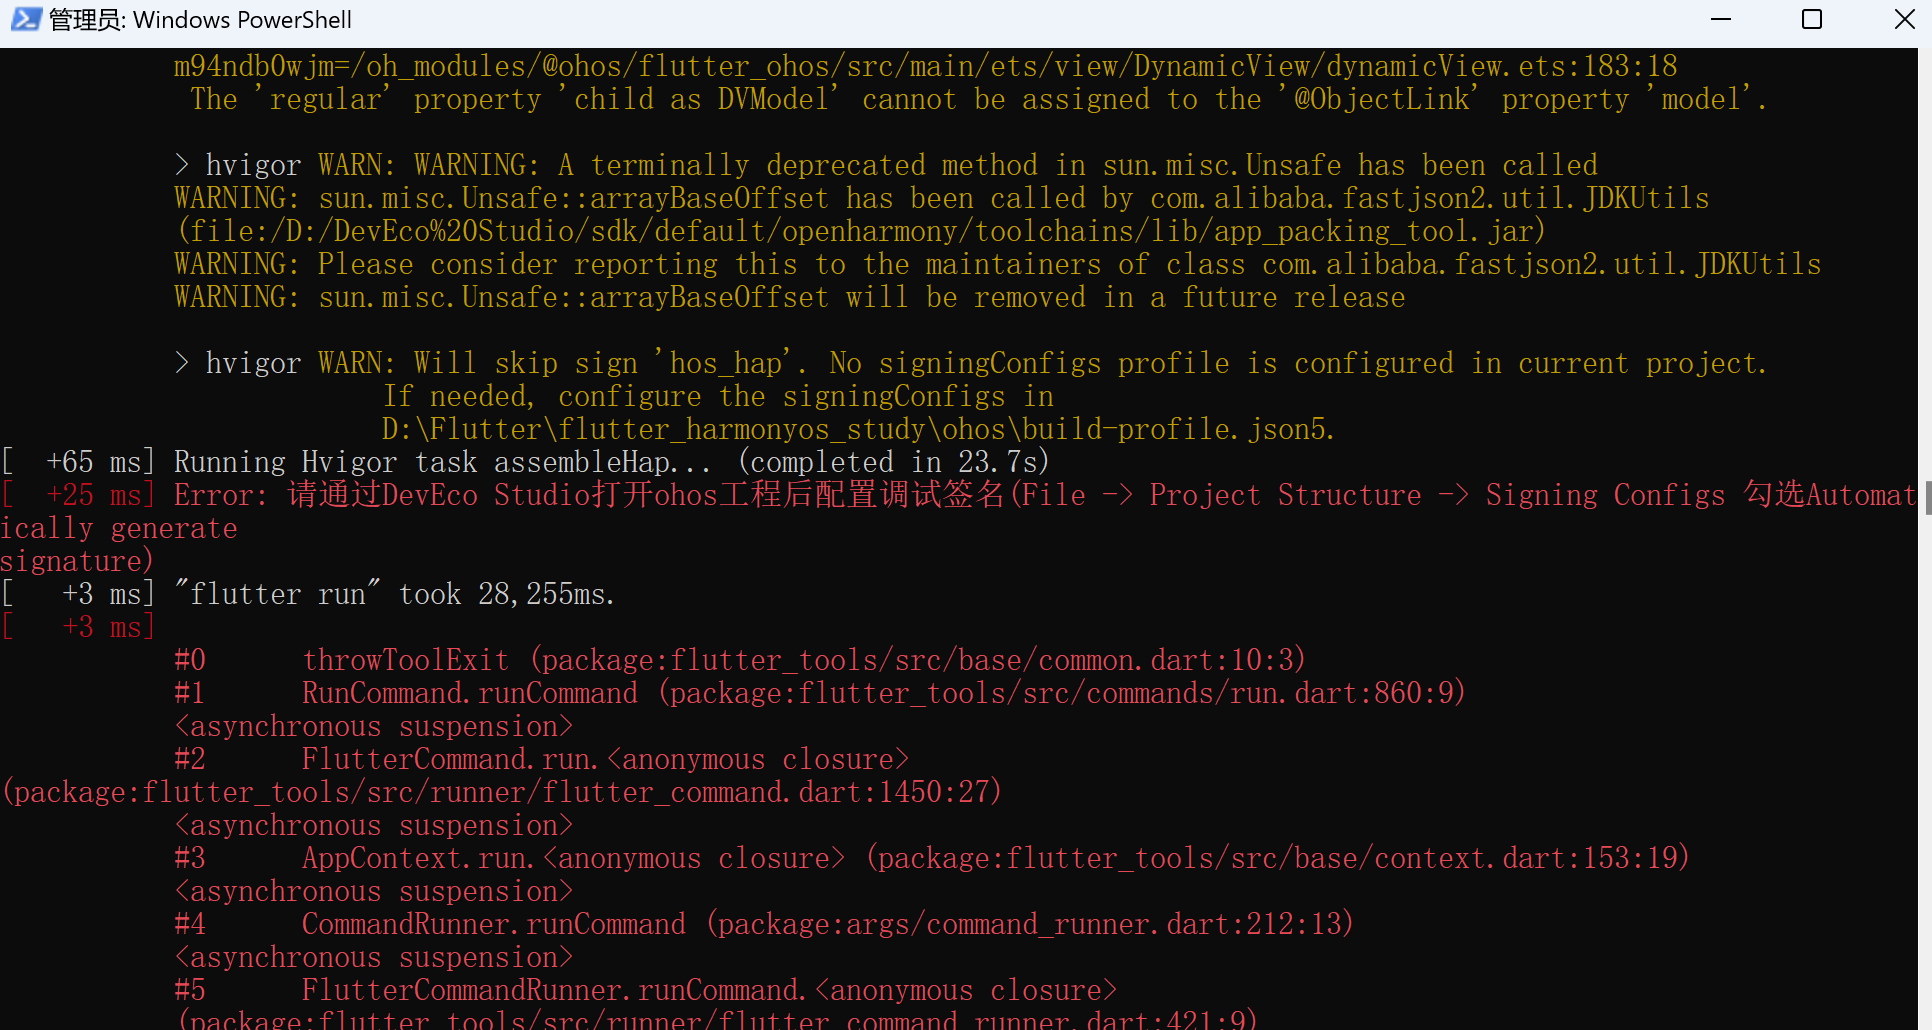
3、ERROR:1 WARN:253
253异常处理方式与243相同,我们可以参考:https://laoshifu.blog.csdn.net/article/details/156833496 来解决这个问题。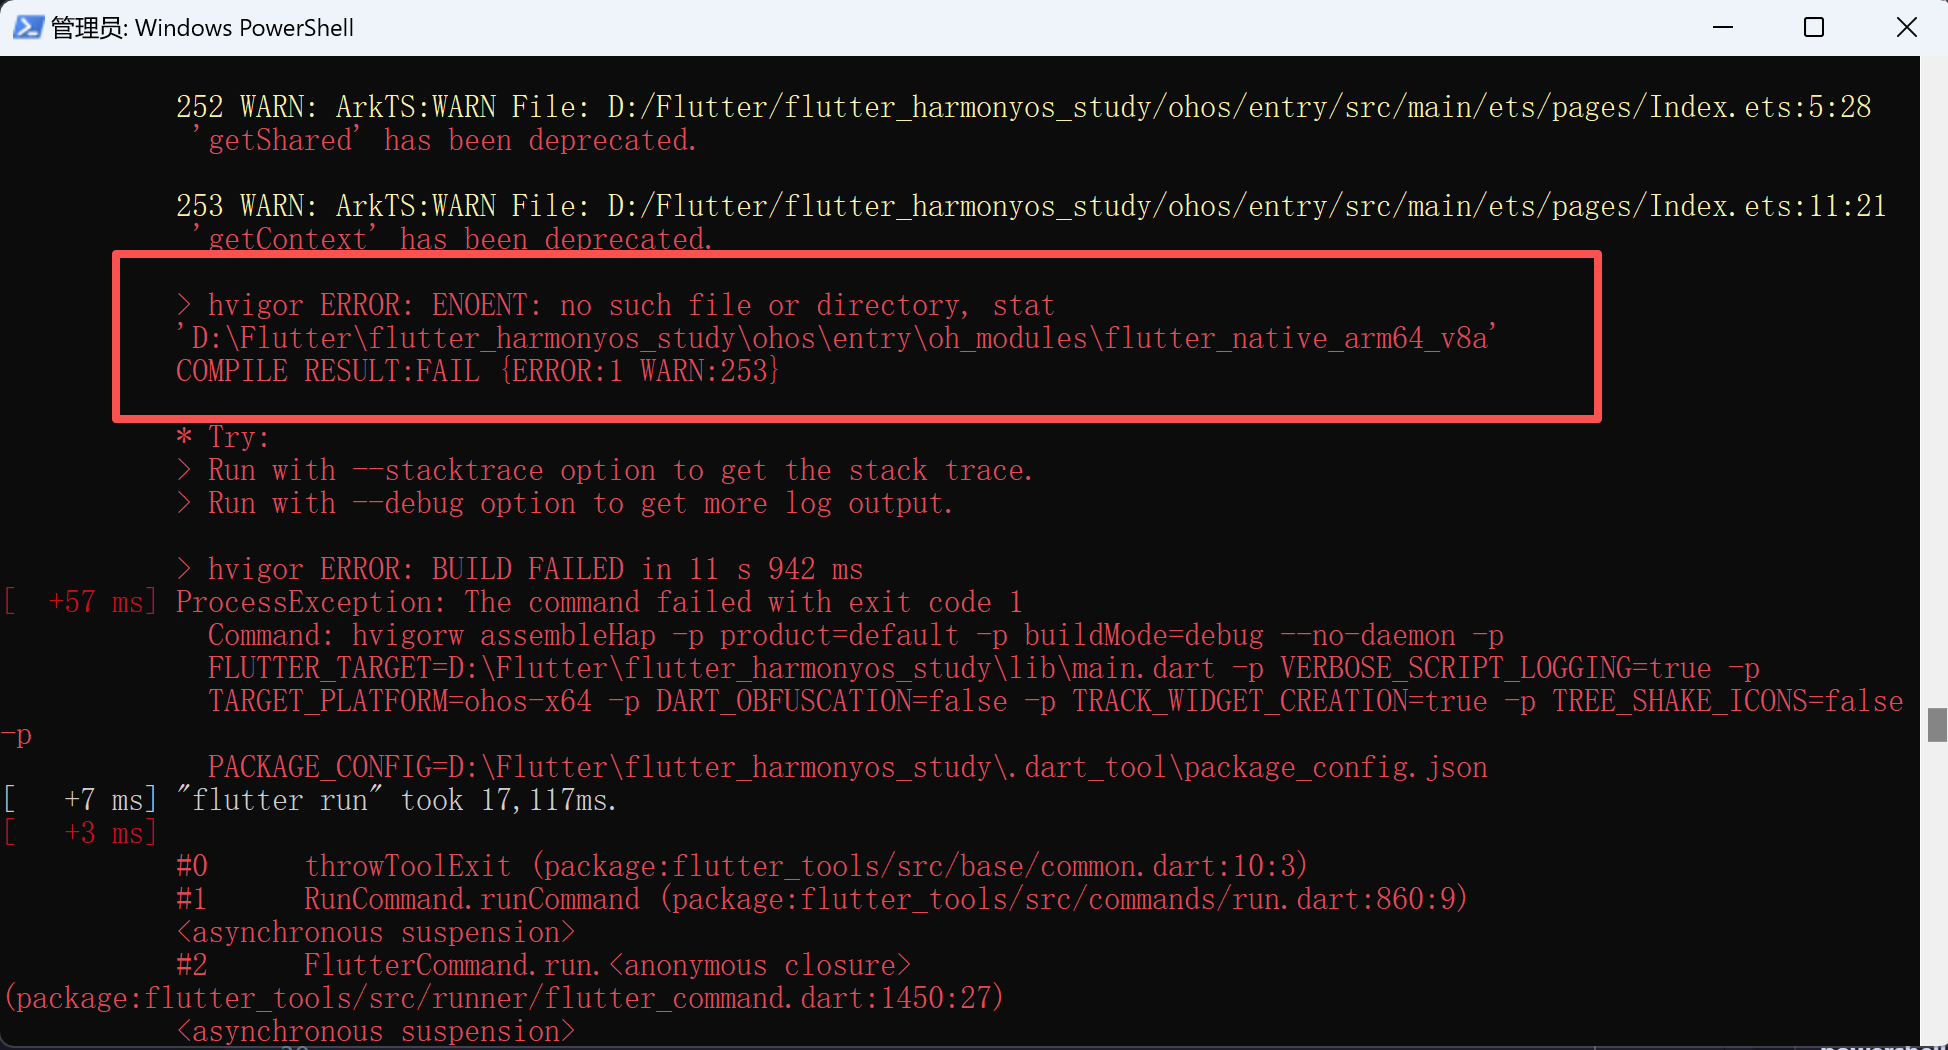
删除要处理的文件: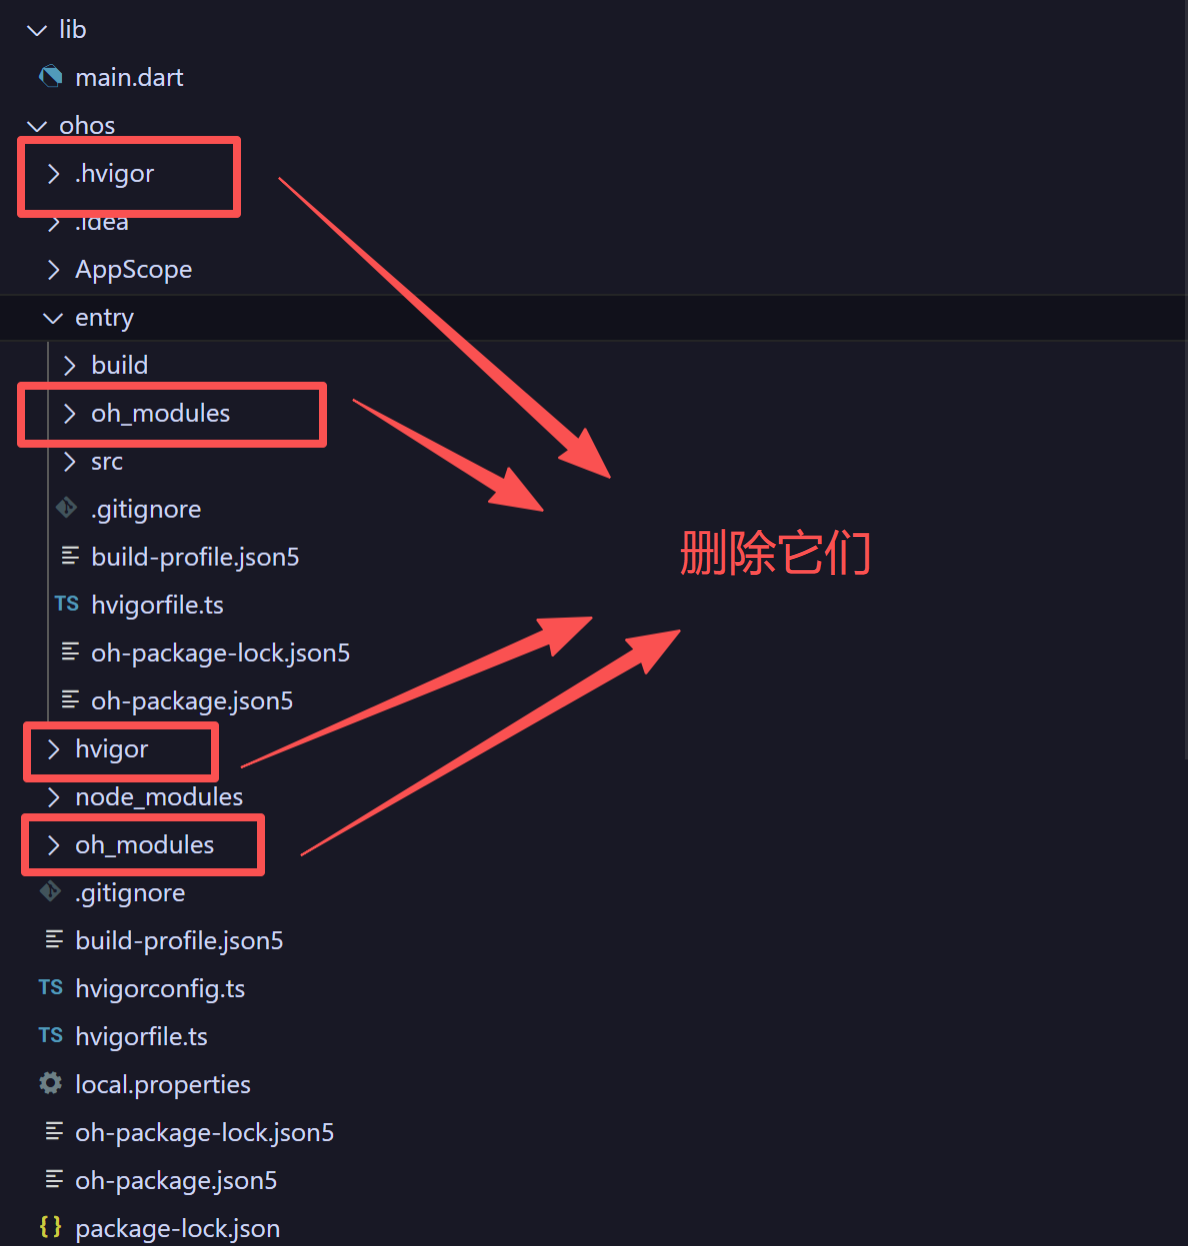
运行命令:
flutter create --platforms ohos .

作为“人工智能6S店”的官方数字引擎,为AI开发者与企业提供一个覆盖软硬件全栈、一站式门户。
更多推荐
 12
12 0
0- 0


 已为社区贡献64条内容

所有评论(0)