
旅行记录应用云同步 - Cordova & OpenHarmony 混合开发实战
文章摘要: 本文介绍了开源鸿蒙跨平台开发中的云同步功能实现方案。云同步功能允许用户在多设备间同步旅行数据,确保数据一致性。文章详细说明了云同步的三个关键步骤:云端账户认证、数据上传下载、原生层网络通信与离线支持。通过Web代码示例展示了云同步页面的HTML结构、登录认证、立即同步和自动同步功能的实现方法,包括使用Cordova插件与原生层交互。该方案支持定时自动同步,并记录同步历史,为开发者提供了
欢迎大家加入开源鸿蒙跨平台开发者社区,一起共建开源鸿蒙跨平台生态。
📌 概述
云同步功能允许用户将旅行数据同步到云端,实现多设备间的数据同步。用户可以在不同设备上访问相同的旅行数据,云同步确保数据的一致性。在 Cordova 与 OpenHarmony 的混合开发框架中,云同步需要实现数据上传、下载和冲突解决。
🔗 完整流程
第一步:云端账户与认证
云同步需要用户登录云端账户。用户需要提供用户名和密码进行认证,认证成功后才能进行云同步操作。
第二步:数据上传与下载
云同步需要实现数据的上传和下载。上传时,将本地数据发送到云端。下载时,从云端获取最新数据。同步过程需要处理网络错误和重试。
第三步:原生层网络通信与离线支持
OpenHarmony 原生层可以实现网络通信,与云端服务器通信。原生层还可以实现离线支持,用户可以在离线状态下继续使用应用,然后在联网时同步。
🔧 Web 代码实现
云同步页面 HTML 结构
<div id="sync-page" class="page">
<div class="page-header">
<h1>云同步</h1>
</div>
<div class="sync-container">
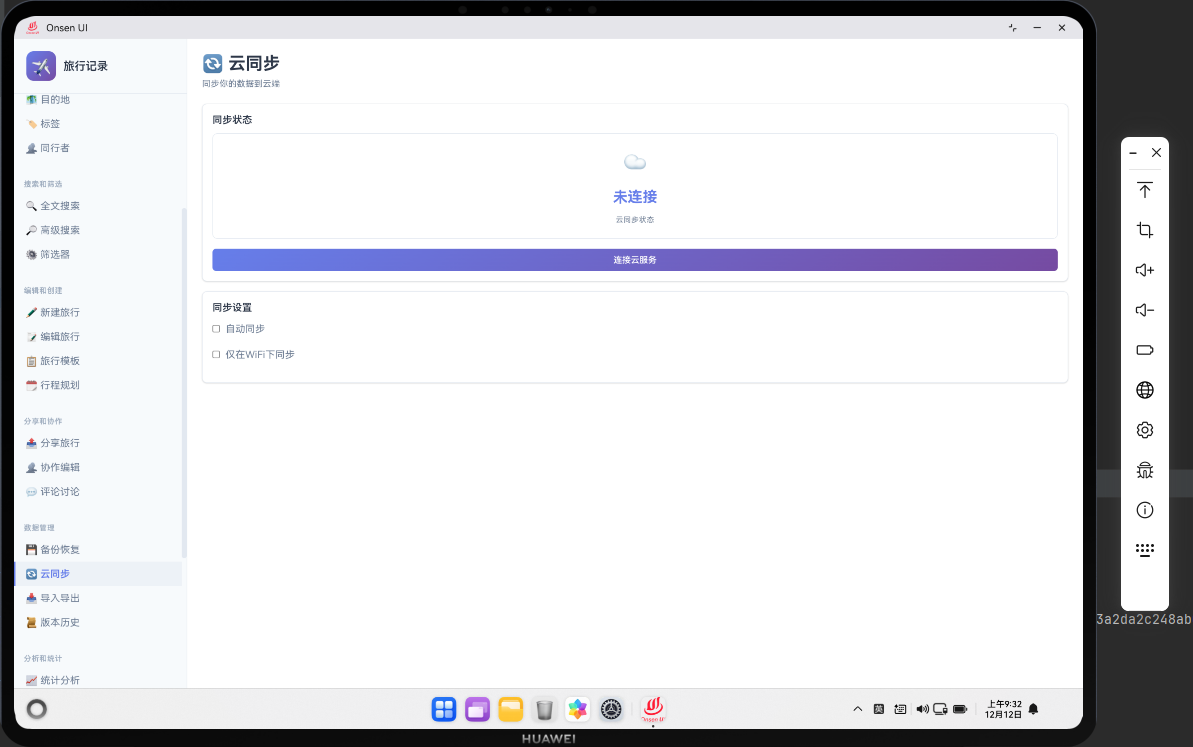
<div class="sync-status" id="syncStatus">
<h3>同步状态</h3>
<p id="syncStatusText">未连接</p>
</div>
<div class="sync-actions">
<button class="btn btn-primary" onclick="loginCloud()">
🔐 登录云账户
</button>
<button class="btn btn-secondary" onclick="syncNow()">
🔄 立即同步
</button>
<button class="btn btn-secondary" onclick="enableAutoSync()">
⚙️ 启用自动同步
</button>
</div>
<div class="sync-history" id="syncHistory">
<h3>同步历史</h3>
<div class="history-items" id="historyItems">
<!-- 同步历史动态加载 -->
</div>
</div>
</div>
</div>
HTML 结构包含同步状态、操作按钮和同步历史。
登录云账户函数
async function loginCloud() {
    try {
        // 打开登录模态框
        const username = prompt('请输入用户名:');
        const password = prompt('请输入密码:');

        if (!username || !password) {
            return;
        }

        // 通知原生层进行认证
        if (window.cordova) {
            cordova.exec(
                (result) => {
                    if (result.success) {
                        window.cloudToken = result.token;
                        showToast('登录成功');
                        updateSyncStatus('已连接');
                    } else {
                        showToast('登录失败');
                    }
                },
                (error) => console.error('Login error:', error),
                'SyncPlugin',
                'login',
                [{ username: username, password: password, timestamp: Date.now() }]
            );
        }
    } catch (error) {
        console.error('Error logging in:', error);
        showToast('登录失败');
    }
}
登录云账户函数进行用户认证。
立即同步函数
async function syncNow() {
    try {
        if (!window.cloudToken) {
            showToast('请先登录云账户');
            return;
        }

        // 获取所有数据
        const trips = await db.getAllTrips();
        const destinations = await db.getAllDestinations();
        const tags = await db.getAllTags();

        // 准备同步数据
        const syncData = {
            trips: trips,
            destinations: destinations,
            tags: tags,
            timestamp: Date.now()
        };

        // 通知原生层上传数据
        if (window.cordova) {
            cordova.exec(
                (result) => {
                    if (result.success) {
                        showToast('同步成功');
                        recordSyncHistory('上传成功', trips.length);
                    } else {
                        showToast('同步失败');
                    }
                },
                (error) => console.error('Sync error:', error),
                'SyncPlugin',
                'syncData',
                [{ data: syncData, token: window.cloudToken, timestamp: Date.now() }]
            );
        }
    } catch (error) {
        console.error('Error syncing:', error);
        showToast('同步失败');
    }
}
立即同步函数上传本地数据到云端。syncNow 函数是云同步的核心执行函数。函数首先检查用户是否已登录云账户,如果未登录则提示用户先登录。然后从本地数据库中获取所有数据,包括旅行、目的地和标签。接着准备同步数据对象,包含所有数据和时间戳。最后通过 Cordova 插件通知原生层上传数据到云端。原生层负责网络通信,将数据发送到云端服务器。同步完成后,函数记录同步历史,用户可以查看同步的详细信息。通过这个函数,用户可以随时将本地数据同步到云端,实现多设备间的数据同步。
启用自动同步函数
function enableAutoSync() {
    try {
        // 设置自动同步间隔(每5分钟)
        const autoSyncInterval = 5 * 60 * 1000;

        window.autoSyncTimer = setInterval(() => {
            syncNow();
        }, autoSyncInterval);

        showToast('自动同步已启用');

        // 通知原生层
        if (window.cordova) {
            cordova.exec(
                (result) => console.log('Auto sync enabled:', result),
                (error) => console.error('Enable error:', error),
                'SyncPlugin',
                'enableAutoSync',
                [{ interval: autoSyncInterval, timestamp: Date.now() }]
            );
        }
    } catch (error) {
        console.error('Error enabling auto sync:', error);
        showToast('启用自动同步失败');
    }
}
启用自动同步函数设置定时同步。
记录同步历史函数
async function recordSyncHistory(status, itemCount) {
    try {
        // 创建同步历史记录
        const history = {
            id: Date.now(),
            status: status,
            itemCount: itemCount,
            timestamp: new Date().toISOString()
        };

        // 保存到数据库
        await db.addSyncHistory(history);

        // 重新加载同步历史
        loadSyncHistory();
    } catch (error) {
        console.error('Error recording sync history:', error);
    }
}
记录同步历史函数保存同步操作的历史记录。
加载同步历史函数
async function loadSyncHistory() {
    try {
        // 获取同步历史
        const history = await db.getAllSyncHistory();

        // 按时间倒序排序
        history.sort((a, b) => new Date(b.timestamp) - new Date(a.timestamp));

        // 渲染同步历史
        renderSyncHistory(history);
    } catch (error) {
        console.error('Error loading sync history:', error);
    }
}
加载同步历史函数从数据库获取同步历史。
同步历史渲染函数
function renderSyncHistory(history) {
    const container = document.getElementById('historyItems');
    container.innerHTML = '';

    history.slice(0, 10).forEach(record => {
        const historyElement = document.createElement('div');
        historyElement.className = 'history-item';
        historyElement.innerHTML = `
            <div class="history-info">
                <span class="history-status">${record.status}</span>
                <span class="history-time">${formatDate(record.timestamp)}</span>
            </div>
            <div class="history-detail">
                <p>同步项目数: ${record.itemCount}</p>
            </div>
        `;
        container.appendChild(historyElement);
    });
}
同步历史渲染函数展示同步历史。
更新同步状态函数
function updateSyncStatus(status) {
    document.getElementById('syncStatusText').textContent = status;
}
更新同步状态函数更新 UI 中的同步状态。
🔌 OpenHarmony 原生代码实现
云同步插件
// SyncPlugin.ets
import { BusinessError } from '@ohos.base';
import { http } from '@kit.NetworkKit';

export class SyncPlugin {
    private cloudToken: string = '';
    private cloudUrl: string = 'https://api.example.com';

    // 用户登录
    login(args: any, callback: Function): void {
        try {
            const username = args[0].username;
            const password = args[0].password;

            // 这里应该调用云端 API 进行认证
            console.log(`[Sync] Login: ${username}`);

            // 模拟返回 token
            const token = 'mock_token_' + Date.now();

            callback({ success: true, token: token, message: '登录成功' });
        } catch (error) {
            callback({ success: false, error: error.message });
        }
    }

    // 同步数据
    syncData(args: any, callback: Function): void {
        try {
            const data = args[0].data;
            const token = args[0].token;

            console.log(`[Sync] Syncing data...`);

            // 这里应该调用云端 API 上传数据
            callback({ success: true, message: '数据已同步' });
        } catch (error) {
            callback({ success: false, error: error.message });
        }
    }

    // 启用自动同步
    enableAutoSync(args: any, callback: Function): void {
        try {
            const interval = args[0].interval;

            console.log(`[Sync] Auto sync enabled with interval: ${interval}ms`);

            callback({ success: true, message: '自动同步已启用' });
        } catch (error) {
            callback({ success: false, error: error.message });
        }
    }
}
云同步插件处理登录、数据同步和自动同步。
📝 总结
云同步功能展示了如何在 Cordova 与 OpenHarmony 框架中实现一个云端数据同步系统。Web 层负责同步 UI 和数据准备,原生层负责网络通信。通过云同步,用户可以在多设备间同步数据。

作为“人工智能6S店”的官方数字引擎,为AI开发者与企业提供一个覆盖软硬件全栈、一站式门户。
更多推荐


 26
26 0
0- 0


 已为社区贡献12条内容

所有评论(0)