
鸿蒙原生应用 Ark6.0实战:虚线上传卡 + 四件套表单 —— 票据上传页的录入架构
鸿蒙原生应用 Ark6.0实战:虚线上传卡 + 四件套表单 —— 票据上传页的录入架构
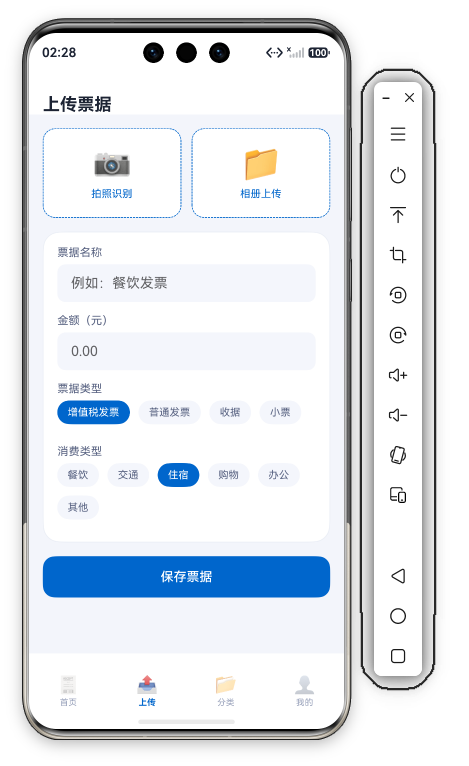
App 52「电子票据管理」上传页(Func1Tab),主题色
#0066CC科技蓝,4 个 Tab 分别为首页(🧾)、上传(📤)、分类(📂)、我的(👤)。本篇基于52-e-receipt/entry/src/main/ets/pages/Func1Tab.ets(共 107 行)逐段拆解,附 4 张实机截图。
一、整体结构:三区"Header + 上传卡 + 表单"布局
上传页是"入口 + 表单"的组合布局——3 个 @Builder 块:
build() {
  Column() {
    this.Header()
    Scroll() {
      Column({ space: 16 }) {
        this.UploadZone()
        this.FormCard()
        Button('保存票据').fontSize(15).fontColor('#FFFFFF').backgroundColor(C.primary)
          .width('100%').height(48).borderRadius(D.rMd)
          .onClick(() => { promptAction.showToast({ message: this.amount.length > 0 ? '票据已保存' : '请填写金额' }); })
      }
      .width('100%')
      .padding({ left: D.pad, right: D.pad, top: 16, bottom: D.pad + this.safeBottom + 20 })
    }
    .layoutWeight(1).scrollBar(BarState.Off).align(Alignment.Top)
  }
  .width('100%').height('100%').backgroundColor(C.bg)
}
3 块结构:UploadZone(拍照/相册双虚线卡)→ FormCard(四件套表单)→ 保存按钮。上传页是"录入页"——先选来源(拍照/相册),再填信息(名称/金额/类型/分类),最后保存。来源入口在上、信息表单在下,模拟真实记账流程。
二、四状态声明 + 数据模型
@State title: string = '';
@State amount: string = '';
@State activeType: number = 0;
@State activeCat: number = 0;
private types: string[] = ['增值税发票', '普通发票', '收据', '小票'];
private cats: string[] = ['餐饮', '交通', '住宿', '购物', '办公', '其他'];
四个 @State:title(票据名称)、amount(金额)、activeType(票据类型索引,默认 0)、activeCat(消费类型索引,默认 0)。types 4 种票据类型 + cats 6 种消费类型——两个独立维度(票据类型描述"票的凭证形式",消费类型描述"钱的去向")。
三、Header:单行标题
Header() {
  Row() { Text('上传票据').fontSize(20).fontWeight(FontWeight.Bold).fontColor(C.text) }
  .width('100%').height(this.safeTop + 56).padding({ top: this.safeTop, left: D.pad, right: D.pad })
  .backgroundColor(C.card).alignItems(VerticalAlign.Bottom)
}
20 号加粗(首页 22 号、功能页 20 号——字号差体现页面层级)、safeTop + 56 固定高、文字贴底——系列功能页 Header 统一范式。
四、UploadZone:拍照/相册双虚线卡
UploadZone() {
  Row({ space: 12 }) {
    Column({ space: 6 }) {
      Text('📷').fontSize(36)
      Text('拍照识别').fontSize(12).fontColor(C.primary)
    }.layoutWeight(1).padding({ top: 20, bottom: 20 })
    .backgroundColor(C.card).borderRadius(D.rMd).border({ width: 1, color: C.primary, style: BorderStyle.Dashed })
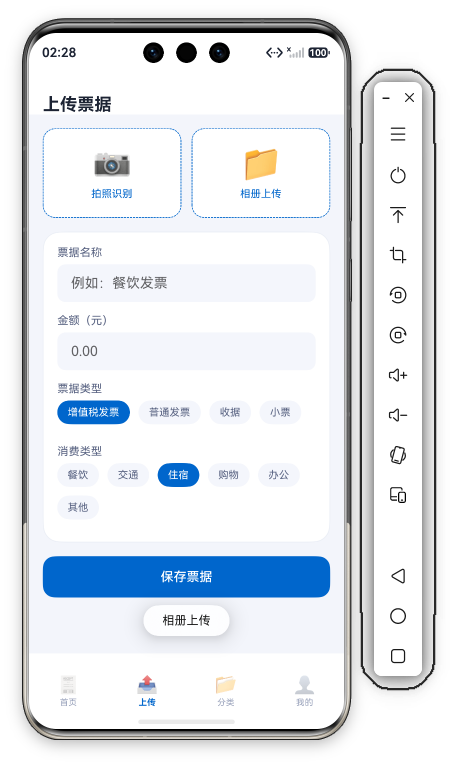
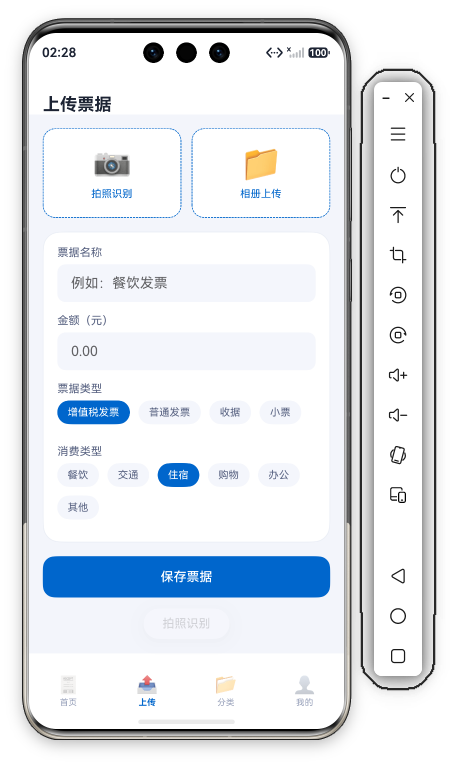
    .onClick(() => { promptAction.showToast({ message: '拍照识别' }); })
    Column({ space: 6 }) {
      Text('📁').fontSize(36)
      Text('相册上传').fontSize(12).fontColor(C.primary)
    }.layoutWeight(1).padding({ top: 20, bottom: 20 })
    .backgroundColor(C.card).borderRadius(D.rMd).border({ width: 1, color: C.primary, style: BorderStyle.Dashed })
    .onClick(() => { promptAction.showToast({ message: '相册上传' }); })
  }.width('100%')
}
逐点拆解:
- 双卡均分:两个
layoutWeight(1)Column——左右 1:1 平分宽度,拍照识别在左、相册上传在右。 - 蓝色虚线边框:
BorderStyle.Dashed+C.primary蓝——虚线 = "可点击上传区"的视觉语言(类比系统相册的虚线选择框),暗示"拖入/点击上传"。 - 36 号大图标:📷 / 📁 用 36 号——图标是上传卡的主体(比 12 号文字大得多),一眼识别两个入口。
- 主色文字标签:12 号
C.primary蓝字——与虚线同色呼应,强调"这是主功能入口"。
五、FormCard:四件套录入表单
FormCard() {
  Column({ space: 14 }) {
    Column({ space: 6 }) {
      Text('票据名称').fontSize(13).fontColor(C.textSub).width('100%')
      TextInput({ placeholder: '例如:餐饮发票' })
        .backgroundColor(C.cardSoft).borderRadius(D.rSm).height(44)
        .onChange((v: string) => { this.title = v; })
    }
    Column({ space: 6 }) {
      Text('金额(元)').fontSize(13).fontColor(C.textSub).width('100%')
      TextInput({ placeholder: '0.00' }).type(InputType.Number)
        .backgroundColor(C.cardSoft).borderRadius(D.rSm).height(44)
        .onChange((v: string) => { this.amount = v; })
    }
前两件套:
- 票据名称:
TextInput44 高淡蓝灰底圆角 10,onChange绑?定this.title——普通文本输入。 - 金额(元):
InputType.Number数字键盘 + 占位符"0.00"——金额是本页最关键字段(保存按钮校验它),数字键盘减少输入错误。
    Column({ space: 6 }) {
      Text('票据类型').fontSize(13).fontColor(C.textSub).width('100%')
      Flex({ wrap: FlexWrap.Wrap }) {
        ForEach(this.types, (t: string, idx: number) => {
          Text(t).fontSize(12)
            .fontColor(this.activeType === idx ? '#FFFFFF' : C.textSub)
            .padding({ left: 12, right: 12, top: 7, bottom: 7 })
            .backgroundColor(this.activeType === idx ? C.primary : C.cardSoft).borderRadius(14)
            .margin({ right: 10, bottom: 10 })
            .onClick(() => { this.activeType = idx; })
        }, (t: string) => t)
      }.width('100%')
    }
第三件套——票据类型 4 胶囊:
- Flex 换行胶囊:
Flex({ wrap: FlexWrap.Wrap })+ 4 项——选中C.primary蓝底白字、未选C.cardSoft灰底灰字,圆角 14、margin({ right: 10, bottom: 10 })间距。
    Column({ space: 6 }) {
      Text('消费类型').fontSize(13).fontColor(C.textSub).width('100%')
      Flex({ wrap: FlexWrap.Wrap }) {
        ForEach(this.cats, (c: string, idx: number) => {
          Text(c).fontSize(12)
            .fontColor(this.activeCat === idx ? '#FFFFFF' : C.textSub)
            .padding({ left: 12, right: 12, top: 7, bottom: 7 })
            .backgroundColor(this.activeCat === idx ? C.primary : C.cardSoft).borderRadius(14)
            .margin({ right: 10, bottom: 10 })
            .onClick(() => { this.activeCat = idx; })
        }, (c: string) => c)
      }.width('100%')
    }
第四件套——消费类型 6 胶囊:同款胶囊逻辑,activeCat 独立选中,6 类换行排两行。胶囊选中态公式:选中 = 白字蓝底、未选 = 灰字灰底——两处(类型/分类)完全一致。
六、保存按钮:三元校验
Button('保存票据').fontSize(15).fontColor('#FFFFFF').backgroundColor(C.primary)
  .width('100%').height(48).borderRadius(D.rMd)
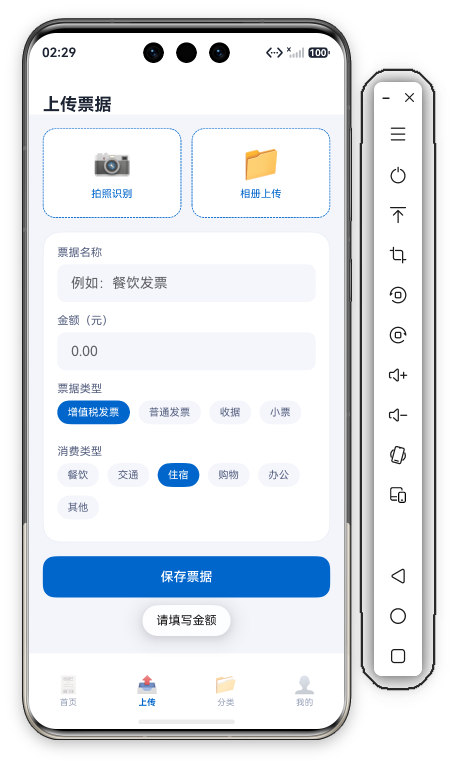
  .onClick(() => { promptAction.showToast({ message: this.amount.length > 0 ? '票据已保存' : '请填写金额' }); })
逐点拆解:
- 全宽蓝色 CTA:
width('100%').height(48)+C.primary——表单页标准 CTA 形态。 - 三元校验:
this.amount.length > 0 ? '票据已保存' : '请填写金额'——以金额字段为校验锚点(金额是票据的核心字段,没有金额的票据没有财务意义),非空 → 保存成功、为空 → 提示填写。 - Toast 轻反馈:成功/失败都用 Toast——不遮挡表单、不打断录入流程。
七、跨页数据自洽:上传是票据的"进库口"
private cats: string[] = ['餐饮', '交通', '住宿', '购物', '办公', '其他'];
上传页"消费类型 6 胶囊" ↔ 首页票据的分类标签(餐饮/交通/住宿/购物)↔ 分类页 6 分类——同一套分类体系,录入维度 = 统计维度。保存的新票据会出现在首页列表(receipts.unshift() 插入头部),上传的每一笔都汇入首页总额。
八、系列横向对比:录入页的五种形态
| 录入页 | 代表 App | 录入方式 | 核心特色 |
|---|---|---|---|
| 双虚线卡 + 表单 | App 52 上传 | 先采集后录入 | 来源双卡 + 校验保存 |
| 九宫格选图 | App 40 活动照片 | 以图为主 | 少字段录入 |
| 所见即所得 | App 43 明信片 | 编辑驱动 | 模板化录入 |
| 相机取景 | App 51 证件照 | 相机驱动 | 规格预选 |
| 动态选项 | App 49 投票 | 纯表单 | 动态增删选项 |
差异点:App 52 的"来源双卡 + 校验式保存"——虚线卡强调"票据可以拍照也可以从相册传",保存按钮的金额校验是财务场景的刚性需求。
九、开发者视角:调试与验证技巧
- TextInput 受控绑定:
onChange里this.title = v是单向绑定——若要回显需TextInput({ text: this.title })双向,当前是"只存不显"。 - Number 键盘边界:
InputType.Number只限制键盘类型,不限制小数格式——产品化时应amount.replace(/[^\d.]/g, '')过滤非法字符。 - 胶囊默认值:
activeType = 0/activeCat = 0默认选中第一项——降低用户决策成本,但保存时要把默认值也纳入校验。 - 校验锚点单一:只校验金额——名称/类型/分类允许为空。产品化建议名称为空时自动用类型+日期兜底("普通发票 08-15")。
- 虚线边框平台差异:
BorderStyle.Dashed在部分真机主题下虚线密度不同——建议真机验证跨设备一致性。
十、演进方向
| 方向 | 当前状态 | 产品化演进 |
|---|---|---|
| 拍照识别 | Toast"拍照识别" | 图像预处理 → OCR 文字识别 → 字段自动回填 |
| 相册上传 | Toast"相册上传" | PhotoViewPicker 选图 → 预览 → 回填 |
| 表单校验 | 仅校验金额非空 | 金额格式(两位小数)+ 名称长度 + 默认值兜底 |
| 保存反馈 | Toast"票据已保存" | 返回首页刷新 + 新票据置顶 + 成功动画 |
| 权限申请 | 无 | 相机权限 + 相册读取权限 |
十一、一句话总结
上传页以"双虚线上传卡 + 四件套表单 + 校验保存"完成了票据的录入闭环。BorderStyle.Dashed 蓝色虚线边框暗示可点击上传区、InputType.Number 数字键盘降低金额输入错误、Flex({ wrap: FlexWrap.Wrap }) 换行胶囊单选减少操作步骤、三元校验 amount.length > 0 ? '票据已保存' : '请填写金额' 以金额为锚点——107 行代码,一个"拍照/上传 → 填表单 → 校验保存"的票据进库页,也是录入型页面的标准参考。


作为“人工智能6S店”的官方数字引擎,为AI开发者与企业提供一个覆盖软硬件全栈、一站式门户。
更多推荐



 0
0 0
0- 0



 已为社区贡献388条内容

所有评论(0)