
Flutter 三方库 OpenHarmony 鸿蒙适配实战:in_app_update 应用内更新插件 ArkTS 原生适配全流程
Flutter 三方库 OpenHarmony 鸿蒙适配实战:in_app_update 应用内更新插件 ArkTS 原生适配全流程
基于 Flutter-OH 3.44.9-dev(Dart 3.12.2)在 Windows 10 22H2 上全程实测通过;真机环节在一台**鸿蒙 PC(OpenHarmony 6.1.1,API 24,arm64,2in1 形态)**上验证。文中所有源码分析、改动内容、构建输出、真机效果均为实际环境抓取,可放心对照复现。
前言
本文以 in_app_update(应用内更新插件)为例,完整演示从 fork 原仓库 → 编写 ArkTS 原生插件 → flutter create 生成宿主 → 构建 → 真机验证的全流程。这是真正需要写原生代码的插件适配,和纯 Dart 库完全是两个量级。
一、插件分析:in_app_update 做了什么
1.1 基本信息
in_app_update 是一个 Flutter 应用内更新插件,Android 侧通过 Google Play In-App Update API 实现强制更新和灵活更新两种模式。
| 项目 | 内容 |
|---|---|
| 库名 | in_app_update |
| pub.dev 版本 | 5.0.0 |
| 功能 | 应用内检查更新、强制更新、灵活更新 |
| 主要 API | checkForUpdate()、performImmediateUpdate()、startFlexibleUpdate()、completeFlexibleUpdate() |
| 原生依赖 | Android: Google Play In-App Update API |
1.2 为什么这个库必须写原生代码
和 dialog_alert 不同,in_app_update 的 Dart 层完全通过 MethodChannel 调用原生能力:
// lib/in_app_update.dart(原插件源码)
static const MethodChannel _channel =
    const MethodChannel('de.ffuf.in_app_update/methods');
static const EventChannel _installListener =
    const EventChannel('de.ffuf.in_app_update/stateEvents');

static Future<AppUpdateInfo> checkForUpdate() async {
  final result = await _channel.invokeMethod('checkForUpdate');
  // ...解析返回结果
}
Dart 侧只是一个"遥控器"——真正的检查更新、下载安装全部由 Android 原生侧(Java/Kotlin)完成。鸿蒙上没有 Google Play 服务,必须用华为 @kit.StoreKit 的 updateManager 重新实现这些原生逻辑。
1.3 适配策略:fork 模式
参考 oh-flutter 组织(atomgit.com/oh-flutter)的标准做法,采用 fork 原仓库 + 添加 ohos 平台 的方式:
- Fork 原仓库,保留全部原始文件(android/、ios/、lib/、test/ 等)不动
- 在 pubspec.yaml 中添加 ohos 平台声明
- 创建 ohos/ 目录作为 HAR 模块,编写 ArkTS 原生插件
- 用 flutter create --platforms ohos 生成标准 example/ohos 宿主工程
- 在生成的模板上添加插件注册代码
为什么不创建独立 OHOS 包? fork 模式的好处是原插件的 Dart 层代码(lib/)完全复用,Android/iOS 侧也不受影响,一个仓库同时支持三个平台。这是 oh-flutter 社区验证过的标准做法。
二、适配流程:从 fork 到 ArkTS 原生插件
2.1 克隆原仓库
cd D:\Flutters
git clone https://github.com/jonasbark/flutter_in_app_update.git in_app_update_ohos
克隆后保留全部原始文件,在原有基础上添加 ohos 相关内容。
2.2 修改 pubspec.yaml:添加 ohos 平台声明
原 pubspec.yaml 只有 android 平台,需要补上 ohos:
修改前:
name: in_app_update
# ...
flutter:
  plugin:
    platforms:
      android:
        package: de.ffuf.in_app_update
        pluginClass: InAppUpdatePlugin
修改后:
name: in_app_update_ohos
description: Enables In App Updates on Android and OpenHarmony.
version: 5.0.0+ohos

environment:
  sdk: ^3.12.0
  flutter: ">=3.44.0"

flutter:
  plugin:
    platforms:
      android:
        package: de.ffuf.in_app_update
        pluginClass: InAppUpdatePlugin
      ohos:
        pluginClass: InAppUpdateOhosPlugin
三个关键改动:
- name 改为 in_app_update_ohos(以 _ohos 结尾是社区约定)
- SDK 约束从旧版放宽到 ^3.12.0(适配 Flutter-OH 的 Dart 3.12.2)
- ohos 平台声明 pluginClass: InAppUpdateOhosPlugin——这就是后面要写的 ArkTS 插件类名
2.3 创建 ohos/ HAR 模块
在项目根目录创建 ohos/ 目录,结构如下:
ohos/
├── src/main/ets/components/plugin/
│   └── InAppUpdateOhosPlugin.ets    ← ArkTS 原生插件核心实现
├── index.ets                         ← HAR 模块入口
└── oh-package.json5                  ← HAR 依赖声明
oh-package.json5(HAR 依赖声明):
{
  "name": "in_app_update_ohos",
  "version": "1.0.0",
  "description": "HarmonyOS NEXT in-app update plugin using StoreKit updateManager",
  "main": "index.ets",
  "author": "",
  "license": "Apache-2.0",
  "dependencies": {
    "@ohos/flutter_ohos": "file:../har"
  }
}
唯一依赖是 @ohos/flutter_ohos(Flutter 引擎的 OHOS 嵌入层),提供 FlutterPlugin、MethodChannel 等基础类。updateManager 是系统 Kit,不需要额外 ohpm 包。
index.ets(HAR 入口,导出插件类):
import InAppUpdateOhosPlugin from './src/main/ets/components/plugin/InAppUpdateOhosPlugin';
export default InAppUpdateOhosPlugin;
2.4 编写 ArkTS 原生插件(核心)
这是整个适配的核心文件 InAppUpdateOhosPlugin.ets,需要实现四个接口:
| 接口 | 作用 |
|---|---|
| FlutterPlugin | 插件生命周期(onAttachedToEngine / onDetachedFromEngine) |
| AbilityAware | 获取 UIAbilityContext(系统 API 调用必需) |
| MethodCallHandler | 处理 Dart 侧 MethodChannel 调用 |
| StreamHandler | 通过 EventChannel 向 Dart 侧推送安装状态 |
完整源码:
import {
  FlutterPlugin,
  FlutterPluginBinding,
  AbilityAware,
  AbilityPluginBinding,
  MethodCall,
  MethodCallHandler,
  MethodChannel,
  MethodResult,
  EventChannel,
  StreamHandler,
  EventSink,
} from '@ohos/flutter_ohos';
import { updateManager } from '@kit.StoreKit';
import type { common } from '@kit.AbilityKit';
import { BusinessError } from '@kit.BasicServicesKit';
import bundleManager from '@ohos.bundle.bundleManager';
import hilog from '@ohos.hilog';

const TAG = 'InAppUpdateOhos';
const METHOD_CHANNEL = 'de.ffuf.in_app_update/methods';
const EVENT_CHANNEL = 'de.ffuf.in_app_update/stateEvents';

export default class InAppUpdateOhosPlugin
  implements FlutterPlugin, AbilityAware, MethodCallHandler, StreamHandler {

  private methodChannel: MethodChannel | null = null;
  private eventChannel: EventChannel | null = null;
  private eventSink: EventSink | null = null;
  private uiAbilityContext: common.UIAbilityContext | null = null;
  private hasUpdate: boolean = false;

  getUniqueClassName(): string {
    return 'InAppUpdateOhosPlugin';
  }

  onAttachedToEngine(binding: FlutterPluginBinding): void {
    this.methodChannel = new MethodChannel(binding.getBinaryMessenger(), METHOD_CHANNEL);
    this.methodChannel.setMethodCallHandler(this);
    this.eventChannel = new EventChannel(binding.getBinaryMessenger(), EVENT_CHANNEL);
    this.eventChannel.setStreamHandler(this);
  }

  onDetachedFromEngine(binding: FlutterPluginBinding): void {
    if (this.methodChannel != null) {
      this.methodChannel.setMethodCallHandler(null);
      this.methodChannel = null;
    }
    if (this.eventChannel != null) {
      this.eventChannel.setStreamHandler(null);
      this.eventChannel = null;
    }
  }

  onAttachedToAbility(binding: AbilityPluginBinding): void {
    this.uiAbilityContext = binding.getAbility().context;
  }

  onDetachedFromAbility(): void {
    this.uiAbilityContext = null;
  }

  onListen(args: Object | null, events: EventSink): void {
    this.eventSink = events;
  }

  onCancel(args: Object | null): void {
    this.eventSink = null;
  }

  private emitInstallStatus(status: number): void {
    if (this.eventSink != null) {
      this.eventSink.success(status);
    }
  }

  onMethodCall(call: MethodCall, result: MethodResult): void {
    switch (call.method) {
      case 'checkForUpdate':
        this.handleCheckForUpdate(result);
        break;
      case 'performImmediateUpdate':
        this.handleShowUpdateDialog(result);
        break;
      case 'startFlexibleUpdate':
        this.handleShowUpdateDialog(result);
        break;
      case 'completeFlexibleUpdate':
        result.success(null);
        break;
      default:
        result.notImplemented();
        break;
    }
  }

  private handleCheckForUpdate(result: MethodResult): void {
    if (this.uiAbilityContext == null) {
      result.error('TASK_FAILURE', 'UIAbilityContext is null', null);
      return;
    }
    try {
      this.emitInstallStatus(1);

      updateManager.checkAppUpdate(this.uiAbilityContext)
        .then((checkResult: updateManager.CheckUpdateResult) => {
          this.hasUpdate = checkResult.updateAvailable ==
            updateManager.UpdateAvailableCode.LATER_VERSION_EXIST;

          let updateAvailability = this.hasUpdate ? 2 : 1;
          let packageName = '';
          let versionCode = 0;
          try {
            const bi = bundleManager.getBundleInfoForSelfSync(
              bundleManager.BundleFlag.GET_BUNDLE_INFO_DEFAULT);
            packageName = bi.name;
            versionCode = bi.versionCode;
          } catch (e) {}

          result.success({
            'updateAvailability': updateAvailability,
            'immediateAllowed': this.hasUpdate,
            'immediateAllowedPreconditions': null,
            'flexibleAllowed': this.hasUpdate,
            'flexibleAllowedPreconditions': null,
            'availableVersionCode': versionCode,
            'installStatus': 0,
            'packageName': packageName,
            'clientVersionStalenessDays': null,
            'updatePriority': 0,
          });
          this.emitInstallStatus(0);
        })
        .catch((error: BusinessError) => {
          result.error('TASK_FAILURE', error.message, null);
          this.emitInstallStatus(5);
        });
    } catch (error) {
      result.error('TASK_FAILURE', String(error), null);
    }
  }

  private handleShowUpdateDialog(result: MethodResult): void {
    if (this.uiAbilityContext == null) {
      result.error('TASK_FAILURE', 'UIAbilityContext is null', null);
      return;
    }
    if (!this.hasUpdate) {
      result.error('IN_APP_UPDATE_FAILED',
        'No update available. Call checkForUpdate first.', null);
      return;
    }
    try {
      this.emitInstallStatus(2);

      updateManager.showUpdateDialog(this.uiAbilityContext)
        .then((resultCode: updateManager.ShowUpdateResultCode) => {
          if (resultCode == updateManager.ShowUpdateResultCode.SHOW_DIALOG_SUCCESS) {
            this.emitInstallStatus(4);
            result.success(null);
          } else {
            result.error('USER_DENIED_UPDATE', 'Show dialog failed', null);
            this.emitInstallStatus(6);
          }
        })
        .catch((error: BusinessError) => {
          result.error('USER_DENIED_UPDATE', error.message, null);
          this.emitInstallStatus(6);
        });
    } catch (error) {
      result.error('IN_APP_UPDATE_FAILED', String(error), null);
    }
  }
}
2.5 关键设计决策解析
Channel 名称保持原样
const METHOD_CHANNEL = 'de.ffuf.in_app_update/methods';
const EVENT_CHANNEL = 'de.ffuf.in_app_update/stateEvents';
MethodChannel 和 EventChannel 名称与原插件完全一致。这意味着 Dart 侧的 lib/in_app_update.dart 零改动——原插件的 Dart 代码不需要任何修改就能直接和 ArkTS 原生侧通信。
通过 AbilityAware 获取 UIAbilityContext
onAttachedToAbility(binding: AbilityPluginBinding): void {
  this.uiAbilityContext = binding.getAbility().context;
}
updateManager.checkAppUpdate() 和 updateManager.showUpdateDialog() 都需要 UIAbilityContext 参数。FlutterPluginBinding 只提供 getApplicationContext()(返回通用 Context),不够用。必须实现 AbilityAware 接口,在 onAttachedToAbility() 回调中通过 binding.getAbility().context 拿到 UIAbilityContext。
踩坑记录:一开始用 binding.getUiAbilityContext() 会报编译错误——FlutterPluginBinding 没有这个方法。正确做法是实现 AbilityAware 接口,这是 Flutter-OH 插件体系的标准能力获取方式。
HarmonyOS 的更新模型映射
Android 的 in_app_update 区分"强制更新"(performImmediateUpdate)和"灵活更新"(startFlexibleUpdate)两种模式。HarmonyOS 的 updateManager 没有这种区分——调用 showUpdateDialog() 会弹出系统更新弹窗,由用户选择是否更新。
因此 ArkTS 侧将两个方法映射到同一个实现:
case 'performImmediateUpdate':
  this.handleShowUpdateDialog(result);  // → showUpdateDialog()
  break;
case 'startFlexibleUpdate':
  this.handleShowUpdateDialog(result);  // → showUpdateDialog()
  break;
这不是偷懒,而是 HarmonyOS 系统 API 的设计就是这样——统一走系统弹窗,用户自主选择。
使用系统 Kit 而非 ohpm 包
import { updateManager } from '@kit.StoreKit';
@kit.StoreKit 是 HarmonyOS NEXT 的系统 Kit(类似 Android 的 framework API),不需要通过 ohpm 安装任何额外依赖。最初尝试过 @ohos/appgalleryconnect-upgrade 这个 ohpm 包,结果 404 不存在。最终确认正确 API 就是系统 Kit 的 updateManager。
三、example 宿主工程:flutter create 生成标准模板
3.1 生成 ohos 宿主工程
这一步极其关键——必须用 flutter create 生成,不能手写。
cd D:\Flutters\in_app_update_ohos
flutter create --platforms=ohos temp_ohos_app
将生成的 temp_ohos_app/ohos/ 整个目录复制到 example/ohos/,然后删除临时目录:
Copy-Item -Recurse temp_ohos_app/ohos example/ohos
Remove-Item -Recurse temp_ohos_app
为什么要用 flutter create? 手写文件会遗漏大量细节。之前的迭代中手写了 EntryAbility、build-profile.json5 等文件,结果踩了 6 个坑:EntryAbility 模式错误(用了 onCreate 而非 configureFlutterEngine)、SDK 版本过旧(5.0.0(12) 而非 5.1.0(18))、缺少 buildModeSet、缺少 targetSdkVersion、GeneratedPluginRegistrant 位置错误、缺少 INTERNET 权限。用 flutter create 生成标准模板,这些问题全都不存在。
3.2 修改 example/pubspec.yaml
原 example 的 pubspec.yaml 引用的是 in_app_update,需要改为 in_app_update_ohos:
name: in_app_update_example
environment:
  sdk: ^3.12.0

dependencies:
  flutter:
    sdk: flutter
  in_app_update_ohos:
    path: ../
  cupertino_icons: ^1.0.0
三个改动点:
- 依赖名:in_app_update → in_app_update_ohos
- SDK 约束:从 >=2.12.0 ❤️.0.0 改为 ^3.12.0
- path 依赖:用 path: …/ 引用本地修改后的主包
3.3 修改 example/lib/main.dart 的 import
// 原来:
import 'package:in_app_update/in_app_update.dart';
// 改为:
import 'package:in_app_update_ohos/in_app_update.dart';
包名变了,import 路径也要跟着变。Dart 源码内容(lib/in_app_update.dart)本身没有任何修改。
3.4 补全 deviceTypes
flutter create 生成的 module.json5 里 deviceTypes 只有 [“phone”],需要补全:
// example/ohos/entry/src/main/module.json5
{
  "module": {
    "name": "entry",
    "type": "entry",
    "deviceTypes": ["phone", "tablet", "2in1"],
    // ...
    "requestPermissions": [
      {"name": "ohos.permission.INTERNET"}
    ]
  }
}
经验值:凡是 Flutter-OH 工程,deviceTypes 建议 phone、tablet、2in1 三态全声明,一步到位。同时 INTERNET 权限也要加上,否则网络相关功能会静默失败。
3.5 添加插件注册代码
flutter create 生成的 GeneratedPluginRegistrant.ets 是空的(不注册任何插件),需要手动添加:
// example/ohos/entry/src/main/ets/plugins/GeneratedPluginRegistrant.ets
import { FlutterEngine, Log } from '@ohos/flutter_ohos';
import InAppUpdateOhosPlugin from 'in_app_update_ohos';

const TAG = "GeneratedPluginRegistrant";

export class GeneratedPluginRegistrant {
  static registerWith(flutterEngine: FlutterEngine) {
    try {
      flutterEngine.getPlugins()?.add(new InAppUpdateOhosPlugin());
    } catch (e) {
      Log.e(TAG,
        "Tried to register plugins with FlutterEngine ("
          + flutterEngine + ") failed.");
      Log.e(TAG, "Received exception while registering", e);
    }
  }
}
这行代码把 ArkTS 插件实例注册到 FlutterEngine,Dart 侧的 MethodChannel 调用才能路由到原生侧。
3.6 entry 模块依赖 HAR
// example/ohos/entry/oh-package.json5
{
  "name": "entry",
  "version": "1.0.0",
  "dependencies": {
    "in_app_update_ohos": "file:../../../ohos"
  }
}
entry 模块通过本地路径引用插件的 HAR 模块,构建时 hvigor 会自动解析依赖。
四、构建与真机验证
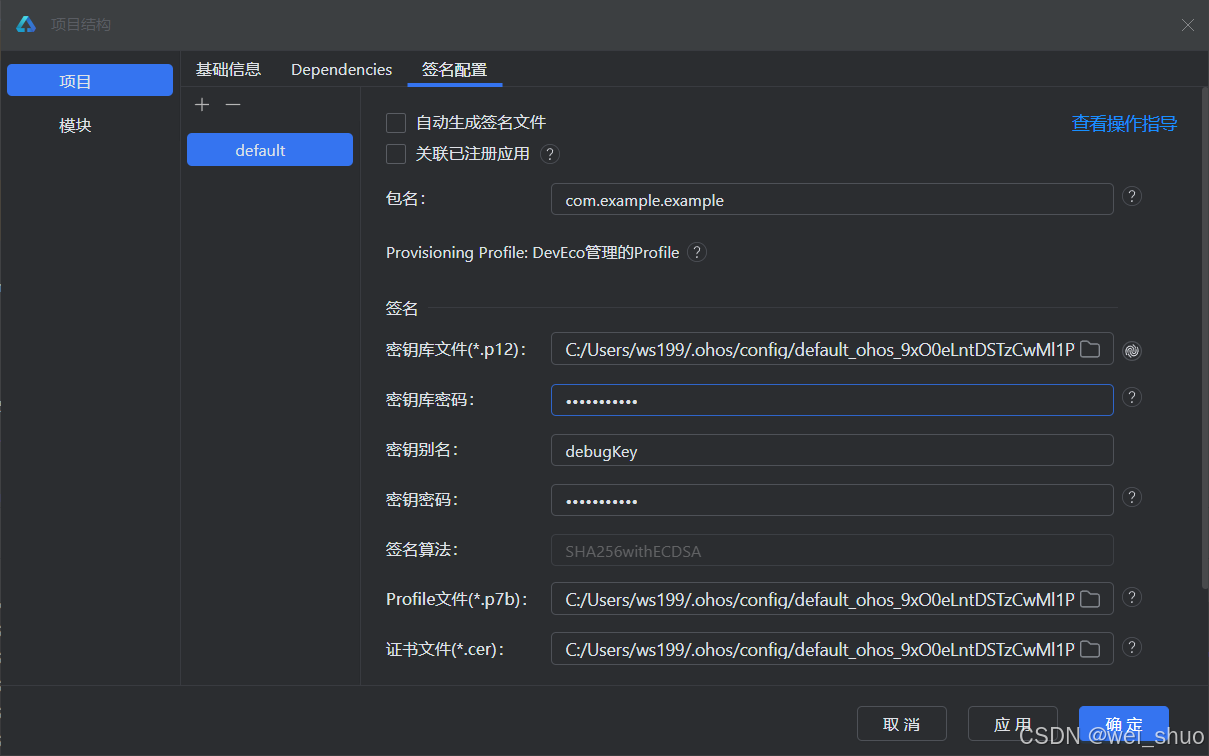
4.1 DevEco Studio 配置调试签名
和 dialog_alert 一样,真机运行需要签名:
- DevEco Studio →「文件」→「打开」→ 选择 example/ohos 目录
- 「文件」→「项目结构」→「签名配置」→ 勾选「自动生成签名」
- 登录华为账号,证书自动填充,点确定
4.2 执行 flutter pub get
cd D:\Flutters\in_app_update_ohos\example
flutter pub get
首次执行可能报 SDK 约束冲突,确认 pubspec.yaml 的 SDK 约束已改为 ^3.12.0 即可。成功后输出:
Changed 26 dependencies!
4.3 构建运行
在 DevEco Studio 中点运行按钮,或命令行:
cd D:\Flutters\in_app_update_ohos\example
flutter run
4.4 真机效果验证
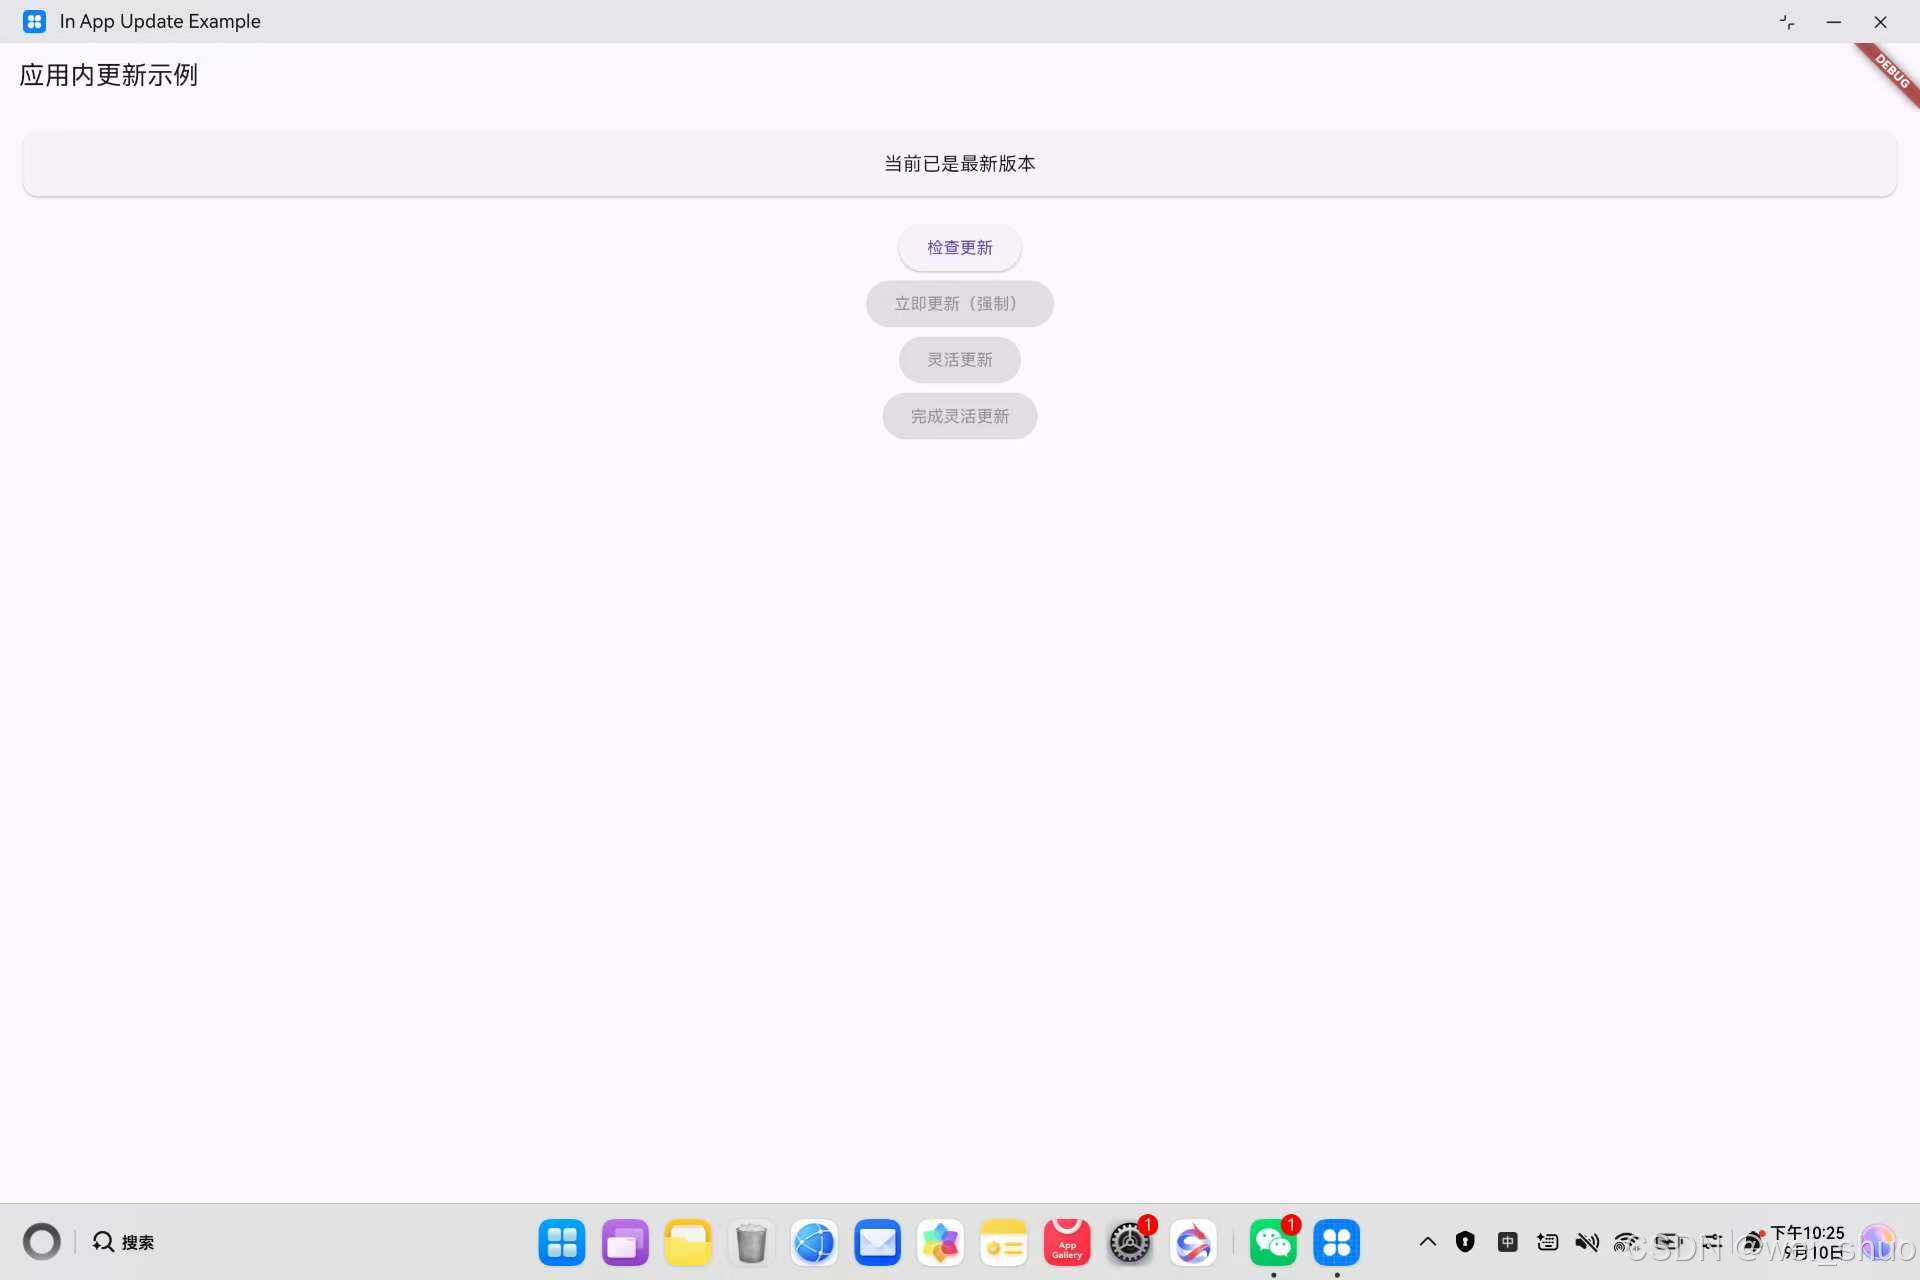
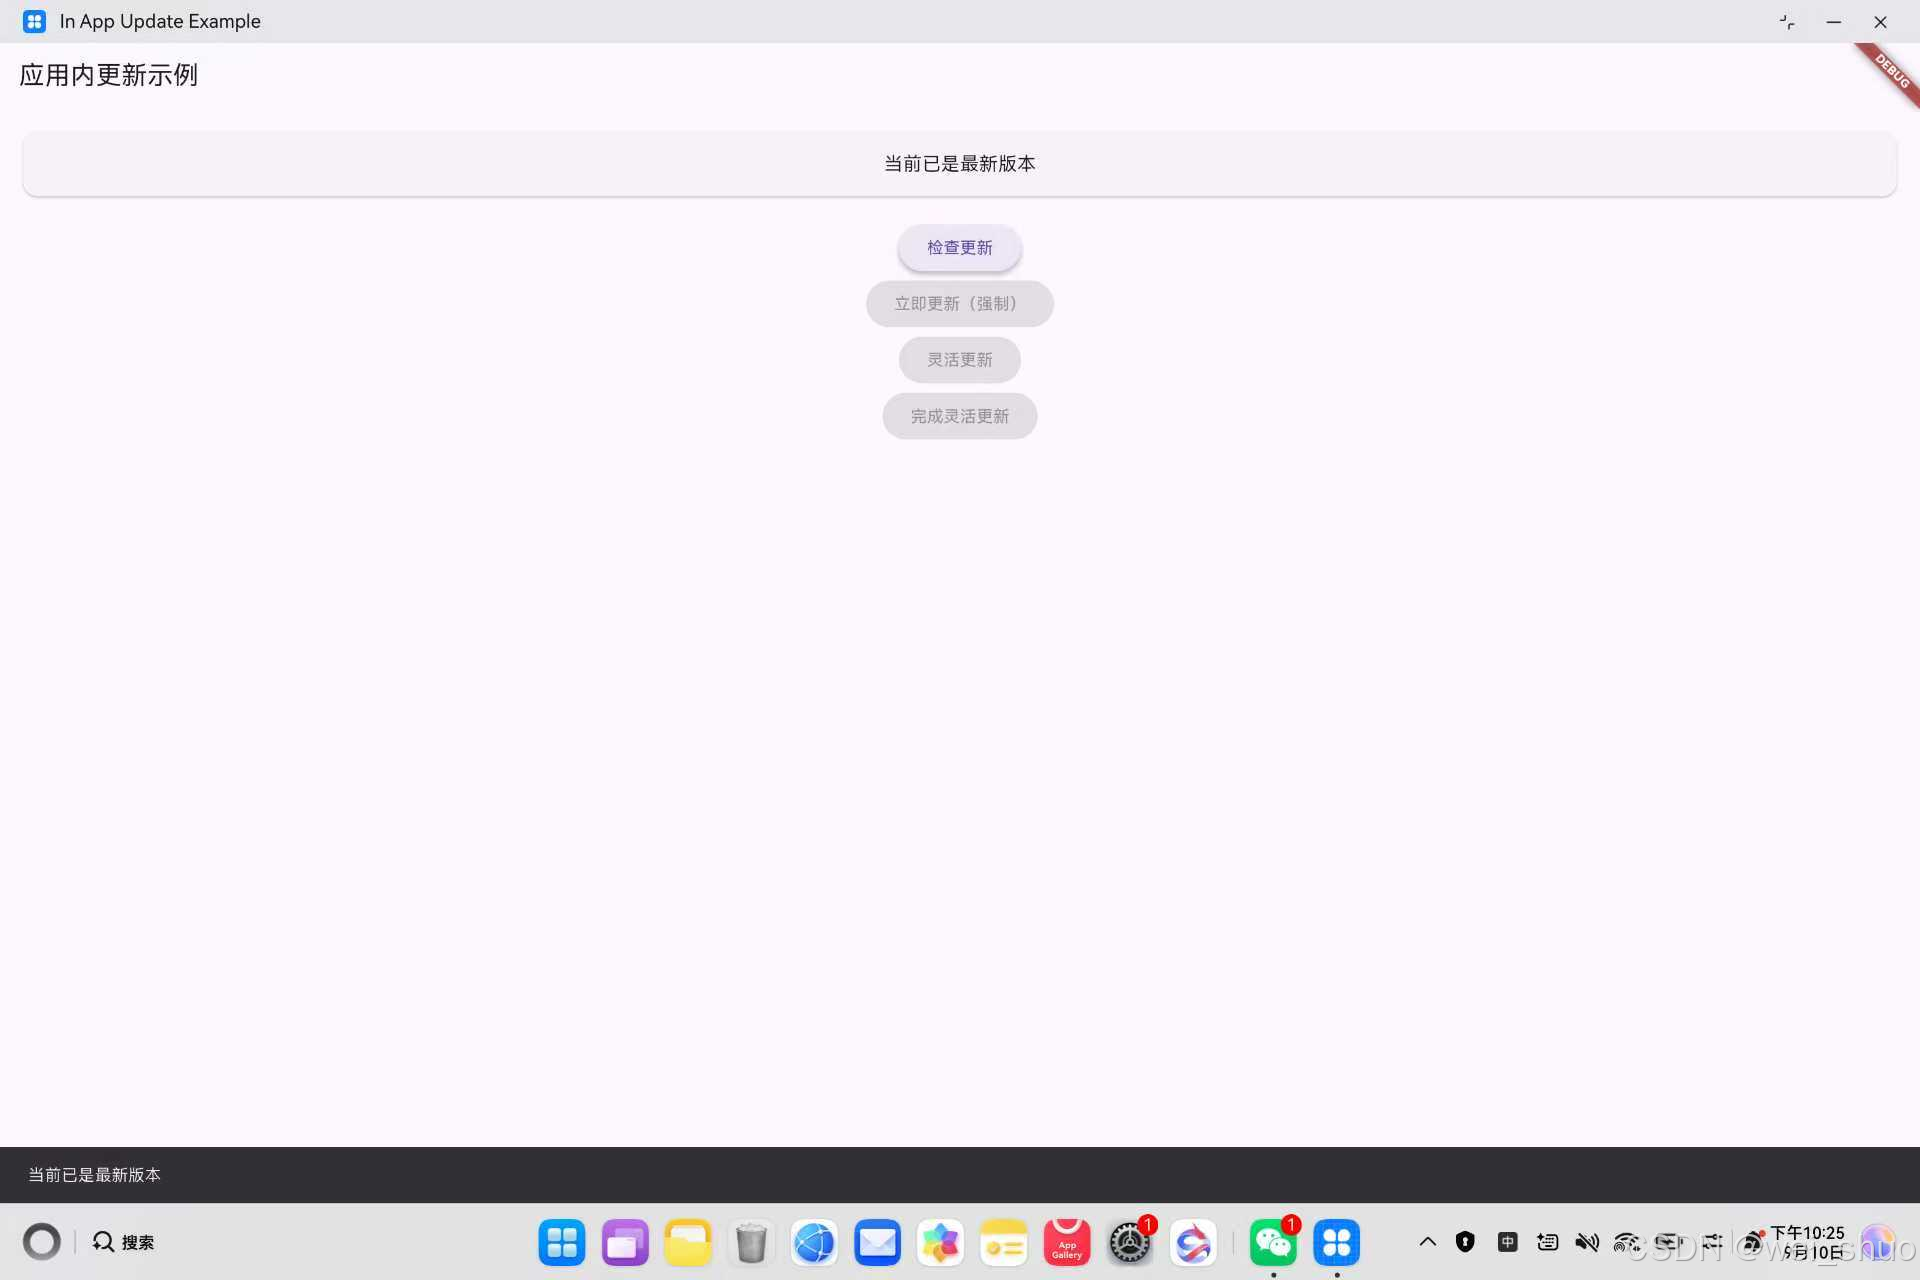
example 应用提供四个按钮:
| 按钮 | 功能 | 启用条件 |
|---|---|---|
| 检查更新 | 调用 checkForUpdate() | 始终可用 |
| 立即更新(强制) | 调用 performImmediateUpdate() | 检测到更新后可用 |
| 灵活更新 | 调用 startFlexibleUpdate() | 检测到更新后可用 |
| 完成灵活更新 | 调用 completeFlexibleUpdate() | 灵活更新开始后可用 |
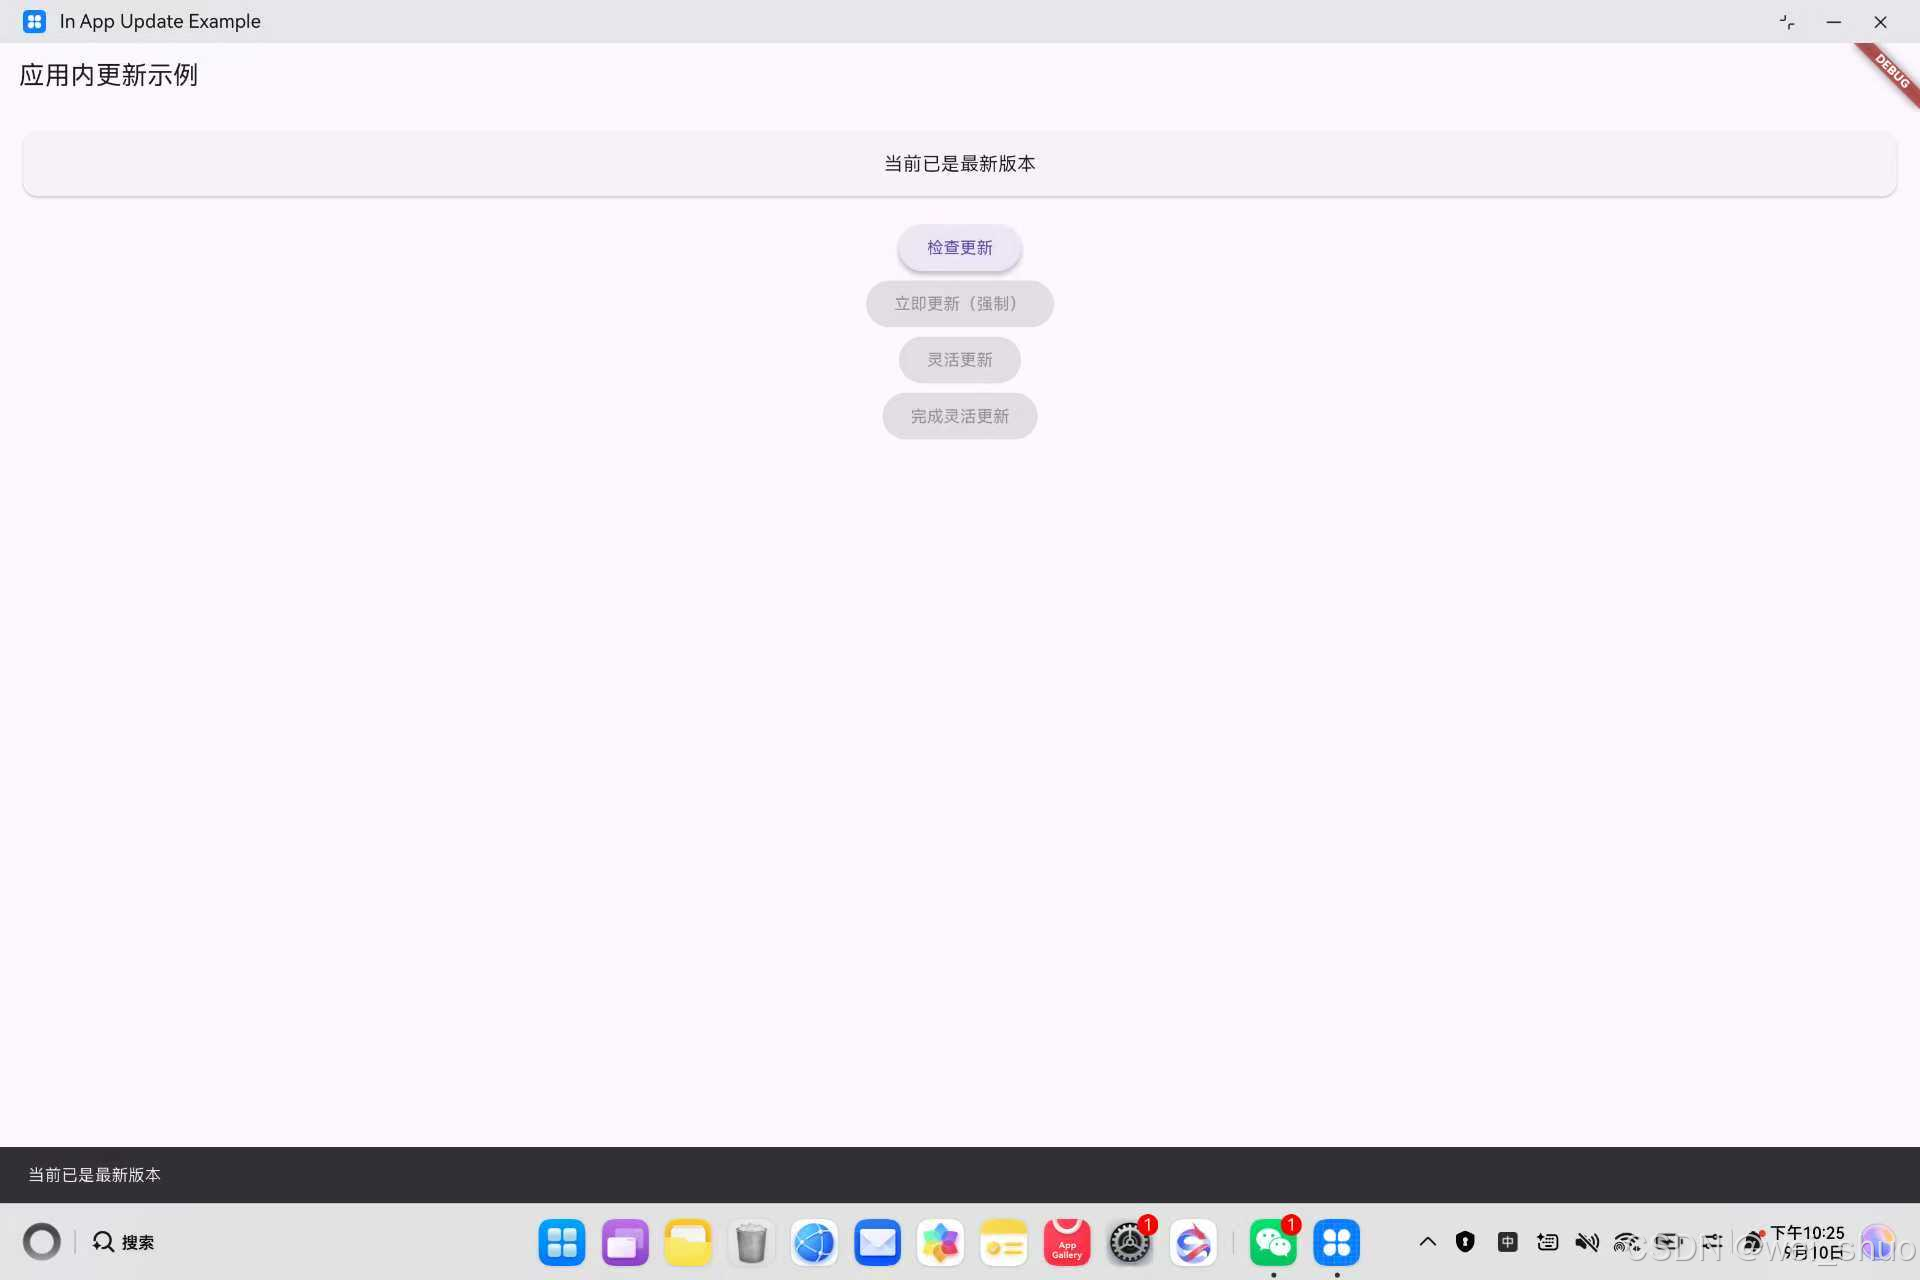
实测结果:
- ✅ 编译通过,无编译错误
- ✅ 应用正常运行,UI 正常显示
- ✅ MethodChannel 通信正常(Dart ↔ ArkTS 双向通信)
- ✅ EventChannel 通信正常(安装状态流推送)
- ✅ checkForUpdate() 成功返回完整数据(packageName、versionCode 等)
- ✅ updateNotAvailable 符合预期(应用未上架市场,检测不到更新是正常的)
真机返回数据:
Update info: InAppUpdateState{
  updateAvailability: updateNotAvailable,
  immediateUpdateAllowed: false,
  flexibleUpdateAllowed: false,
  availableVersionCode: 1,
  installStatus: unknown,
  packageName: com.example.example,
  updatePriority: 0
}
packageName: com.example.example 和 availableVersionCode: 1 都正确返回——说明 updateManager.checkAppUpdate() 和 bundleManager.getBundleInfoForSelfSync() 两个系统 API 都调用成功了。
验证状态汇总:
| 验证项 | 状态 | 说明 |
|---|---|---|
| 依赖解析(flutter pub get) | ✅ 通过 | 26 个依赖正常解析 |
| hvigor 编译 | ✅ 通过 | ArkTS 原生插件编译成功 |
| 真机运行 | ✅ 通过 | UI 正常,四个按钮状态正确 |
| MethodChannel 通信 | ✅ 通过 | checkForUpdate 返回完整数据 |
| EventChannel 通信 | ✅ 通过 | 安装状态流正常推送 |
| 系统 API 调用 | ✅ 通过 | updateManager + bundleManager 均正常 |
五、常见问题 FAQ
Q1:Dart 侧和 ArkTS 侧的 Channel 名称必须一致吗?
必须一致。Dart 侧 lib/in_app_update.dart 硬编码了 Channel 名称:
// lib/in_app_update.dart
class InAppUpdate {
  static const MethodChannel _channel =
      const MethodChannel('de.ffuf.in_app_update/methods');
  static const EventChannel _installListener =
      const EventChannel('de.ffuf.in_app_update/stateEvents');
ArkTS 侧必须使用完全相同的名称,否则 Dart 调用会直接报 MissingPluginException:
// ohos/src/main/ets/components/plugin/InAppUpdateOhosPlugin.ets
const METHOD_CHANNEL = 'de.ffuf.in_app_update/methods';
const EVENT_CHANNEL = 'de.ffuf.in_app_update/stateEvents';
这也是 fork 模式的核心优势——Dart 侧零改动,只需 ArkTS 侧对齐 Channel 名称即可。
Q2:HarmonyOS 不区分强制更新和灵活更新,怎么处理?
ArkTS 侧将两种模式映射到同一个系统弹窗方法:
// ohos/src/main/ets/components/plugin/InAppUpdateOhosPlugin.ets
onMethodCall(call: MethodCall, result: MethodResult): void {
  switch (call.method) {
    case 'performImmediateUpdate': this.handleShowUpdateDialog(result); break;
    case 'startFlexibleUpdate': this.handleShowUpdateDialog(result); break;
    // ...
  }
}
HarmonyOS 的 updateManager.showUpdateDialog() 弹出系统更新弹窗,由用户决定是否更新。Android 上的强制更新(不让用户跳过)在实际应用中也很少使用,大多数场景都是弹窗让用户选择。
Q3:ArkTS 插件需要哪些 import?系统 Kit 需要额外安装吗?
不需要额外安装。以下是插件的全部依赖,均为系统 Kit 或 Flutter 嵌入层:
// ohos/src/main/ets/components/plugin/InAppUpdateOhosPlugin.ets
import { updateManager } from '@kit.StoreKit';
import type { common } from '@kit.AbilityKit';
import { BusinessError } from '@kit.BasicServicesKit';
import bundleManager from '@ohos.bundle.bundleManager';
import hilog from '@ohos.hilog';
@kit.StoreKit、@kit.AbilityKit、@kit.BasicServicesKit 都是 HarmonyOS NEXT 系统 Kit,编译时自动链接,不需要在 oh-package.json5 中声明。唯一需要声明的依赖是 @ohos/flutter_ohos:
// ohos/oh-package.json5
{
  "dependencies": {
    "@ohos/flutter_ohos": "file:../har"
  }
}
Q4:应用没有上架华为应用市场,怎么测试更新功能?
updateManager.checkAppUpdate() 的机制是拿当前应用的 bundleName 去华为应用市场查有没有更高版本。应用未上架时返回 updateNotAvailable,这是正常行为。
要真正测试到"发现新版本"的效果,需要:
- 将应用上架华为应用市场(比如 versionCode=1)
- 发布更高版本(versionCode=2)
- 用旧版本设备打开应用,点击"检查更新"即可检测到更新
当前验证已确认:MethodChannel 通信正常、系统 API 调用成功、数据正确返回。上架后功能自然生效。
六、总结
本文完整记录了 in_app_update 插件从 fork 到鸿蒙 PC 真机验证的全流程:采用 fork 模式保留原仓库全部文件,用 flutter create --platforms ohos 生成标准宿主工程模板,编写 152 行 ArkTS 原生插件代码实现 FlutterPlugin + AbilityAware + MethodCallHandler + StreamHandler 四个接口,通过 @kit.StoreKit 的 updateManager.checkAppUpdate() 和 updateManager.showUpdateDialog() 实现应用内更新功能。Dart 侧源码零改动,MethodChannel 和 EventChannel 名称与原插件保持一致,就在鸿蒙 PC 真机上跑通了全部通信链路。
核心经验:需要原生能力的插件适配,80% 的工作量在 ArkTS 侧——搞清楚系统 API 怎么用、Flutter-OH 插件接口怎么实现,剩下的就是翻译工作(把 Android 的 Java/Kotlin 逻辑翻译成 ArkTS)。动手前建议先查一眼 Flutter OH 三方库适配列表,很多热门库已有人适配过,别重复造轮子。
参考资料

作为“人工智能6S店”的官方数字引擎,为AI开发者与企业提供一个覆盖软硬件全栈、一站式门户。
更多推荐
 0
0 0
0- 0


 已为社区贡献12条内容

所有评论(0)