
鸿蒙系统 Electron 开发图片处理工具 hap
图片处理工具
- 一、环境准备
- 二、源代码本地运行问题及解决方法
- 1、Uncaught Exception:Error: Cannot find module '/data/storage/el1/bundle/electron/resources/resfile/resources/app/.vite/build/main.js' at Module._resolveFilename
- 2、A JavaScript error occurred in themain process Uncaught Exception: Error: Could not load the "sharp" module usingthe ohos-arm64 runtimePossible solutions:- Manually install libvips >= 8.17.1- Add experimental WebAssembly-baseddependencies:npm install --cpu=wasm32 sharpnpm install @img/sharp-wasm32- Consult the installation documentation:See https://sharp.pixelplumbing.com/install at Object.
- 3、 开发环境启动、运行本地服务器文件,鸿蒙设备会报 http://localhost:xx 无法访问
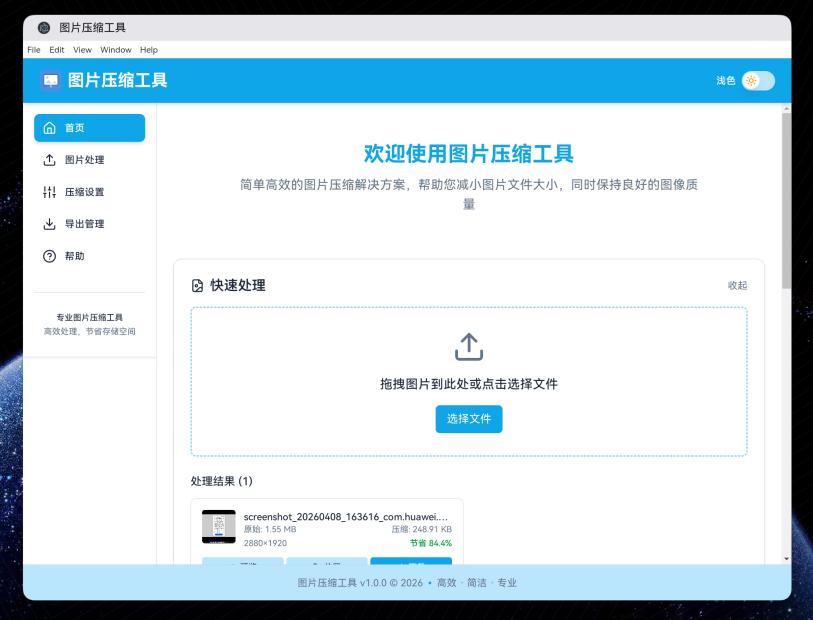
- 三、应用显示
- 四、致谢
一、环境准备
鸿蒙官方提供的构建完成的 Electron 框架包开发鸿蒙版本,LocalSqueeze代码仓地址
1、鸿蒙工具
-
鸿蒙官方开发工具DevEco Studio
开发环境: Windows
开发工具:DevEco Studio 下载地址

-
鸿蒙官方提供的构建完成的 Electron 框架包
仓库地址:Electron-34.x版本通过切换分支可以查看支持的版本
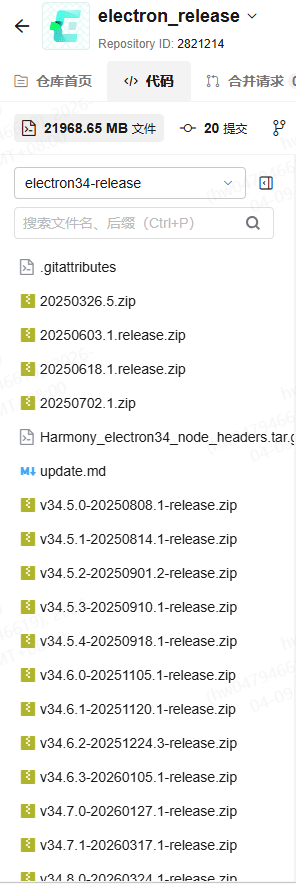
下载所需 Electron 版本包后,本地解压。目录结构如下:
libelectron/
├── lib.unstripped/
└── ohos_hap/
├── AppScope/ --------------应用的配置内容
├── electron/
│ ├── build/
│ │ ├── default/
│ │ │ └── outputs/
│ │ │ └── default/
│ │ │ ├── electron-default-signed.hap --------------产物:hap包
│ │ │ ├── electron-default-unsigned.hap
├── web_engine/
│ ├── src/
│ │ ├── main/
│ │ │ └── resources/
│ │ │ └── resfile/
│ │ │ └── resources/
│ │ │ └── app/ --------------Electron 代码放置的位置 -
IDE中完成应用的签名
可以在官方文档查阅签名方式。当前使用的是个人签名,签名的步骤如下: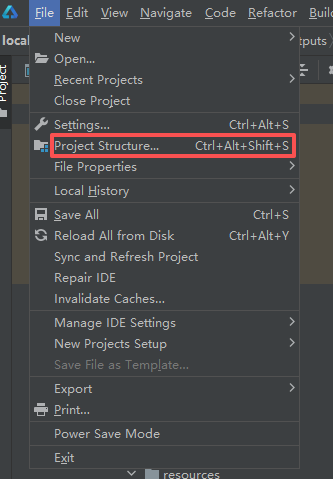
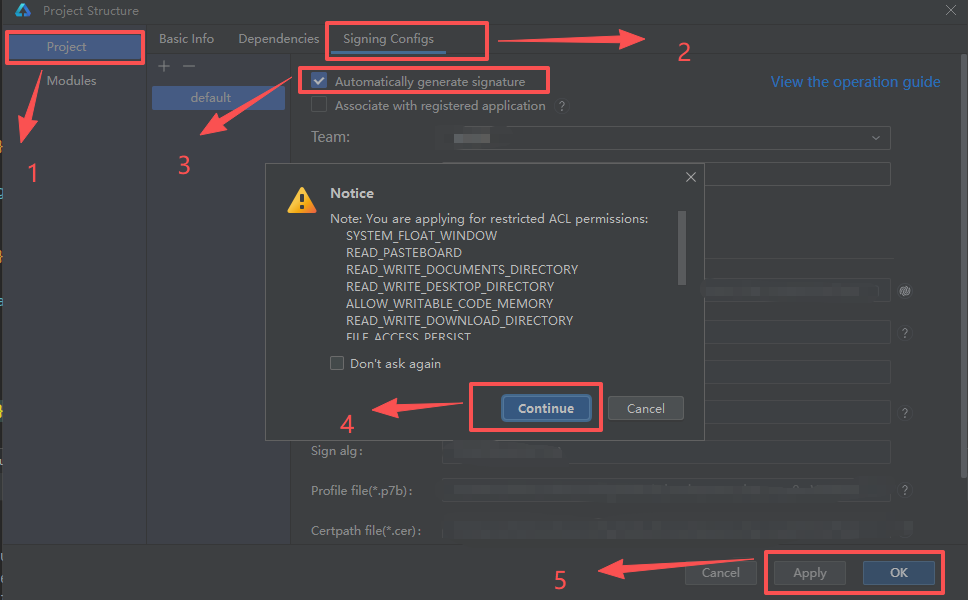
首次可能会提示登录,可以登录后,按照此步骤完成应用签名。
2、图片处理工具代码
-
选择了 github 开源的优质本地图片处理桌面工具项目:LocalSqueeze代码仓地址,拉取 master 分支代码。
-
笔者所写时此项目使用的 Electron 版本为 37.2.1,因为鸿蒙版 34 版本多且降级适配度更高,故此选择了 34.x 版本的框架,可依据开发时鸿蒙化进度自行选择合适的版本。使用 AI Cli 工具或者 AI IDE 将项目使用的 Electron 降级为34.0.0,以确保鸿蒙版本任意 34.x 版本都能支持。适配鸿蒙设备的代码仓地址
-
放置后目录结构如下:
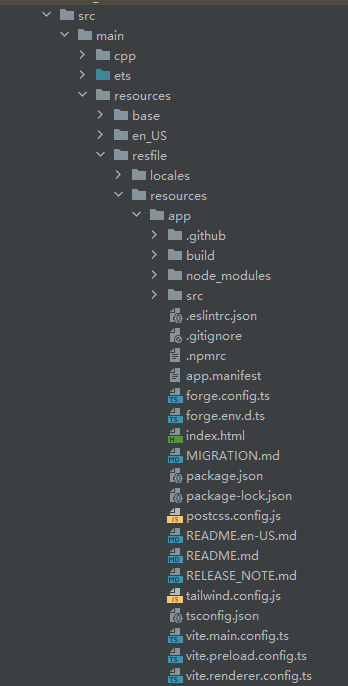
-
app 相当于一个完整的 Electron 项目,所以可以在 app 目录下执行:
安装依赖:npm install --legacy-peer-deps
启动运行:npm start(会生成构建的输出的build文件夹)
二、源代码本地运行问题及解决方法
1、Uncaught Exception:Error: Cannot find module ‘/data/storage/el1/bundle/electron/resources/resfile/resources/app/.vite/build/main.js’ at Module._resolveFilename
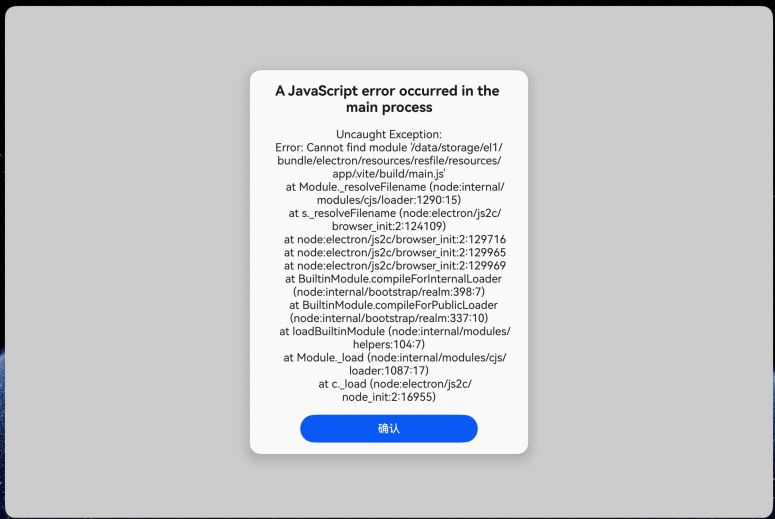
原因:.vite 文件夹无法打包进 hap,可能是 hap 打包对文件夹名称进行过滤。可以手动修改代码指定文件夹名称,此处笔者设置的名称为 build。
方法:入口、配置文件进行修改。
文件位置:app/package.json
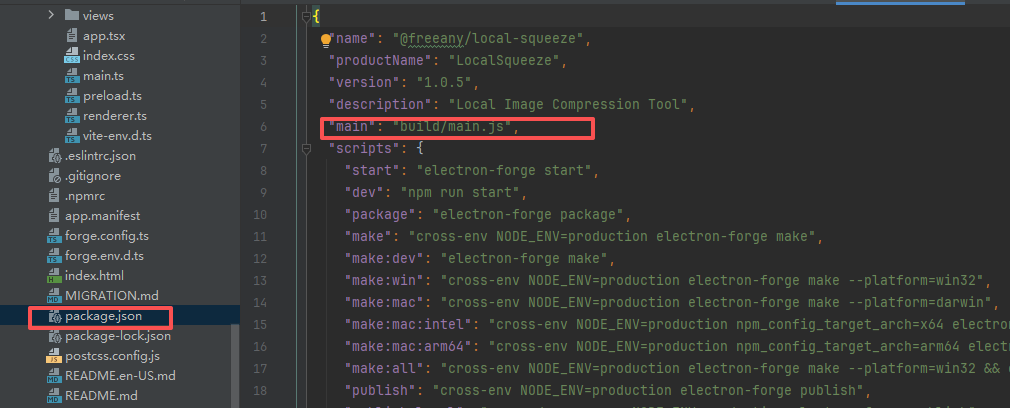
"main": "build/main.js",
文件位置:app/vite.main.config.ts
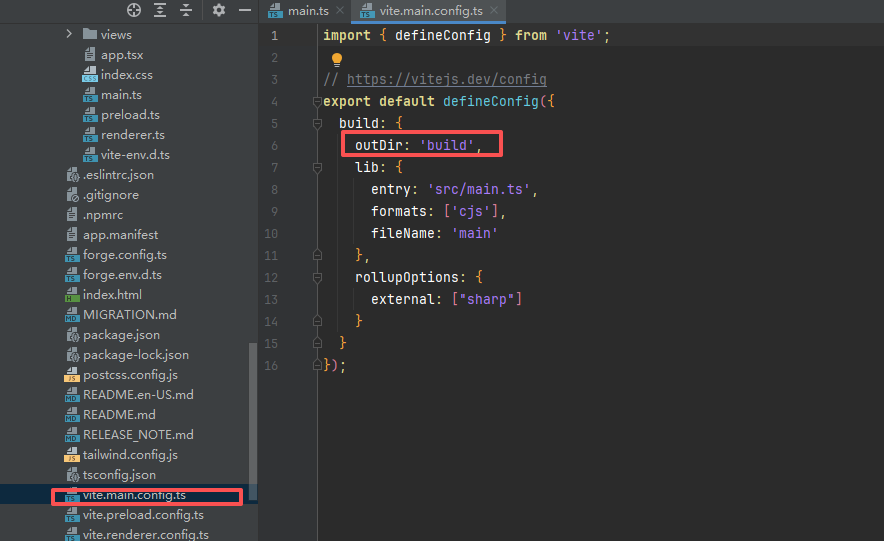
	import { defineConfig } from 'vite';

	// https://vitejs.dev/config
	export default defineConfig({
	  build: {
	    outDir: 'build',
	    lib: {
	      entry: 'src/main.ts',
	      formats: ['cjs'],
	      fileName: 'main'
	    },
	    rollupOptions: {
	      external: ["sharp"]
	    }
	  }
	});
文件位置:app/vite.preload.config.ts
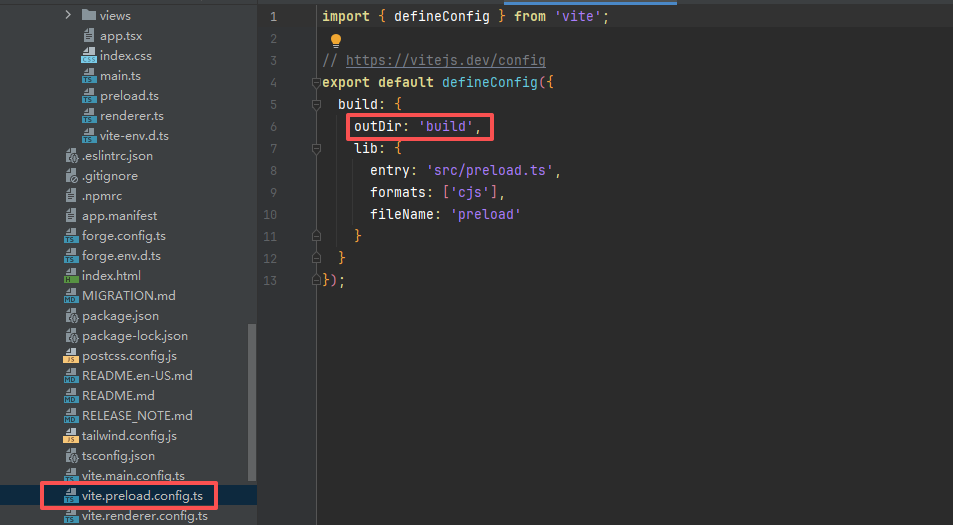
	import { defineConfig } from 'vite';

	// https://vitejs.dev/config
	export default defineConfig({
	  build: {
	    outDir: 'build',
	    lib: {
	      entry: 'src/preload.ts',
	      formats: ['cjs'],
	      fileName: 'preload'
	    }
	  }
	});
文件位置:app/vite.renderer.config.ts
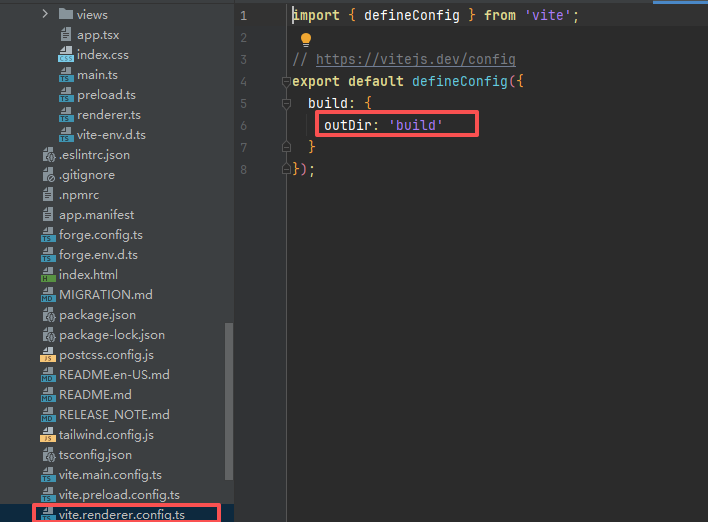
	import { defineConfig } from 'vite';

	// https://vitejs.dev/config
	export default defineConfig({
	  build: {
	    outDir: 'build'
	  }
	});
2、A JavaScript error occurred in themain process Uncaught Exception: Error: Could not load the “sharp” module usingthe ohos-arm64 runtimePossible solutions:- Manually install libvips >= 8.17.1- Add experimental WebAssembly-baseddependencies:npm install --cpu=wasm32 sharpnpm install @img/sharp-wasm32- Consult the installation documentation:See https://sharp.pixelplumbing.com/install at Object.
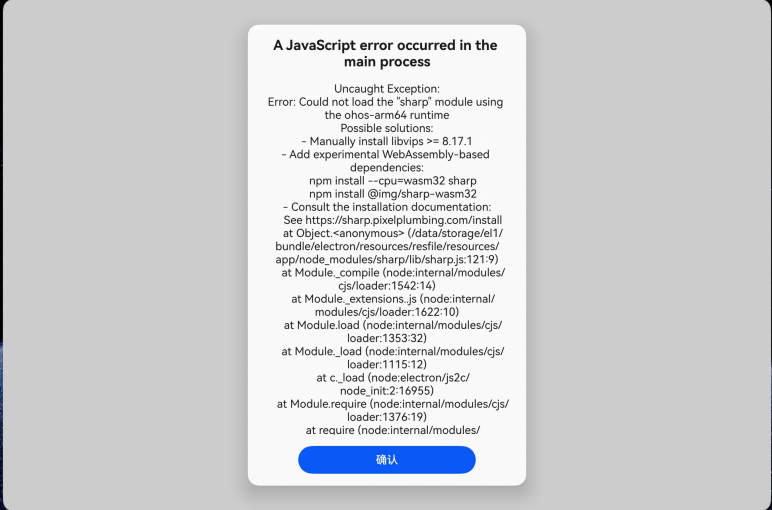
原因:基于 WebAssembly 的运行时(如 WebContainers),无法执行 sharp 所需的原生(Native)二进制代码。
方法:官方提供了一种解决方案,即手动安装指定的 sharp。运行时会根据设备,自动选用符合的 sharp。
在 app 文件夹下,执行安装命令:
npm install --cpu=wasm32 sharp
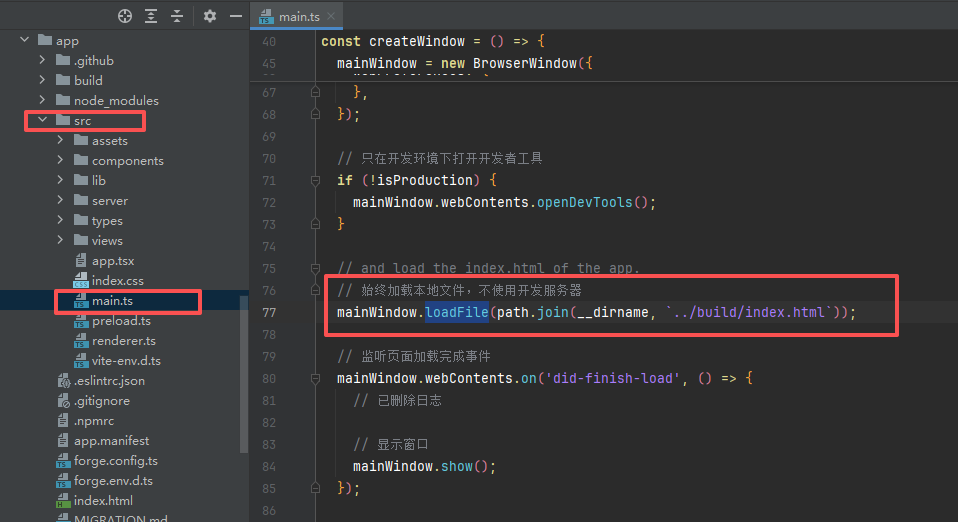
3、 开发环境启动、运行本地服务器文件,鸿蒙设备会报 http://localhost:xx 无法访问
原因:当前阶段可能不具备访问本地服务器能力(仅仅猜测😉)。
方法:修改 loadFile 处逻辑,不区分环境都使用加载本地文件。
文件位置:app/src/main.ts
mainWindow.loadFile(path.join(__dirname, `../build/index.html`));
三、应用显示
四、致谢
感谢开源代码 Coder 的贡献 !✿✿ヽ(°▽°)ノ✿

作为“人工智能6S店”的官方数字引擎,为AI开发者与企业提供一个覆盖软硬件全栈、一站式门户。
更多推荐


 6
6 0
0- 0


 已为社区贡献4条内容

所有评论(0)