
鸿蒙大型项目高级架构:MVVM/MVI分层设计/DI容器依赖注入/模块化治理方案
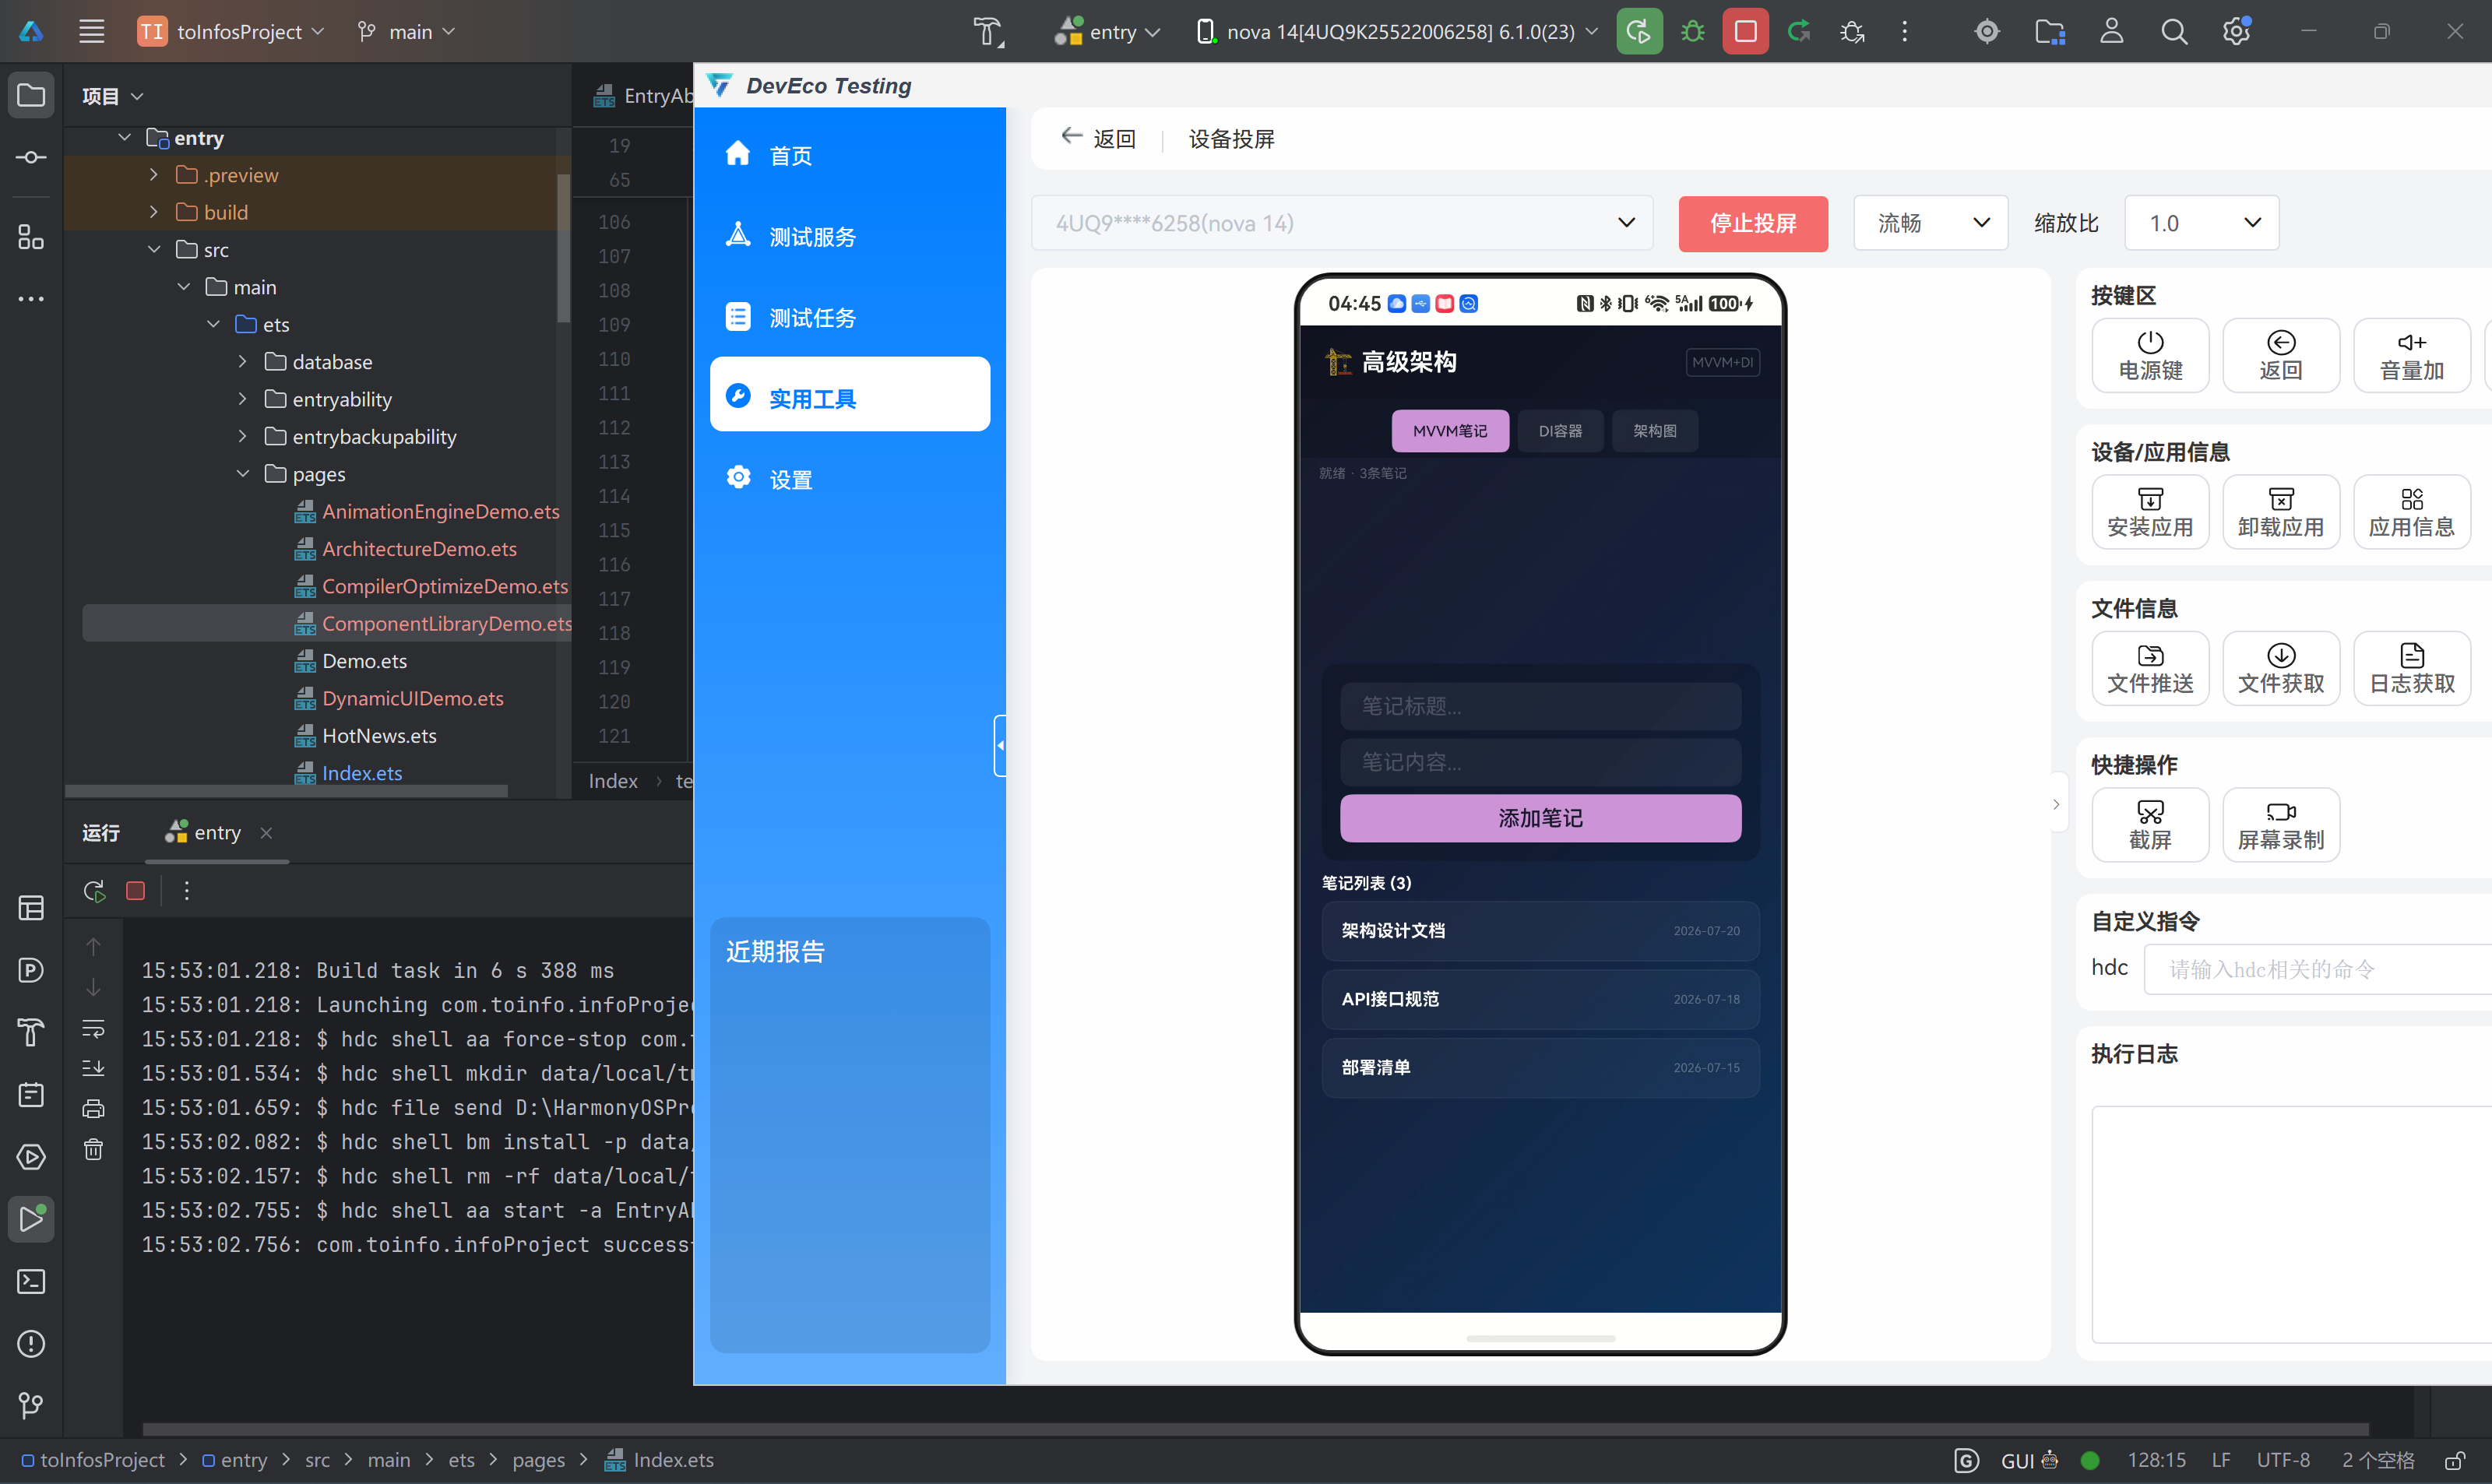
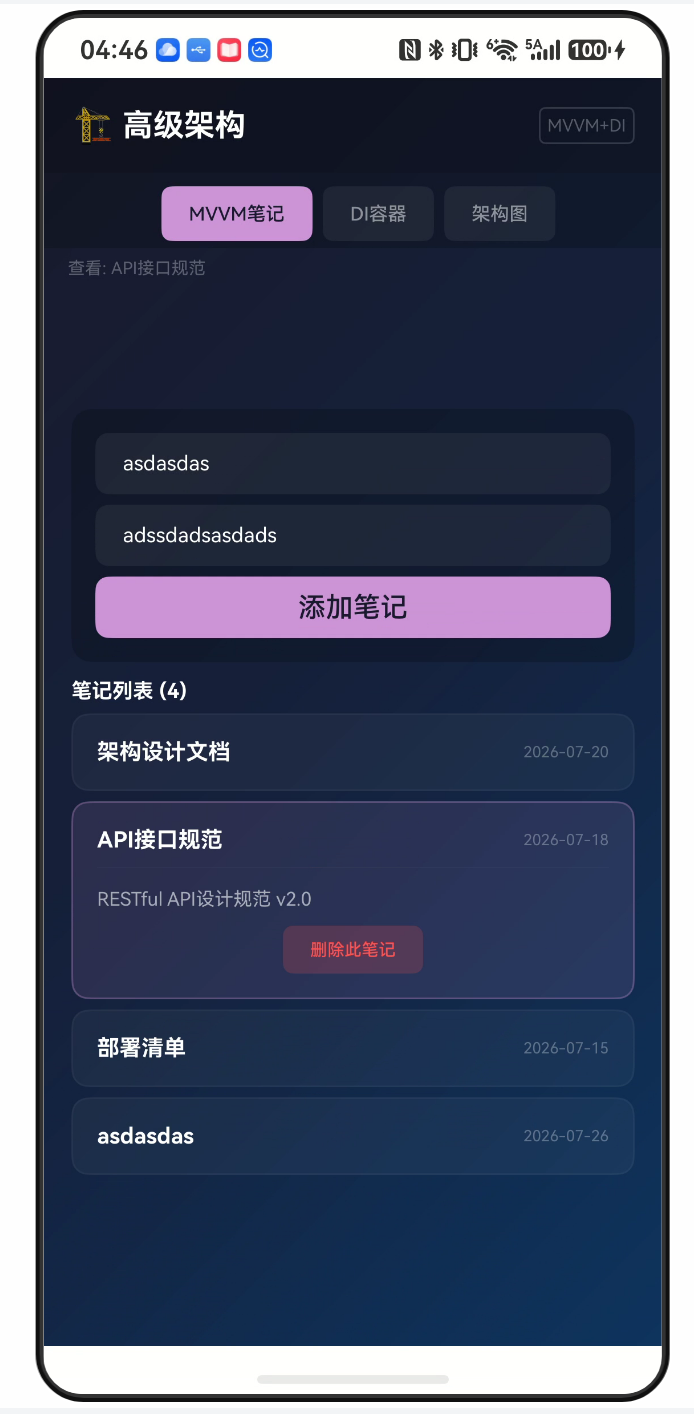
一、前置思考
随着应用从"Demo级"演进到"企业级",代码量膨胀、模块增多、职责混乱——这些问题在鸿蒙项目中同样适用且更加棘手,因为ArkTS的类型系统限制了某些传统设计模式的直接应用(无反射、无装饰器元数据、无动态代理)。
如何在ArkTS的约束下设计出可维护、可测试、可扩展的大型项目架构?本文将分模块化治理、DI容器、MVVM分层、Repository模式四个维度展开。
企业级架构要解决的核心问题:
- 改动隔离:修改A功能,B功能不受影响(高内聚低耦合)
- 可测试性:业务逻辑可以脱离UI在单元测试中验证
- 团队协作:多人并行开发不同模块,不产生代码冲突
- 演进能力:新增功能、替换技术栈时成本可控
二、文件结构治理
2.1 按特性分层 vs 按类型分层
按类型分层(初创项目常用,不适合大型项目):
entry/src/main/ets/
├── models/       → 散落各处的数据类,找不到归属
├── pages/        → 页面文件,50+个时找文件像大海捞针
├── components/   → 通用组件和业务组件混在一起
└── utils/        → 各种工具函数堆砌
按特性分层(推荐):
entry/src/main/ets/
├── model/            # 数据模型(Entity/Interface/Enum)
├── viewmodel/        # 视图模型(@ObservedV2驱动UI)
├── repository/       # 数据仓储(本地/远程数据源抽象)
├── service/          # 业务服务层(单例/工厂)
├── component/        # 通用UI组件(与业务无关)
│   ├── SmartCard/
│   ├── GradientButton/
│   └── ProgressRing/
├── pages/            # 页面(@Entry,薄薄一层)
├── di/               # 依赖注入容器
├── theme/            # 主题管理
├── router/           # 路由管理
└── utils/            # 纯工具函数
    ├── LoggerUtil.ets
    ├── ToastUtil.ets
    └── DateUtil.ets
两种分层的关键区别:
- 按类型分层:文件找得快(所有model放一起),但改动要跨多个目录
- 按特性分层:单特性改动在一个目录内完成,新增/删除特性也干净
2.2 模块间依赖规则
┌─────────────────────────────────────┐
│  Pages(@Entry,薄薄一层组合)        │
│  依赖 → viewmodel + component       │
├─────────────────────────────────────┤
│  ViewModel(@ObservedV2,UI状态逻辑) │
│  依赖 → repository + service        │
├─────────────────────────────────────┤
│  Repository(数据抽象,单一真相源)    │
│  依赖 → model                       │
├─────────────────────────────────────┤
│  Service(业务逻辑,可跨Repository)   │
│  依赖 → model + repository          │
├─────────────────────────────────────┤
│  Model(纯数据,无依赖)              │
└─────────────────────────────────────┘
依赖铁律:
- Model不依赖任何层(最底层)
- Repository不依赖ViewModel/Page
- Page只依赖ViewModel(不直接调Repository)
- 所有跨层通信通过接口,不通过具体实现
三、依赖注入(DI)完整实现
3.1 轻量DI容器设计
ArkTS中无法使用reflect-metadata装饰器体系,但可以通过工厂+注册表实现轻量DI:
class DIContainer {
  private static registry: Map<string, Object> = new Map();

  // 注册实例(通常为单例)
  static register<T>(key: string, instance: T): void {
    DIContainer.registry.set(key, instance as Object);
  }

  // 获取实例
  static get<T>(key: string): T | undefined {
    return DIContainer.registry.get(key) as T;
  }

  // 检查是否已注册
  static has(key: string): boolean {
    return DIContainer.registry.has(key);
  }

  // 获取所有已注册的key(用于调试)
  static getAllKeys(): string[] {
    const keys: string[] = [];
    DIContainer.registry.forEach((_: Object, k: string) => {
      keys.push(k);
    });
    return keys;
  }

  // 移除注册
  static remove(key: string): void {
    DIContainer.registry.delete(key);
  }
}
3.2 DI容器使用流程
// ===== 应用启动时(app.ets 的 onCreate)=====
// 注册数据层
const noteRepo: NoteRepository = new NoteRepository();
DIContainer.register('NoteRepository', noteRepo);

// 注册服务层
const userService: UserService = new UserService();
DIContainer.register('UserService', userService);

// ===== 页面/ViewModel 中使用 =====
class NoteViewModel {
  private repo: NoteRepository;

  constructor() {
    // 从DI容器获取依赖
    const temp: NoteRepository | undefined =
      DIContainer.get<NoteRepository>('NoteRepository');
    this.repo = temp as NoteRepository;
  }

  getNotes(): Note[] {
    return this.repo.getAll();
  }
}
3.3 DI容器 vs 单例模式
| 维度 | 单例模式(直接new) | DI容器 |
|---|---|---|
| 依赖关系 | 硬编码在代码中 | 运行时配置 |
| 单元测试 | 难Mock(单例本身就是具体类) | 易Mock(注册时注入Mock实例) |
| 生命周期管理 | 只有全局单例 | 可控(单例/工厂/作用域) |
| 依赖发现 | 散落各处,不可见 | 集中在注册点 |
实际收益:假设你有一个NoteRepository,单元测试时需要Mock掉数据库调用。用单例你只能修改源码,用DI你只需:
// 测试环境
DIContainer.register('NoteRepository', new MockNoteRepository());
// 生产环境
DIContainer.register('NoteRepository', new NoteRepository());
同一个ViewModel代码,一行不改。
3.4 DI最佳实践
- 集中注册:所有register调用集中在一个
di/DISetup.ets文件中,启动时调用 - 命名规范:key用类名(‘NoteRepository’),不要用魔法字符串(‘nr’)
- null检查:get()返回
undefined时必须处理,不能假设一定有值 - 注册时机:在
Ability.onCreate或首个aboutToAppear中注册,保证使用时已就绪
四、MVVM分层深度
4.1 三层职责
View (Page/@ComponentV2)
  ┃ 职责:UI渲染 + 事件分发
  ┃ 不包含:业务逻辑、数据获取
  ┃ 依赖:ViewModel(通过 @Param/@Local/@ObjectLink)
  ↓ 用户操作
ViewModel (@ObservedV2 类)
  ┃ 职责:UI状态管理 + 业务逻辑调度
  ┃ 不包含:数据持久化、网络请求
  ┃ 依赖:Repository + Service
  ↓ 数据请求
Repository
  ┃ 职责:数据获取/存储的抽象
  ┃ 不包含:UI逻辑、业务校验
  ┃ 依赖:DataSource(本地DB/云端API)
4.2 Model 数据层
数据模型应该是纯数据结构,不包含任何业务逻辑:
// 基础实体接口
interface Entity {
  id: number;
}

// 业务实体
interface Note extends Entity {
  title: string;
  content: string;
  createdAt: string;
}

// 应用配置(独立模型)
interface AppConfig {
  appName: string;
  version: string;
}
模型设计原则:
- 用
interface而非class定义数据结构(ArkTS中interface更轻量) - 继承基础接口(Entity)确保ID一致性
- 不包含方法(纯数据结构),方法放在Repository/Service中
4.3 Repository 数据仓储
Repository是数据源的"单一真相源":
class NoteRepository {
  private data: Map<number, Note> = new Map();
  private nextId: number = 1001;

  constructor() {
    // 预填充初始数据(生产环境应从DB/API加载)
    const initNotes: Note[] = [
      { id: 1001, title: '架构设计文档',
        content: 'MVVM + DI + Repository 三层架构方案',
        createdAt: '2026-07-20' },
      { id: 1002, title: 'API接口规范',
        content: 'RESTful API设计规范 v2.0',
        createdAt: '2026-07-18' }
    ];
    for (let i: number = 0; i < initNotes.length; i++) {
      const note: Note = initNotes[i];
      this.data.set(note.id, note);
    }
  }

  getAll(): Note[] {
    const result: Note[] = [];
    this.data.forEach((note: Note) => {
      result.push(note);
    });
    return result;
  }

  getById(id: number): Note | undefined {
    return this.data.get(id);
  }

  add(title: string, content: string): Note {
    const note: Note = {
      id: this.nextId,
      title: title,
      content: content,
      createdAt: this.getCurrentDate()
    };
    this.data.set(this.nextId, note);
    this.nextId++;
    return note;
  }

  delete(id: number): boolean {
    return this.data.delete(id);
  }

  private getCurrentDate(): string {
    const now: Date = new Date();
    const year: number = now.getFullYear();
    const month: string = String(now.getMonth() + 1).padStart(2, '0');
    const day: string = String(now.getDate()).padStart(2, '0');
    return year + '-' + month + '-' + day;
  }
}
Repository设计要点:
- 对外暴露语义化方法(
getAll、getById、add、delete),隐藏存储细节 - 内部可以切换存储实现(当前用Map,未来可以切换到关系型数据库),对外接口不变
- 返回的是数据副本或直接引用,取决于场景
4.4 ViewModel 状态管理
@ObservedV2
class NoteListViewModel {
  @Trace notes: Note[] = [];
  @Trace loading: boolean = false;
  @Trace error: string = '';

  private repo: NoteRepository;

  constructor() {
    const temp: NoteRepository | undefined =
      DIContainer.get<NoteRepository>('NoteRepository');
    this.repo = temp as NoteRepository;
    this.loadNotes();
  }

  loadNotes(): void {
    this.loading = true;
    this.error = '';
    // 生产环境这里可能是异步API调用
    this.notes = this.repo.getAll();
    this.loading = false;
  }

  deleteNote(id: number): void {
    this.repo.delete(id);
    this.notes = this.repo.getAll(); // 刷新列表
  }
}
ViewModel设计要点:
- 用
@ObservedV2+@Trace让属性变更自动通知UI刷新 - 通过DI容器获取Repository依赖(而非直接new)
- 暴露加载/错误状态(
loading、error),让UI层做兜底展示
4.5 View 层
View层(Page/@ComponentV2)的代码应该极薄:
@Entry
@ComponentV2
struct ArchitectureDemo {
  @Local viewModel: NoteListViewModel = new NoteListViewModel();
  @Local selectedNoteId: number = -1;

  build() {
    Column() {
      // 加载指示器
      if (this.viewModel.loading) {
        LoadingProgress().width(40).height(40)
      }

      // 错误提示
      if (this.viewModel.error !== '') {
        Text(this.viewModel.error)
          .fontColor('#FF5252')
          .fontSize(14)
      }

      // 列表
      List() {
        ForEach(this.viewModel.notes, (note: Note) => {
          ListItem() {
            Text(note.title)
              .fontSize(16)
              .fontColor('#FFFFFF')
          }
          .onClick(() => {
            this.selectedNoteId = note.id;
          })
        })
      }
    }
  }
}
View层铁律:
- ❌ 不包含数据库操作
- ❌ 不包含网络请求
- ❌ 不包含复杂业务逻辑
- ✅ 只做三件事:渲染UI、分发事件、订阅ViewModel状态
五、错误处理架构
5.1 统一错误处理策略
用户操作 → ViewModel.foo()
  → try {
      Repository.bar()
    } catch (e) {
      → 记录日志(LoggerUtil.error)
      → 更新ViewModel.error状态
      → toast提示用户
      → (可选)上报错误到监控平台
    }
5.2 错误分类
| 错误类型 | 处理策略 | 用户提示 |
|---|---|---|
| 网络错误 | 自动重试3次 → 提示 | “网络连接失败,请检查网络” |
| 数据校验失败 | 阻断操作 → 高亮错误字段 | “标题不能为空” |
| 权限不足 | 引导授权 | “需要相机权限,请前往设置” |
| 未知异常 | 记录堆栈 → 上报 | “出了点问题,请稍后重试” |
六、代码规范与工具链
6.1 命名规范
文件命名:PascalCase → UserRepository.ets、SmartCard.ets
接口/类:PascalCase → NoteRepository、AppConfig
变量/方法:camelCase → noteTitle、getAllNotes()
常量:UPPER_SNAKE → MAX_RETRY_COUNT
@Entry页面:以Demo/Page结尾 → ThemeArchitectureDemo
6.2 文件内声明顺序
按照workspace规范严格排序:
1. imports
2. interface / type / enum / class (按依赖顺序)
3. const 常量
4. @Builder 函数
5. @Entry / @ComponentV2 struct:
   5.1 状态变量 (@Local / @Param / @Provide)
   5.2 生命周期 (aboutToAppear / aboutToDisappear)
   5.3 @Builder 方法
   5.4 build()
七、避坑速查
| 坑 | 现象 | 原因 | 解决 |
|---|---|---|---|
| DI使用前未注册 | 启动闪退 | get()返回undefined后直接使用 | 在启动最早时机集中注册;get()后判null |
| ViewModel直接操作UI | 业务逻辑中出现UI引用 | 违反了MVVM分层 | ViewModel只管理状态,不引用组件 |
| Repository返回可变对象 | 外部修改了内部数据 | Map/Array返回的是引用 | 返回时做浅拷贝或使用不可变数据 |
| 循环依赖 | 编译报错或启动卡死 | A依赖B,B依赖A | 引入中间接口解耦 |
| ViewModel臃肿 | 单个ViewModel超过500行 | 职责不单一 | 按页面/功能拆分ViewModel |
八、总结
大型项目的架构目标不是"用的设计模式最多",而是改动成本最低。
核心原则:
- 依赖倒置(DIP):高层不依赖低层,两者都依赖抽象(DI容器就是那个抽象)
- 单一职责(SRP):Page只管渲染、ViewModel只管状态、Repository只管数据
- 接口隔离(ISP):不强迫调用方依赖它不需要的方法
- 一个文件只做一件事:200行以内最优,500行开始有异味
MVVM + DI + Repository三层足够覆盖90%的企业级场景。剩下10%的复杂场景(跨页面状态共享、复杂表单联动、数据流追溯),可以在此基础上叠加@Provide/@Consume、EventHub等机制。
对应Demo文件:
entry/src/main/ets/pages/ArchitectureDemo.ets

作为“人工智能6S店”的官方数字引擎,为AI开发者与企业提供一个覆盖软硬件全栈、一站式门户。
更多推荐
 0
0 0
0- 0


 已为社区贡献72条内容

所有评论(0)