
鸿蒙Flutter 长按与双击事件:Flutter手势识别进阶
引言
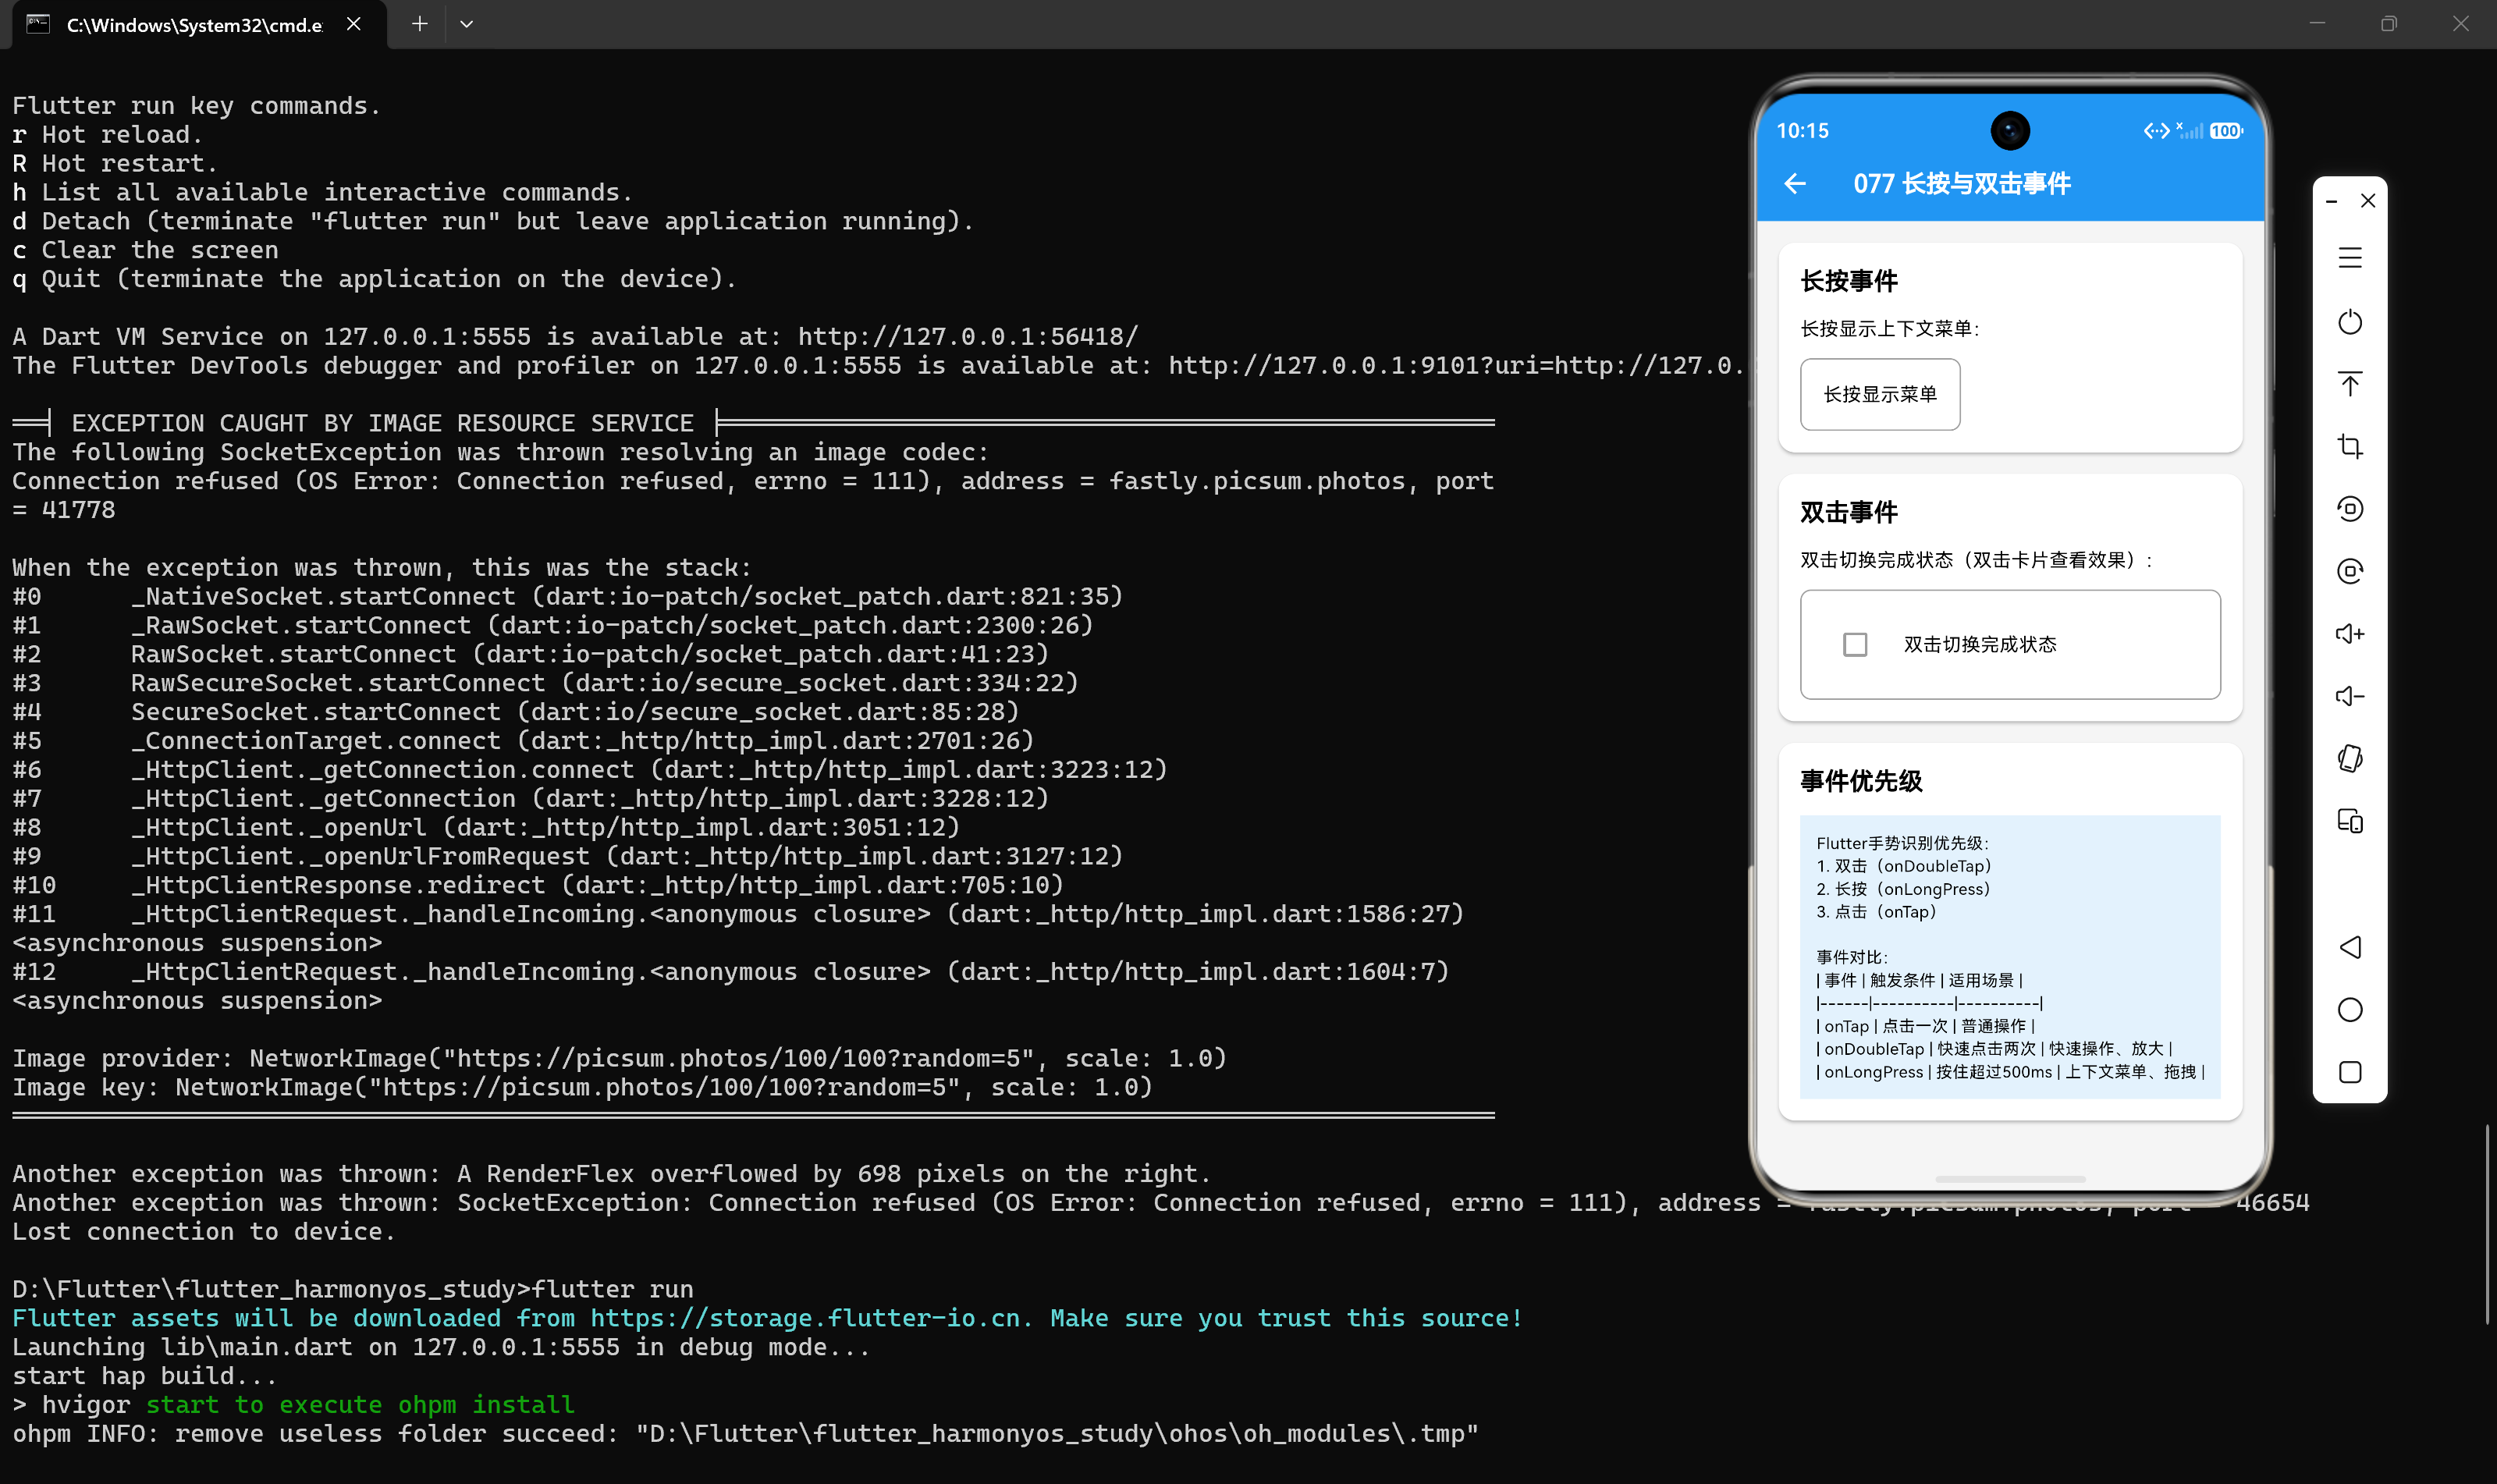
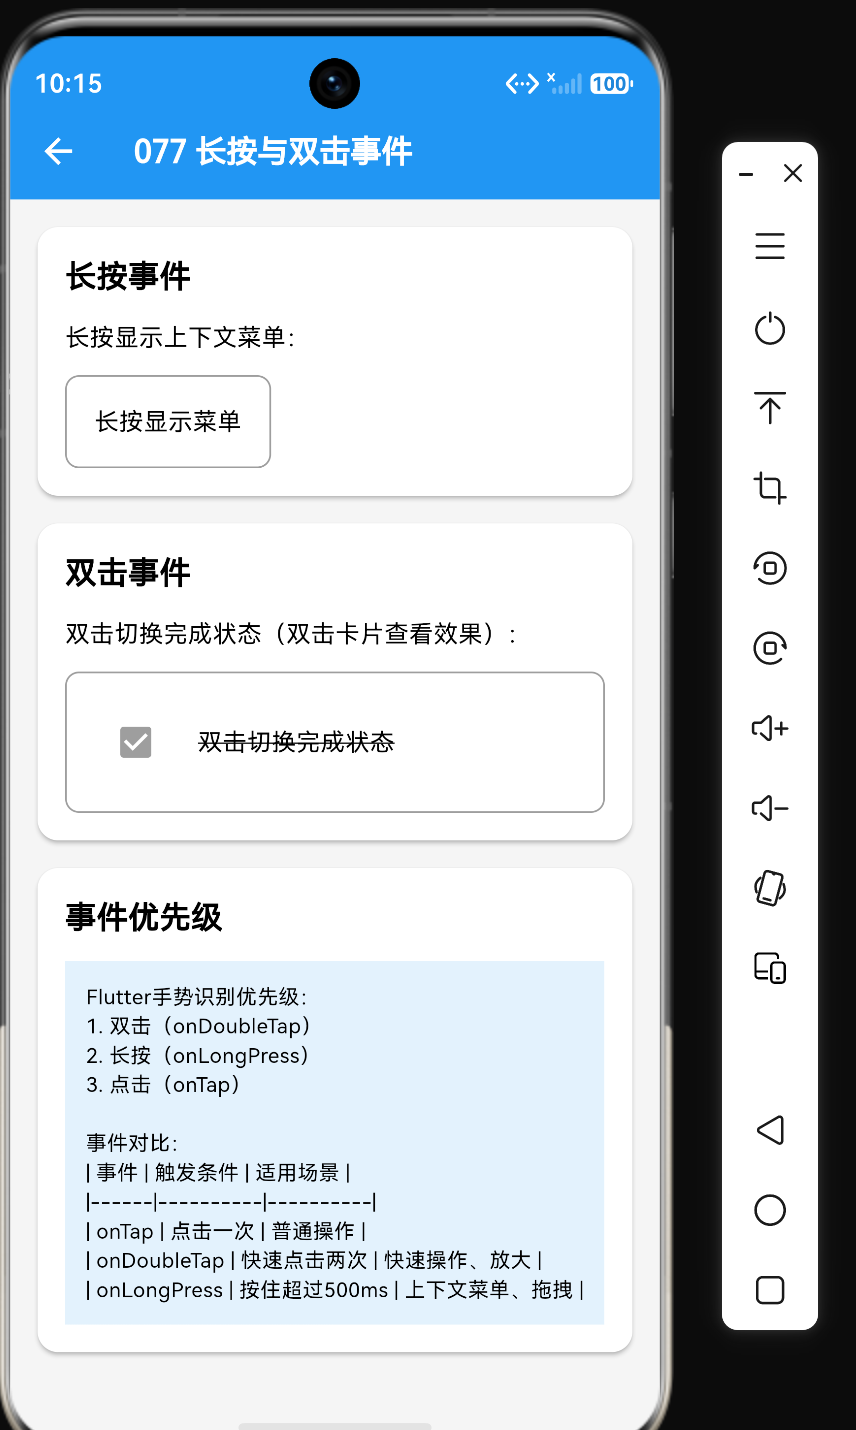
在Flutter应用开发中,手势识别是实现丰富交互体验的关键。除了基础的点击事件外,长按和双击事件也是常用的交互方式。长按事件常用于显示上下文菜单、触发拖拽操作或提供额外选项,而双击事件则常用于快速操作,如快速完成任务、放大缩小等。本文将深入探讨Flutter中长按和双击事件的实现方式,并提供完整的代码示例和最佳实践。
一、手势识别概述
1.1 Flutter手势系统
Flutter提供了一套完整的手势识别系统,主要包含以下层次:
| 层次 | 组件/类 | 说明 |
|---|---|---|
| 原始手势层 | GestureDetector | 底层手势识别器,支持各种手势 |
| Material层 | InkWell | Material风格的手势组件,带涟漪效果 |
| 语义层 | InkResponse | 更灵活的Material手势组件 |
1.2 手势事件类型
Flutter支持多种手势事件:
| 事件类型 | 触发条件 | 适用场景 |
|---|---|---|
| onTap | 点击一次 | 普通操作 |
| onDoubleTap | 快速点击两次 | 快速操作、放大缩小 |
| onLongPress | 按住超过500ms | 上下文菜单、拖拽 |
| onLongPressStart | 长按开始 | 拖拽开始 |
| onLongPressMoveUpdate | 长按移动 | 拖拽移动 |
| onLongPressEnd | 长按结束 | 拖拽结束 |
1.3 事件优先级
Flutter手势识别有明确的优先级顺序:
- 双击(onDoubleTap) - 最高优先级
- 长按(onLongPress) - 中等优先级
- 点击(onTap) - 最低优先级
这意味着如果同时设置了onTap和onDoubleTap,第一次点击会等待一段时间(约300ms)来判断是否是双击。
二、长按事件
2.1 长按事件概述
长按事件是用户按住屏幕一段时间后触发的事件,默认时间阈值为500毫秒。长按事件在移动端应用中非常常见,常用于:
- 显示上下文菜单(Context Menu)
- 触发拖拽操作
- 删除确认
- 显示详情信息
- 快捷操作
2.2 InkWell长按示例
InkWell组件提供了长按事件支持:
InkWell(
  onTap: () => toggleTodo(todo.id),
  onLongPress: () => _showContextMenu(context, todo),
  child: TodoItem(todo: todo),
)
2.3 GestureDetector长按示例
GestureDetector提供更详细的长按事件回调:
GestureDetector(
  onTap: () => _handleTap(),
  onLongPress: () => _handleLongPress(),
  onLongPressStart: (details) => _handleLongPressStart(details),
  onLongPressMoveUpdate: (details) => _handleLongPressMoveUpdate(details),
  onLongPressEnd: (details) => _handleLongPressEnd(details),
  child: Container(
    padding: const EdgeInsets.all(16),
    color: Colors.blue,
    child: const Text('长按测试'),
  ),
)
2.4 长按显示上下文菜单
长按事件最常见的应用是显示上下文菜单:
void _showContextMenu(BuildContext context, Todo todo) {
  showModalBottomSheet(
    context: context,
    builder: (context) => SafeArea(
      child: Wrap(
        children: [
          ListTile(
            leading: const Icon(Icons.edit),
            title: const Text('编辑'),
            onTap: () {
              Navigator.pop(context);
              _editTodo(todo);
            },
          ),
          ListTile(
            leading: const Icon(Icons.delete, color: Colors.red),
            title: const Text('删除', style: TextStyle(color: Colors.red)),
            onTap: () {
              Navigator.pop(context);
              _deleteTodo(todo.id);
            },
          ),
          ListTile(
            leading: const Icon(Icons.share),
            title: const Text('分享'),
            onTap: () {
              Navigator.pop(context);
              _shareTodo(todo);
            },
          ),
        ],
      ),
    ),
  );
}
2.5 自定义长按时间
可以通过LongPressGestureRecognizer自定义长按时间:
class CustomLongPressButton extends StatefulWidget {
final Widget child;
final void Function() onLongPress;
final Duration duration;
const CustomLongPressButton({
super.key,
required this.child,
required this.onLongPress,
this.duration = const Duration(milliseconds: 500),
});
State<CustomLongPressButton> createState() => _CustomLongPressButtonState();
}
class _CustomLongPressButtonState extends State<CustomLongPressButton> {
late LongPressGestureRecognizer _recognizer;
void initState() {
super.initState();
_recognizer = LongPressGestureRecognizer(
duration: widget.duration,
)..onLongPress = widget.onLongPress;
}
void dispose() {
_recognizer.dispose();
super.dispose();
}
Widget build(BuildContext context) {
return GestureDetector(
behavior: HitTestBehavior.opaque,
child: widget.child,
gestureRecognizers: {_recognizer},
);
}
}
2.6 带视觉反馈的长按
class LongPressFeedbackButton extends StatefulWidget {
final String text;
final void Function() onLongPress;
const LongPressFeedbackButton({
super.key,
required this.text,
required this.onLongPress,
});
State<LongPressFeedbackButton> createState() => _LongPressFeedbackButtonState();
}
class _LongPressFeedbackButtonState extends State<LongPressFeedbackButton> {
bool _isLongPressing = false;
Widget build(BuildContext context) {
return GestureDetector(
onLongPressStart: (_) {
setState(() => _isLongPressing = true);
},
onLongPressEnd: (_) {
setState(() => _isLongPressing = false);
widget.onLongPress();
},
onLongPressCancel: () {
setState(() => _isLongPressing = false);
},
child: AnimatedContainer(
duration: const Duration(milliseconds: 150),
padding: const EdgeInsets.symmetric(horizontal: 24, vertical: 12),
decoration: BoxDecoration(
color: _isLongPressing ? Colors.blue[700] : Colors.blue,
borderRadius: BorderRadius.circular(8),
boxShadow: _isLongPressing
? [
BoxShadow(
color: Colors.blue[300]!,
blurRadius: 15,
offset: const Offset(0, 5),
),
]
: [
BoxShadow(
color: Colors.blue[200]!,
blurRadius: 10,
offset: const Offset(0, 3),
),
],
),
child: Text(
widget.text,
style: const TextStyle(color: Colors.white),
),
),
);
}
}
三、双击事件
3.1 双击事件概述
双击事件是用户快速连续点击屏幕两次时触发的事件。双击事件常用于:
- 快速完成操作
- 放大/缩小视图
- 快速切换状态
- 快捷操作
3.2 InkWell双击示例
InkWell(
  onTap: () => _handleTap(),
  onDoubleTap: () => _handleDoubleTap(),
  child: Container(
    width: 200,
    height: 200,
    color: Colors.blue,
    child: const Center(child: Text('双击放大')),
  ),
)
3.3 双击切换完成状态
在待办事项应用中,双击可以快速切换完成状态:
class TodoCard extends StatefulWidget {
final Todo todo;
final VoidCallback onToggle;
const TodoCard({super.key, required this.todo, required this.onToggle});
State<TodoCard> createState() => _TodoCardState();
}
class _TodoCardState extends State<TodoCard> {
bool _isDoubleTap = false;
Widget build(BuildContext context) {
return InkWell(
onDoubleTap: () {
setState(() {
_isDoubleTap = true;
});
widget.onToggle();
Future.delayed(const Duration(milliseconds: 300), () {
setState(() {
_isDoubleTap = false;
});
});
},
child: Container(
padding: const EdgeInsets.all(16),
decoration: BoxDecoration(
color: _isDoubleTap ? Colors.green[100] : Colors.white,
border: Border.all(color: Colors.grey),
),
child: Text(widget.todo.title),
),
);
}
}
3.4 双击放大效果
class DoubleTapZoom extends StatefulWidget {
final Widget child;
const DoubleTapZoom({super.key, required this.child});
State<DoubleTapZoom> createState() => _DoubleTapZoomState();
}
class _DoubleTapZoomState extends State<DoubleTapZoom> {
double _scale = 1.0;
Widget build(BuildContext context) {
return GestureDetector(
onDoubleTap: () {
setState(() {
_scale = _scale == 1.0 ? 1.5 : 1.0;
});
},
child: AnimatedScale(
scale: _scale,
duration: const Duration(milliseconds: 300),
curve: Curves.easeOut,
child: widget.child,
),
);
}
}
3.5 双击与单击共存
当同时使用单击和双击时,需要注意事件冲突问题:
class TapDoubleTapButton extends StatefulWidget {
final void Function() onTap;
final void Function() onDoubleTap;
const TapDoubleTapButton({
super.key,
required this.onTap,
required this.onDoubleTap,
});
State<TapDoubleTapButton> createState() => _TapDoubleTapButtonState();
}
class _TapDoubleTapButtonState extends State<TapDoubleTapButton> {
int _tapCount = 0;
Timer? _timer;
void _handleTap() {
_tapCount++;
if (_tapCount == 1) {
_timer = Timer(const Duration(milliseconds: 300), () {
_tapCount = 0;
widget.onTap();
});
} else if (_tapCount == 2) {
_timer?.cancel();
_tapCount = 0;
widget.onDoubleTap();
}
}
void dispose() {
_timer?.cancel();
super.dispose();
}
Widget build(BuildContext context) {
return GestureDetector(
onTap: _handleTap,
child: const Text('点击/双击'),
);
}
}
四、长按与拖拽组合
4.1 长按拖拽实现
长按拖拽是常见的交互模式,用户长按后可以拖动元素:
class DraggableTodo extends StatefulWidget {
final Todo todo;
const DraggableTodo({super.key, required this.todo});
State<DraggableTodo> createState() => _DraggableTodoState();
}
class _DraggableTodoState extends State<DraggableTodo> {
bool _isDragging = false;
Offset _offset = Offset.zero;
Widget build(BuildContext context) {
return GestureDetector(
onLongPressStart: (_) {
setState(() {
_isDragging = true;
});
},
onLongPressMoveUpdate: (details) {
setState(() {
_offset += details.offsetFromOrigin;
});
},
onLongPressEnd: (_) {
setState(() {
_isDragging = false;
_offset = Offset.zero;
});
},
child: Transform.translate(
offset: _offset,
child: Opacity(
opacity: _isDragging ? 0.8 : 1.0,
child: TodoItem(todo: widget.todo),
),
),
);
}
}
4.2 使用Draggable组件
Flutter提供了Draggable组件简化拖拽操作:
Draggable<Todo>(
  data: todo,
  feedback: Container(
    width: 200,
    padding: const EdgeInsets.all(8),
    color: Colors.blue,
    child: Text(todo.title, style: const TextStyle(color: Colors.white)),
  ),
  childWhenDragging: Opacity(
    opacity: 0.5,
    child: TodoItem(todo: todo),
  ),
  child: TodoItem(todo: todo),
)
4.3 拖拽排序实现
class DragSortList extends StatefulWidget {
final List<Todo> todos;
const DragSortList({super.key, required this.todos});
State<DragSortList> createState() => _DragSortListState();
}
class _DragSortListState extends State<DragSortList> {
int? _draggedIndex;
Widget build(BuildContext context) {
return ReorderableListView(
onReorder: (oldIndex, newIndex) {
setState(() {
if (oldIndex < newIndex) {
newIndex -= 1;
}
final item = widget.todos.removeAt(oldIndex);
widget.todos.insert(newIndex, item);
});
},
children: widget.todos
.map((todo) => ListTile(key: Key(todo.id.toString()), title: Text(todo.title)))
.toList(),
);
}
}
五、手势冲突处理
5.1 手势冲突概述
在复杂UI中,手势冲突是常见问题。例如,列表项可能同时支持点击、长按和滑动操作。
5.2 使用GestureDetector处理冲突
GestureDetector(
  onTap: () => _handleTap(),
  onLongPress: () => _handleLongPress(),
  onHorizontalDragStart: (details) => _handleDragStart(details),
  child: Container(
    padding: const EdgeInsets.all(16),
    color: Colors.grey[100],
    child: const Text('手势冲突测试'),
  ),
)
5.3 使用AbsorbPointer和IgnorePointer
// AbsorbPointer阻止子组件接收手势
AbsorbPointer(
  absorbing: _isDragging,
  child: TodoItem(todo: todo),
)

// IgnorePointer忽略自身手势,让子组件接收
IgnorePointer(
  ignoring: _isDisabled,
  child: ElevatedButton(
    onPressed: () {},
    child: const Text('按钮'),
  ),
)
5.4 自定义手势识别器
class CustomGestureRecognizer extends OneSequenceGestureRecognizer {
void Function()? onCustomGesture;
void addPointer(PointerEvent event) {
startTrackingPointer(event.pointer);
}
void handleEvent(PointerEvent event) {
if (event is PointerUpEvent) {
onCustomGesture?.call();
stopTrackingPointer(event.pointer);
}
}
String get debugDescription => 'CustomGestureRecognizer';
void didStopTrackingLastPointer(int pointer) {}
}
六、实战示例:待办事项卡片
6.1 完整代码示例
import 'package:flutter/material.dart';
class Todo {
final int id;
final String title;
final bool isCompleted;
Todo({
required this.id,
required this.title,
this.isCompleted = false,
});
}
class TodoCard extends StatefulWidget {
final Todo todo;
final void Function() onToggle;
final void Function() onDelete;
final void Function() onEdit;
const TodoCard({
super.key,
required this.todo,
required this.onToggle,
required this.onDelete,
required this.onEdit,
});
State<TodoCard> createState() => _TodoCardState();
}
class _TodoCardState extends State<TodoCard> {
bool _isDoubleTap = false;
bool _isLongPressing = false;
void _showContextMenu() {
showModalBottomSheet(
context: context,
builder: (context) => SafeArea(
child: Wrap(
children: [
ListTile(
leading: const Icon(Icons.edit),
title: const Text('编辑'),
onTap: () {
Navigator.pop(context);
widget.onEdit();
},
),
ListTile(
leading: const Icon(Icons.delete, color: Colors.red),
title: const Text('删除', style: TextStyle(color: Colors.red)),
onTap: () {
Navigator.pop(context);
widget.onDelete();
},
),
],
),
),
);
}
Widget build(BuildContext context) {
return InkWell(
onTap: widget.onToggle,
onDoubleTap: () {
setState(() {
_isDoubleTap = true;
});
widget.onToggle();
Future.delayed(const Duration(milliseconds: 300), () {
setState(() {
_isDoubleTap = false;
});
});
},
onLongPress: _showContextMenu,
onLongPressStart: (_) {
setState(() => _isLongPressing = true);
},
onLongPressEnd: (_) {
setState(() => _isLongPressing = false);
},
child: AnimatedContainer(
duration: const Duration(milliseconds: 150),
padding: const EdgeInsets.all(16),
margin: const EdgeInsets.symmetric(horizontal: 16, vertical: 8),
decoration: BoxDecoration(
color: _isDoubleTap ? Colors.green[100] : (_isLongPressing ? Colors.blue[100] : Colors.white),
border: Border.all(color: _isLongPressing ? Colors.blue : Colors.grey),
borderRadius: BorderRadius.circular(8),
boxShadow: _isLongPressing
? [BoxShadow(color: Colors.blue[200]!, blurRadius: 10)]
: [BoxShadow(color: Colors.grey[200]!, blurRadius: 4)],
),
child: Row(
children: [
Icon(
widget.todo.isCompleted ? Icons.check_circle : Icons.circle_outlined,
color: widget.todo.isCompleted ? Colors.green : Colors.grey,
),
const SizedBox(width: 12),
Expanded(
child: Text(
widget.todo.title,
style: TextStyle(
decoration: widget.todo.isCompleted ? TextDecoration.lineThrough : TextDecoration.none,
color: widget.todo.isCompleted ? Colors.grey : Colors.black,
),
),
),
const Icon(Icons.more_vert, color: Colors.grey),
],
),
),
);
}
}
6.2 使用待办事项卡片
TodoCard(
  todo: Todo(id: 1, title: '完成项目文档', isCompleted: false),
  onToggle: () => print('切换状态'),
  onDelete: () => print('删除'),
  onEdit: () => print('编辑'),
)
6.3 事件交互说明
| 操作 | 效果 | 触发事件 |
|---|---|---|
| 单击 | 切换完成状态 | onTap |
| 双击 | 快速切换完成状态,带绿色高亮 | onDoubleTap |
| 长按 | 显示上下文菜单,带蓝色高亮 | onLongPress |
七、性能优化与最佳实践
7.1 避免手势冲突
// 推荐:使用GestureDetector处理多种手势
GestureDetector(
  onTap: () {},
  onDoubleTap: () {},
  onLongPress: () {},
  child: const Text('按钮'),
)

// 不推荐:嵌套多个GestureDetector
GestureDetector(
  onTap: () {},
  child: GestureDetector(
    onDoubleTap: () {},
    child: const Text('按钮'),
  ),
)
7.2 使用AnimatedWidget优化动画
class AnimatedTodoCard extends AnimatedWidget {
final Todo todo;
final void Function() onToggle;
const AnimatedTodoCard({
super.key,
required Animation<double> animation,
required this.todo,
required this.onToggle,
}) : super(listenable: animation);
Widget build(BuildContext context) {
final animation = listenable as Animation<double>;
return Transform.scale(
scale: animation.value,
child: InkWell(
onTap: onToggle,
child: Text(todo.title),
),
);
}
}
7.3 及时释放资源
void dispose() {
_timer?.cancel();
_recognizer?.dispose();
super.dispose();
}
7.4 合理设置手势区域
// 使用behavior控制手势区域
GestureDetector(
  behavior: HitTestBehavior.opaque, // 不透明,接收所有手势
  onTap: () {},
  child: const Text('按钮'),
)

GestureDetector(
  behavior: HitTestBehavior.translucent, // 半透明,只接收子组件区域的手势
  onTap: () {},
  child: const Text('按钮'),
)
7.5 考虑无障碍用户
Semantics(
  label: '待办事项:${todo.title}',
  hint: '双击切换完成状态,长按显示菜单',
  child: TodoCard(
    todo: todo,
    onToggle: () {},
    onDelete: () {},
    onEdit: () {},
  ),
)
八、常见问题与解决方案
8.1 问题1:长按和点击冲突
问题描述:同时设置onTap和onLongPress时,长按会先触发点击事件。
解决方案:Flutter会自动处理这种冲突,长按会取消点击事件。
GestureDetector(
  onTap: () => print('点击'),
  onLongPress: () => print('长按'),
  child: const Text('测试'),
)
8.2 问题2:双击延迟
问题描述:双击时第一次点击有延迟。
解决方案:这是正常行为,Flutter需要等待判断是否是双击。可以自定义手势识别器优化:
class FastDoubleTapRecognizer extends DoubleTapGestureRecognizer {
Duration get doubleTapMinTime => const Duration(milliseconds: 100);
Duration get doubleTapTimeout => const Duration(milliseconds: 200);
}
8.3 问题3:长按拖拽不流畅
问题描述:长按拖拽时动画不流畅。
解决方案:使用AnimatedContainer或AnimatedBuilder:
AnimatedContainer(
  duration: const Duration(milliseconds: 50),
  transform: Matrix4.translationValues(_offset.dx, _offset.dy, 0),
  child: TodoItem(todo: todo),
)
8.4 问题4:手势穿透
问题描述:子组件的手势穿透到父组件。
解决方案:使用IgnorePointer或AbsorbPointer:
AbsorbPointer(
  absorbing: true,
  child: child,
)
8.5 问题5:双击和缩放冲突
问题描述:同时支持双击和缩放手势时出现冲突。
解决方案:使用GestureDetector的onDoubleTap和onScaleUpdate:
GestureDetector(
  onDoubleTap: () => setState(() => _scale = _scale == 1.0 ? 1.5 : 1.0),
  onScaleUpdate: (details) => setState(() => _scale *= details.scale),
  child: Transform.scale(scale: _scale, child: child),
)
九、总结
通过本文的学习,我们掌握了以下核心知识点:
- 长按事件使用
onLongPress、onLongPressStart、onLongPressMoveUpdate、onLongPressEnd实现 - 双击事件使用
onDoubleTap实现,常用于快速操作 - 事件优先级:双击 > 长按 > 点击
- 长按拖拽结合
onLongPressStart、onLongPressMoveUpdate、onLongPressEnd实现 - 手势冲突处理使用
AbsorbPointer、IgnorePointer和自定义手势识别器 - 性能优化包括避免手势冲突、使用AnimatedWidget、及时释放资源等
在实际开发中,合理使用长按和双击事件能够提升用户体验。理解手势识别的优先级和冲突处理机制,能够帮助我们创建出交互流畅、响应及时的应用。
参考资料
- Flutter官方文档:https://docs.flutter.dev/development/ui/advanced/gestures
- Flutter手势识别器:https://api.flutter.dev/flutter/gestures/GestureRecognizer-class.html
- InkWell组件:https://api.flutter.dev/flutter/material/InkWell-class.html

作为“人工智能6S店”的官方数字引擎,为AI开发者与企业提供一个覆盖软硬件全栈、一站式门户。
更多推荐
 16
16 0
0- 0


 已为社区贡献46条内容

所有评论(0)