
鸿蒙原生ArkTS布局方式之pixelStretch像素拉伸动画深度解析
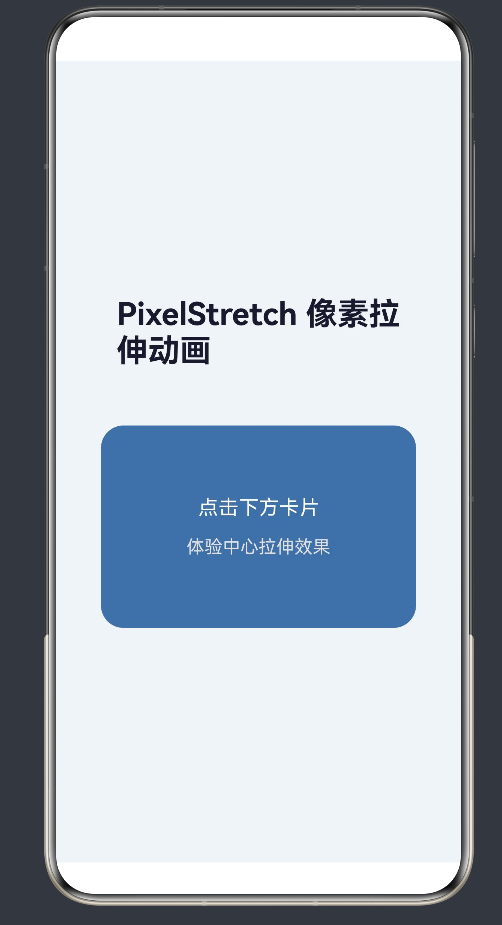
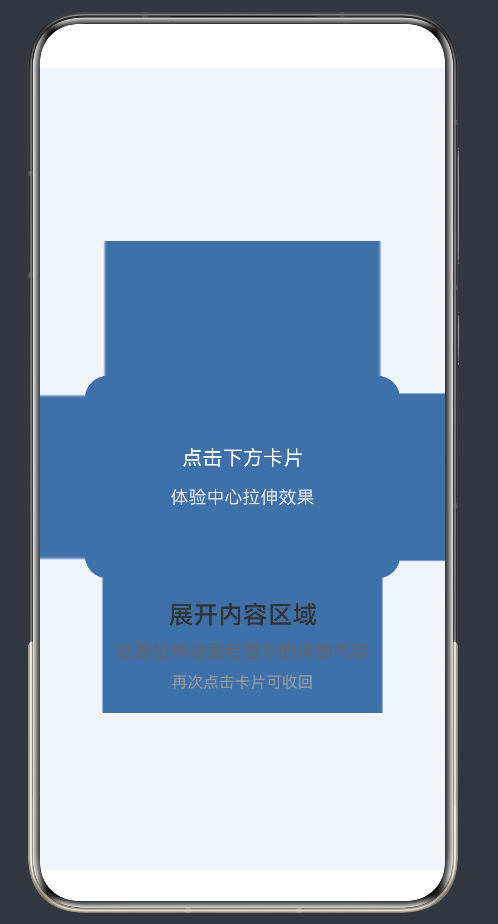
项目演示
一、引言
在HarmonyOS NEXT的ArkUI框架中,动画效果是提升用户体验的关键要素。pixelStretchEffect作为一种独特的像素级拉伸效果,为开发者提供了从中心向外扩展或向内收缩的视觉效果,能够创造出极具冲击力的界面过渡动画。
本文将深入探讨pixelStretchEffect的原理、使用方法、与animateTo和transition的组合应用,以及在实际开发中的最佳实践。
二、pixelStretchEffect概述
2.1 什么是pixelStretchEffect
pixelStretchEffect是HarmonyOS ArkUI提供的一种图像效果属性,用于控制组件边缘像素的拉伸距离。与传统的缩放动画不同,pixelStretchEffect不是对整个组件进行缩放,而是将组件边缘的像素向外或向内扩展,从而创造出独特的拉伸视觉效果。
2.2 API定义与参数说明
根据官方文档,pixelStretchEffect的API定义如下:
pixelStretchEffect(options: Optional<PixelStretchEffectOptions>): T
PixelStretchEffectOptions参数说明:
| 参数名 | 类型 | 必填 | 说明 |
|---|---|---|---|
| left | number | 否 | 左侧边缘像素拉伸距离,单位为像素。正值向外拉伸,负值向内收缩,默认值为0 |
| top | number | 否 | 顶部边缘像素拉伸距离,单位为像素。正值向外拉伸,负值向内收缩,默认值为0 |
| right | number | 否 | 右侧边缘像素拉伸距离,单位为像素。正值向外拉伸,负值向内收缩,默认值为0 |
| bottom | number | 否 | 底部边缘像素拉伸距离,单位为像素。正值向外拉伸,负值向内收缩,默认值为0 |
2.3 作用原理
pixelStretchEffect的工作原理是:当设置拉伸距离后,组件边缘的像素会沿着指定方向进行复制和扩展。例如,当left设置为100时,组件左侧边缘的像素会向左延伸100像素,形成一种从中心向外拉伸的视觉效果。
与scale缩放不同,pixelStretchEffect不会改变组件内部内容的比例,只会拉伸边缘像素,这使得它特别适合用于创建边框扩展、光晕扩散等效果。
三、animateTo显式动画详解
3.1 animateTo概述
animateTo是HarmonyOS提供的全局显式动画接口,用于为状态变化添加过渡动画效果。当在animateTo的回调函数中修改状态变量时,系统会自动计算状态变化前后的差值,并插入平滑的过渡动画。
3.2 API定义与参数说明
animateTo(value: AnimateParam, event: () => void): void
AnimateParam参数说明:
| 参数名 | 类型 | 必填 | 说明 |
|---|---|---|---|
| duration | number | 否 | 动画持续时间,单位为毫秒,默认值为1000 |
| curve | Curve | ICurve | 否 | 动画曲线,默认值为Curve.Linear |
| delay | number | 否 | 动画延迟执行时间,单位为毫秒,默认值为0 |
| iterations | number | 否 | 动画播放次数,默认值为1,设置为-1表示无限循环 |
| playMode | PlayMode | 否 | 动画播放模式,默认值为PlayMode.Normal |
| onFinish | () => void | 否 | 动画播放完成时的回调函数 |
3.3 常用动画曲线
HarmonyOS提供了丰富的动画曲线供选择:
| 曲线名称 | 说明 | 适用场景 |
|---|---|---|
| Curve.Linear | 线性曲线 | 匀速运动场景 |
| Curve.Ease | 缓入缓出曲线 | 通用场景 |
| Curve.EaseIn | 缓入曲线 | 加速运动场景 |
| Curve.EaseOut | 缓出曲线 | 减速运动场景 |
| Curve.EaseInOut | 缓入缓出曲线 | 需要自然过渡的场景 |
| Curve.Friction | 摩擦力曲线 | 模拟物理阻尼效果 |
| Curve.Spring | 弹簧曲线 | 模拟弹性效果 |
| Curve.Overshoot | 过冲曲线 | 带有回弹效果的动画 |
3.4 使用示例
@Entry
@Component
struct AnimateToExample {
  @State widthSize: number = 250
  @State heightSize: number = 100

  build() {
    Column() {
      Button('Change Size')
        .width(this.widthSize)
        .height(this.heightSize)
        .margin(30)
        .onClick(() => {
          animateTo({
            duration: 600,
            curve: Curve.Friction
          }, () => {
            this.widthSize = this.widthSize === 250 ? 100 : 250
            this.heightSize = this.heightSize === 100 ? 50 : 100
          })
        })
    }
    .width('100%')
    .height('100%')
  }
}
四、transition过渡动画详解
4.1 transition概述
transition用于定义组件在进入或退出视图时的过渡效果。当组件被添加到或从容器中移除时,系统会自动应用transition定义的动画效果。
4.2 API定义与参数说明
transition(value: TransitionOptions): void
TransitionOptions参数说明:
| 参数名 | 类型 | 必填 | 说明 |
|---|---|---|---|
| type | TransitionType | 否 | 过渡类型,包括Enter、Exit、All,默认值为TransitionType.All |
| opacity | number | 否 | 透明度过渡,组件进入时从该值过渡到1,退出时从1过渡到该值 |
| scale | { x: number, y: number } | 否 | 缩放过渡,组件进入时从该缩放值过渡到1,退出时从1过渡到该缩放值 |
| translate | { x: number, y: number } | 否 | 位移过渡,组件进入时从该位置过渡到默认位置,退出时从默认位置过渡到该位置 |
| rotate | { angle: number } | 否 | 旋转过渡,组件进入时从该角度过渡到0,退出时从0过渡到该角度 |
4.3 TransitionEffect组合使用
TransitionEffect提供了更灵活的方式来组合多种过渡效果:
transition(TransitionEffect.OPACITY
  .combine(TransitionEffect.scale({ x: 0.8, y: 0.8 }))
  .combine(TransitionEffect.translate({ y: 20 }))
)
4.4 使用示例
@Entry
@Component
struct TransitionExample {
  @State showContent: boolean = false

  build() {
    Column() {
      Button('Toggle Content')
        .onClick(() => {
          animateTo({ duration: 400 }, () => {
            this.showContent = !this.showContent
          })
        })

      if (this.showContent) {
        Column()
          .transition({
            type: TransitionType.Enter,
            opacity: 0,
            scale: { x: 0.8, y: 0.8 }
          }) {
          Text('This is the content')
            .fontSize(20)
        }
      }
    }
    .width('100%')
    .height('100%')
  }
}
五、pixelStretchEffect + animateTo + transition组合实战
5.1 核心场景:中心拉伸展开动画
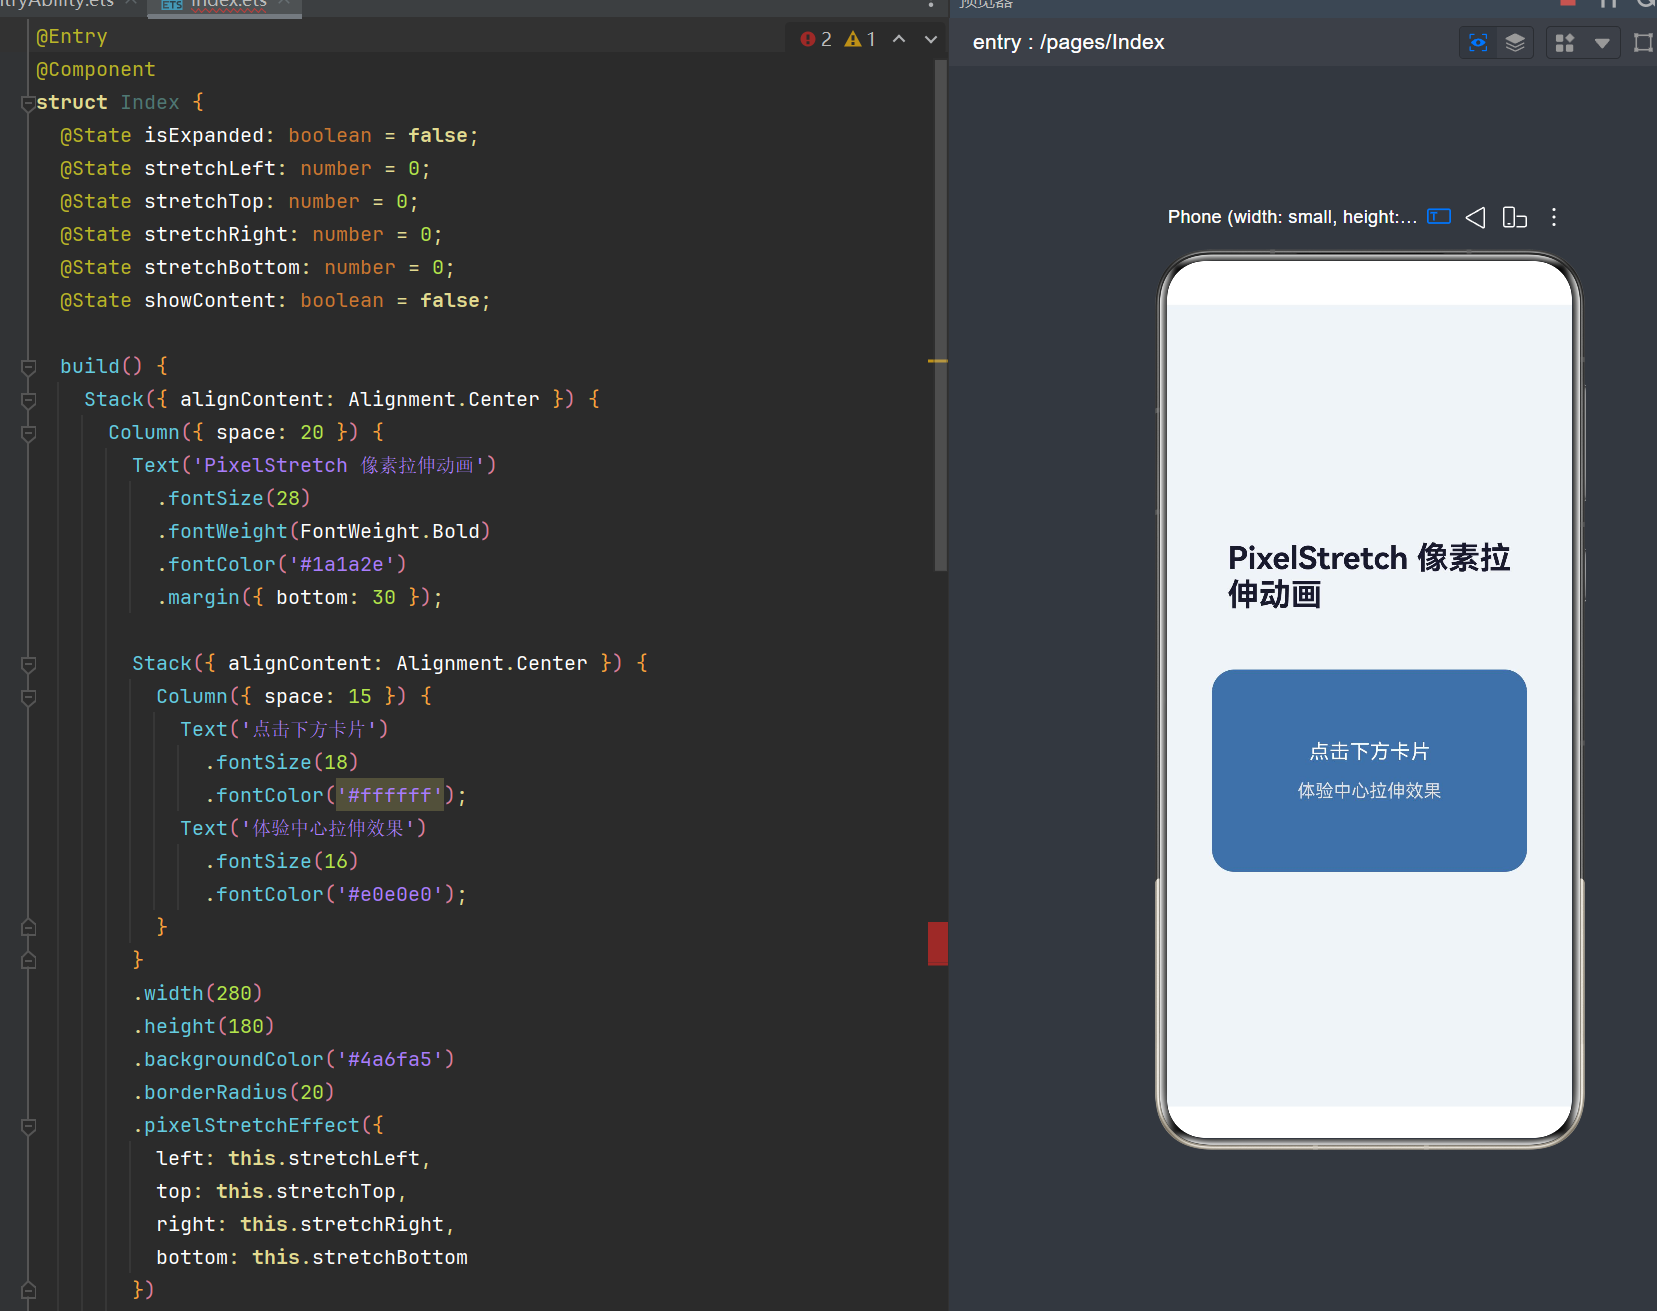
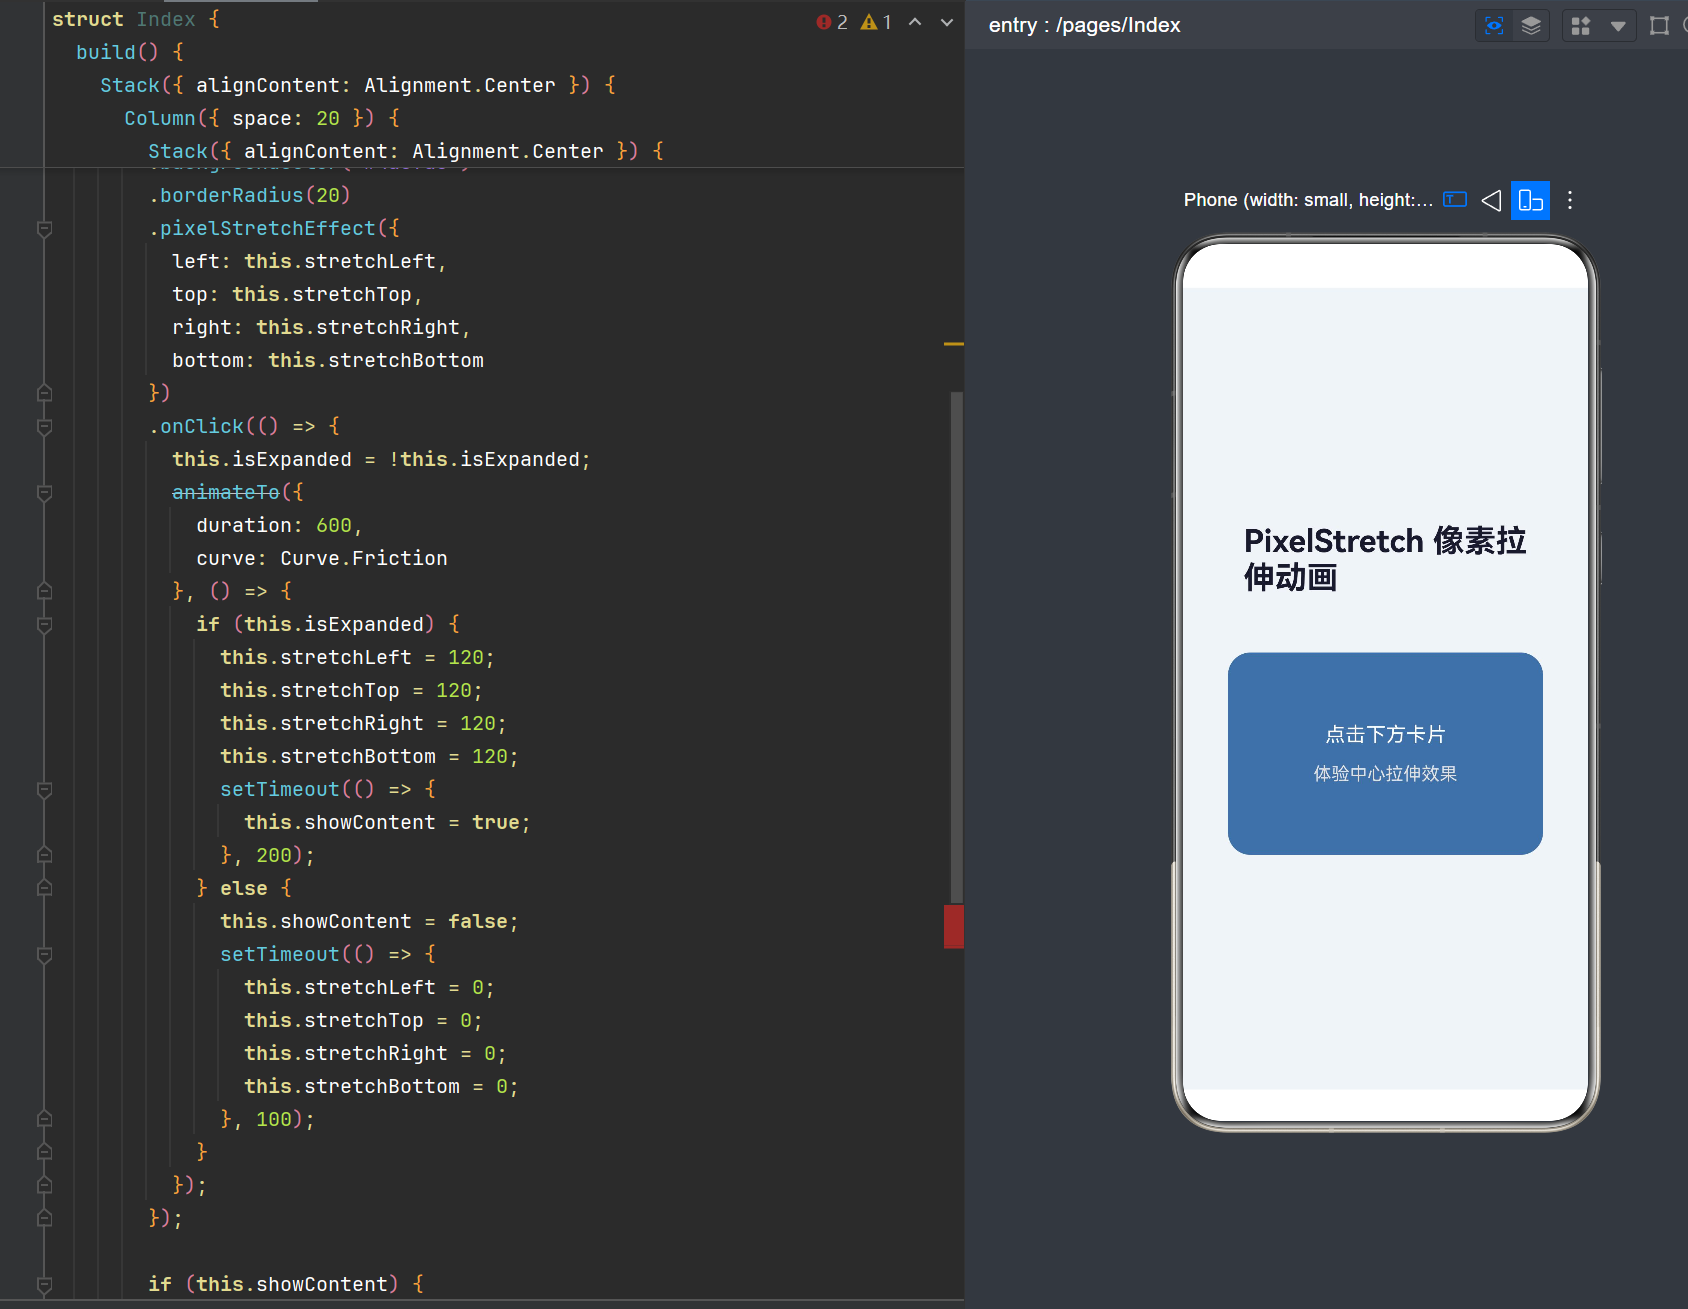
这是pixelStretchEffect最典型的应用场景:从中心向四周拉伸展开的动画效果。
@Entry
@Component
struct PixelStretchExpandExample {
  @State isExpanded: boolean = false
  @State stretchLeft: number = 0
  @State stretchTop: number = 0
  @State stretchRight: number = 0
  @State stretchBottom: number = 0
  @State showContent: boolean = false

  build() {
    Stack({ alignContent: Alignment.Center }) {
      Column({ space: 20 }) {
        Text('PixelStretch 中心拉伸动画')
          .fontSize(28)
          .fontWeight(FontWeight.Bold)
          .fontColor('#1a1a2e')
          .margin({ bottom: 30 })

        Stack({ alignContent: Alignment.Center }) {
          Column({ space: 15 }) {
            Text('点击卡片展开')
              .fontSize(18)
              .fontColor('#ffffff')
            Text('体验像素拉伸效果')
              .fontSize(16)
              .fontColor('#e0e0e0')
          }
        }
        .width(280)
        .height(180)
        .backgroundColor('#4a6fa5')
        .borderRadius(20)
        .pixelStretchEffect({
          left: this.stretchLeft,
          top: this.stretchTop,
          right: this.stretchRight,
          bottom: this.stretchBottom
        })
        .onClick(() => {
          this.isExpanded = !this.isExpanded

          animateTo({
            duration: 600,
            curve: Curve.Friction
          }, () => {
            if (this.isExpanded) {
              this.stretchLeft = 120
              this.stretchTop = 120
              this.stretchRight = 120
              this.stretchBottom = 120

              setTimeout(() => {
                this.showContent = true
              }, 200)
            } else {
              this.showContent = false

              setTimeout(() => {
                this.stretchLeft = 0
                this.stretchTop = 0
                this.stretchRight = 0
                this.stretchBottom = 0
              }, 100)
            }
          })
        })

        if (this.showContent) {
          Column({ space: 10 })
            .padding({ top: 20 })
            .transition({
              type: TransitionType.Enter,
              opacity: 0,
              translate: { y: 20 }
            }) {
            Text('展开内容区域')
              .fontSize(22)
              .fontWeight(FontWeight.Medium)
              .fontColor('#333333')
            Text('这是拉伸动画后显示的详细内容')
              .fontSize(16)
              .fontColor('#666666')
            Text('再次点击卡片可收回')
              .fontSize(14)
              .fontColor('#999999')
          }
        }
      }
      .padding(40)
    }
    .width('100%')
    .height('100%')
    .backgroundColor('#f0f4f8')
  }
}
5.2 场景二:卡片边缘发光效果
利用pixelStretchEffect可以创建卡片边缘发光的效果:
@Entry
@Component
struct GlowEffectExample {
  @State isGlowing: boolean = false
  @State glowLeft: number = 0
  @State glowTop: number = 0
  @State glowRight: number = 0
  @State glowBottom: number = 0

  build() {
    Stack({ alignContent: Alignment.Center }) {
      Column({ space: 30 }) {
        Text('卡片边缘发光效果')
          .fontSize(24)
          .fontWeight(FontWeight.Bold)

        Stack({ alignContent: Alignment.Center }) {
          Text('Hover to Glow')
            .fontSize(20)
            .fontColor('#ffffff')
        }
        .width(200)
        .height(120)
        .backgroundColor('#007dff')
        .borderRadius(16)
        .pixelStretchEffect({
          left: this.glowLeft,
          top: this.glowTop,
          right: this.glowRight,
          bottom: this.glowBottom
        })
        .onHover((isHover: boolean) => {
          this.isGlowing = isHover

          animateTo({
            duration: 300,
            curve: Curve.EaseOut
          }, () => {
            const glowValue = isHover ? 30 : 0
            this.glowLeft = glowValue
            this.glowTop = glowValue
            this.glowRight = glowValue
            this.glowBottom = glowValue
          })
        })
      }
    }
    .width('100%')
    .height('100%')
    .backgroundColor('#1a1a2e')
  }
}
5.3 场景三:图片边框扩展效果
pixelStretchEffect也可以用于图片的边框扩展效果:
@Entry
@Component
struct ImageBorderExpandExample {
  @State isExpanded: boolean = false
  @State borderWidth: number = 0

  build() {
    Stack({ alignContent: Alignment.Center }) {
      Column({ space: 30 }) {
        Text('图片边框扩展效果')
          .fontSize(24)
          .fontWeight(FontWeight.Bold)

        Image($r('app.media.sample_image'))
          .width(200)
          .height(200)
          .borderRadius(12)
          .pixelStretchEffect({
            left: this.borderWidth,
            top: this.borderWidth,
            right: this.borderWidth,
            bottom: this.borderWidth
          })
          .onClick(() => {
            this.isExpanded = !this.isExpanded

            animateTo({
              duration: 500,
              curve: Curve.Friction
            }, () => {
              this.borderWidth = this.isExpanded ? 50 : 0
            })
          })

        Text(this.isExpanded ? '点击收缩边框' : '点击扩展边框')
          .fontSize(16)
          .fontColor('#666666')
      }
    }
    .width('100%')
    .height('100%')
    .backgroundColor('#f5f5f5')
  }
}
六、高级技巧与最佳实践
6.1 非对称拉伸效果
通过设置不同方向的拉伸距离,可以创建非对称的拉伸效果:
.pixelStretchEffect({
  left: 50,
  top: 100,
  right: 50,
  bottom: 100
})
这种方式可以创建类似梯形展开的效果,增加视觉层次感。
6.2 结合其他动画效果
pixelStretchEffect可以与其他动画效果组合使用,创造更丰富的视觉体验:
@Entry
@Component
struct CombinedAnimationExample {
  @State isExpanded: boolean = false
  @State stretchLeft: number = 0
  @State stretchRight: number = 0
  @State opacityValue: number = 1
  @State scaleValue: number = 1

  build() {
    Stack({ alignContent: Alignment.Center }) {
      Column() {
        Stack({ alignContent: Alignment.Center }) {
          Text('组合动画效果')
            .fontSize(20)
            .fontColor('#ffffff')
        }
        .width(200)
        .height(100)
        .backgroundColor('#ff6b6b')
        .borderRadius(16)
        .opacity(this.opacityValue)
        .scale({ x: this.scaleValue, y: this.scaleValue })
        .pixelStretchEffect({
          left: this.stretchLeft,
          right: this.stretchRight
        })
        .onClick(() => {
          this.isExpanded = !this.isExpanded

          animateTo({
            duration: 400,
            curve: Curve.EaseOut
          }, () => {
            if (this.isExpanded) {
              this.stretchLeft = 80
              this.stretchRight = 80
              this.opacityValue = 0.8
              this.scaleValue = 1.1
            } else {
              this.stretchLeft = 0
              this.stretchRight = 0
              this.opacityValue = 1
              this.scaleValue = 1
            }
          })
        })
      }
    }
    .width('100%')
    .height('100%')
    .backgroundColor('#f0f4f8')
  }
}
6.3 动态控制拉伸方向
根据用户交互动态控制拉伸方向:
@Entry
@Component
struct DynamicStretchExample {
  @State stretchLeft: number = 0
  @State stretchRight: number = 0

  build() {
    Stack({ alignContent: Alignment.Center }) {
      Column({ space: 20 }) {
        Stack({ alignContent: Alignment.Center }) {
          Text('← →')
            .fontSize(24)
            .fontColor('#ffffff')
        }
        .width(150)
        .height(80)
        .backgroundColor('#4ecdc4')
        .borderRadius(12)
        .pixelStretchEffect({
          left: this.stretchLeft,
          right: this.stretchRight
        })

        Row({ space: 20 }) {
          Button('← 向左拉伸')
            .onClick(() => {
              animateTo({ duration: 300 }, () => {
                this.stretchLeft = 100
                this.stretchRight = 0
              })
            })

          Button('向右拉伸 →')
            .onClick(() => {
              animateTo({ duration: 300 }, () => {
                this.stretchLeft = 0
                this.stretchRight = 100
              })
            })

          Button('重置')
            .onClick(() => {
              animateTo({ duration: 300 }, () => {
                this.stretchLeft = 0
                this.stretchRight = 0
              })
            })
        }
      }
    }
    .width('100%')
    .height('100%')
    .backgroundColor('#1a1a2e')
  }
}
6.4 性能优化建议
在使用pixelStretchEffect时,需要注意以下性能优化点:
- 避免过大的拉伸值:拉伸值过大会导致大量像素复制,影响性能
- 配合硬件加速:对于复杂场景,可以考虑使用renderGroup进行硬件加速
- 合理使用动画曲线:选择合适的动画曲线可以减少不必要的计算
- 避免过度使用:pixelStretchEffect是一种特殊效果,过度使用会让用户感到疲劳
七、常见问题与解决方案
7.1 pixelStretchEffect不生效
问题描述:设置了pixelStretchEffect但没有看到拉伸效果。
解决方案:
- 确保组件有实际的背景色或背景图片
- 确保拉伸值不为0
- 检查是否在animateTo中正确修改了状态变量
7.2 拉伸效果与预期不符
问题描述:拉伸方向或距离与预期不一致。
解决方案:
- 检查left/top/right/bottom参数的设置
- 注意正值向外拉伸,负值向内收缩
- 确保animateTo正确包裹了状态变化
7.3 动画卡顿
问题描述:拉伸动画出现卡顿现象。
解决方案:
- 减小拉伸值
- 缩短动画时长
- 使用更简单的动画曲线
- 考虑使用renderGroup进行优化
7.4 transition与animateTo配合问题
问题描述:transition效果没有按照预期执行。
解决方案:
- 确保transition的type参数设置正确
- 确保状态变化在animateTo回调中进行
- 检查TransitionType的正确使用方式
八、总结与展望
8.1 核心要点回顾
pixelStretchEffect作为HarmonyOS ArkUI的独特图像效果,为开发者提供了像素级的拉伸能力:
- 原理独特:与scale缩放不同,pixelStretchEffect只拉伸边缘像素
- 参数灵活:支持left/top/right/bottom四个方向独立控制
- 组合强大:可以与animateTo、transition等动画API组合使用
- 适用场景:适合创建边框扩展、光晕扩散、中心展开等效果
8.2 应用场景推荐
pixelStretchEffect在以下场景中特别有效:
- 卡片展开/收起动画:从中心向四周拉伸
- 边缘发光效果:模拟光效扩散
- 图片边框扩展:增强视觉层次感
- 按钮交互反馈:提供视觉反馈
8.3 未来发展方向
随着HarmonyOS的不断发展,pixelStretchEffect可能会支持更多高级特性:
- 渐变拉伸:支持拉伸距离的渐变效果
- 方向控制:支持任意角度的拉伸方向
- 性能优化:进一步优化渲染性能
- 组合效果:与更多图像效果的组合使用
附录:完整示例代码
以下是一个完整的pixelStretchEffect综合示例:
@Entry
@Component
struct PixelStretchComprehensiveExample {
  @State isExpanded: boolean = false
  @State stretchLeft: number = 0
  @State stretchTop: number = 0
  @State stretchRight: number = 0
  @State stretchBottom: number = 0
  @State showContent: boolean = false
  @State contentOpacity: number = 0
  @State contentScale: number = 0.8

  build() {
    Stack({ alignContent: Alignment.Center }) {
      Column({ space: 20 }) {
        Text('PixelStretch 综合示例')
          .fontSize(28)
          .fontWeight(FontWeight.Bold)
          .fontColor('#1a1a2e')
          .margin({ bottom: 30 })

        Stack({ alignContent: Alignment.Center }) {
          Column({ space: 15 }) {
            Text(this.isExpanded ? '点击收回' : '点击展开')
              .fontSize(18)
              .fontColor('#ffffff')
            Text('体验像素拉伸动画')
              .fontSize(16)
              .fontColor('#e0e0e0')
          }
        }
        .width(280)
        .height(180)
        .backgroundColor('#4a6fa5')
        .borderRadius(20)
        .pixelStretchEffect({
          left: this.stretchLeft,
          top: this.stretchTop,
          right: this.stretchRight,
          bottom: this.stretchBottom
        })
        .onClick(() => {
          this.isExpanded = !this.isExpanded

          animateTo({
            duration: 600,
            curve: Curve.Friction
          }, () => {
            if (this.isExpanded) {
              this.stretchLeft = 120
              this.stretchTop = 120
              this.stretchRight = 120
              this.stretchBottom = 120

              setTimeout(() => {
                this.showContent = true
                animateTo({
                  duration: 400,
                  curve: Curve.EaseOut
                }, () => {
                  this.contentOpacity = 1
                  this.contentScale = 1
                })
              }, 200)
            } else {
              animateTo({
                duration: 300,
                curve: Curve.EaseIn
              }, () => {
                this.contentOpacity = 0
                this.contentScale = 0.8
              })

              setTimeout(() => {
                this.showContent = false
                animateTo({
                  duration: 500,
                  curve: Curve.Friction
                }, () => {
                  this.stretchLeft = 0
                  this.stretchTop = 0
                  this.stretchRight = 0
                  this.stretchBottom = 0
                })
              }, 300)
            }
          })
        })

        if (this.showContent) {
          Column({ space: 15 })
            .padding({ top: 30 })
            .opacity(this.contentOpacity)
            .scale({ x: this.contentScale, y: this.contentScale }) {
            Text('详细内容标题')
              .fontSize(24)
              .fontWeight(FontWeight.Bold)
              .fontColor('#333333')

            Text('这是使用pixelStretchEffect实现的中心拉伸展开效果。')
              .fontSize(16)
              .fontColor('#666666')
              .maxLines(3)

            Text('通过animateTo驱动状态变化,配合transition实现内容的淡入淡出效果。')
              .fontSize(16)
              .fontColor('#666666')
              .maxLines(3)

            Row({ space: 15 }) {
              Button('了解更多')
                .backgroundColor('#4a6fa5')
                .fontColor('#ffffff')
                .borderRadius(8)

              Button('立即体验')
                .backgroundColor('#ffffff')
                .fontColor('#4a6fa5')
                .borderWidth(1)
                .borderColor('#4a6fa5')
                .borderRadius(8)
            }
          }
        }
      }
      .padding(40)
    }
    .width('100%')
    .height('100%')
    .backgroundColor('#f0f4f8')
  }
}
参考文献

作为“人工智能6S店”的官方数字引擎,为AI开发者与企业提供一个覆盖软硬件全栈、一站式门户。
更多推荐
 4
4 0
0- 0


 已为社区贡献28条内容

所有评论(0)