
鸿蒙分布式能力与超级终端实战:设备发现·数据同步·任务流转
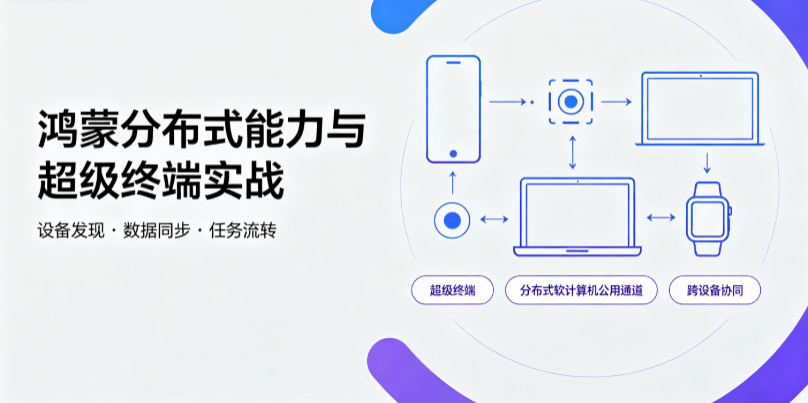
在 HarmonyOS NEXT 的设计哲学中,"设备"不再是一个个孤立的信息孤岛,而是可以随时被调用的分布式资源。超级终端(Super Device)的理念,使得手机、平板、智慧屏、手表、PC、车机甚至 IoT 设备能够协同工作,实现能力的跨设备延伸。这一切背后,分布式软总线(Distributed Soft Bus)扮演了"神经系统"的角色——它负责设备发现、认证、数据传输和任务调度,对开发者完全透明却又高度可控。
本文选取分布式能力中最核心的三条链路——设备发现与信任组管理、跨设备数据同步、跨设备任务流转——配以完整可运行的 ArkTS 示例代码,带你从原理到实践彻底掌握 HarmonyOS NEXT 的超级终端开发范式。
一、分布式软总线的架构概览
1.1 软总线的分层模型
分布式软总线位于 HarmonyOS 系统架构的底层,对上为Ability框架、ArkData数据管理、WantAgent任务调度等模块提供统一的分布式通信能力。其核心可以分为四层:
- 设备管理层(DeviceManager):负责周边设备的发现、认证、上下线感知与信任组维护。
- 协议适配层:自动适配 Wi-Fi、蓝牙、NFC、USB 等多种物理传输介质,开发者无需关心底层细节。
- 分布式调度层(DistributedScheduler):负责跨设备任务的发起、分配与生命周期管理。
- 数据通道层(DistributedData):提供统一的 KVStore 接口,实现跨设备键值对同步。
理解这四层的职责边界,有助于在实际开发中选择正确的 API 入口。
1.2 超级终端的设备角色
超级终端中,每个设备都有两种动态角色:
- 可信设备(Trusted Device):已通过设备认证并加入信任组的设备,可以直接进行数据同步和任务流转。
- 协同设备(Collaborative Device):临时被拉起协同的设备,通常由WantAgent 拉起对方的特定Ability后短暂连接。
设备角色并非固定,而是根据业务场景动态变化。例如,当手机与平板建立信任组后,两者互为可信设备;但如果手机通过扫码将笔记本拉起协同编辑文档,笔记本在文档协作场景中即为协同设备。
二、设备发现与信任组管理:DeviceManager 实战
2.1 核心原理
设备发现的第一步是感知周围的同局域网或蓝牙范围内的 HarmonyOS 设备。DeviceManager 模块封装了这一过程,提供:
- startTrustAgent():启动认证代理,弹出认证 UI,等待对方设备扫码确认。
- authenticateDevice():主动认证一个已发现的设备。
- getTrustedDeviceList():获取当前信任组中所有已认证设备。
- checkDeviceAuthentication():检查特定设备是否已认证。
值得注意的是,设备认证是双向的——设备 A 认证设备 B 后,设备 B 需要在自己的设备管理界面确认,认证才正式生效。这是软总线安全模型的设计核心。
2.2 完整示例:设备发现与认证
以下示例展示如何在一个 EntryAbility 中初始化 DeviceManager、监听设备列表变化,并在 UI 上展示已认证设备。
// entry/src/main/ets/pages/DeviceDiscovery.ets

import { deviceInfo } from '@kit.BasicServicesKit';
import { distributedDeviceManager } from '@kit.DistributedServiceKit';
import { BusinessError } from '@kit.BasicServicesKit';

class DeviceDiscoveryViewModel {
  // 设备管理器单例,全应用只需一个实例
  private deviceManager: distributedDeviceManager.DeviceManager | null = null;
  // 设备列表状态,用于 UI 绑定
  deviceList: distributedDeviceManager.DeviceBasicInfo[] = [];

  // 设备列表变化回调
  private onDeviceListChange = (data: distributedDeviceManager.DeviceBasicInfo[]): void => {
    this.deviceList = data.filter(device => {
      // 仅保留可信设备(STATE_ACTIVE)
      return device.state === distributedDeviceManager.DeviceState.STATE_ACTIVE;
    });
    console.info(`[DeviceDiscovery] Active devices: ${this.deviceList.length}`);
  };

  // 设备上下线回调
  private onDeviceChange = (type: distributedDeviceManager.SubscribeType,
                             data: distributedDeviceManager.DeviceBasicInfo): void => {
    if (type === distributedDeviceManager.SubscribeType.SUBECRIBE_TYPE_DEVICELIST_CHANGE) {
      console.info(`[DeviceDiscovery] Device list changed: ${JSON.stringify(data)}`);
      this.refreshDeviceList();
    }
  };

  async initialize(): Promise<void> {
    const context = getContext(this);

    try {
      // 创建设备管理器实例,传入包名
      this.deviceManager = distributedDeviceManager.createDeviceManager(
        context.applicationInfo.name
      );

      // 注册设备列表变化监听
      this.deviceManager.on('deviceListChange',
        distributedDeviceManager.SubscribeType.SUBECRIBE_TYPE_DEVICELIST_CHANGE,
        this.onDeviceChange
      );

      // 初始加载一次设备列表
      await this.refreshDeviceList();
      console.info('[DeviceDiscovery] DeviceManager initialized successfully');
    } catch (err) {
      const error = err as BusinessError;
      console.error(`[DeviceDiscovery] Init failed: ${error.code} - ${error.message}`);
    }
  }

  async refreshDeviceList(): Promise<void> {
    if (!this.deviceManager) return;

    try {
      const list = this.deviceManager.getTrustedDeviceListSync();
      this.deviceList = list.filter(d => d.state === distributedDeviceManager.DeviceState.STATE_ACTIVE);
      console.info(`[DeviceDiscovery] Found ${this.deviceList.length} trusted devices`);
    } catch (err) {
      console.error(`[DeviceDiscovery] Get device list failed: ${(err as BusinessError).message}`);
    }
  }

  async startTrustAgent(context: Context): Promise<void> {
    if (!this.deviceManager) return;

    try {
      // 启动认证代理,拉起系统认证界面
      this.deviceManager.startTrustAgent({
        onError: (code: number, message: string) => {
          console.error(`[DeviceDiscovery] TrustAgent error: ${code} - ${message}`);
        }
      });
      console.info('[DeviceDiscovery] TrustAgent started');
    } catch (err) {
      console.error(`[DeviceDiscovery] Start TrustAgent failed: ${(err as BusinessError).message}`);
    }
  }

  destroy(): void {
    if (this.deviceManager) {
      this.deviceManager.off('deviceListChange');
      this.deviceManager.release();
      this.deviceManager = null;
    }
  }

  // 获取本机设备 UUID
  getLocalDeviceUuid(): string {
    return deviceInfo.uuid;
  }
}

export { DeviceDiscoveryViewModel };
上述 ViewModel 封装了设备发现的核心逻辑。接下来将其接入 ArkUI 页面:
// entry/src/main/ets/pages/DeviceDiscoveryPage.ets
import { DeviceDiscoveryViewModel } from '../viewmodel/DeviceDiscoveryViewModel';

@Entry
@Component
struct DeviceDiscoveryPage {
  @State viewModel: DeviceDiscoveryViewModel = new DeviceDiscoveryViewModel();
  @State localUuid: string = '';
  @State isDiscovering: boolean = false;

  async aboutToAppear(): Promise<void> {
    await this.viewModel.initialize();
    this.localUuid = this.viewModel.getLocalDeviceUuid();
  }

  aboutToDisappear(): void {
    this.viewModel.destroy();
  }

  build() {
    Navigation() {
      Column({ space: 16 }) {
        // 本机信息卡片
        Row() {
          Column() {
            Text('本机 UUID')
              .fontSize(12)
              .fontColor('#999999')
            Text(this.localUuid.substring(0, 8) + '...')
              .fontSize(14)
              .fontFamily('monospace')
          }
          .alignItems(HorizontalAlign.Start)
        }
        .width('100%')
        .padding(16)
        .backgroundColor('#F5F5F5')
        .borderRadius(12)

        // 设备列表标题
        Row() {
          Text('可信设备')
            .fontSize(16)
            .fontWeight(FontWeight.Bold)

          Text(`(${this.viewModel.deviceList.length} 台)`)
            .fontSize(14)
            .fontColor('#666666')
        }
        .width('100%')
        .padding({ left: 16, right: 16 })

        // 设备列表
        List() {
          ForEach(this.viewModel.deviceList, (device: distributedDeviceManager.DeviceBasicInfo) => {
            ListItem() {
              Row() {
                Column() {
                  Text(device.deviceName)
                    .fontSize(15)
                    .fontWeight(FontWeight.Medium)
                  Text(device.deviceId.substring(0, 16) + '...')
                    .fontSize(11)
                    .fontColor('#999999')
                    .fontFamily('monospace')
                }
                .alignItems(HorizontalAlign.Start)
                .layoutWeight(1)

                Text(device.deviceType?.toString() ?? 'Unknown')
                  .fontSize(12)
                  .backgroundColor('#E8F5E9')
                  .padding({ left: 8, right: 8, top: 4, bottom: 4 })
                  .borderRadius(4)
              }
              .padding(16)
            }
          }, (device: distributedDeviceManager.DeviceBasicInfo) => device.deviceId)
        }
        .width('100%')
        .layoutWeight(1)
        .divider({ strokeWidth: 0.5, color: '#EEEEEE', startMargin: 16, endMargin: 16 })

        // 添加设备按钮
        Button('发现新设备', { type: ButtonType.Capsule })
          .width('80%')
          .height(48)
          .onClick(() => {
            this.viewModel.startTrustAgent(getContext(this));
          })
      }
      .width('100%')
      .height('100%')
      .padding(16)
    }
    .title('设备发现')
    .navDestination(this.PageMap)
  }

  PageMap: NavPathStack = new NavPathStack();
}
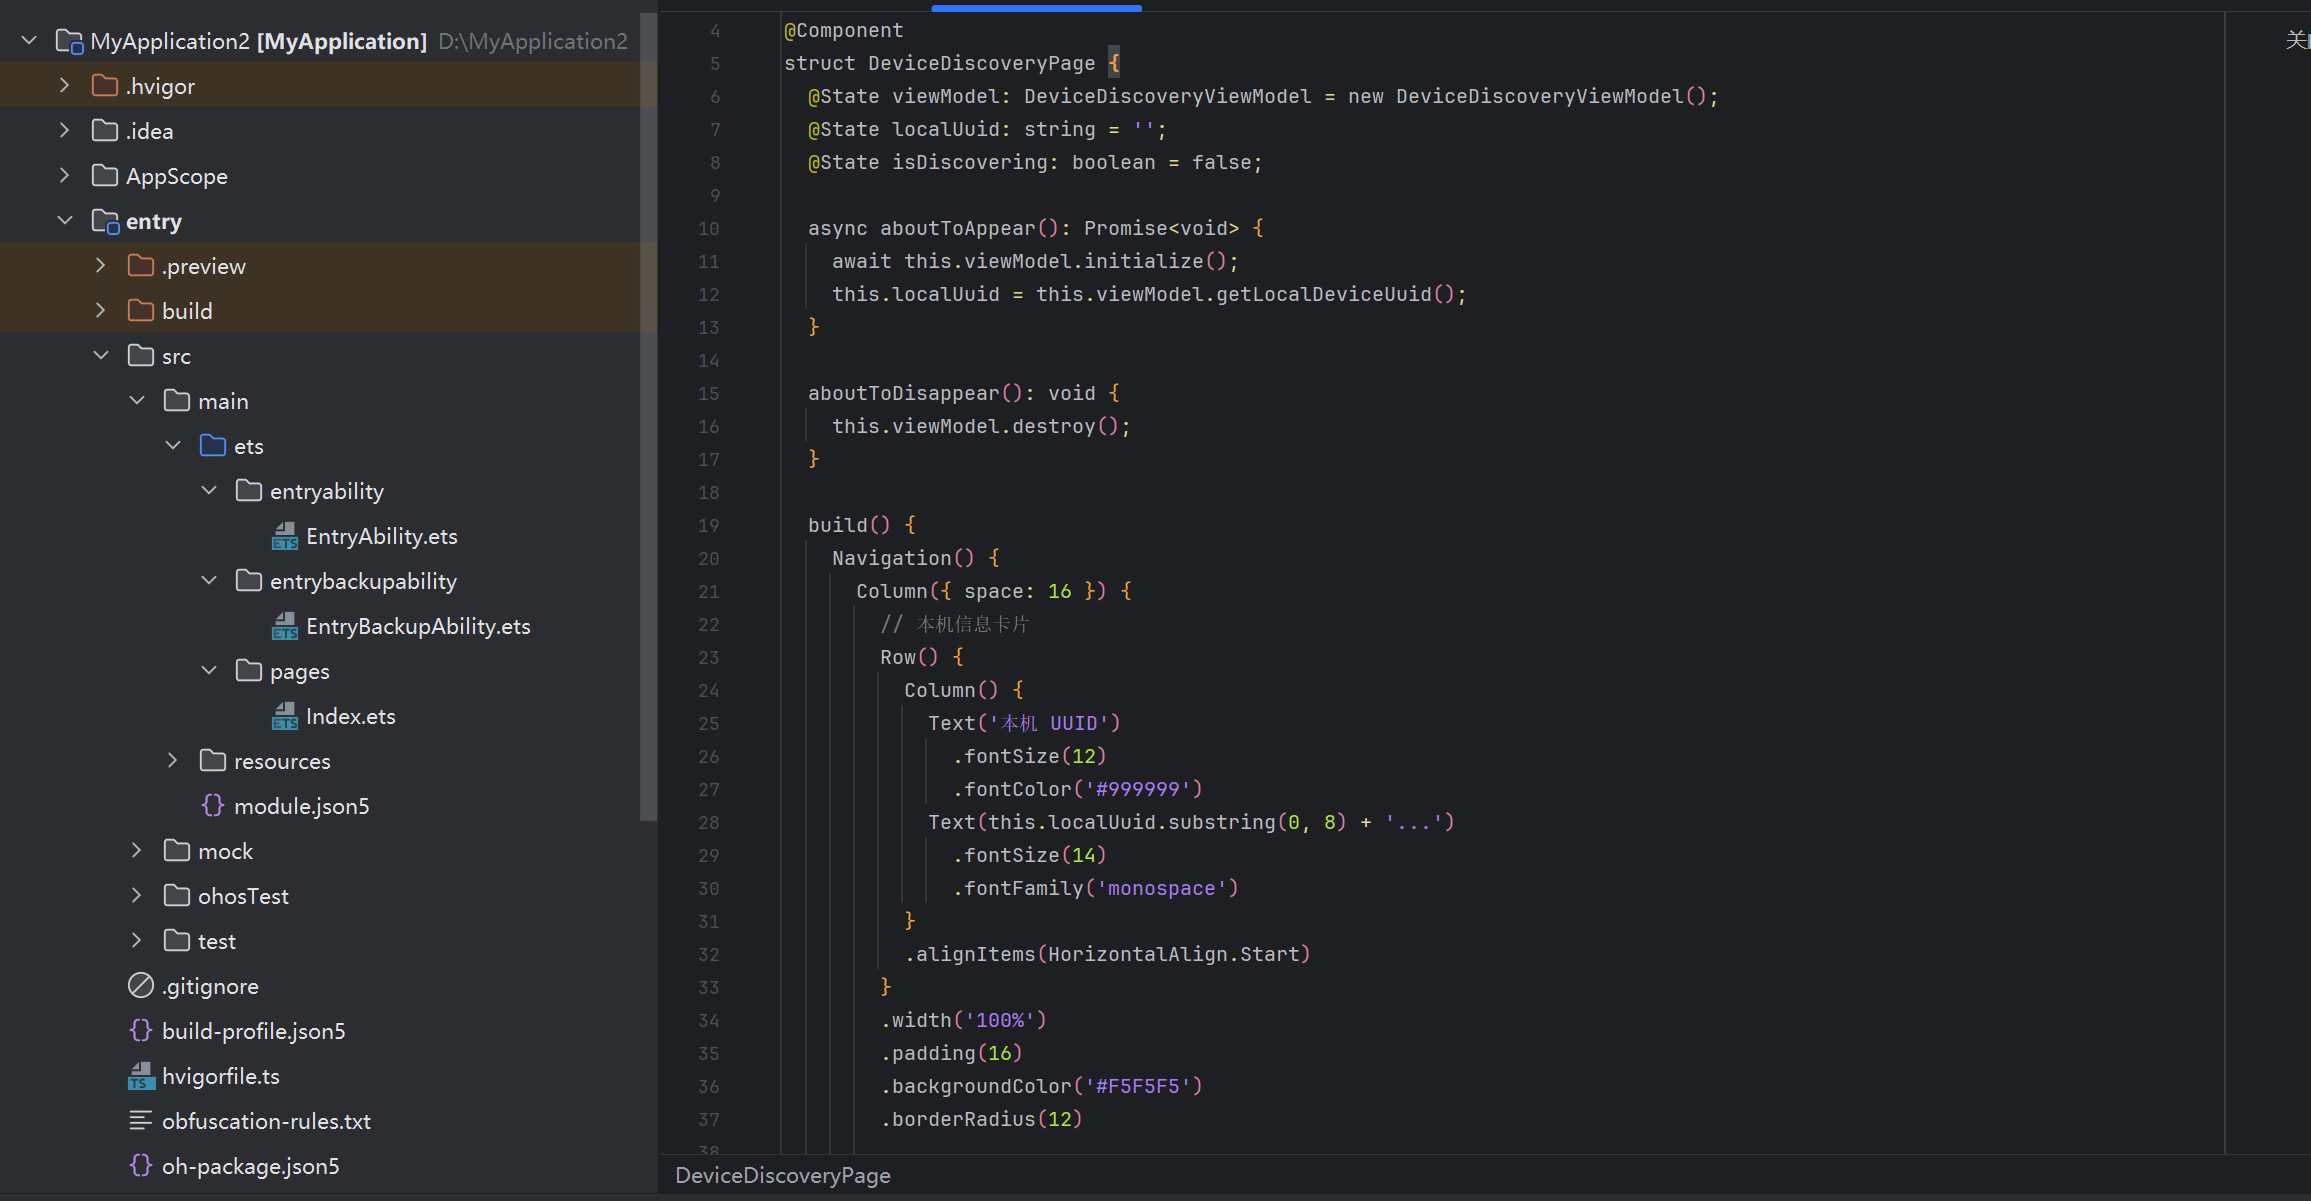
上面这段代码展示了完整的设备发现流程:初始化 DeviceManager → 注册设备列表变化监听 → 刷新设备列表 → 展示设备信息 → 启动认证代理。
需要特别说明的是,startTrustAgent() 启动后,系统会弹出认证二维码界面。另一台设备扫描后,双方设备均需在各自界面确认,设备才会进入 STATE_ACTIVE 状态。认证完成后,onDeviceListChange 回调会自动触发,UI 随之更新。
三、跨设备数据同步:Distributed KVStore 实战
3.1 为什么选择 KVStore 而不是普通 AppStorage
HarmonyOS 提供了多种数据持久化方案:AppStorage、UserInfoRepo、Distributed KVStore。那么何时该用分布式 KVStore?
简单来说:如果数据需要在多台设备间实时同步,选择 KVStore;如果数据仅存在于本地,选择 AppStorage。 KVStore 的底层实现基于分布式软总线,自动处理冲突合并(Last-Write-Wins 策略)、断点续传和网络切换恢复,对开发者屏蔽了全部传输层细节。
KVStore 有三种模式:
- DeviceSingle KVStore:单设备键值存储,不可跨设备同步。
- DeviceDistributed KVStore:可跨设备同步的分布式 KVStore,同步范围为同一用户下所有可信设备。
- SingleKVStore + 手动同步:通过
sync()方法按需触发同步,灵活性最高。
对于超级终端场景,推荐使用 DeviceDistributed KVStore,因为它天然支持设备组网后自动同步,无需手动调用 sync()。
3.2 完整示例:分布式笔记同步
假设我们要实现一个跨设备笔记应用,数据在手机和平板之间实时同步。以下是完整的分布式数据管理架构。
// entry/src/main/ets/data/NoteModel.ets

// 笔记数据模型
interface Note {
  id: string;
  title: string;
  content: string;
  updatedAt: number;  // 时间戳,用于冲突解决
  deviceId: string;  // 最后修改的设备 ID
}

class DistributedNoteStore {
  private kvStore: distributedKVStore.DeviceKVStore | null = null;
  private storeId: string = 'note_distributed_store';
  private currentDeviceId: string = '';

  async initialize(context: Context): Promise<void> {
    // 获取本机设备 ID,用于追踪修改来源
    const options: distributedKVStore.StoreOptions = {
      createIfMissing: true,
      // 开启跨设备加密同步,数据在传输过程中全程加密
      encrypt: true,
      // 允许数据自动同步到其他可信设备
      autoSync: true,
      // 同步策略:优先以本机数据为准
      conflictStrategy: distributedKVStore.ConflictStrategy.VERSION
    };

    try {
      const mgr = distributedKVStore.createKVManager(context);
      this.kvStore = await mgr.getKVStore<distributedKVStore.DeviceKVStore>(
        this.storeId,
        options
      );

      // 监听数据变化(来自本设备或其他设备的变化均会触发)
      this.kvStore.on('dataChange', distributedKVStore.SubscribeType.SUBSCRIBE_TYPE_ALL,
        (data: distributedKVStore.KVStoreDataChange) => {
          console.info(`[NoteStore] Data changed. Inserted: ${data.insertEntries.length}, ` +
            `Updated: ${data.updateEntries.length}, Deleted: ${data.deleteEntries.length}`);
          this.notifyChange();
        }
      );

      console.info('[NoteStore] Initialized successfully');
    } catch (err) {
      console.error(`[NoteStore] Init failed: ${(err as Error).message}`);
    }
  }

  // 保存一条笔记,自动带上时间戳和设备标识
  async saveNote(note: Note): Promise<void> {
    if (!this.kvStore) {
      throw new Error('KVStore not initialized');
    }

    const noteWithMeta: Note = {
      ...note,
      updatedAt: Date.now(),
      deviceId: this.currentDeviceId
    };

    try {
      await this.kvStore.put(`note_${note.id}`, JSON.stringify(noteWithMeta));
      console.info(`[NoteStore] Saved note: ${note.id}`);
    } catch (err) {
      console.error(`[NoteStore] Save failed: ${(err as Error).message}`);
    }
  }

  // 读取指定笔记
  async getNote(noteId: string): Promise<Note | null> {
    if (!this.kvStore) return null;

    try {
      const raw = await this.kvStore.get(`note_${noteId}`);
      if (raw) {
        return JSON.parse(raw as string) as Note;
      }
      return null;
    } catch (err) {
      console.error(`[NoteStore] Get note failed: ${(err as Error).message}`);
      return null;
    }
  }

  // 获取所有笔记(按更新时间倒序)
  async getAllNotes(): Promise<Note[]> {
    if (!this.kvStore) return [];

    try {
      const entries = await this.kvStore.getEntries('');  // 空字符串匹配所有 key
      const notes: Note[] = [];

      for (const entry of entries) {
        if (entry.key.startsWith('note_')) {
          const note = JSON.parse(entry.value.value as string) as Note;
          notes.push(note);
        }
      }

      // 按更新时间倒序排列
      notes.sort((a, b) => b.updatedAt - a.updatedAt);
      return notes;
    } catch (err) {
      console.error(`[NoteStore] GetAll failed: ${(err as Error).message}`);
      return [];
    }
  }

  // 删除笔记
  async deleteNote(noteId: string): Promise<void> {
    if (!this.kvStore) return;

    try {
      await this.kvStore.delete(`note_${noteId}`);
      console.info(`[NoteStore] Deleted note: ${noteId}`);
    } catch (err) {
      console.error(`[NoteStore] Delete failed: ${(err as Error).message}`);
    }
  }

  // 手动触发跨设备同步(仅在非自动模式或需要立即同步时使用)
  async forceSync(): Promise<void> {
    if (!this.kvStore) return;

    try {
      await this.kvStore.sync(
        distributedKVStore.SyncMode.PUSH_ONLY,
        3000  // 超时 3 秒
      );
      console.info('[NoteStore] Force sync triggered');
    } catch (err) {
      console.error(`[NoteStore] Sync failed: ${(err as Error).message}`);
    }
  }

  private changeCallback: (() => void) | null = null;

  onChange(callback: () => void): void {
    this.changeCallback = callback;
  }

  private notifyChange(): void {
    if (this.changeCallback) {
      this.changeCallback();
    }
  }

  destroy(): void {
    if (this.kvStore) {
      this.kvStore.off('dataChange');
      this.kvStore = null;
    }
  }
}

export { DistributedNoteStore, Note };
接下来,将上述数据层接入笔记编辑器页面:
// entry/src/main/ets/pages/NoteEditorPage.ets
import { DistributedNoteStore, Note } from '../data/NoteModel';
import { BusinessError } from '@kit.BasicServicesKit';

@Entry
@Component
struct NoteEditorPage {
  @State note: Note = {
    id: '',
    title: '',
    content: '',
    updatedAt: 0,
    deviceId: ''
  };
  @State allNotes: Note[] = [];
  @State isEditing: boolean = false;
  @State syncStatus: string = 'idle';

  private store: DistributedNoteStore = new DistributedNoteStore();

  async aboutToAppear(): Promise<void> {
    await this.store.initialize(getContext(this));
    this.store.onChange(() => {
      // 数据变化时重新加载列表
      this.loadNotes();
    });
    await this.loadNotes();
  }

  async loadNotes(): Promise<void> {
    this.allNotes = await this.store.getAllNotes();
  }

  async saveCurrentNote(): Promise<void> {
    if (!this.note.title.trim()) return;

    // 生成唯一 ID(生产环境建议用 UUID 库)
    if (!this.note.id) {
      this.note.id = `note_${Date.now()}_${Math.random().toString(36).substring(2, 9)}`;
    }

    this.syncStatus = 'syncing';
    await this.store.saveNote(this.note);
    this.syncStatus = 'synced';

    setTimeout(() => { this.syncStatus = 'idle'; }, 2000);
    await this.loadNotes();
  }

  async deleteNote(id: string): Promise<void> {
    await this.store.deleteNote(id);
    await this.loadNotes();
  }

  newNote(): void {
    this.note = { id: '', title: '', content: '', updatedAt: 0, deviceId: '' };
    this.isEditing = true;
  }

  editNote(note: Note): void {
    this.note = { ...note };
    this.isEditing = true;
  }

  build() {
    NavDestination() {
      Column() {
        // 同步状态指示器
        Row() {
          if (this.syncStatus === 'syncing') {
            Text('↻ 同步中...')
              .fontSize(12)
              .fontColor('#1976D2')
          } else if (this.syncStatus === 'synced') {
            Text('✓ 已同步')
              .fontSize(12)
              .fontColor('#388E3C')
          }
        }
        .width('100%')
        .height(24)
        .padding({ left: 16 })

        if (this.isEditing) {
          // 编辑视图
          Column({ space: 12 }) {
            TextInput({ placeholder: '标题', text: this.note.title })
              .width('100%')
              .height(48)
              .fontSize(16)
              .onChange((v: string) => { this.note.title = v; })

            TextArea({ placeholder: '内容', text: this.note.content })
              .width('100%')
              .layoutWeight(1)
              .fontSize(15)
              .onChange((v: string) => { this.note.content = v; })

            Row({ space: 12 }) {
              Button('保存', { type: ButtonType.Capsule })
                .onClick(() => this.saveCurrentNote())

              Button('取消', { type: ButtonType.Capsule })
                .type(ButtonType.Normal)
                .backgroundColor('#EEEEEE')
                .fontColor('#333333')
                .onClick(() => { this.isEditing = false; })
            }
            .width('100%')
            .padding(16)
          }
          .width('100%')
          .height('100%')
          .padding(16)
        } else {
          // 笔记列表视图
          Column() {
            List() {
              ForEach(this.allNotes, (note: Note) => {
                ListItem() {
                  Column({ space: 6 }) {
                    Text(note.title)
                      .fontSize(15)
                      .fontWeight(FontWeight.Medium)
                      .maxLines(1)
                      .textOverflow({ overflow: TextOverflow.Ellipsis })

                    Text(note.content)
                      .fontSize(13)
                      .fontColor('#666666')
                      .maxLines(2)
                      .textOverflow({ overflow: TextOverflow.Ellipsis })

                    Row() {
                      Text(new Date(note.updatedAt).toLocaleString())
                        .fontSize(11)
                        .fontColor('#AAAAAA')

                      if (note.deviceId) {
                        Text(` 来自: ${note.deviceId.substring(0, 6)}...`)
                          .fontSize(11)
                          .fontColor('#90CAF9')
                      }
                    }
                  }
                  .width('100%')
                  .padding(12)
                  .alignItems(HorizontalAlign.Start)
                }
                .swipeAction({
                  end: {
                    label: '删除',
                    color: '#F44336',
                    action: () => this.deleteNote(note.id)
                  }
                })
                .onClick(() => this.editNote(note))
              }, (note: Note) => note.id)
            }
            .width('100%')
            .layoutWeight(1)
            .divider({ strokeWidth: 0.5, color: '#EEEEEE', startMargin: 16, endMargin: 16 })
          }
          .width('100%')
          .layoutWeight(1)

          // 新建按钮
          Button({ type: ButtonType.Circle }) {
            Text('+')
              .fontSize(28)
              .fontWeight(FontWeight.Light)
          }
          .width(56)
          .height(56)
          .backgroundColor('#1976D2')
          .alignItems(VerticalAlign.Center)
          .justifyContent(FlexAlign.Center)
          .position({ x: '75%', y: '85%' })
          .onClick(() => this.newNote())
        }
      }
      .width('100%')
      .height('100%')
    }
    .title('分布式笔记')
    .onBackPressed(() => {
      this.isEditing = false;
      return true;
    })
  }
}
从上述两段代码可以看出,KVStore 的使用体验非常接近本地存储——put、get、delete、getEntries 这些操作与本地 API 完全一致,但背后会自动完成跨设备数据同步。当平板上编辑了一条笔记,手机端几乎可以实时感知到变化(通常在 1~3 秒内),无需任何额外代码。
数据冲突的处理同样值得注意。KVStore 默认使用 Last-Write-Wins 策略:当同一 key 在多台设备被同时修改时,以 updatedAt 时间戳最大的版本为准。在笔记场景下,这种策略是合理的;但如果你的业务需要更精细的冲突保留(比如保留两个版本),可以在 Note 模型中维护一个 versions 数组,由应用层自行合并。
四、跨设备任务流转:WantAgent 与分布式调度实战
4.1 什么是任务流转
任务流转(Task Continuity)是超级终端最直观的能力之一:用户在手机上开始编辑文档、查看地图或者播放音乐,可以随时将任务"迁移"到平板或车机上继续操作,全程无需重新打开应用或手动传输数据。
从技术角度看,任务流转的实现依赖 WantAgent 和 DistributedScheduler 两个模块:
- WantAgent:封装了一个"意图"(Want),包含目标设备、目标Ability、传参数据。相当于一个跨设备的函数调用请求。
- DistributedScheduler:负责在设备间传递 WantAgent,并管理目标设备上 Ability 的生命周期。
任务流转有三种典型模式:
- 拉起(Start):在目标设备上启动指定的 Ability,并传递数据。
- 续写(Continue):将本设备当前 Ability 的状态快照传到目标设备,目标设备以该状态继续运行。
- 后台运行(BackgroundRunning):在后台设备上持续运行任务(如音乐播放、导航),不影响前台设备。
4.2 完整示例:文档续写与任务迁移
以下示例演示完整的任务流转场景:从设备 A 发起文档续写请求,设备 B 接收并以相同状态继续编辑。
// entry/src/main/ets/data/TaskFlowManager.ets

import { distributedMissionManager } from '@kit.MiscServicesKit';
import { wantAgent, Want } from '@kit.AbilityKit';
import { Caller, Callee } from '@kit.IPCKit';
import { distributedDeviceManager } from '@kit.DistributedServiceKit';
import { BusinessError } from '@kit.BasicServicesKit';

// 任务流转的上下文数据结构
interface DocumentTaskContext {
  taskId: string;
  documentId: string;
  documentTitle: string;
  cursorPosition: number;
  scrollOffset: number;
  deviceName: string;
  timestamp: number;
}

class TaskFlowManager {
  // 记录本端注册的 Callee,用于接收来自其他设备的续写请求
  private calleeStub: Callee | null = null;
  private deviceManager: distributedDeviceManager.DeviceManager | null = null;
  private localDeviceId: string = '';

  async initialize(context: Context): Promise<void> {
    // 获取本机设备 ID
    const deviceInfo = await distributedMissionManager.getLocalDeviceInfo();
    this.localDeviceId = deviceInfo.id;

    // 创建设备管理器(用于查询目标设备信息)
    this.deviceManager = distributedDeviceManager.createDeviceManager(
      context.applicationInfo.name
    );

    // 注册跨设备续写回调
    await this.registerContinueCallback(context);
    console.info(`[TaskFlow] Initialized, local device: ${this.localDeviceId}`);
  }

  // 注册续写回调——当其他设备请求续写到本设备时触发
  private async registerContinueCallback(context: Context): Promise<void> {
    try {
      const subscriberInfo: distributedMissionManager.SubscriberInfo = {
        subscriberName: 'DocumentContinueSubscriber',
        subscriberId: 'document_continue_001'
      };

      const callback: distributedMissionManager.ContinueCallback = {
        onContinue: this.handleContinueRequest.bind(this),
        onComplete: this.handleContinueComplete.bind(this),
        onTimeout: this.handleContinueTimeout.bind(this)
      };

      await distributedMissionManager.subscribeMissionCallback(subscriberInfo, callback);
      console.info('[TaskFlow] Continue callback registered');
    } catch (err) {
      const error = err as BusinessError;
      console.error(`[TaskFlow] Subscribe failed: ${error.code} - ${error.message}`);
    }
  }

  // 处理续写请求:将文档上下文序列化后启动文档编辑器
  private async handleContinueRequest(ctx: Context,
                                       params: Record<string, Object>): Promise<void> {
    console.info('[TaskFlow] Continue request received');

    // 从 params 中提取文档上下文
    const taskContext = params['taskContext'] as DocumentTaskContext;
    if (!taskContext) {
      console.error('[TaskFlow] taskContext is null');
      return;
    }

    // 将上下文数据通过 AppStorage 传递给 Ability
    AppStorage.setOrCreate('continueDocumentContext', taskContext);

    // 启动文档编辑 Ability,携带续写参数
    const want: Want = {
      deviceId: this.localDeviceId,
      bundleName: 'com.example.documentapp',
      abilityName: 'DocumentEditorAbility',
      parameters: {
        'taskContext': taskContext,
        'isContinued': true
      }
    };

    try {
      const controller = await wantAgent.getWantAgent(want);
      await wantAgent.startWantAgent(controller, {
        wantStartTime: 5000
      });
      console.info(`[TaskFlow] Launched DocumentEditorAbility with context: ${taskContext.documentTitle}`);
    } catch (err) {
      console.error(`[TaskFlow] Launch failed: ${(err as BusinessError).message}`);
    }
  }

  private handleContinueComplete(sourceDeviceId: string): void {
    console.info(`[TaskFlow] Continue completed from device: ${sourceDeviceId}`);
  }

  private handleContinueTimeout(sourceDeviceId: string): void {
    console.warn(`[TaskFlow] Continue timeout from device: ${sourceDeviceId}`);
  }

  // 发起任务流转:将当前文档上下文发送到目标设备
  async continueToDevice(context: Context, targetDeviceId: string,
                          documentContext: DocumentTaskContext): Promise<void> {
    if (!targetDeviceId || targetDeviceId === this.localDeviceId) {
      console.warn('[TaskFlow] Invalid or local target device');
      return;
    }

    // 构造续写 Want
    const continueWant: Want = {
      deviceId: targetDeviceId,
      bundleName: 'com.example.documentapp',
      abilityName: 'DocumentEditorAbility',
      flags: 0x00000001,  // FLAG_ABILITY_CONTINUATION
      parameters: {
        'taskContext': documentContext,
        'isContinued': true,
        'sourceDeviceId': this.localDeviceId
      }
    };

    // 获取目标设备信息(用于日志展示)
    if (this.deviceManager) {
      const device = this.deviceManager.getDeviceInfo(targetDeviceId);
      console.info(`[TaskFlow] Continuing to: ${device?.deviceName ?? targetDeviceId}`);
    }

    try {
      // 创建续写代理
      const agentInfo: wantAgent.wantAgentInfo = {
        wants: [continueWant],
        operationType: wantAgent.OperationType.CONTINUATION,
        requestCode: 0,
        wantAgentFlags: [wantAgent.WantAgentFlags.UPDATE_PRESENT_FLAG]
      };

      const agent = await wantAgent.getWantAgent(agentInfo);

      // 执行续写(系统会在目标设备上拉起对应 Ability)
      await wantAgent.startWantAgent(agent, {
        wantStartTime: 10000
      });

      console.info(`[TaskFlow] Task continued to ${targetDeviceId}`);
    } catch (err) {
      const error = err as BusinessError;
      console.error(`[TaskFlow] Continue failed: ${error.code} - ${error.message}`);
      throw error;
    }
  }

  // 查询可信设备列表,供用户选择流转目标
  getAvailableDevices(): distributedDeviceManager.DeviceBasicInfo[] {
    if (!this.deviceManager) return [];

    const allDevices = this.deviceManager.getTrustedDeviceListSync();
    // 过滤掉本设备
    return allDevices.filter(d =>
      d.state === distributedDeviceManager.DeviceState.STATE_ACTIVE &&
      d.deviceId !== this.localDeviceId
    );
  }

  // 获取当前任务快照(用于续写时传递完整状态)
  createDocumentSnapshot(documentId: string, title: string,
                          cursorPos: number, scrollOffset: number): DocumentTaskContext {
    return {
      taskId: `task_${Date.now()}`,
      documentId,
      documentTitle: title,
      cursorPosition: cursorPos,
      scrollOffset: scrollOffset,
      deviceName: this.localDeviceId,
      timestamp: Date.now()
    };
  }

  destroy(): void {
    if (this.calleeStub) {
      this.calleeStub = null;
    }
    if (this.deviceManager) {
      this.deviceManager.release();
      this.deviceManager = null;
    }
  }
}

export { TaskFlowManager, DocumentTaskContext };
下面是将任务流转能力集成到文档编辑器 UI 的完整页面代码:
// entry/src/main/ets/pages/DocumentEditorPage.ets
import { TaskFlowManager, DocumentTaskContext } from '../data/TaskFlowManager';
import { distributedDeviceManager } from '@kit.DistributedServiceKit';

@Entry
@Component
struct DocumentEditorPage {
  @State documentId: string = 'doc_001';
  @State documentTitle: string = '项目需求文档';
  @State documentContent: string = '';
  @State cursorPosition: number = 0;
  @State scrollOffset: number = 0;
  @State availableDevices: distributedDeviceManager.DeviceBasicInfo[] = [];
  @State showDevicePicker: boolean = false;
  @State flowStatus: string = '';

  private taskFlowManager: TaskFlowManager = new TaskFlowManager();
  private scroller: Scroller = new Scroller();

  async aboutToAppear(): Promise<void> {
    await this.taskFlowManager.initialize(getContext(this));

    // 检查是否有续写上下文传入(从其他设备流转过来)
    const continueCtx = AppStorage.get<DocumentTaskContext>('continueDocumentContext');
    if (continueCtx) {
      this.documentId = continueCtx.documentId;
      this.documentTitle = continueCtx.documentTitle;
      this.cursorPosition = continueCtx.cursorPosition;
      this.scrollOffset = continueCtx.scrollOffset;
      console.info(`[DocEditor] Opened with continue context: ${continueCtx.documentTitle}`);
      // 清除上下文,防止下次重复使用
      AppStorage.delete('continueDocumentContext');
    }

    // 加载可用流转设备
    this.availableDevices = this.taskFlowManager.getAvailableDevices();
  }

  aboutToDisappear(): void {
    this.taskFlowManager.destroy();
  }

  // 获取当前文档快照
  getCurrentSnapshot(): DocumentTaskContext {
    return this.taskFlowManager.createDocumentSnapshot(
      this.documentId,
      this.documentTitle,
      this.cursorPosition,
      this.scrollOffset
    );
  }

  // 执行跨设备流转
  async continueToDevice(targetDeviceId: string): Promise<void> {
    this.flowStatus = '流转中...';
    this.showDevicePicker = false;

    try {
      const snapshot = this.getCurrentSnapshot();
      await this.taskFlowManager.continueToDevice(getContext(this), targetDeviceId, snapshot);
      this.flowStatus = '已流转';

      // 3 秒后隐藏状态提示
      setTimeout(() => { this.flowStatus = ''; }, 3000);
    } catch {
      this.flowStatus = '流转失败';
      setTimeout(() => { this.flowStatus = ''; }, 3000);
    }
  }

  build() {
    Stack() {
      Column({ space: 16 }) {
        // 标题栏
        Row() {
          TextInput({ text: this.documentTitle, placeholder: '文档标题' })
            .fontSize(18)
            .fontWeight(FontWeight.Bold)
            .layoutWeight(1)
            .onChange((v: string) => { this.documentTitle = v; })

          // 流转按钮
          if (this.availableDevices.length > 0) {
            Row({ space: 4 }) {
              Image($r('sys.media.ohos_ic_public_arrow_right'))
                .width(16)
                .height(16)
                .fillColor('#1976D2')
              Text('流转')
                .fontSize(14)
                .fontColor('#1976D2')
            }
            .padding({ left: 12, right: 8, top: 6, bottom: 6 })
            .border({ width: 1, color: '#1976D2', radius: 16 })
            .onClick(() => { this.showDevicePicker = true; })
          }
        }
        .width('100%')
        .padding({ left: 16, right: 16, top: 12 })

        Divider().padding({ left: 16, right: 16 })

        // 文档内容编辑区
        Scroll(this.scroller) {
          TextArea({ text: this.documentContent, placeholder: '在此输入文档内容...' })
            .width('100%')
            .minHeight(400)
            .fontSize(15)
            .lineSpacing({ leading: 8, trailing: 8 })
            .onChange((v: string) => {
              this.documentContent = v;
            })
            .onTextSelectionChange((selection: { selectionStart: number, selectionEnd: number }) => {
              this.cursorPosition = selection.selectionStart;
            })
        }
        .scrollable(ScrollDirection.Vertical)
        .scrollBar(BarState.Auto)
        .layoutWeight(1)
        .padding(16)

        // 流转状态提示
        if (this.flowStatus) {
          Row() {
            if (this.flowStatus === '流转中...') {
              LoadingProgress()
                .width(16)
                .height(16)
            } else if (this.flowStatus === '已流转') {
              Text('✓')
                .fontSize(14)
                .fontColor('#388E3C')
            }
            Text(` ${this.flowStatus}`)
              .fontSize(13)
              .fontColor(this.flowStatus.includes('失败') ? '#D32F2F' : '#666666')
          }
          .width('100%')
          .padding(12)
          .backgroundColor('#FAFAFA')
        }
      }
      .width('100%')
      .height('100%')

      // 设备选择器浮层
      if (this.showDevicePicker) {
        Column() {
          // 半透明遮罩
          Column()
            .width('100%')
            .height('100%')
            .backgroundColor('rgba(0,0,0,0.4)')
            .onClick(() => { this.showDevicePicker = false; })

          // 选择面板
          Column() {
            Text('流转到')
              .fontSize(16)
              .fontWeight(FontWeight.Bold)
              .width('100%')
              .padding({ left: 20, bottom: 16 })

            ForEach(this.availableDevices, (device: distributedDeviceManager.DeviceBasicInfo) => {
              Row() {
                Column() {
                  Text(device.deviceName)
                    .fontSize(15)
                    .fontWeight(FontWeight.Medium)
                  Text(device.deviceType?.toString() ?? '')
                    .fontSize(12)
                    .fontColor('#666666')
                }
                .layoutWeight(1)
                .alignItems(HorizontalAlign.Start)

                Text('流转')
                  .fontSize(13)
                  .fontColor('#1976D2')
              }
              .width('100%')
              .padding(16)
              .onClick(() => this.continueToDevice(device.deviceId))
            })
          }
          .width('100%')
          .backgroundColor('#FFFFFF')
          .borderRadius({ topLeft: 16, topRight: 16 })
          .transition({ type: TransitionType.Insert, translate: { y: 300 } })
        }
        .width('100%')
        .height('100%')
        .position({ x: 0, y: 0 })
      }
    }
    .width('100%')
    .height('100%')
  }
}
4.3 后台任务流转:音乐续播示例
除了文档续写,任务流转的另一个高频场景是音乐跨设备续播——用户在家用手机听音乐,出门时将播放任务无缝迁移到车机上。以下是后台运行模式的实现:
// entry/src/main/ets/service/MusicContinuityService.ets

import { wantAgent } from '@kit.AbilityKit';
import { BackgroundTaskManager, BackgroundTaskTiming } from '@kit.BackgroundTasksKit';
import { BusinessError } from '@kit.BasicServicesKit';

class MusicContinuityService {
  private readonly TARGET_BUNDLE = 'com.example.carkitapp';
  private readonly TARGET_ABILITY = 'MusicPlayerAbility';

  // 将音乐播放任务流转到车机
  async transferMusicToCar(carDeviceId: string, trackInfo: MusicTrack): Promise<void> {
    const continueWant = {
      deviceId: carDeviceId,
      bundleName: this.TARGET_BUNDLE,
      abilityName: this.TARGET_ABILITY,
      flags: 0x00000001,  // FLAG_ABILITY_CONTINUATION
      parameters: {
        'trackId': trackInfo.trackId,
        'trackTitle': trackInfo.title,
        'artist': trackInfo.artist,
        'albumArt': trackInfo.albumArtUri,
        'playbackPosition': trackInfo.currentPosition,  // 当前播放位置
        'mode': 'continue'
      }
    };

    const agentInfo: wantAgent.wantAgentInfo = {
      wants: [continueWant],
      operationType: wantAgent.OperationType.CONTINUATION,
      requestCode: 1,
      wantAgentFlags: [wantAgent.WantAgentFlags.UPDATE_PRESENT_FLAG]
    };

    const agent = await wantAgent.getWantAgent(agentInfo);

    // 启动车机上的音乐播放器,并携带播放状态
    await wantAgent.startWantAgent(agent, {
      wantStartTime: 8000
    });

    console.info(`[MusicContinuity] Transferred "${trackInfo.title}" to car: ${carDeviceId}`);
  }

  // 请求后台运行权限,在本设备上保持音乐播放
  async requestBackgroundRunning(context: Context): Promise<void> {
    try {
      const needRequest = await BackgroundTaskManager.requestSuspendDelay(
        'MusicPlayback',
        () => {
          console.info('[MusicContinuity] Background task expiring');
        }
      );

      console.info(`[MusicContinuity] Background running approved. Remaining: ${needRequest.remainTime}ms`);
    } catch (err) {
      const error = err as BusinessError;
      console.error(`[MusicContinuity] Background request failed: ${error.code} - ${error.message}`);
    }
  }
}

interface MusicTrack {
  trackId: string;
  title: string;
  artist: string;
  albumArtUri: string;
  currentPosition: number;  // 毫秒
  duration: number;
}

export { MusicContinuityService, MusicTrack };
这段代码中,BackgroundTaskManager.requestSuspendDelay() 的作用是在应用退到后台后,系统不会立即将其杀死,而是给予一定时长的后台执行时间。音乐播放器通常需要这个能力来保证在用户切换任务时不会中断播放。
五、实战中的关键工程问题
5.1 权限配置:module.json5 中的必填项
分布式能力需要在 module.json5 中声明对应权限,漏填会导致 API 调用直接失败。以下是本文所有示例对应的权限清单:
{
  "module": {
    "requestPermissions": [
      {
        "name": "ohos.permission.DISTRIBUTED_DEVICE_INFO_ACCESS",
        "reason": "$string:reason_device_info",
        "usedScene": {
          "abilities": ["EntryAbility"],
          "when": "inuse"
        }
      },
      {
        "name": "ohos.permission.DISTRIBUTED_DATASYNC",
        "reason": "$string:reason_data_sync",
        "usedScene": {
          "abilities": ["EntryAbility"],
          "when": "inuse"
        }
      },
      {
        "name": "ohos.permission.INTERNET",
        "reason": "$string:reason_network"
      },
      {
        "name": "ohos.permission.GET_BUNDLE_INFO",
        "reason": "$string:reason_bundle_info"
      }
    ]
  }
}
此外,在 DevEco Studio 中还需在"Signing Config"页面配置"Enable Distributed Communication"选项,否则设备发现功能在模拟器上无法正常工作。
5.2 网络环境的要求
分布式软总线的跨设备通信依赖以下网络条件之一:
- 同一局域网(Wi-Fi):设备必须在同一网段,支持 mDNS 设备发现。
- 蓝牙近场:适用于设备间距离较近但不在同一 Wi-Fi 网络的场景。
- 分布式路由(HarmonyOS Connect):通过 HarmonyOS Connect 生态设备实现跨路由协同。
在调试阶段,如果遇到设备互不可见的问题,首先检查两台设备是否在同一个局域网内,以及是否开启了网络发现功能。
5.3 调试工具:hdc 的分布式命令
使用 hdc 工具可以验证分布式能力是否正常:
# 查看已连接的设备列表(包括跨设备协同的设备)
hdc list targets

# 查看指定设备的基本信息
hdc shell hidumper -s DeviceManager

# 强制触发 KVStore 同步
hdc shell "bm dump -a | grep kvstore"

# 查看分布式任务状态
hdc shell "bm dump -s distributed_scheduler"
这些命令在排查设备发现失败或数据同步延迟问题时非常有用。
5.4 性能与安全建议
在实际生产环境中,以下几点值得特别关注:
同步延迟控制。 KVStore 的自动同步延迟通常在 1~3 秒内,但在弱网环境下可能延长至 10 秒以上。如果业务对实时性要求极高(如即时协作编辑),建议在 KVStore 之上叠加 WebSocket 或 RPC 通信作为实时通道,KVStore 仅作为最终一致性的持久化层。
数据量控制。 KVStore 单条 value 的建议大小不超过 2 MB。如果需要同步更大的文件(如图片、视频),建议将文件存储到分布式文件系统(Distributed File System),而在 KVStore 中仅同步文件的 URI 和元数据。
安全隔离。 同一应用在不同设备间共享数据,但不同应用之间的分布式数据是隔离的。即使两台设备建立了信任组,应用 A 的 KVStore 数据也无法被应用 B 访问。如果需要在不同应用间共享数据,需要使用 publishSession 等高级 API 并经过严格的权限校验。
六、从原理到实践的完整闭环
让我们回顾一下超级终端分布式能力的完整调用链路:
[用户操作]
    ↓
[DeviceManager] 设备发现 → 认证 → 加入信任组
    ↓
[跨设备通信建立]
    ↓
┌───────────────┬───────────────────────┐
│  KVStore      │  WantAgent            │
│  数据同步     │  任务流转              │
│  (实时/持久)  │  (即时/一次性)         │
└───────────────┴───────────────────────┘
    ↓
[目标设备] 接收数据 / 启动 Ability / 续写状态
    ↓
[用户体验] 无缝切换,任务连续
这条链路清晰地划分了 DeviceManager、KVStore、WantAgent 三个核心 API 的职责边界。理解了这个架构分层,你就掌握了在 HarmonyOS NEXT 上开发超级终端功能的核心方法论——无论是数据驱动的协作应用,还是任务导向的生产力工具,都能游刃有余地构建出来。
超级终端的愿景不只是技术上的互联,更是在体验上让用户感知不到设备的存在——数据随人走,任务跟人转。这才是分布式能力真正要解决的问题。

作为“人工智能6S店”的官方数字引擎,为AI开发者与企业提供一个覆盖软硬件全栈、一站式门户。
更多推荐



 5
5 0
0- 0


 已为社区贡献74条内容

所有评论(0)