
鸿蒙新特性实战:@ohos.multimedia.image — 编程生成 PixelMap、模式填充与元数据诊断
引言
在 HarmonyOS 应用开发中,图片处理是一个非常高频的需求。大多数开发者习惯从资源文件或网络 URL 加载图片,但有时我们需要在运行时动态生成图像——比如根据用户配色方案生成头像占位图、绘制数据可视化图案、或创建程序化纹理。这些场景下,文件资源和网络图片就派不上用场了。
HarmonyOS NEXT 通过 @ohos.multimedia.image(ImageKit)提供了完整的图片处理能力。除了常规的图片解码/编码外,它还支持从原始像素数据编程创建 PixelMap——这意味着你可以像操作数组一样控制每一个像素的 RGBA 值,然后将它渲染到屏幕上。
本文将构建一个像素图实验室 Demo,展示三个核心能力:用纯色、渐变、棋盘三种图案模式填充像素缓冲区,通过 createPixelMap() 构建 PixelMap 对象,再通过 getImageInfo() 读取图像元数据进行诊断展示。
读完本文,你将掌握:
- PixelMap 编程创建:
createPixelMap(colors, options)从 ArrayBuffer 构建像素图 - 像素数据填充:Uint8Array 逐像素写入 RGB/A 通道
- 元数据诊断:
getImageInfo()获取尺寸、格式、AlphaType - 内存管理:
release()及时释放 PixelMap 资源 - 组件渲染:Image 组件直接接收 PixelMap 对象并显示
环境与权限
@ohos.multimedia.image 属于 ImageKit 工具包,自 API 6 开始提供,不需要申请任何权限即可使用基础的 PixelMap 创建功能。
import { image } from '@kit.ImageKit';
注意:导入路径是 @kit.ImageKit 而非 @ohos.multimedia.image。这是 HarmonyOS NEXT 的 Kit 化导入方式,系统会自动映射到对应的模块。
一、核心概念:PixelMap 是什么?
在深入 API 之前,先理解 PixelMap 的本质。
PixelMap 是一块存在于内存中的位图,它由三要素组成:
- 像素数据(Pixel Data):一块连续的字节数组,按行排列存储每个像素的颜色信息
- 图像信息(ImageInfo):描述如何解读这些字节——宽度、高度、像素格式、Alpha 类型
- 内存管理:PixelMap 占用堆内存,使用完毕必须调用
release()释放
与从文件中解码得到的 PixelMap 不同,编程创建的 PixelMap 让你完全控制像素数据。你可以把 PixelMap 想象成一块画布,Uint8Array 就是你的画笔。
像素格式(PixelMapFormat)
像素格式决定了每个像素占用多少字节,以及各颜色通道的排列顺序:
| 格式 | 字节/像素 | 通道排列 | 说明 |
|---|---|---|---|
RGBA_8888 | 4 | R,G,B,A | 最常用格式,每个通道 8 位 |
BGRA_8888 | 4 | B,G,R,A | Windows 常用的像素顺序 |
ARGB_8888 | 4 | A,R,G,B | macOS/iOS 常用的像素顺序 |
RGB_888 | 3 | R,G,B | 无 Alpha 通道,文件体积更小 |
RGB_565 | 2 | R(5),G(6),B(5) | 低色彩精度,适合嵌入式设备 |
ALPHA_8 | 1 | A | 仅 Alpha 通道,用于遮罩 |
本文使用 RGBA_8888 格式。这意味着一个 200×200 的图像需要 200 × 200 × 4 = 160,000 字节的像素数据。
AlphaType
AlphaType 描述 Alpha 通道的编码方式:
- OPAQUE(不透明):图像没有 Alpha 通道,或所有像素完全不透明
- PREMUL(预乘 Alpha):每个颜色通道已经乘以了 Alpha 值。这是渲染性能最高的格式
- UNPREMUL(非预乘 Alpha):颜色通道存储原始值,Alpha 独立存储。这是最常见的格式
对于编程创建的 RGBA_8888 PixelMap,通常使用 OPAQUE(如果 A 总是 255)或 UNPREMUL(如果需要透明度)。
二、InitializationOptions:创建参数
createPixelMap() 需要一个 InitializationOptions 对象来指定 PixelMap 的元数据:
interface InitializationOptions {
  size: Size;                          // 必填:{ width: number, height: number }
  pixelFormat?: PixelMapFormat;        // 可选:目标像素格式,默认 RGBA_8888
  srcPixelFormat?: PixelMapFormat;     // 可选:源数据像素格式(API 12+)
  editable?: boolean;                   // 可选:是否允许编辑(默认 false)
  alphaType?: AlphaType;               // 可选:Alpha 类型(API 12+)
}
最少只需要提供 size:
let opts: image.InitializationOptions = {
  size: { width: 200, height: 200 },
  pixelFormat: image.PixelMapFormat.RGBA_8888,
  editable: true     // 设为 true 才能后续修改像素
};
editable 参数决定了创建后的 PixelMap 是否可被修改。如果设为 false(默认),PixelMap 是只读的,有助于内存优化。在 Demo 中我们设为 true,展示完善的资源管理。
三、核心 API 详解
3.1 createPixelMap() — 从字节数组创建
这是本文最核心的 API。函数签名如下:
function createPixelMap(
  colors: ArrayBuffer,
  options: InitializationOptions
): Promise<PixelMap>;
colors 参数是一个 ArrayBuffer,包含按行排列的原始像素数据。数据的字节数必须与 options.size 和 options.pixelFormat 匹配——200×200 的 RGBA_8888 图像需要恰好 160,000 字节。
如果字节数不匹配,API 会抛出 401 参数错误。
完整创建流程:
import { image } from '@kit.ImageKit';

let width = 200;
let height = 200;
let bytesPerPixel = 4;
let totalBytes = width * height * bytesPerPixel;

// 1. 创建 ArrayBuffer
let buf = new ArrayBuffer(totalBytes);
let view = new Uint8Array(buf);

// 2. 填充像素数据(红色)
for (let i = 0; i < totalBytes; i += 4) {
  view[i] = 255;     // R
  view[i + 1] = 0;   // G
  view[i + 2] = 0;   // B
  view[i + 3] = 255; // A
}

// 3. 创建 PixelMap
let opts: image.InitializationOptions = {
  size: { width: width, height: height },
  pixelFormat: image.PixelMapFormat.RGBA_8888,
  editable: true
};

image.createPixelMap(buf, opts).then((pixelMap: image.PixelMap) => {
  console.log('PixelMap 创建成功: ' +
    pixelMap.getBytesNumberPerRow() + ' bytes/row');
  // 这里可以将 pixelMap 传给 Image 组件显示
}).catch((err: Error) => {
  console.error('创建失败: ' + err.message);
});
3.2 getImageInfo() — 读取图像元数据
创建 PixelMap 后,可以通过 getImageInfo() 获取完整的图像描述信息:
pixelMap.getImageInfo().then((info: image.ImageInfo) => {
  console.log('尺寸: ' + info.size.width + 'x' + info.size.height);
  console.log('像素格式: ' + info.pixelFormat);
  console.log('Alpha 类型: ' + info.alphaType);
  console.log('色彩空间: ' + info.colorSpace);
});
ImageInfo 包含四个关键属性:
interface ImageInfo {
  size: Size;              // { width: number, height: number }
  pixelFormat: PixelMapFormat;
  alphaType: AlphaType;
  colorSpace: colorSpaceManager.ColorSpaceManager;
}
在 Demo 中,我们将这些信息展示在"PixelMap 信息"面板中,让开发者可以直观地看到每个像素图的内存布局。
3.3 getBytesNumberPerRow() — 获取每行字节数
这个方法返回图像一行像素占用的字节数,它是 width × bytesPerPixel 的结果,但可能因为内存对齐而大于预期值:
let bytesPerRow: number = pixelMap.getBytesNumberPerRow();
// 对于 200px 宽的 RGBA_8888 图像:200 × 4 = 800 字节/行
这个值对于理解 PixelMap 的内存布局至关重要——总字节数 = bytesPerRow × height。
3.4 readPixelsToBuffer() — 读出像素数据
如果想读取 PixelMap 的原始像素数据到缓冲区:
let dst = new ArrayBuffer(totalBytes);
pixelMap.readPixelsToBuffer(dst).then(() => {
  let pixels = new Uint8Array(dst);
  console.log('第一个像素 R: ' + pixels[0]);
  console.log('第一个像素 G: ' + pixels[1]);
});
注意:readPixelsToBuffer 会读取当前的像素数据。如果你创建时指定了不同的 pixelFormat(如将 RGB_565 源数据转换为 RGBA_8888),读出的数据将是转换后的格式。
3.5 release() — 释放内存
PixelMap 占用的是 native 堆内存,不会自动被 JS GC 回收。使用完毕后必须手动释放:
pixelMap.release().then(() => {
  console.log('PixelMap 已释放');
});
在 Demo 中,每次生成新 PixelMap 之前都会先释放旧的,避免内存泄漏。组件销毁时也会在 aboutToDisappear() 生命周期中释放。
四、三种图案的像素填充算法
Demo 中实现了三种图案填充模式,它们是理解"编程生成图像"的关键。
4.1 纯色填充(Solid)
最简单的填充方式:所有像素写入相同的 RGBA 值。
fillSolid(buf: Uint8Array, color: number[], w: number, h: number): void {
  let idx = 0;
  for (let y = 0; y < h; y++) {
    for (let x = 0; x < w; x++) {
      buf[idx] = color[0];     // R
      buf[idx + 1] = color[1]; // G
      buf[idx + 2] = color[2]; // B
      buf[idx + 3] = color[3]; // A
      idx += 4;
    }
  }
}
虽然是两层循环,但对 200×200 的图像来说,总共只有 40,000 个像素,填充时间可以忽略不计。
4.2 水平渐变(Gradient)
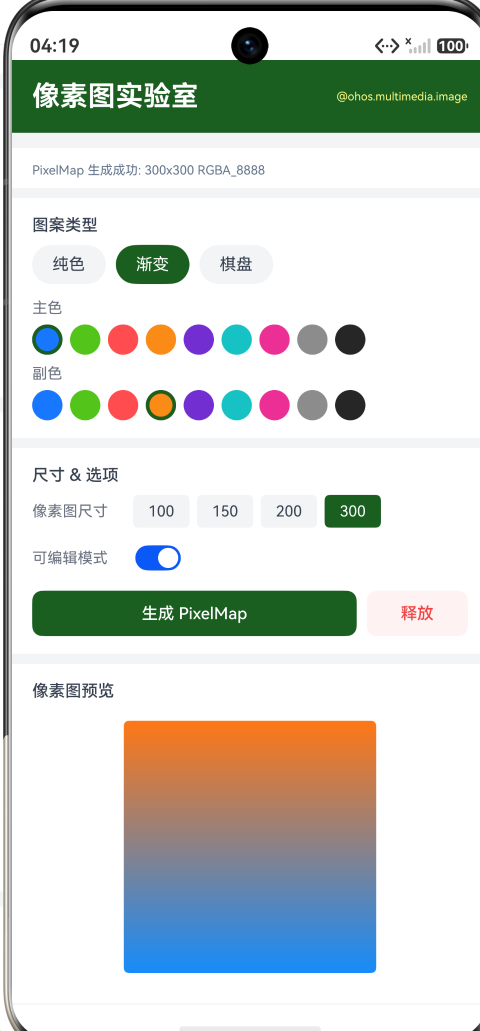
在 y 轴方向上从颜色 C1 线性过渡到 C2。每一行的颜色值由当前 y 坐标决定:
fillGradient(buf: Uint8Array, c1: number[], c2: number[],
             w: number, h: number): void {
  let idx = 0;
  for (let y = 0; y < h; y++) {
    let t = y / (h - 1);  // 0..1 的插值因子
    let r = Math.round(c1[0] + (c2[0] - c1[0]) * t);
    let g = Math.round(c1[1] + (c2[1] - c1[1]) * t);
    let b = Math.round(c1[2] + (c2[2] - c1[2]) * t);
    for (let x = 0; x < w; x++) {
      buf[idx] = r;
      buf[idx + 1] = g;
      buf[idx + 2] = b;
      buf[idx + 3] = 255;
      idx += 4;
    }
  }
}
这里使用线性插值公式:result = C1 + (C2 - C1) × t。由于像素值必须是整数,所以用 Math.round() 四舍五入。
4.3 棋盘格(Checker)
将图像分成 20×20 像素的小格子,偶数行列用颜色 C1,奇数行列用颜色 C2:
fillChecker(buf: Uint8Array, c1: number[], c2: number[],
            w: number, h: number): void {
  let cellSize = 20;
  let idx = 0;
  for (let y = 0; y < h; y++) {
    let cy = Math.floor(y / cellSize);
    for (let x = 0; x < w; x++) {
      let cx = Math.floor(x / cellSize);
      let useC1 = (cx + cy) % 2 === 0;
      buf[idx] = useC1 ? c1[0] : c2[0];
      buf[idx + 1] = useC1 ? c1[1] : c2[1];
      buf[idx + 2] = useC1 ? c1[2] : c2[2];
      buf[idx + 3] = 255;
      idx += 4;
    }
  }
}
(cx + cy) % 2 === 0 这个条件产生了经典的棋盘交替效果。将 % 2 改为 % 4 可以产生更复杂的图案,但交替效果是最好的视觉验证——一眼就能看出像素是否正确排列。
五、在 Image 组件中渲染 PixelMap
创建好的 PixelMap 对象可以直接传给 ArkUI 的 Image 组件:
@State pixelMap: image.PixelMap | null = null;

build() {
  Column() {
    if (this.pixelMap !== null) {
      Image(this.pixelMap)
        .width(200)
        .height(200)
        .objectFit(ImageFit.Contain)
    }
  }
}
Image 组件的构造函数接受三种类型的 source:
string:图片文件路径或网络 URLResource:应用资源引用PixelMap:内存中的像素图对象
第三种方式就是本文的核心用法。Image 组件会直接渲染 PixelMap,无需额外的编码或文件写入步骤。
六、实战 Demo:像素图实验室
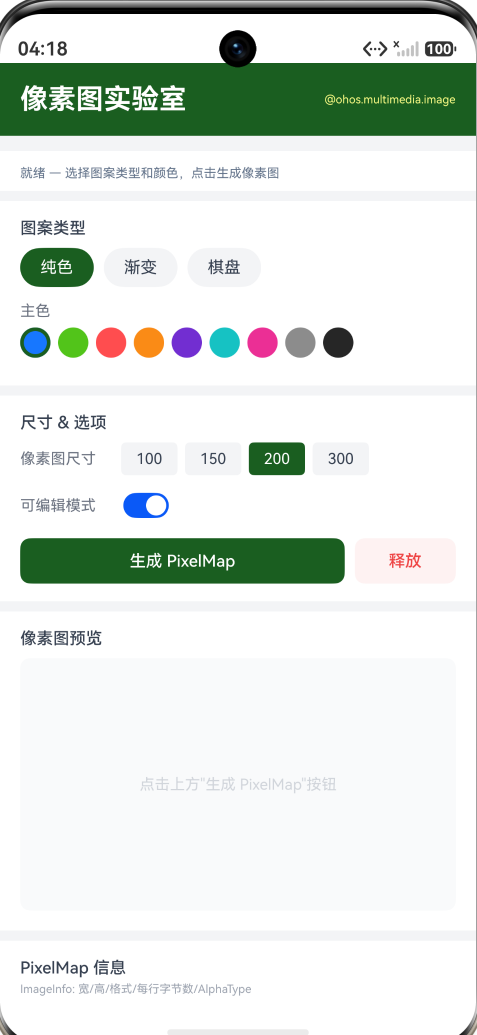
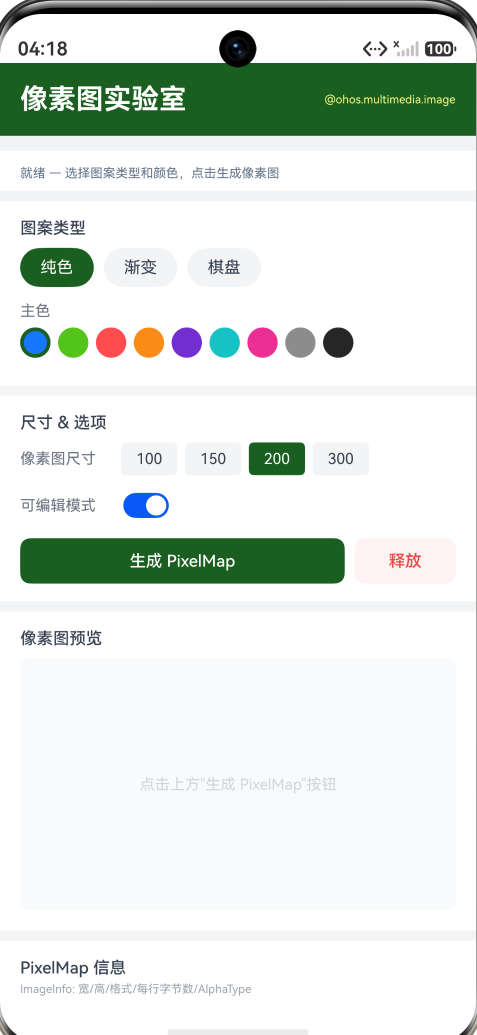
页面结构
像素图实验室
├── 状态栏 — 操作反馈
├── 图案类型选择 — 纯色 / 渐变 / 棋盘
├── 颜色选择器 — 10 种预定义颜色
│   ├── 主色(10 色小圆点)
│   └── 副色(渐变/棋盘模式显示)
├── 尺寸 & 选项
│   ├── 像素图尺寸 — 100/150/200/300
│   ├── 可编辑模式 — Toggle 开关
│   ├── 生成 PixelMap 按钮
│   └── 释放 按钮
├── 像素图预览 — Image 组件渲染区域
├── PixelMap 信息 — 宽/高/格式/每行字节/总字节/AlphaType/可编辑
├── 数据流示意图 — Uint8Array → createPixelMap() → Image()
└── 核心 API 参考
4 个交互点
- 图案切换 — 在纯色/渐变/棋盘之间切换,改变像素填充逻辑
- 颜色选择 — 从 10 种预定义颜色中选择主色和副色,实时影响生成效果
- 尺寸调节 — 在 100/150/200/300 四种尺寸间切换,观察不同尺寸下的内存占用
- 生成与释放 — 点击生成按钮创建 PixelMap 并实时预览,点击释放按钮销毁资源
核心代码位置
完整代码在 dev/entry/src/main/ets/pages/PixelMapLabPage.ets(约 360 行),路由已注册为 pages/PixelMapLabPage。
七、内存管理最佳实践
PixelMap 占用的是 native 内存而非 JS 堆内存,因此需要特别注意:
1. 及时释放旧 PixelMap
if (this.pixelMap !== null) {
  await this.pixelMap.release();
  this.pixelMap = null;
}
在创建新的 PixelMap 之前,先释放旧的。否则每次创建都会泄漏一块 native 内存。
2. 使用 aboutToDisappear 兜底
aboutToDisappear(): void {
  if (this.pixelMap !== null) {
    this.pixelMap.release();
    this.pixelMap = null;
  }
}
页面离开时必须释放资源,这是 ArkUI 的生命周期最佳实践。
3. editable 参数的影响
editable: true 创建的 PixelMap 占用更多内存(因为需要保留写入能力),如果只是显示用途,建议使用默认的 editable: false。
八、API 总结表
| API | 返回值 | 说明 |
|---|---|---|
image.createPixelMap(buf, opts) | Promise<PixelMap> | 从 ArrayBuffer 创建 PixelMap |
pm.getImageInfo() | Promise<ImageInfo> | 获取图像元数据 |
pm.getBytesNumberPerRow() | number | 获取每行字节数 |
pm.readPixelsToBuffer(dst) | Promise<void> | 读取像素数据到缓冲区 |
pm.writePixelsToBuffer(src) | Promise<void> | 写入像素数据(需要 editable) |
pm.writeBufferToPixels(src) | Promise<void> | 从缓冲区写入像素 |
pm.release() | Promise<void> | 释放 PixelMap 内存 |
Image(pixelMap) | 组件 | 在 Image 组件中直接渲染 |
九、与 ComponentSnapshot 的对比
第 17 篇文章介绍了 ComponentSnapshot——从 UI 组件捕获生成 PixelMap。而本文的 createPixelMap 是反向操作——从原始像素数据创建 PixelMap。
| 维度 | ComponentSnapshot | createPixelMap |
|---|---|---|
| 数据来源 | UI 组件截图 | 原始像素数组 |
| 像素可控性 | 不可控(取决于渲染结果) | 完全可控(逐像素编程) |
| 适用场景 | 分享截图、生成缩略图 | 程序化纹理、数据可视化 |
| 权限要求 | 无 | 无 |
两者结合使用可以实现"截图 → 像素级处理 → 重新渲染"的完整图片处理流水线。
十、总结
@ohos.multimedia.image 的 createPixelMap() 为 HarmonyOS NEXT 应用提供了完全编程化的像素图创建能力:
- 从零构建 — 用
ArrayBuffer+Uint8Array直接控制每个像素的 RGBA - 三种图案 — 纯色、渐变、棋盘格演示了不同的像素填充算法
- 元数据诊断 —
getImageInfo()+getBytesNumberPerRow()揭示内存布局 - 组件渲染 —
Image(pixelMap)直接渲染,无需中间文件 - 严格内存管理 —
release()释放 native 内存,aboutToDisappear兜底
这个模块与 ComponentSnapshot、createImageSource、createImagePacker 共同构成了 HarmonyOS 的图像处理基石。在需要程序化绘制、实时图像生成、或像素级图像编辑的场景中,createPixelMap 是不可替代的基础 API。

作为“人工智能6S店”的官方数字引擎,为AI开发者与企业提供一个覆盖软硬件全栈、一站式门户。
更多推荐



 8
8 0
0- 0


 已为社区贡献286条内容

所有评论(0)