
鸿蒙 ArkUI 基础表单与卡片组件实训博客
·
鸿蒙 ArkUI 基础表单与卡片组件实训博客
一、实训介绍
本次实训使用 ArkTS 开发界面,练习 Column、Row 布局,Text、TextInput、Button、Image 组件样式配置,实现基础布局、简约登录、注册表单、多按钮登录、个人信息卡片共五组页面。
二、案例 1:基础居中布局 TextInputDemo
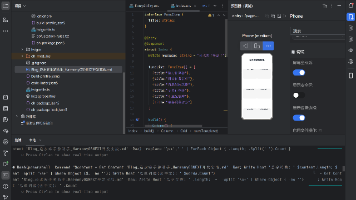
代码
ets
@Entry
@Component
struct TextlnputDemo{
  build() {
    Column({space:30})
    .width('100%')
    .height('100%')
    .justifyContent(FlexAlign.Center)
    .alignItems(HorizontalAlign.Center)
  }
}
说明
页面通用基础骨架,创建全屏垂直居中布局容器。
三、案例 2:简约美化登录表单 StyleDemo
代码
ets
@Entry
@Component
struct StyleDemo{
  build() {
    Column({space:20}){
      TextInput({placeholder:"请输入账号"})
        .width(320)
        .height(50)
        .backgroundColor(0xF8F8F8)
        .borderRadius(15)
        .padding({left:20})

      TextInput({placeholder:"请输入密码"})
        .width(320)
        .height(50)
        .backgroundColor(0xF8F8F8)
        .borderRadius(15)
        .padding({left:20})

      Button("登录")
        .width(320)
        .height(50)
        .borderRadius(12)
        .backgroundColor(0x007dff)
        .fontSize(18)
        .fontColor(Color.White)
    }
    .width('100%')
    .height('100%')
    .justifyContent(FlexAlign.Center)
    .alignItems(HorizontalAlign.Center)
    .padding(20)
  }
}
说明
简易登录表单,对输入框、按钮做圆角、底色美化,搭建简洁登录界面。
四、案例 3:用户注册页面 TextDemo
代码
ets
@Entry
@Component
struct TextDemo {
  build() {
    Column({space:30}) {
      Text('用户注册')
        .fontSize(38)
        .fontWeight(FontWeight.Bolder)
        .margin({bottom:20})

      TextInput({placeholder:"请输入学号"})
        .width(320)
        .height(60)
        .backgroundColor(0xf5f5f5)
        .fontSize(20)
        .borderRadius(10)

      TextInput({placeholder:"请输入密码"})
        .type(InputType.Password)
        .width(320)
        .height(60)
        .backgroundColor(0xf5f5f5)
        .fontSize(20)
        .borderRadius(10)

      TextInput({placeholder:"请输入手机号码"})
        .width(320)
        .height(60)
        .backgroundColor(0xf5f5f5)
        .fontSize(20)
        .borderRadius(10)

      Button('注册')
        .height(50)
        .width(200)
        .fontSize(25)
    }
    .width('100%')
    .height('100%')
    .justifyContent(FlexAlign.Center)
    .alignItems(HorizontalAlign.Center)
  }
}
说明
完整注册表单,包含学号、密码、手机号三项输入,使用密码密文输入模式,搭配注册提交按钮。
五、案例 4:多按钮登录页面 ButtonDemo1
代码
ets
@Entry
@Component
struct ButtonDemo1 {
  build() {
    Column({ space: 30 }) {
      Text('用户登录')
        .fontSize(38)
        .fontWeight(FontWeight.Bolder)
        .margin({ bottom: 20 })

      TextInput({ placeholder: "请输入学号/手机号码" })
        .width(320)
        .height(60)
        .backgroundColor(0xf5f5f5)
        .fontSize(40)
        .borderRadius(10)

      TextInput({ placeholder: "请输入密码" })
        .type(InputType.Password)
        .width(320)
        .height(60)
        .backgroundColor(0xf5f5f5)
        .fontSize(40)
        .borderRadius(10)

      Button("确认")
        .width(300)
        .height(50)
        .backgroundColor(0x007DFF)
        .fontSize(20)
        .borderRadius(18)

      Row({ space: 25 }) {
        Button("取消操作")
          .width(140)
          .height(50)
          .backgroundColor(0x999999)
          .fontSize(20)
          .borderRadius(18)

        Button("立即注册")
          .width(140)
          .height(50)
          .backgroundColor(0xf53f3f)
          .fontSize(20)
          .borderRadius(18)
      }
    }
    .width('100%')
    .height('100%')
    .justifyContent(FlexAlign.Center)
    .alignItems(HorizontalAlign.Center)
  }
}
说明
多功能按钮登录页,通过 Row 横向排列取消、注册按钮,使用不同颜色区分按钮功能。
六、案例 5:个人信息卡片 card
代码
ets
@Entry
@Component
struct card {
  build() {
    Column({ space: 20 }) {
      Text("个人信息中心")
        .fontSize(22)
        .fontWeight(FontWeight.Bold)
        .width('100%')
        .textAlign(TextAlign.Center)
        .margin({ bottom: 20 })

      Column({ space: 20 }) {
        Row({ space: 20 }) {
          Image($r('app.media.cover'))
            .width(80)
            .height(80)
            .borderRadius(40)

          Column({ space: 10 }) {
            Text("鸿蒙应用开发者:张三")
              .fontSize(16)
            Text("计算机应用工程系")
              .fontSize(16)
          }
        }
        .width('100%')
        .justifyContent(FlexAlign.Start)
        .alignItems(VerticalAlign.Center)

        Row({ space: 15 }) {
          Button("编辑资料")
            .width(140)
            .height(40)
            .borderRadius(8)
          Button("查看详情")
            .width(140)
            .height(40)
            .borderRadius(8)
        }
        .width('100%')
        .justifyContent(FlexAlign.Center)
      }
      .width('100%')
      .padding(20)
      .backgroundColor(0xF0F0F0)
      .borderRadius(12)
    }
    .width('100%')
    .height('100%')
    .padding(15)
    .justifyContent(FlexAlign.Center)
    .alignItems(HorizontalAlign.Center)
  }
}
说明
卡片式个人信息页面,结合圆形头像、文字信息、功能按钮,使用嵌套布局实现卡片容器效果。
七、实训总结
本次案例练习了垂直、水平两种基础布局,掌握文本、输入框、按钮、图片组件基础样式美化,实现项目中常见的登录、注册表单以及个人信息卡片页面。

作为“人工智能6S店”的官方数字引擎,为AI开发者与企业提供一个覆盖软硬件全栈、一站式门户。
更多推荐
 0
0 0
0- 0


 已为社区贡献3条内容

所有评论(0)