
鸿蒙实战:多级Tab联动支持横向滚动、指示器动画与边界手势切换
在鸿蒙应用开发中,顶部 Tab 栏的多页面结构十分常见,例如首页的“关注-发现-城市”三个一级 Tab,而“发现”页内部又包含“推荐-热门-同城…”等多个二级 Tab。如何优雅地实现一级与二级 Tab 的滑动联动(当二级滑动到边界并继续向外滑动时,自动切换一级 Tab),同时让顶部标签栏具备横向滚动、指示器动画、自定义主题色等能力?本文将分享一套完整的生产级解决方案,已在实际项目中稳定运行。
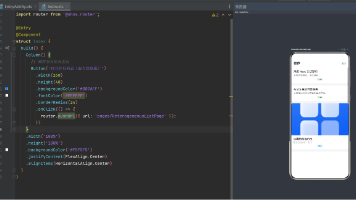
一、最终效果预览
- 一级 Tab:关注 / 发现 / 北京(城市名随定位变化),支持横向滑动切换,底部有红色指示器(动画跟随)。
- 二级 Tab(发现页内):推荐、热门、同城等十几个标签,不显示指示器,选中的标签自动放大 1.1 倍。
- 边界联动:当用户在“发现”页的二级内容区域滑动到最左(推荐)或最右(旅游)并继续向外滑动时,一级 Tab 自动切换到“关注”或“北京”。
- 顶部导航栏:左侧菜单按钮、中间标签栏、右侧搜索按钮,三者垂直居中对齐,底部有分割线。
二、整体架构图
┌────────────────────────────────────────────┐
│  HomePage                                   │
│  ┌────────────────────────────────────────┐ │
│  │  Row (菜单 + TopTabBar + 搜索)         │ │
│  │  - 一级标签 (关注/发现/北京)            │ │
│  │  - 底部指示器 (红色横条)                │ │
│  └────────────────────────────────────────┘ │
│  ┌────────────────────────────────────────┐ │
│  │  Tabs (一级内容区域)                    │ │
│  │  ┌──────┐ ┌───────────┐ ┌──────────┐  │ │
│  │  │关注页│ │ 发现页    │ │ 城市页   │  │ │
│  │  │      │ │ ┌───────┐ │ │          │  │ │
│  │  │      │ │ │二级Tab │ │ │          │  │ │
│  │  │      │ │ │(无指示器│ │ │          │  │ │
│  │  │      │ │ │选中放大)│ │ │          │  │ │
│  │  │      │ │ └───────┘ │ │          │  │ │
│  │  │      │ │ Tabs内容  │ │          │  │ │
│  │  └──────┘ └───────────┘ └──────────┘  │ │
│  └────────────────────────────────────────┘ │
└────────────────────────────────────────────┘
三、核心组件实现
1. 通用标签栏组件 TopTabBar(自定义)
该组件独立于业务逻辑,接收标签数组、当前索引、颜色配置等参数,内部处理:
- 标签横向滚动:当标签总宽度超出可视区宽度时,自动滚动当前选中项到可视区中间;若标签总宽未超出,则所有标签自然排布,不产生滚动。
- 指示器位置计算与动画:通过
translate+animateTo实现平滑移动。 - 两种视觉模式:
showIndicator=true时显示底部红条;showIndicator=false时隐藏红条,选中标签自动放大 1.1 倍。
@ComponentV2
export struct TopTabBar {
  @Param tabs: string[] = [];
  @Param currentIndex: number = 0;
  @Param topPadding: number = 0;
  @Param activeColor: ResourceColor = $r('app.color.tabbar_selected_color');
  @Param normalColor: ResourceColor = '#333333';
  @Param showIndicator: boolean = true;
  @Param normalFontSize: number = 16;
  @Event onTabClick: (index: number) => void;

  @Local indicatorTranslateX: number = 0;
  private readonly TAB_WIDTH: number = 70;
  private readonly INDICATOR_WIDTH: number = 40;
  private totalWidth: number = 0;
  private pageWidth: number = 0;
  private tabScroller: Scroller = new Scroller();

  private calcIndicatorX(index: number): number {
    return index * this.TAB_WIDTH + (this.TAB_WIDTH - this.INDICATOR_WIDTH) / 2;
  }

  private updateIndicator(index: number) {
    if (!this.showIndicator) return;
    this.getUIContext().animateTo({ duration: 200, onFinish: () => this.scrollToCenter() }, () => {
      this.indicatorTranslateX = this.calcIndicatorX(index);
    });
  }

  @Monitor('currentIndex')
  onCurrentIndexChange() {
    this.updateIndicator(this.currentIndex);
  }

  private scrollToCenter() {
    // 仅当标签总宽超出可视区时,才将选中标签滚动到中间
    if (this.totalWidth <= this.pageWidth) return;
    const index = this.currentIndex;
    const tabCenterX = index * this.TAB_WIDTH + this.TAB_WIDTH / 2;
    const targetX = Math.max(tabCenterX - this.pageWidth / 2, 0);
    this.tabScroller.scrollTo({ xOffset: targetX, yOffset: 0, animation: { duration: 200 } });
  }

  build() {
    Stack() {
      Scroll(this.tabScroller) {
        Row() {
          ForEach(this.tabs, (title: string, idx: number) => {
            Text(title)
              .width(this.TAB_WIDTH)
              .padding({ top: 10, bottom: 10 })
              .fontSize(this.normalFontSize)
              .fontColor(idx === this.currentIndex ? this.activeColor : this.normalColor)
              .fontWeight(idx === this.currentIndex ? FontWeight.Bold : FontWeight.Normal)
              .textAlign(TextAlign.Center)
              .scale(idx === this.currentIndex && !this.showIndicator ? { x: 1.1, y: 1.1 } : { x: 1, y: 1 })
              .animation({ duration: 200, curve: Curve.EaseOut })
              .onClick(() => this.onTabClick(idx));
          }, (item: string) => item)
        }.onAreaChange((_, area) => { this.totalWidth = area.width as number; })
      }
      .width("100%")
      .scrollable(ScrollDirection.Horizontal)
      .scrollBar(BarState.Off)

      if (this.showIndicator) {
        Line()
          .width(this.INDICATOR_WIDTH)
          .height(2)
          .backgroundColor(this.activeColor)
          .position({ bottom: 0 })
          .translate({ x: this.indicatorTranslateX })
      }
    }
    .padding({ top: this.topPadding })
    .width("100%")
    .backgroundColor(Color.White)
    .onAppear(() => this.updateIndicator(this.currentIndex))
    .onAreaChange((_, area) => { this.pageWidth = area.width as number; })
  }
}
2. 发现页 DiscoverPage(二级 Tab + 边界联动)
二级 Tab 使用同样的 TopTabBar,只是 showIndicator=false。二级内容使用系统 Tabs 组件,并绑定 onGestureSwipe 事件来检测边界滑动。
import { TopTabBar } from "common";

@ComponentV2
export struct DiscoverPage {
  @Local subTabs: string[] = [ '推荐', '热门', '同城', '影视', '美食', '游戏', '音乐', '直播', '综艺', '动漫', '纪录片', '体育', '财经', '科技', '数码', '汽车', '旅游' ];
  @Local currentSubIndex: number = 0;
  private tabsController: TabsController = new TabsController();
  @Event onEdgeReach?: (direction: 'left' | 'right') => void;

  private onSubTabClick(index: number) {
    if (this.currentSubIndex === index) return;
    this.currentSubIndex = index;
    this.tabsController.changeIndex(index);
  }

  private onTabsSelected(index: number) {
    this.currentSubIndex = index;
  }

  @Builder
  SubPageContent(title: string, index: number) {
    Column() { Text(`${title} 内容页`).fontSize(22) }
      .width('100%').height('100%').justifyContent(FlexAlign.Center).backgroundColor(Color.White)
  }

  private onGestureSwipe(_targetIndex: number, extraInfo: TabsAnimationEvent) {
    // currentOffset > 0 表示向右滑动(试图向左越界)
    if (this.currentSubIndex === 0 && extraInfo.currentOffset > 0) {
      this.onEdgeReach?.('left');
    } else if (this.currentSubIndex === this.subTabs.length - 1 && extraInfo.currentOffset < 0) {
      this.onEdgeReach?.('right');
    }
  }

  build() {
    Column() {
      TopTabBar({
        showIndicator: false,
        tabs: this.subTabs,
        currentIndex: this.currentSubIndex,
        normalColor: '#666666',
        onTabClick: (idx) => this.onSubTabClick(idx)
      })
      Tabs({
        barPosition: BarPosition.Start,
        index: this.currentSubIndex,
        controller: this.tabsController
      }) {
        ForEach(this.subTabs, (title: string, idx: number) => {
          TabContent() { this.SubPageContent(title, idx) }
        }, (item: string) => item)
      }
      .barHeight(0)
      .animationMode(AnimationMode.NO_ANIMATION)
      .onGestureSwipe((_, extraInfo) => this.onGestureSwipe(_, extraInfo))
      .onSelected((index) => this.onTabsSelected(index))
      .layoutWeight(1)
      .width('100%')
      .backgroundColor(Color.White)
    }
    .width('100%').height('100%').backgroundColor(Color.White)
  }
}
3. 主页 HomePage(一级 Tab + 联动处理)
一级 Tab 同样使用 TopTabBar(showIndicator=true),并放置在一个 Row 中与菜单/搜索图标组合。一级内容使用系统 Tabs,根据标题动态渲染 FollowPage、DiscoverPage 或 CityPage。
联动逻辑在 DiscoverPage 的 onEdgeReach 回调中实现:
import { SafeAreaState } from 'common';
import { AppStorageV2 } from '@kit.ArkUI';
import { TopTabBar } from 'common/src/main/ets/component/TopTabBar';
import { FollowPage } from './FollowPage';
import { DiscoverPage } from './DiscoverPage';
import { CityPage } from './CityPage';

@ComponentV2
export struct HomePage {
  @Local primaryTabs: string[] = ['关注', '发现', '北京'];
  @Local currentIndex: number = 1;
  @Local safeArea: SafeAreaState = AppStorageV2.connect<SafeAreaState>(SafeAreaState, () => new SafeAreaState())!;
  private tabsController: TabsController = new TabsController();

  private onTabClick(index: number) {
    this.currentIndex = index;
    this.tabsController.changeIndex(index);
  }

  private onTabsSelected(index: number) {
    this.currentIndex = index;
  }

  build() {
    Column() {
      // 顶部导航栏:左侧菜单 + 一级 Tab + 右侧搜索
      Row() {
        Image($r('app.media.ic_menu')).width(35).height(35).padding(5).objectFit(ImageFit.Contain)
        TopTabBar({
          tabs: this.primaryTabs,
          currentIndex: this.currentIndex,
          normalFontSize: 17,
          onTabClick: (idx) => this.onTabClick(idx)
        }).layoutWeight(1).backgroundColor(Color.White)
        Image($r('app.media.ic_search')).width(35).height(35).padding(5).objectFit(ImageFit.Contain)
      }
      .padding({ left: 10, right: 10, top: this.safeArea.statusBarHeightVp })
      .width('100%')
      .alignItems(VerticalAlign.Center)
      .justifyContent(FlexAlign.SpaceBetween)
      .backgroundColor(Color.White)
      .border({ width: { bottom: 1 }, color: '#E5E5E5' })

      // 一级内容区域
      Tabs({
        barPosition: BarPosition.Start,
        index: this.currentIndex,
        controller: this.tabsController
      }) {
        ForEach(this.primaryTabs, (title: string, idx: number) => {
          TabContent() {
            if (title === "关注") {
              FollowPage()
            } else if (title === "发现") {
              DiscoverPage({
                onEdgeReach: (direction) => {
                  let newIndex = this.currentIndex + (direction === 'left' ? -1 : 1);
                  if (newIndex >= 0 && newIndex < this.primaryTabs.length) {
                    this.currentIndex = newIndex;
                    this.tabsController.changeIndex(newIndex);
                  }
                }
              })
            } else {
              CityPage()
            }
          }
        }, (item: string) => item)
      }
      .barHeight(0)
      .animationMode(AnimationMode.NO_ANIMATION)
      .onSelected((index) => this.onTabsSelected(index))
      .layoutWeight(1)
      .width('100%')
      .backgroundColor(Color.White)
    }
    .width('100%').height('100%').backgroundColor(Color.White)
  }
}
四、关键技术点
- 禁用系统 Tab 动画:设置
.animationMode(AnimationMode.NO_ANIMATION)不取消系统动画影响视觉一致性。 - 边界检测原理:
onGestureSwipe回调中,currentOffset > 0表示向右滑动(试图查看左边不存在的页面),此时触发左边界事件;currentOffset < 0表示向左滑动(试图查看右边),触发右边界事件。 - 标签自动居中:仅在标签总宽度超出可视区时,
TopTabBar才会将当前选中标签滚动到屏幕中间;若总宽度未超出,则所有标签自然排布,不滚动。 - 性能优化:每个页面独立封装,利用
Tabs的页面缓存,避免重复渲染。 - 使用
onSelected不要使用onChange,因为执行时序onSelected比onChange早,需要API18以上。
如果使用onChange,执行效果就是页面切换完了,然后指示器开始做成响应,会慢半拍。随着API版本升级基本可以满足效果需求。当前tab切换联动通过边界判断我们自己实现的,在API24提供了
nestedScroll设置Tabs组件与其父组件的嵌套滚动模式。如果考虑低版本就需要全部自定义了。
六、总结
通过自定义 TopTabBar 与系统 Tabs 组合,我们实现了功能完整、交互顺滑的多级 Tab 联动。适合资讯、社交、电商等需要复杂导航的应用场景。完整源码可直接参考本文代码块,按需引入即可。
希望这份经验能帮助大家少走弯路,如有疑问欢迎交流!

作为“人工智能6S店”的官方数字引擎,为AI开发者与企业提供一个覆盖软硬件全栈、一站式门户。
更多推荐

 0
0 0
0- 0


 已为社区贡献100条内容

所有评论(0)