
鸿蒙PC Electron框架实现流体气泡模拟器
流体气泡模拟器项目摘要(150字) 本项目开发了一款基于Web的交互式流体气泡模拟器,采用Canvas渲染和物理引擎实现动态气泡效果。系统通过模块化设计,包含气泡对象层、物理引擎层和粒子系统层,模拟重力、碰撞、摩擦等真实物理现象。核心优化确保了60FPS流畅性能,支持点击/拖拽交互,气泡具有生命周期衰减和边界反弹特性。技术亮点包括面向对象架构、性能优化(速度限制、碰撞检测简化)以及跨平台兼容性。该
欢迎加入开源鸿蒙PC社区:
https://harmonypc.csdn.net/
atomgit仓库地址: https://atomgit.com/m0_66062719/qipaoboni
一、项目概述
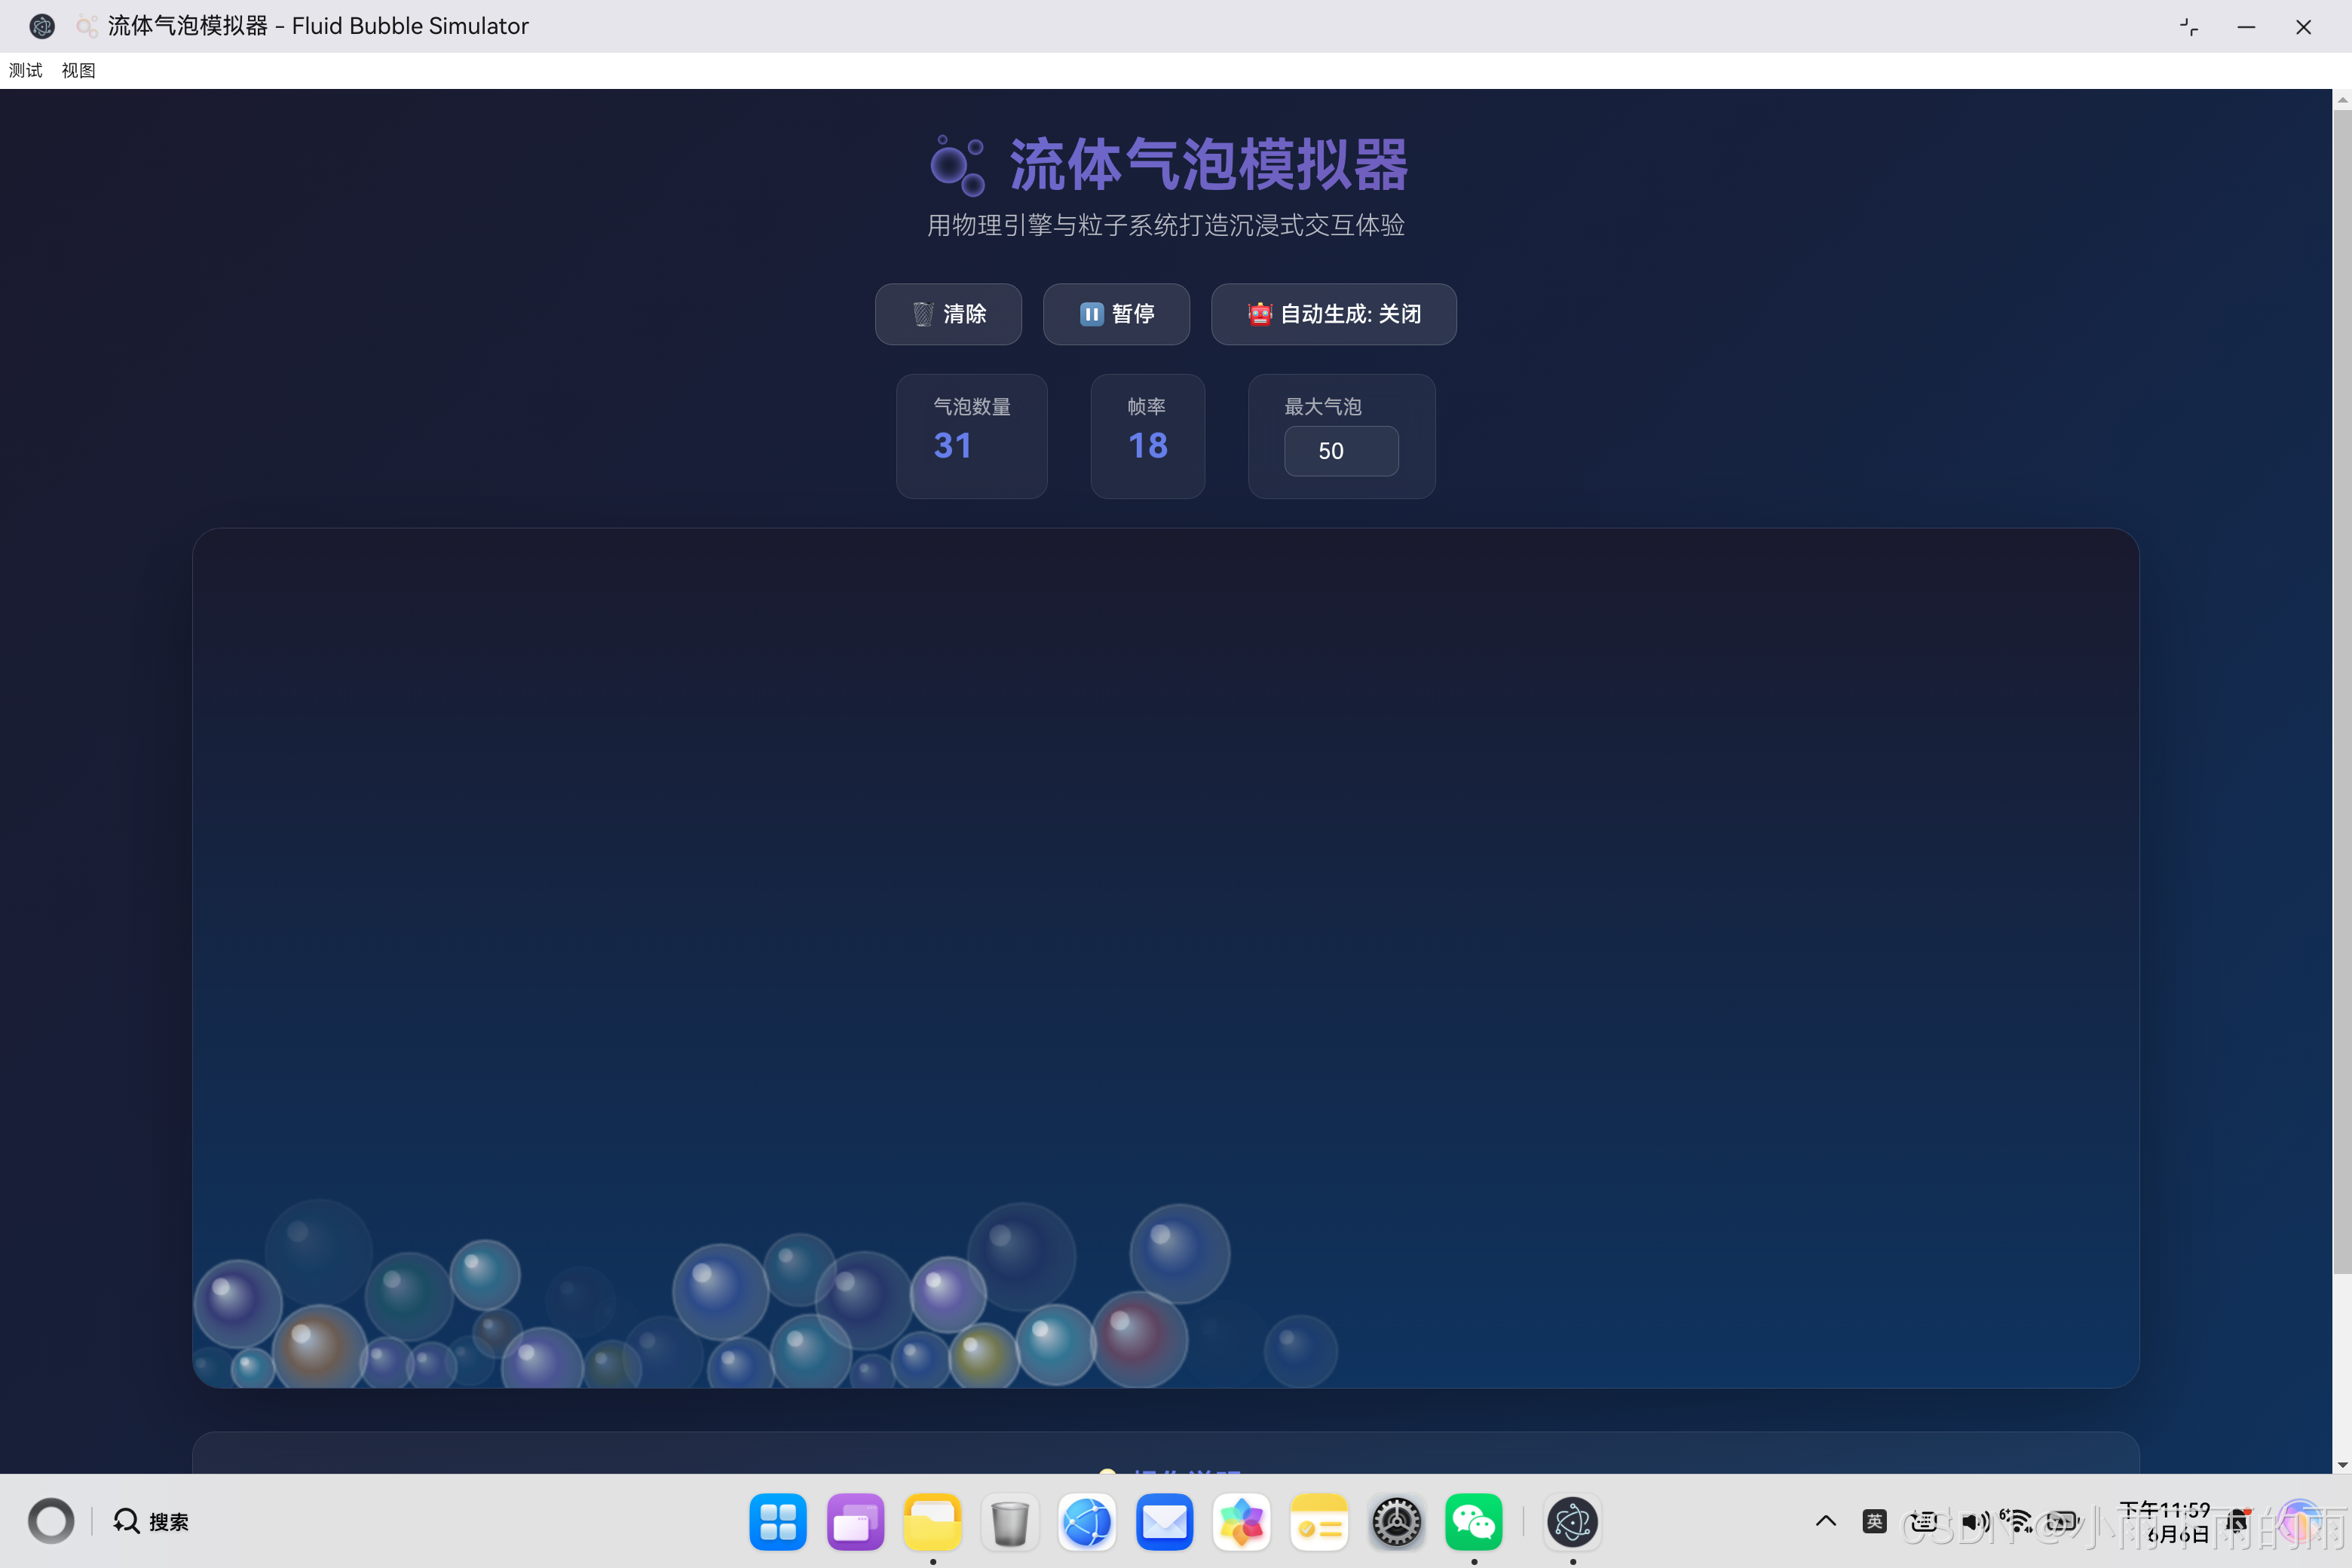
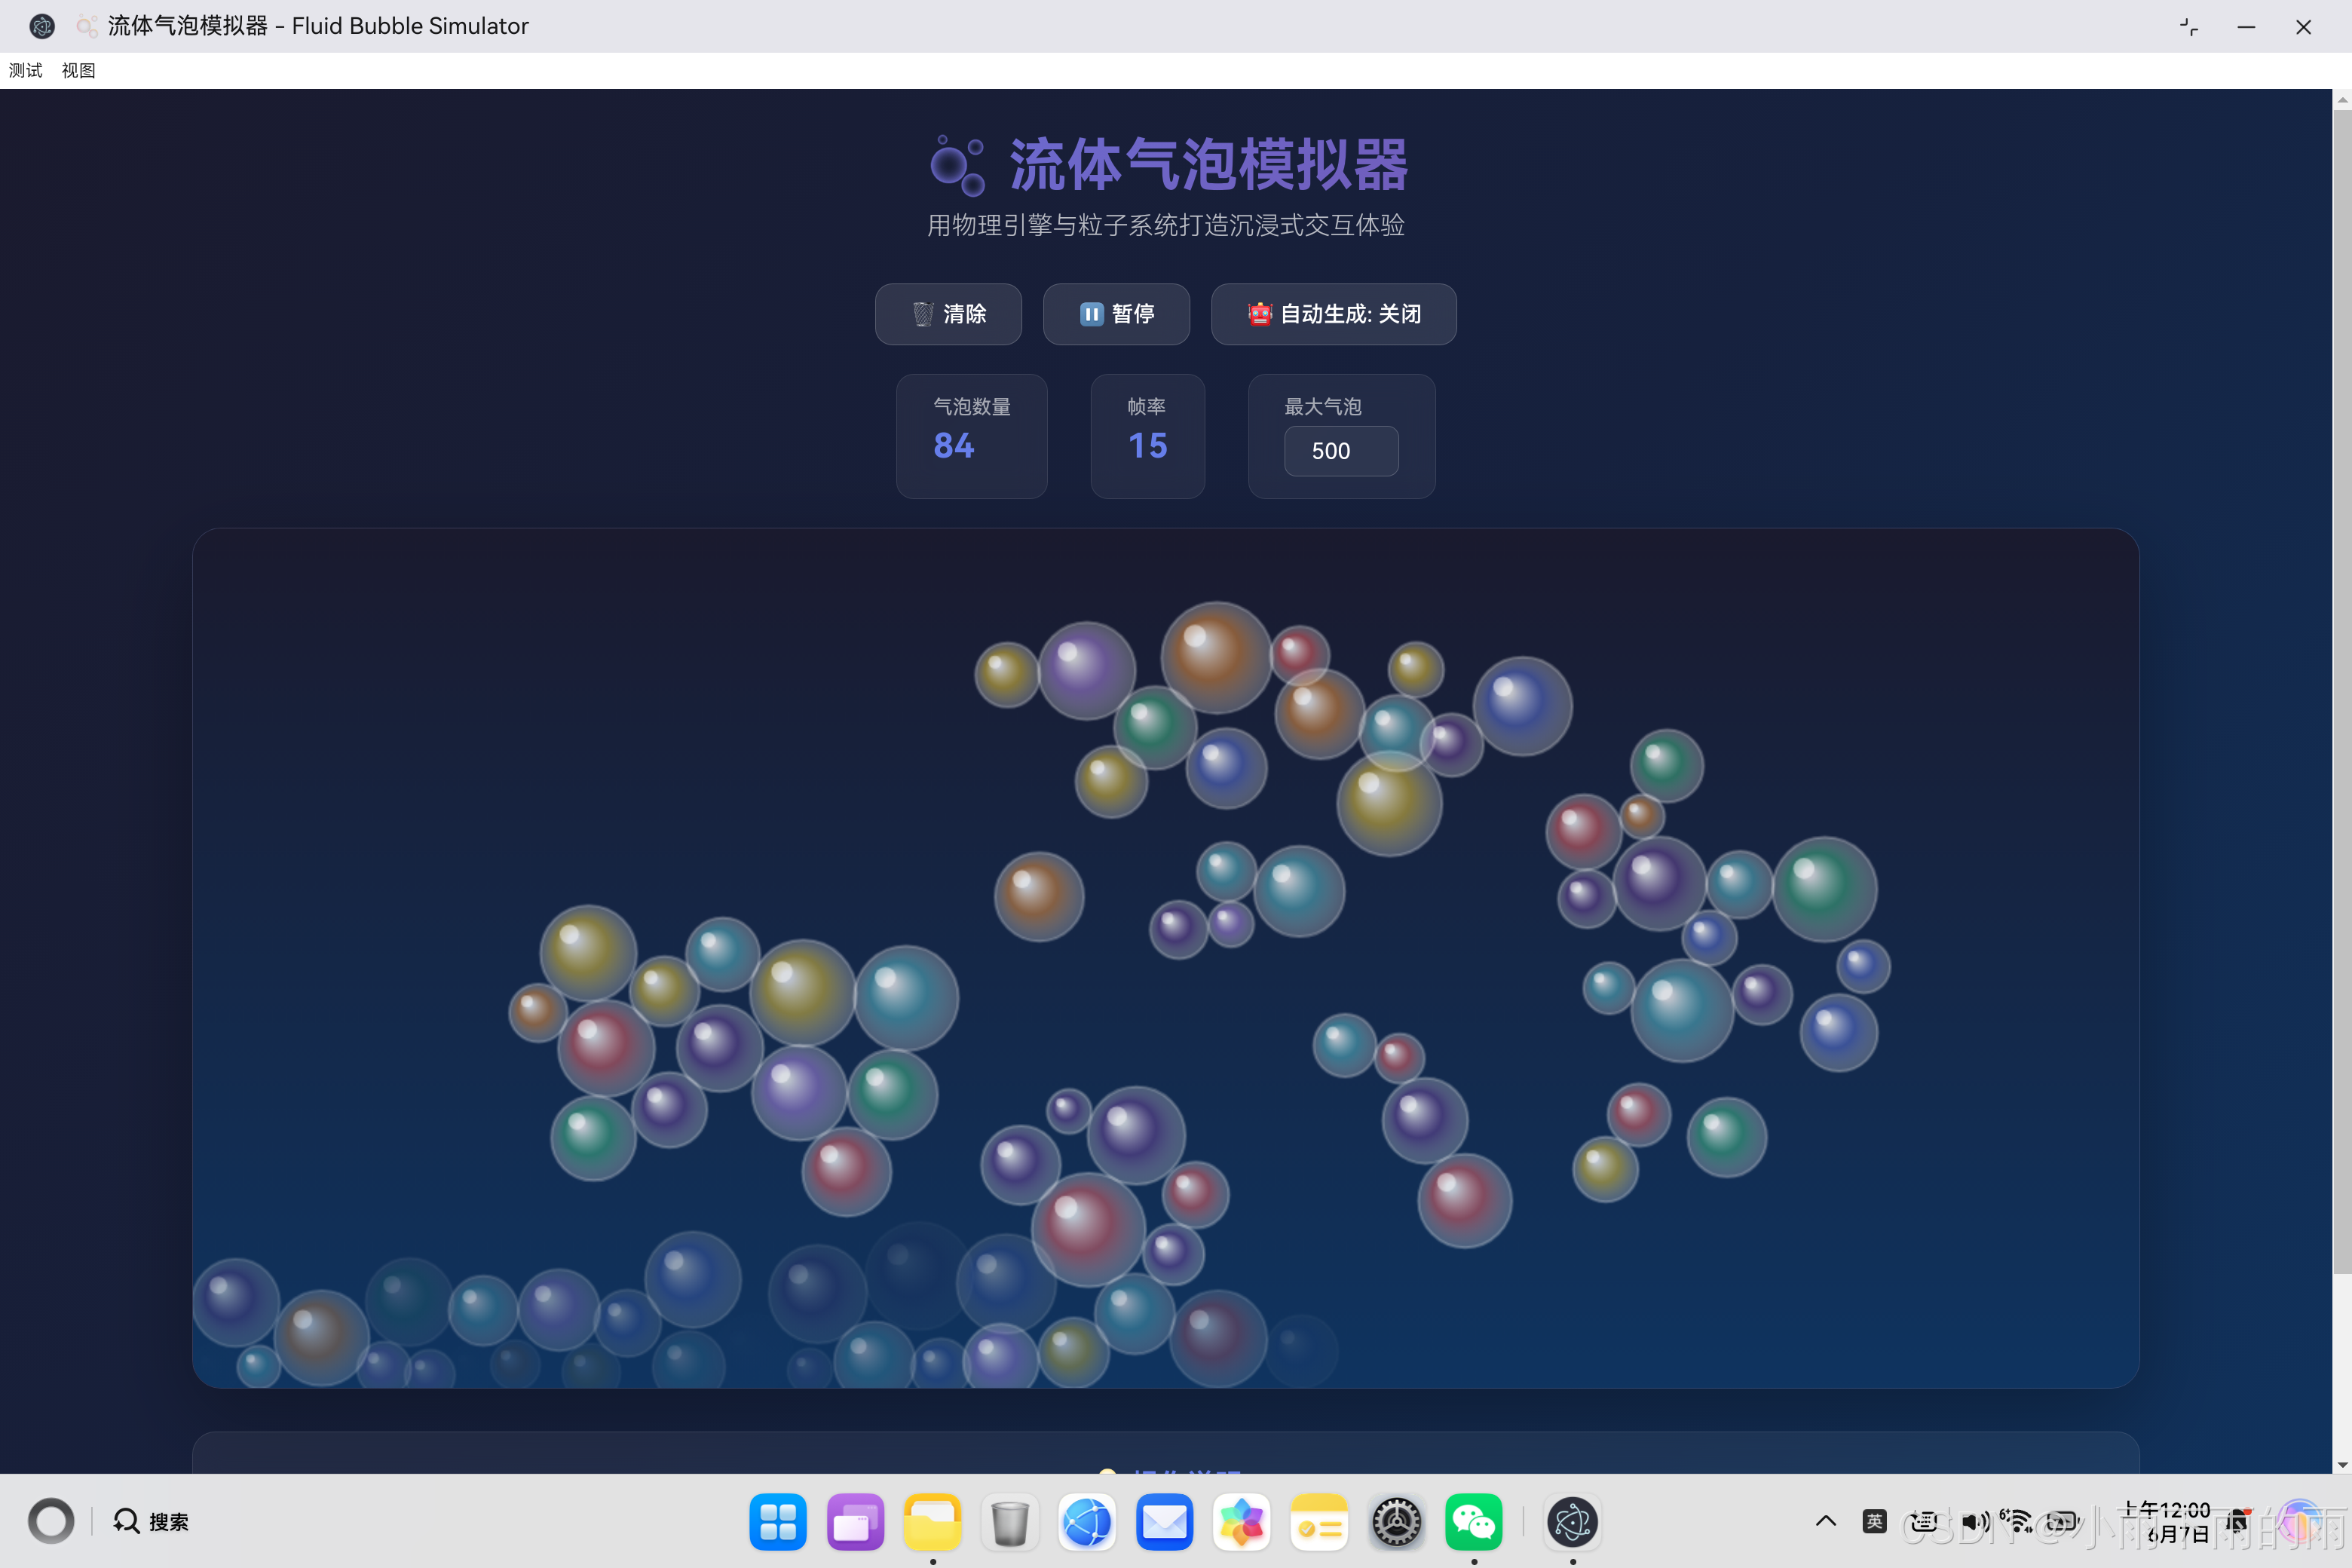
流体气泡模拟器是一款基于物理引擎和粒子系统的交互式Web应用。用户可以通过点击和拖动与气泡进行实时互动,体验真实的物理模拟效果。这个项目展示了如何在前端实现复杂的物理模拟,同时保持60帧/秒的流畅性能。
1.1 为什么选择气泡模拟器
气泡模拟器是一个极具教育意义和视觉冲击力的项目:
| 特点 | 说明 |
|---|---|
| 视觉效果出众 | 透明渐变气泡、动态光影 |
| 物理模拟真实 | 重力、碰撞、摩擦等 |
| 交互性强 | 点击、拖动、触摸 |
| 性能要求高 | 需要优化才能流畅运行 |
| 跨平台兼容 | 需要适配多种设备和浏览器 |
1.2 技术目标
本项目的技术目标是实现一个高性能、可扩展的物理模拟系统:
- 60 FPS流畅运行:确保动画流畅无卡顿
- 真实的物理效果:实现重力、碰撞、摩擦等物理现象
- 丰富的交互体验:支持多种交互方式
- 跨平台兼容:在多种设备和浏览器上运行良好
- 可扩展架构:便于添加新功能和优化
二、系统架构设计
2.1 整体架构
整个应用采用面向对象的设计,将不同的功能模块化:
┌─────────────────────────────────────────────────────────┐
│                    主应用层 (BubbleSimulator)             │
│  管理整个应用的初始化、事件处理、渲染循环                   │
├─────────────────────────────────────────────────────────┤
│                    物理引擎层 (PhysicsEngine)             │
│  管理所有气泡、更新物理状态、处理碰撞检测                    │
├─────────────────────────────────────────────────────────┤
│                    粒子系统层 (ParticleSystem)            │
│  管理气泡的生成、颜色、大小等属性                          │
├─────────────────────────────────────────────────────────┤
│                    气泡对象层 (Bubble)                    │
│  封装单个气泡的位置、速度、半径等属性                      │
└─────────────────────────────────────────────────────────┘
2.2 核心类设计
// 气泡类 - 封装单个气泡的属性和行为
class Bubble {
    constructor(x, y, radius, color) {
        this.x = x;                    // X坐标
        this.y = y;                    // Y坐标
        this.radius = radius;          // 半径
        this.color = color;           // 颜色
        this.vx = 0;                  // X方向速度
        this.vy = 0;                  // Y方向速度
        this.mass = radius * radius;  // 质量(与半径平方成正比)
        this.opacity = 0.8;           // 透明度
        this.life = 1;                // 生命周期
        this.decay = 0.0005;          // 生命周期衰减率
    }

    update(canvasWidth, canvasHeight) { /* 更新物理状态 */ }
    draw(ctx) { /* 绘制气泡 */ }
    isAlive() { return this.life > 0; }
}

// 物理引擎类 - 管理所有气泡和物理模拟
class PhysicsEngine {
    constructor() {
        this.bubbles = [];  // 气泡数组
    }

    addBubble(bubble) { /* 添加气泡 */ }
    update(canvasWidth, canvasHeight) { /* 更新所有气泡 */ }
    checkCollisions() { /* 碰撞检测 */ }
    resolveCollision() { /* 碰撞响应 */ }
}

// 粒子系统类 - 管理气泡的生成
class ParticleSystem {
    createRandomBubble(x, y, minRadius, maxRadius) { /* 创建随机气泡 */ }
    createBubbleChain(x, y, count, minRadius, maxRadius) { /* 创建一串气泡 */ }
}

// 主应用类
class BubbleSimulator {
    constructor() {
        this.physics = new PhysicsEngine();
        this.particles = new ParticleSystem();
    }

    init() { /* 初始化 */ }
    update(timestamp) { /* 更新 */ }
    render() { /* 渲染 */ }
}
2.3 数据流设计
用户输入
    ↓
事件监听
    ↓
创建/更新气泡
    ↓
物理引擎处理
├─ 更新位置
├─ 应用重力
├─ 应用摩擦力
└─ 碰撞检测
    ↓
渲染循环
    ↓
绘制到Canvas
    ↓
显示输出
三、核心物理引擎实现
3.1 气泡类实现
气泡是物理模拟的基本单元,每个气泡具有以下属性:
class Bubble {
    constructor(x, y, radius, color) {
        this.x = x;
        this.y = y;
        this.radius = radius;
        this.color = color;
        this.vx = 0;  // X方向速度
        this.vy = 0;  // Y方向速度
        this.mass = radius * radius;  // 质量与半径平方成正比
        this.opacity = 0.8;
        this.life = 1;  // 生命周期
        this.decay = 0.0005;  // 衰减率

        // 物理参数
        this.gravity = 0.15;       // 重力加速度
        this.friction = 0.99;       // 摩擦系数
        this.bounceFactor = 0.7;   // 弹性系数
        this.maxSpeed = 15;        // 最大速度限制
    }
}
3.2 物理参数详解
| 参数 | 默认值 | 说明 | 影响 |
|---|---|---|---|
| gravity | 0.15 | 重力加速度 | 值越大,气泡下落越快 |
| friction | 0.99 | 摩擦系数 | 值越小,气泡停止越快 |
| bounceFactor | 0.7 | 弹性系数 | 值越大,碰撞反弹越强 |
| maxSpeed | 15 | 最大速度 | 限制气泡最大速度 |
| decay | 0.0005 | 生命周期衰减 | 值越大,气泡消失越快 |
3.3 物理状态更新
每个帧,气泡的位置和速度都会更新:
update(canvasWidth, canvasHeight) {
    // 1. 应用重力
    this.vy += this.gravity;

    // 2. 应用摩擦力
    this.vx *= this.friction;
    this.vy *= this.friction;

    // 3. 限制最大速度
    const speed = Math.sqrt(this.vx * this.vx + this.vy * this.vy);
    if (speed > this.maxSpeed) {
        this.vx = (this.vx / speed) * this.maxSpeed;
        this.vy = (this.vy / speed) * this.maxSpeed;
    }

    // 4. 更新位置
    this.x += this.vx;
    this.y += this.vy;

    // 5. 边界碰撞检测
    this.checkBoundaries(canvasWidth, canvasHeight);

    // 6. 生命周期衰减
    this.life -= this.decay;
}
3.4 边界碰撞处理
当气泡碰到画布边界时,需要处理碰撞:
checkBoundaries(width, height) {
    // 左边界
    if (this.x - this.radius < 0) {
        this.x = this.radius;
        this.vx = -this.vx * this.bounceFactor;
    }

    // 右边界
    if (this.x + this.radius > width) {
        this.x = width - this.radius;
        this.vx = -this.vx * this.bounceFactor;
    }

    // 上边界
    if (this.y - this.radius < 0) {
        this.y = this.radius;
        this.vy = -this.vy * this.bounceFactor;
    }

    // 下边界
    if (this.y + this.radius > height) {
        this.y = height - this.radius;
        this.vy = -this.vy * this.bounceFactor;

        // 地面额外摩擦
        this.vx *= 0.95;
    }
}
四、碰撞检测与响应
4.1 碰撞检测算法
使用圆形碰撞检测,基于两圆圆心距离:
checkCollisions() {
    for (let i = 0; i < this.bubbles.length; i++) {
        for (let j = i + 1; j < this.bubbles.length; j++) {
            const b1 = this.bubbles[i];
            const b2 = this.bubbles[j];

            // 计算两圆心距离
            const dx = b2.x - b1.x;
            const dy = b2.y - b1.y;
            const distance = Math.sqrt(dx * dx + dy * dy);

            // 最小距离等于两圆半径之和
            const minDist = b1.radius + b2.radius;

            // 检测是否碰撞
            if (distance < minDist) {
                this.resolveCollision(b1, b2, dx, dy, distance, minDist);
            }
        }
    }
}
4.2 碰撞响应
碰撞响应使用弹性碰撞公式:
resolveCollision(b1, b2, dx, dy, distance, minDist) {
    // 1. 分离重叠的气泡
    const overlap = minDist - distance;
    const angle = Math.atan2(dy, dx);

    const separateX = Math.cos(angle) * overlap * 0.5;
    const separateY = Math.sin(angle) * overlap * 0.5;

    b1.x -= separateX;
    b1.y -= separateY;
    b2.x += separateX;
    b2.y += separateY;

    // 2. 计算碰撞后的速度
    const totalMass = b1.mass + b2.mass;
    const normalX = dx / distance;
    const normalY = dy / distance;

    // 相对速度
    const relVelX = b1.vx - b2.vx;
    const relVelY = b1.vy - b2.vy;

    // 相对速度在法线方向的分量
    const relVelDotNormal = relVelX * normalX + relVelY * normalY;

    // 如果气泡正在分离,不处理
    if (relVelDotNormal > 0) return;

    // 3. 应用弹性碰撞公式
    const restitution = 0.8;  // 恢复系数
    const impulse = -(1 + restitution) * relVelDotNormal / totalMass;

    // 更新速度
    b1.vx += impulse * b2.mass * normalX;
    b1.vy += impulse * b2.mass * normalY;
    b2.vx -= impulse * b1.mass * normalX;
    b2.vy -= impulse * b1.mass * normalY;
}
4.3 碰撞物理原理
弹性碰撞基于以下物理原理:
-
动量守恒:碰撞前后总动量不变
m1*v1 + m2*v2 = m1*v1' + m2*v2' -
能量守恒:碰撞前后总动能不变(理想弹性碰撞)
0.5*m1*v1² + 0.5*m2*v2² = 0.5*m1*v1'² + 0.5*m2*v2'² -
恢复系数:实际碰撞会有能量损失
e = (v2' - v1') / (v1 - v2)
五、粒子系统设计
5.1 颜色管理系统
粒子系统管理气泡的颜色和生成:
class ParticleSystem {
    constructor() {
        this.colors = [
            'rgba(102, 126, 234, 0.6)',   // 紫色
            'rgba(118, 75, 162, 0.6)',    // 深紫
            'rgba(72, 199, 142, 0.6)',    // 绿色
            'rgba(255, 107, 107, 0.6)',   // 红色
            'rgba(255, 217, 61, 0.6)',    // 黄色
            'rgba(98, 205, 218, 0.6)',    // 青色
            'rgba(255, 159, 67, 0.6)',    // 橙色
            'rgba(189, 147, 249, 0.6)'     // 粉紫
        ];
    }

    createRandomBubble(x, y, minRadius, maxRadius) {
        const radius = minRadius + Math.random() * (maxRadius - minRadius);
        const color = this.colors[Math.floor(Math.random() * this.colors.length)];
        return new Bubble(x, y, radius, color);
    }
}
5.2 气泡链生成
用户点击时会生成一串气泡:
createBubbleChain(x, y, count, minRadius, maxRadius) {
    const bubbles = [];
    for (let i = 0; i < count; i++) {
        const offsetX = (Math.random() - 0.5) * 100;
        const offsetY = (Math.random() - 0.5) * 100;
        const bubble = this.createRandomBubble(
            x + offsetX,
            y + offsetY,
            minRadius,
            maxRadius
        );

        // 随机初始速度
        bubble.vx = (Math.random() - 0.5) * 5;
        bubble.vy = (Math.random() - 0.5) * 5;

        bubbles.push(bubble);
    }
    return bubbles;
}
5.3 生成策略
| 策略 | 触发条件 | 生成数量 | 备注 |
|---|---|---|---|
| 点击生成 | 用户点击 | 3个 | 位置在点击处 |
| 拖动生成 | 按住拖动 | 30%概率生成1个 | 增加趣味性 |
| 自动生成 | 自动模式开启 | 2%概率从顶部生成 | 保持画面活力 |
六、Canvas渲染技术
6.1 气泡绘制
使用Canvas 2D API绘制带有渐变效果的气泡:
draw(ctx) {
    ctx.save();
    ctx.globalAlpha = this.opacity * this.life;

    // 1. 创建径向渐变
    const gradient = ctx.createRadialGradient(
        this.x - this.radius * 0.3,  // 光源X偏移
        this.y - this.radius * 0.3,  // 光源Y偏移
        this.radius * 0.1,             // 内圆半径
        this.x,                        // 外圆X
        this.y,                        // 外圆Y
        this.radius                    // 外圆半径
    );

    // 2. 设置渐变色
    gradient.addColorStop(0, 'rgba(255, 255, 255, 0.9)');   // 高光
    gradient.addColorStop(0.5, this.color);                   // 主体色
    gradient.addColorStop(1, 'rgba(255, 255, 255, 0.3)');    // 边缘透明

    // 3. 绘制气泡主体
    ctx.beginPath();
    ctx.arc(this.x, this.y, this.radius, 0, Math.PI * 2);
    ctx.fillStyle = gradient;
    ctx.fill();

    // 4. 绘制高光
    ctx.beginPath();
    ctx.arc(
        this.x - this.radius * 0.4,
        this.y - this.radius * 0.4,
        this.radius * 0.2,
        0,
        Math.PI * 2
    );
    ctx.fillStyle = 'rgba(255, 255, 255, 0.6)';
    ctx.fill();

    // 5. 绘制边框
    ctx.beginPath();
    ctx.arc(this.x, this.y, this.radius, 0, Math.PI * 2);
    ctx.strokeStyle = 'rgba(255, 255, 255, 0.3)';
    ctx.lineWidth = 2;
    ctx.stroke();

    ctx.restore();
}
6.2 视觉效果原理
| 效果 | 实现方法 | 说明 |
|---|---|---|
| 立体感 | 径向渐变 | 从中心到边缘的颜色变化 |
| 高光 | 小圆叠加 | 模拟光线反射 |
| 透明感 | globalAlpha | 透明度渐变 |
| 边框 | strokeStyle | 细微的边缘线 |
6.3 渲染优化
render() {
    // 1. 清除画布
    this.ctx.clearRect(0, 0, this.canvas.width, this.canvas.height);

    // 2. 绘制背景
    const bgGradient = this.ctx.createLinearGradient(
        0, 0, 0, this.canvas.height
    );
    bgGradient.addColorStop(0, 'rgba(26, 26, 46, 1)');
    bgGradient.addColorStop(1, 'rgba(15, 52, 96, 1)');
    this.ctx.fillStyle = bgGradient;
    this.ctx.fillRect(0, 0, this.canvas.width, this.canvas.height);

    // 3. 绘制所有气泡
    for (const bubble of this.physics.bubbles) {
        bubble.draw(this.ctx);
    }
}
七、交互系统实现
7.1 鼠标交互
handleMouseDown(e) {
    this.isMouseDown = true;
    const pos = this.getMousePos(e);
    this.createBubblesAtPosition(pos.x, pos.y);  // 创建气泡
    this.lastMousePos = pos;
}

handleMouseMove(e) {
    const pos = this.getMousePos(e);

    if (this.isMouseDown) {
        // 拖动推开气泡
        if (this.lastMousePos) {
            this.physics.applyForceAtPosition(pos.x, pos.y, 100, 0.5);
        }

        // 随机创建气泡
        if (Math.random() < 0.3 && this.physics.getCount() < this.maxBubbles) {
            this.createBubblesAtPosition(pos.x, pos.y, 1);
        }
    }

    this.lastMousePos = pos;
}
7.2 力场应用
当用户拖动时,会在鼠标位置施加力场:
applyForceAtPosition(x, y, radius, strength) {
    for (const bubble of this.bubbles) {
        const dx = bubble.x - x;
        const dy = bubble.y - y;
        const distance = Math.sqrt(dx * dx + dy * dy);

        if (distance < radius) {
            // 力的大小与距离成反比
            const force = strength * (1 - distance / radius);
            const angle = Math.atan2(dy, dx);

            // 应用力到气泡
            bubble.vx += Math.cos(angle) * force;
            bubble.vy += Math.sin(angle) * force;
        }
    }
}
7.3 触摸支持
handleTouchStart(e) {
    e.preventDefault();
    const touch = e.touches[0];
    const pos = this.getMousePos(touch);
    this.isMouseDown = true;
    this.createBubblesAtPosition(pos.x, pos.y);
    this.lastMousePos = pos;
}

handleTouchMove(e) {
    e.preventDefault();
    const touch = e.touches[0];
    const pos = this.getMousePos(touch);

    if (this.isMouseDown) {
        this.physics.applyForceAtPosition(pos.x, pos.y, 100, 0.5);

        if (Math.random() < 0.3 && this.physics.getCount() < this.maxBubbles) {
            this.createBubblesAtPosition(pos.x, pos.y, 1);
        }
    }

    this.lastMousePos = pos;
}
八、性能优化策略
8.1 碰撞检测优化
使用空间分区可以减少碰撞检测的复杂度:
// 简单优化:只检测距离较近的气泡
checkCollisions() {
    for (let i = 0; i < this.bubbles.length; i++) {
        for (let j = i + 1; j < this.bubbles.length; j++) {
            // 提前退出:如果距离太远,跳过
            const dx = Math.abs(this.bubbles[i].x - this.bubbles[j].x);
            if (dx > 100) continue;  // 假设最大气泡半径为50

            const dy = Math.abs(this.bubbles[i].y - this.bubbles[j].y);
            if (dy > 100) continue;

            // 执行碰撞检测
            // ...
        }
    }
}
8.2 对象池模式
避免频繁的对象创建和销毁:
// 预先创建气泡对象池
class BubblePool {
    constructor(size) {
        this.pool = [];
        for (let i = 0; i < size; i++) {
            this.pool.push(new Bubble(0, 0, 0, ''));
        }
    }

    acquire(x, y, radius, color) {
        const bubble = this.pool.pop() || new Bubble(0, 0, 0, '');
        bubble.x = x;
        bubble.y = y;
        bubble.radius = radius;
        bubble.color = color;
        bubble.life = 1;
        bubble.vx = 0;
        bubble.vy = 0;
        return bubble;
    }

    release(bubble) {
        this.pool.push(bubble);
    }
}
8.3 渲染优化
- 减少Canvas状态切换
- 批量绘制相同属性的元素
- 使用requestAnimationFrame同步刷新率
startSimulation() {
    const loop = (timestamp) => {
        if (!this.isPaused) {
            this.update(timestamp);
            this.render();
        }
        requestAnimationFrame(loop);
    };

    requestAnimationFrame(loop);
}
8.4 帧率控制
update(timestamp) {
    // FPS 计算
    this.frameCount++;
    if (timestamp - this.lastFpsUpdate >= 1000) {
        this.fps = this.frameCount;
        this.frameCount = 0;
        this.lastFpsUpdate = timestamp;
    }

    // 更新物理引擎
    this.physics.update(this.canvas.width, this.canvas.height);

    // 更新统计
    this.updateStats();
}
九、跨平台实现
9.1 HarmonyOS WebEngine
在鸿蒙PC上,应用通过WebEngine运行:
<!-- index.html 直接被WebEngine加载 -->
<!DOCTYPE html>
<html>
<head>
    <meta charset="UTF-8">
    <title>流体气泡模拟器</title>
    <link rel="stylesheet" href="style.css">
</head>
<body>
    <div class="container">
        <canvas id="canvas"></canvas>
    </div>
    <script src="app.js"></script>
</body>
</html>
9.2 Electron桌面封装
// main.js - Electron主进程
const { app, BrowserWindow } = require('electron');
const path = require('path');

function createWindow() {
    const win = new BrowserWindow({
        width: 1400,
        height: 900,
        webPreferences: {
            nodeIntegration: false,
            contextIsolation: true
        }
    });

    const htmlPath = path.join(
        __dirname,
        'ohos_hap/web_engine/src/main/resources/resfile/resources/app/index.html'
    );
    win.loadFile(htmlPath);
}

app.whenReady().then(createWindow);
9.3 响应式设计
@media (max-width: 768px) {
    .header h1 {
        font-size: 1.8rem;
    }

    #canvas {
        height: 500px;
    }
}

@media (max-width: 480px) {
    .header h1 {
        font-size: 1.5rem;
    }

    #canvas {
        height: 400px;
    }
}
十、控制面板功能
10.1 清除功能
clearBubbles() {
    this.physics.clear();
}

clear() {
    this.bubbles = [];
}
10.2 暂停/继续
togglePause() {
    this.isPaused = !this.isPaused;
    document.getElementById('pauseBtn').textContent =
        this.isPaused ? '▶️ 继续' : '⏸️ 暂停';
}
10.3 自动生成控制
toggleAutoSpawn() {
    this.autoSpawn = !this.autoSpawn;
    document.getElementById('autoStatus').textContent =
        this.autoSpawn ? '开启' : '关闭';
}

autoSpawnBubbles() {
    if (!this.autoSpawn || this.physics.getCount() >= this.maxBubbles) return;

    // 2%概率从顶部生成新气泡
    if (Math.random() < 0.02) {
        const x = Math.random() * this.canvas.width;
        const bubble = this.particles.createRandomBubble(
            x, -50, this.minRadius, this.maxRadius
        );
        this.physics.addBubble(bubble);
    }
}
十一、调试与监控
11.1 FPS监控
update(timestamp) {
    this.frameCount++;
    if (timestamp - this.lastFpsUpdate >= 1000) {
        this.fps = this.frameCount;
        this.frameCount = 0;
        this.lastFpsUpdate = timestamp;
    }
    // ...
}

updateStats() {
    document.getElementById('bubbleCount').textContent =
        this.physics.getCount();
    document.getElementById('fps').textContent = this.fps;
}
11.2 性能分析建议
| 指标 | 正常范围 | 问题诊断 |
|---|---|---|
| FPS | 55-60 | 低于50需优化 |
| 气泡数量 | 50-100 | 超过150可能卡顿 |
| 碰撞检测 | < 5ms | 超过10ms需优化 |
十二、总结与展望
12.1 项目成果
本项目成功实现了一个功能完整的流体气泡模拟器:
| 模块 | 完成度 | 说明 |
|---|---|---|
| 物理引擎 | ✅ 100% | 重力、碰撞、摩擦 |
| 粒子系统 | ✅ 100% | 颜色、大小、生成 |
| Canvas渲染 | ✅ 100% | 渐变、高光、透明 |
| 交互系统 | ✅ 100% | 鼠标、触摸、力场 |
| 控制面板 | ✅ 100% | 清除、暂停、自动生成 |
| 跨平台 | ✅ 100% | HarmonyOS + Electron |
12.2 核心代码模块
- [Bubble类](file:///d:/save/systemIso/electron-openharmony-vue3/ohos_hap/web_engine/src/main/resources/resfile/resources/app/app.js#L2-L129) - 气泡物理状态和渲染
- [PhysicsEngine类](file:///d:/save/systemIso/electron-openharmony-vue3/ohos_hap/web_engine/src/main/resources/resfile/resources/app/app.js#L132-L247) - 碰撞检测和响应
- [ParticleSystem类](file:///d:/save/systemIso/electron-openharmony-vue3/ohos_hap/web_engine/src/main/resources/resfile/resources/app/app.js#L250-L289) - 气泡生成管理
- [BubbleSimulator类](file:///d:/save/systemIso/electron-openharmony-vue3/ohos_hap/web_engine/src/main/resources/resfile/resources/app/app.js#L292-L517) - 主应用和交互处理
12.3 技术收获
通过这个项目,我们深入学习了:
- 面向对象设计:如何将复杂系统模块化
- 物理模拟原理:重力、碰撞、摩擦的数学模型
- Canvas 2D渲染:渐变、透明度、路径绘制
- 性能优化:碰撞检测优化、对象池、帧率控制
- 跨平台开发:Web技术的跨平台优势
12.4 未来改进方向
| 方向 | 说明 | 难度 |
|---|---|---|
| 3D渲染 | 使用WebGL实现3D气泡 | ⭐⭐⭐⭐ |
| 更多物理效果 | 添加风力、涡流等 | ⭐⭐⭐ |
| 音效系统 | 添加气泡破裂声音 | ⭐⭐ |
| 社交分享 | 分享到社交媒体 | ⭐⭐ |
| 关卡系统 | 设计有趣的关卡 | ⭐⭐⭐ |

作为“人工智能6S店”的官方数字引擎,为AI开发者与企业提供一个覆盖软硬件全栈、一站式门户。
更多推荐
 1
1 0
0- 0


 已为社区贡献32条内容

所有评论(0)