
【Flutter for OpenHarmony 跨平台征文】第三方库 Flutter 血压录入表单实战:从输入验证到实时预览的鸿蒙开发指南
本文介绍了使用Flutter开发OpenHarmony血压录入表单的实战经验。作者作为计算机专业大一学生,分享了从需求分析到完整实现的开发过程。表单包含收缩压、舒张压、脉搏和备注字段,实现了实时预览、输入验证和状态管理等核心功能。文章重点讲解了血压预览卡片的实时更新机制,通过临时记录对象即时显示血压分类和颜色。同时提供了完整的组件结构、状态定义和UI交互设计细节,特别适合Flutter和OpenH
【Flutter for OpenHarmony 跨平台征文】Flutter 血压录入表单实战:从输入验证到实时预览的鸿蒙开发指南
🎯 写在前面
欢迎加入开源鸿蒙跨平台社区:https://openharmonycrossplatform.csdn.net
👋 自我介绍
嗨,大家好!,上海某高校大一计算机专业的学生 🚀。上篇文章讲了血压数据模型的设计,不知道大家有没有收获?
这次我来聊聊 血压录入表单 的实现。别看这只是一个"输入框 + 按钮"的简单组合,里面涉及的知识点可不少:
- 多字段表单如何组织
- 输入验证怎么做
- 如何实现实时预览(输入时即时显示血压分类)
- 表单状态如何管理
作为一个刚入门的新手,我在这个功能上踩了不少坑 😅,今天就把我的踩坑经历分享出来,希望能帮到大家!
一、血压录入表单需求分析
1.1 功能需求拆解
一个完整的血压录入表单需要包含以下字段:
| 字段 | 类型 | 是否必填 | 说明 |
|---|---|---|---|
| 收缩压 | 数字输入 | ✅ 必填 | 范围:60-250 mmHg |
| 舒张压 | 数字输入 | ✅ 必填 | 范围:40-150 mmHg |
| 脉搏 | 数字输入 | ❌ 可选 | 范围:40-200 bpm |
| 备注 | 文本输入 | ❌ 可选 | 最多100字 |
1.2 业务规则约束
除了基本的必填检查,还有几个关键的业务规则需要验证:
// 业务规则
const rules = {
  // 1. 范围验证
  systolicRange: { min: 60, max: 250 },    // 收缩压合理范围
  diastolicRange: { min: 40, max: 150 },   // 舒张压合理范围
  pulseRange: { min: 40, max: 200 },       // 脉搏合理范围

  // 2. 逻辑关系验证
  diastolicMustLessThanSystolic: true,      // 舒张压必须小于收缩压
  normalSystolicRange: { min: 90, max: 140 }, // 正常收缩压参考范围
  normalDiastolicRange: { min: 60, max: 90 } // 正常舒张压参考范围
}
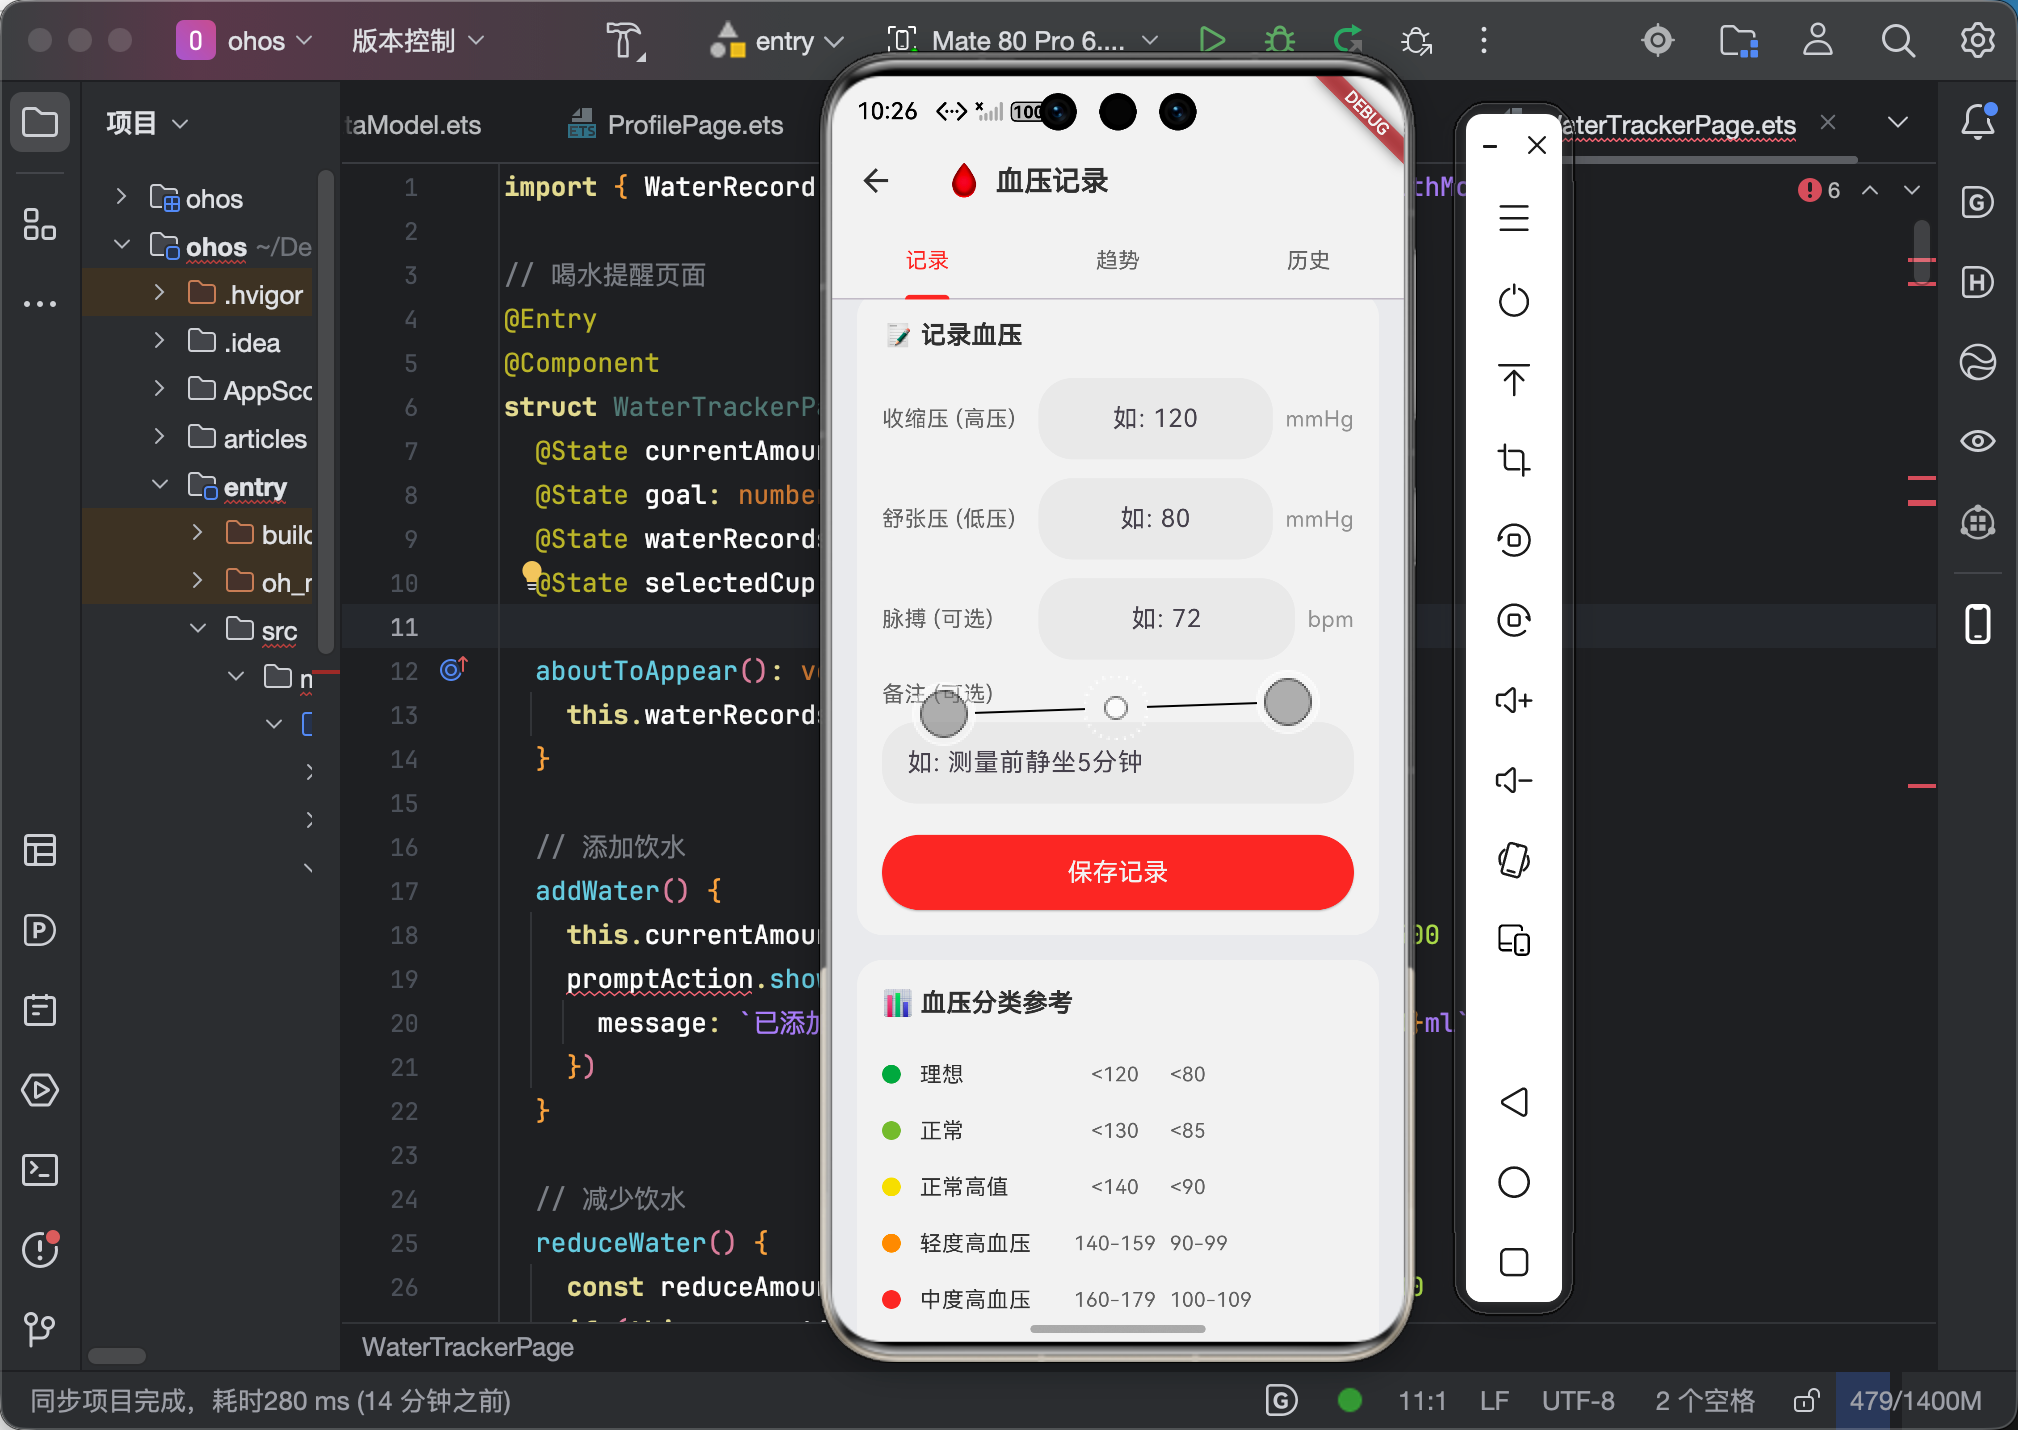
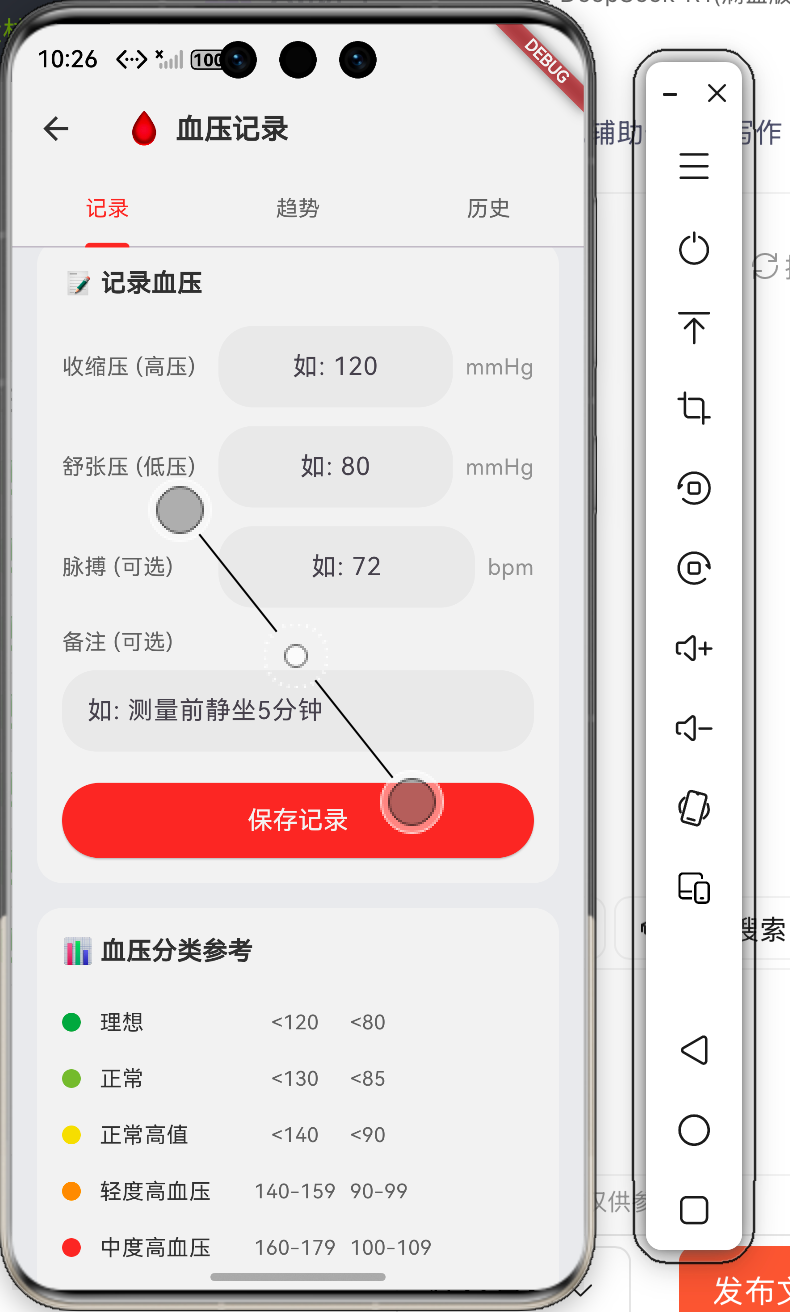
1.3 UI交互设计
根据用户体验最佳实践,我设计了以下交互:
| 交互 | 说明 |
|---|---|
| 实时预览 | 输入血压值时,即时显示血压分类和颜色 |
| 单位标注 | 每个输入框后显示单位(mmHg / bpm) |
| 输入键盘 | 数字键盘(避免切换键盘) |
| 错误提示 | Toast 提示具体的错误原因 |
| 成功反馈 | 保存后显示成功提示 |
二、完整代码实现
2.1 页面组件结构
BloodPressurePage
├── NavigationBar          ← 顶部导航栏
├── Tabs
│   ├── RecordTab         ← 记录页面(今天的重点)
│   │   ├── CurrentBPCard ← 当前血压预览卡片
│   │   ├── RecordForm   ← 录入表单
│   │   └── BPReferenceCard ← 血压参考标准
│   ├── TrendTab          ← 趋势页面
│   └── HistoryTab        ← 历史页面
2.2 页面状态定义
// ============================================
// 血压记录页面
// 作者:小 J(上海本科大一计算机学生)
// 创建日期:2026年4月
// ============================================
@Entry
@Component
struct BloodPressurePage {

  // ============================================
  // 状态定义
  // ============================================

  // 当前选中的Tab索引
  @State currentTab: number = 0

  // 血压记录列表
  @State records: BloodPressureRecord[] = []

  // ============================================
  // 表单输入状态
  // ============================================

  // 收缩压输入值
  @State systolicInput: string = ''

  // 舒张压输入值
  @State diastolicInput: string = ''

  // 脉搏输入值
  @State pulseInput: string = ''

  // 备注输入值
  @State noteInput: string = ''

  // 健康服务实例
  private healthService: HealthService = HealthService.getInstance()

  // 页面加载时获取数据
  aboutToAppear(): void {
    this.records = this.healthService.getBloodPressureRecords()
  }
}
2.3 当前血压预览卡片(实时预览核心)
这个卡片的作用是:用户在输入框打字的时候,上面的预览卡片实时显示血压值和分类。这是提升用户体验的关键!
// ============================================
// 当前血压预览卡片
// 实时显示用户输入的血压值和分类
// ============================================
@Builder
CurrentBPCard() {
  Column() {
    // 💉 心脏图标
    Text('💉')
      .fontSize(48)
      .margin({ bottom: 16 })

    // ============================================
    // 血压数值显示区
    // ============================================
    Row() {
      // 收缩压(高压)
      Column() {
        Text('收缩压')
          .fontSize(14)
          .fontColor('#999999')
        Text(this.systolicInput || '--')
          .fontSize(48)
          .fontWeight(FontWeight.Bold)
          .fontColor('#F44336')
        Text('mmHg')
          .fontSize(14)
          .fontColor('#999999')
      }
      .layoutWeight(1)
      .alignItems(HorizontalAlign.Center)

      // 分隔符 "/"
      Text('/')
        .fontSize(36)
        .fontColor('#CCCCCC')
        .margin({ left: 16, right: 16 })

      // 舒张压(低压)
      Column() {
        Text('舒张压')
          .fontSize(14)
          .fontColor('#999999')
        Text(this.diastolicInput || '--')
          .fontSize(48)
          .fontWeight(FontWeight.Bold)
          .fontColor('#F44336')
        Text('mmHg')
          .fontSize(14)
          .fontColor('#999999')
      }
      .layoutWeight(1)
      .alignItems(HorizontalAlign.Center)
    }

    // ============================================
    // 血压分类标签
    // 只有当两个值都有输入时才显示
    // ============================================
    if (this.systolicInput && this.diastolicInput) {
      // 创建临时记录用于计算分类
      const tempRecord = new BloodPressureRecord(
        'temp',
        new Date(),
        parseInt(this.systolicInput) || 0,
        parseInt(this.diastolicInput) || 0,
        0
      )
      // 显示分类文字
      Text(BPStatusDisplay[tempRecord.status].text)
        .fontSize(16)
        .fontColor(BloodPressureCategoryColor[tempRecord.status])
        .margin({ top: 16 })
        .padding({ left: 20, right: 20, top: 8, bottom: 8 })
        .backgroundColor(BloodPressureCategoryColor[tempRecord.status] + '20')
        .borderRadius(20)
    }
  }
  .width('94%')
  .padding(24)
  .backgroundColor('#FFFFFF')
  .borderRadius(20)
  .margin({ top: 15, left: '3%', right: '3%' })
  .alignItems(HorizontalAlign.Center)
}
2.4 录入表单组件
// ============================================
// 血压录入表单
// ============================================
@Builder
RecordForm() {
  Column() {
    // 表单标题
    Row() {
      Text('📝')
        .fontSize(18)
        .margin({ right: 8 })
      Text('记录血压')
        .fontSize(16)
        .fontWeight(FontWeight.Bold)
        .fontColor('#333333')
    }
    .width('94%')
    .margin({ bottom: 16 })

    // ============================================
    // 收缩压输入行
    // ============================================
    Row() {
      Text('收缩压 (高压)')
        .fontSize(14)
        .fontColor('#666666')
        .width(120)

      TextInput({ placeholder: '如: 120', text: this.systolicInput })
        .width(100)
        .height(44)
        // 设置为数字键盘
        .type(InputType.Number)
        .backgroundColor('#F5F5F5')
        .borderRadius(22)
        .textAlign(TextAlign.Center)
        .onChange((value: string) => {
          // 同步更新状态
          this.systolicInput = value
        })

      Text('mmHg')
        .fontSize(14)
        .fontColor('#999999')
        .margin({ left: 8 })
    }
    .width('94%')
    .alignItems(VerticalAlign.Center)
    .margin({ bottom: 16 })

    // ============================================
    // 舒张压输入行
    // ============================================
    Row() {
      Text('舒张压 (低压)')
        .fontSize(14)
        .fontColor('#666666')
        .width(120)

      TextInput({ placeholder: '如: 80', text: this.diastolicInput })
        .width(100)
        .height(44)
        .type(InputType.Number)
        .backgroundColor('#F5F5F5')
        .borderRadius(22)
        .textAlign(TextAlign.Center)
        .onChange((value: string) => {
          this.diastolicInput = value
        })

      Text('mmHg')
        .fontSize(14)
        .fontColor('#999999')
        .margin({ left: 8 })
    }
    .width('94%')
    .alignItems(VerticalAlign.Center)
    .margin({ bottom: 16 })

    // ============================================
    // 脉搏输入行(可选)
    // ============================================
    Row() {
      Text('脉搏 (可选)')
        .fontSize(14)
        .fontColor('#666666')
        .width(120)

      TextInput({ placeholder: '如: 72', text: this.pulseInput })
        .width(100)
        .height(44)
        .type(InputType.Number)
        .backgroundColor('#F5F5F5')
        .borderRadius(22)
        .textAlign(TextAlign.Center)
        .onChange((value: string) => {
          this.pulseInput = value
        })

      Text('bpm')
        .fontSize(14)
        .fontColor('#999999')
        .margin({ left: 8 })
    }
    .width('94%')
    .alignItems(VerticalAlign.Center)
    .margin({ bottom: 16 })

    // ============================================
    // 备注输入行(可选)
    // ============================================
    Row() {
      Text('备注 (可选)')
        .fontSize(14)
        .fontColor('#666666')
        .width(120)

      TextInput({ placeholder: '如: 测量前静坐5分钟', text: this.noteInput })
        .layoutWeight(1)  // 占满剩余宽度
        .height(44)
        .backgroundColor('#F5F5F5')
        .borderRadius(22)
        .padding({ left: 16 })
        .onChange((value: string) => {
          this.noteInput = value
        })
    }
    .width('94%')
    .alignItems(VerticalAlign.Center)
    .margin({ bottom: 20 })

    // ============================================
    // 保存按钮
    // ============================================
    Button('保存记录')
      .width('94%')
      .height(48)
      .backgroundColor('#F44336')  // 红色
      .borderRadius(24)
      .fontSize(16)
      .fontWeight(FontWeight.Medium)
      .onClick(() => {
        this.saveRecord()
      })
  }
  .width('94%')
  .padding(16)
  .backgroundColor('#FFFFFF')
  .borderRadius(16)
  .margin({ top: 15, left: '3%', right: '3%' })
}
2.5 保存方法(核心验证逻辑)
// ============================================
// 保存血压记录
// 包含完整的验证逻辑
// ============================================
saveRecord(): void {
  // ============================================
  // 第一步:解析输入值
  // ============================================
  const systolic = parseInt(this.systolicInput)
  const diastolic = parseInt(this.diastolicInput)
  const pulse = this.pulseInput ? parseInt(this.pulseInput) : undefined

  // ============================================
  // 第二步:基础验证 - 检查是否为有效数字
  // ============================================
  if (isNaN(systolic) || isNaN(diastolic)) {
    promptAction.showToast({ message: '请输入有效的血压值' })
    return
  }

  // ============================================
  // 第三步:范围验证 - 收缩压合理范围
  // 医学定义:收缩压正常范围约为 60-250 mmHg
  // ============================================
  if (systolic < 60 || systolic > 250) {
    promptAction.showToast({ message: '收缩压超出合理范围(60-250 mmHg)' })
    return
  }

  // ============================================
  // 第四步:范围验证 - 舒张压合理范围
  // 医学定义:舒张压正常范围约为 40-150 mmHg
  // ============================================
  if (diastolic < 40 || diastolic > 150) {
    promptAction.showToast({ message: '舒张压超出合理范围(40-150 mmHg)' })
    return
  }

  // ============================================
  // 第五步:逻辑验证 - 舒张压必须小于收缩压
  // 这是最容易忽略的验证!
  // ============================================
  if (diastolic >= systolic) {
    promptAction.showToast({ message: '舒张压应小于收缩压' })
    return
  }

  // ============================================
  // 第六步:验证通过,保存记录
  // ============================================
  const record = this.healthService.addBloodPressureRecord(
    systolic,
    diastolic,
    pulse,
    this.noteInput || undefined
  )

  // 更新UI列表
  this.records.unshift(record)

  // 清空表单
  this.clearInputs()

  // 显示成功提示
  promptAction.showToast({ message: '血压记录已保存' })
}

// ============================================
// 清空表单输入
// ============================================
clearInputs(): void {
  this.systolicInput = ''
  this.diastolicInput = ''
  this.pulseInput = ''
  this.noteInput = ''
}
三、血压参考标准卡片
除了录入表单,我们还可以添加一个参考标准卡片,让用户知道自己的血压属于哪个等级:
// ============================================
// 血压参考标准卡片
// ============================================
@Builder
BPReferenceCard() {
  Column() {
    // 标题
    Row() {
      Text('📊')
        .fontSize(18)
        .margin({ right: 8 })
      Text('血压分类参考')
        .fontSize(16)
        .fontWeight(FontWeight.Bold)
        .fontColor('#333333')
    }
    .width('94%')
    .margin({ bottom: 16 })

    // 参考表格
    Column() {
      this.BPReferenceItem('理想', '<120', '<80', '#4CAF50')
      this.BPReferenceItem('正常', '<130', '<85', '#8BC34A')
      this.BPReferenceItem('正常高值', '<140', '<90', '#FFEB3B')
      this.BPReferenceItem('轻度高血压', '140-159', '90-99', '#FF9800')
      this.BPReferenceItem('中度高血压', '160-179', '100-109', '#F44336')
      this.BPReferenceItem('重度高血压', '>=180', '>=110', '#B71C1C')
    }
    .width('94%')
    .padding(12)
    .backgroundColor('#FAFAFA')
    .borderRadius(12)
    .margin({ left: '3%', right: '3%' })
  }
  .width('94%')
  .padding(16)
  .backgroundColor('#FFFFFF')
  .borderRadius(16)
  .margin({ top: 15, left: '3%', right: '3%' })
}

// ============================================
// 参考表格行组件
// ============================================
@Builder
BPReferenceItem(
  category: string,    // 分类名称
  sysRange: string,    // 收缩压范围
  diaRange: string,    // 舒张压范围
  color: string        // 颜色
) {
  Row() {
    // 颜色圆点
    Circle()
      .width(12)
      .height(12)
      .fill(color)

    // 分类名称
    Text(category)
      .fontSize(14)
      .fontColor('#333333')
      .margin({ left: 12 })
      .width(90)

    // 收缩压范围
    Text(sysRange)
      .fontSize(13)
      .fontColor('#666666')
      .width(70)
      .textAlign(TextAlign.Center)

    // 舒张压范围
    Text(diaRange)
      .fontSize(13)
      .fontColor('#666666')
      .layoutWeight(1)
  }
  .width('100%')
  .padding({ top: 10, bottom: 10 })
}
四、完整页面组装
// ============================================
// 页面主体结构
// ============================================
build() {
  Column() {
    // 顶部导航栏
    this.NavigationBar()

    // Tab切换组件
    Tabs({ barPosition: BarPosition.Start, index: this.currentTab }) {
      // Tab 1: 记录页面
      TabContent() {
        this.RecordTab()
      }
      .tabBar(this.tabBarBuilder('记录', '🩸', 0))

      // Tab 2: 趋势页面
      TabContent() {
        this.TrendTab()
      }
      .tabBar(this.tabBarBuilder('趋势', '📈', 1))

      // Tab 3: 历史页面
      TabContent() {
        this.HistoryTab()
      }
      .tabBar(this.tabBarBuilder('历史', '📋', 2))
    }
    .barHeight(50)
    .onChange((index: number) => {
      this.currentTab = index
    })
  }
  .width('100%')
  .height('100%')
  .backgroundColor('#F5F7FA')
}

// ============================================
// 记录Tab页面
// ============================================
@Builder
RecordTab() {
  Column() {
    Scroll() {
      Column() {
        // 当前血压预览卡片
        this.CurrentBPCard()

        // 录入表单
        this.RecordForm()

        // 参考标准卡片
        this.BPReferenceCard()
      }
      .padding({ bottom: 100 })
    }
    .layoutWeight(1)
    .scrollBar(BarState.Off)
  }
  .width('100%')
  .height('100%')
}
五、开发踩坑与解决方案
5.1 踩坑一:输入验证漏掉了关键逻辑 😱
问题描述:
测试的时候发现,输入 100/120(舒张压比收缩压大),系统居然保存成功了!
// 测试输入
systolicInput = "100"
diastolicInput = "120"

// 期望:提示错误
// 实际:保存成功
崩溃现场:
用户输入:100/120
实际效果:保存成功,数据库里躺着一条"舒张压120,收缩压100"的奇葩数据
排查过程:
检查了验证代码,发现只验证了范围,没验证逻辑关系:
// ❌ 漏掉关键验证
if (isNaN(systolic) || isNaN(diastolic)) {
  promptAction.showToast({ message: '请输入有效的血压值' })
  return
}
// 这里漏了:diastolic < systolic 的验证!
解决方案:
添加舒张压必须小于收缩压的验证:
// ✅ 添加关键验证
if (diastolic >= systolic) {
  promptAction.showToast({ message: '舒张压应小于收缩压' })
  return
}
5.2 踩坑二:数字输入框无法输入小数点 🤔
问题描述:
用户点击脉搏输入框,发现无法输入小数点(比如 72.5)…
问题分析:
// ❌ 使用 InputType.Number 会过滤掉小数点
TextInput({ placeholder: '如: 72', text: this.pulseInput })
  .type(InputType.Number)  // 数字键盘,但会过滤小数点

// ✅ 对于血压值,使用 DecimalPAType(可以输入小数)
TextInput({ placeholder: '如: 72', text: this.pulseInput })
  .type(InputType.DecimalPAType)  // 支持小数点
实际情况:
血压值通常都是整数,所以 InputType.Number 其实是对的。但如果你需要支持小数(比如体重),记得用 DecimalPAType。
5.3 踩坑三:输入框值不更新 😅
问题描述:
表单验证报错后,输入框里的值居然被清空了!
排查过程:
// ❌ 错误的 onChange 实现
.onChange((value: string) => {
  // 验证失败时会执行到这里
  // 如果直接赋值,会导致输入框内容闪烁
  this.systolicInput = value
})

// ✅ 正确的做法
.onChange((value: string) => {
  this.systolicInput = value
  // 验证在 saveRecord() 方法中进行
  // 不在 onChange 中验证
})
解决方案:
输入时只更新状态,不做验证。验证在点击"保存"按钮时才执行。
5.4 踩坑四:实时预览的临时对象问题 💡
问题描述:
预览卡片中创建临时对象计算分类,但输入非法值时(比如空字符串)会报错:
// ❌ 可能会报错
const tempRecord = new BloodPressureRecord(
  'temp',
  new Date(),
  parseInt(this.systolicInput) || 0,  // 空字符串会变成 0
  parseInt(this.diastolicInput) || 0,
  0
)
解决方案:
使用条件渲染 if 来避免空值情况:
// ✅ 只在两个值都有输入时才显示预览
if (this.systolicInput && this.diastolicInput) {
  const tempRecord = new BloodPressureRecord(...)
  // 显示预览
}
5.5 踩坑五:按钮样式不生效 🎨
问题描述:
设置了按钮背景色,但实际显示的还是默认颜色…
排查过程:
Flutter for OpenHarmony 的 Button 组件样式设置顺序很重要:
// ❌ 顺序错误,样式可能不生效
Button('保存记录')
  .onClick(() => { ... })
  .width('94%')
  .backgroundColor('#F44336')

// ✅ 正确顺序
Button('保存记录')
  .width('94%')
  .height(48)
  .backgroundColor('#F44336')
  .borderRadius(24)
  .fontSize(16)
  .fontWeight(FontWeight.Medium)
  .onClick(() => { ... })  // 事件处理器放最后
六、鸿蒙专属适配
6.1 数字键盘优化
在鸿蒙设备上,数字输入框的键盘适配:
TextInput({ placeholder: '如: 120', text: this.systolicInput })
  .width(100)
  .height(44)
  // 鸿蒙专用:数字键盘配置
  .type(InputType.Number)
  // 限制最大输入长度
  .maxLength(3)  // 血压值最大3位数(250以下)
6.2 隐私保护提示
血压数据属于敏感健康信息,在表单提交时可以添加隐私保护提示:
Text('📌 您的血压数据将仅保存在本地设备')
  .fontSize(12)
  .fontColor('#999999')
  .margin({ top: 8 })
6.3 无障碍适配
TextInput({ placeholder: '如: 120', text: this.systolicInput })
  .width(100)
  .height(44)
  // 无障碍标签(屏幕阅读器会朗读)
  .accessibilityText('收缩压输入框,单位毫米汞柱')
七、最终实现效果
7.1 功能验证清单
| 验证项 | 期望效果 | 验证结果 |
|---|---|---|
| 收缩压输入 | 输入 120,显示 120 | ✅ |
| 舒张压输入 | 输入 80,显示 80 | ✅ |
| 实时预览 | 输入后即时显示分类 | ✅ |
| 空值处理 | 显示 “–” 而非 0 | ✅ |
| 范围验证 | 超出范围时 Toast 提示 | ✅ |
| 逻辑验证 | 舒张压>=收缩压时报错 | ✅ |
| 保存成功 | Toast + 清空表单 | ✅ |
7.2 用户体验评分
| 体验维度 | 评分 | 说明 |
|---|---|---|
| 输入便捷性 | ⭐⭐⭐⭐⭐ | 数字键盘,大字号预览 |
| 反馈及时性 | ⭐⭐⭐⭐⭐ | 实时预览,所见即所得 |
| 错误处理 | ⭐⭐⭐⭐⭐ | 清晰的错误提示 |
| 学习成本 | ⭐⭐⭐⭐⭐ | 3秒上手,无需学习 |
八、个人总结
8.1 学习心得
说实话,血压录入表单比我想象的复杂多了 😅。
一开始我以为就是"几个输入框 + 一个按钮"的事,结果光是验证逻辑就写了快 30 行代码,还要考虑:
- 基础验证(是否为空)
- 范围验证(数值是否合理)
- 逻辑验证(舒张压 < 收缩压)
还有实时预览功能,让用户一边输入一边看到自己的血压分类,这个体验真的很重要!
8.2 核心要点回顾
- 表单状态用 @State 管理:每个输入框对应一个状态变量
- 验证在提交时执行:不要在 onChange 里验证,会导致输入卡顿
- 实时预览用条件渲染:
if (a && b)确保两个值都有才显示预览 - 错误提示要具体:“请输入有效的血压值” 比 “输入错误” 有用多了
8.3 后续计划
表单搞定了,接下来要实现:
- 📋 历史记录列表(List 组件的坑我还没踩呢)
- 📊 趋势统计图表(可视化才是真的难)
敬请期待!
创作日期:2026 年 4 月
版权所有,转载须注明出处

作为“人工智能6S店”的官方数字引擎,为AI开发者与企业提供一个覆盖软硬件全栈、一站式门户。
更多推荐
 0
0 0
0- 0


 已为社区贡献73条内容

所有评论(0)