
ReactNative for OpenHarmony项目鸿蒙化三方库:react-native-blurhash — 模糊占位图组件
欢迎加入开源鸿蒙跨平台社区:https://openharmonycrossplatform.csdn.net📌:本文基于 React Native 0.72.90 版本进行开发适配。
欢迎加入开源鸿蒙跨平台社区:https://openharmonycrossplatform.csdn.net
📌 开发环境声明:本文基于 React Native 0.72.90 版本进行开发适配

🚀 一、开篇引言
图片加载体验是移动应用用户体验的重要组成部分。当网络较慢或图片较大时,用户需要等待图片加载完成,这会导致不良的用户体验。Blurhash 是一种优雅的解决方案,它将图片编码为短字符串,在图片加载前显示模糊占位图,让用户立即感知到图片内容的大致轮廓。react-native-blurhash 是 React Native 社区中实现这一功能的优秀组件,本文将带你深入了解如何在 HarmonyOS 平台上集成和使用这个实用的图片占位组件。
1.1 你将学到什么?
- ✅ Blurhash 的核心概念与工作原理
- ✅ HarmonyOS 平台的完整集成流程
- ✅ 模糊占位图的解码与显示
- ✅ API 属性的深度解析
- ✅ 实际应用场景的最佳实践
1.2 适用人群
- 正在进行 React Native 鸿蒙化迁移的开发者
- 需要优化图片加载体验的开发者
- 对跨平台图片处理开发感兴趣的技术爱好者
1.3 为什么选择 Blurhash?
| 特点 | 说明 |
|---|---|
| 极小体积 | 仅需 20-30 字符的字符串 |
| 快速解码 | 毫秒级生成模糊占位图 |
| 跨平台一致 | iOS、Android、HarmonyOS 表现一致 |
| 优雅降级 | 图片加载前显示模糊预览 |
| 异步解码 | 不阻塞 UI 线程 |
📦 二、库概览
2.1 基本信息
| 项目 | 内容 |
|---|---|
| 库名称 | @react-native-ohos/react-native-blurhash |
| 原库名称 | react-native-blurhash |
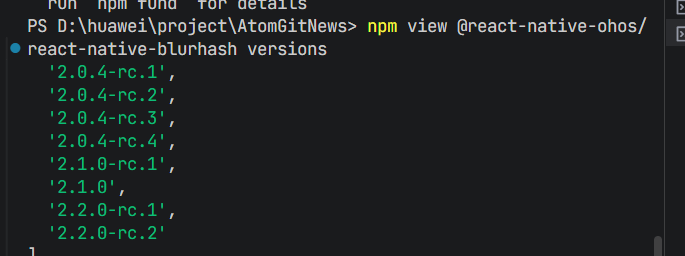
| 版本信息 | 2.0.4 (RN 0.72) / 2.1.0 (RN 0.77) / 2.2.0 (RN 0.82) |
| 官方仓库 | https://github.com/mrousavy/react-native-blurhash |
| 鸿蒙仓库 | https://gitcode.com/openharmony-sig/rntpc_react-native-blurhash |
| 开源协议 | MIT |
2.2 版本兼容性
| 三方库版本 | 支持RN版本 | 是否支持Autolink |
|---|---|---|
| 2.2.0 | 0.82 | No |
| 2.1.0 | 0.77 | No |
| 2.0.4 | 0.72 | Yes |
| <= 2.0.3-0.0.7@deprecated | 0.72 | No |
2.3 核心能力矩阵
| 能力项 | 描述 | HarmonyOS 支持 |
|---|---|---|
| 模糊解码显示 | Blurhash 组件 | ✅ 完全支持 |
| 图片编码 | encode 方法 | ✅ 完全支持 |
| 验证有效性 | isBlurhashValid | ✅ 完全支持 |
| 获取平均颜色 | getAverageColor | ✅ 完全支持 |
| 清除缓存 | clearCosineCache | ✅ 完全支持 |
| 异步解码 | decodeAsync | ✅ 完全支持 |
2.4 技术架构图
2.5 典型应用场景
| 场景 | 描述 | 示例 |
|---|---|---|
| 图片列表 | 列表图片占位 | 📸 图库、动态列表 |
| 详情页图片 | 大图加载占位 | 🖼️ 商品详情、文章配图 |
| 用户头像 | 头像加载占位 | 👤 社交应用、评论列表 |
| 聊天图片 | 聊天图片预览 | 💬 即时通讯、分享图片 |
⚙️ 三、环境准备
3.1 安装依赖
在项目根目录执行以下命令:
npm install @react-native-ohos/react-native-blurhash@2.0.4-rc.1
或使用 yarn:
yarn add @react-native-ohos/react-native-blurhash@2.0.4-rc.1
3.2 验证安装
安装完成后,检查 package.json 文件中是否包含以下依赖:
{
  "dependencies": {
    "@react-native-ohos/react-native-blurhash": "^2.0.4-rc.1"
  }
}
🔧 四、原生配置
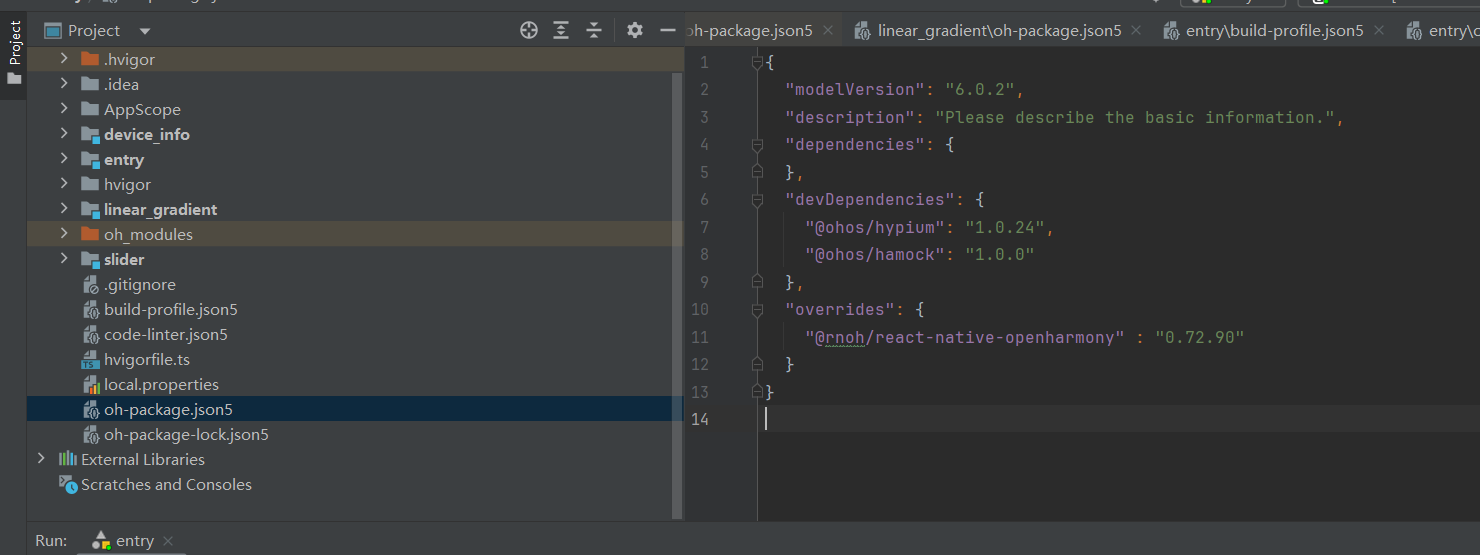
4.1 配置 oh-package.json5
打开 harmony/oh-package.json5,添加 overrides 配置:
{
  "overrides": {
    "@rnoh/react-native-openharmony": "0.72.90"
  }
}
4.2 配置 entry/oh-package.json5
打开 harmony/entry/oh-package.json5,添加依赖:
{
  "dependencies": {
    "@react-native-ohos/react-native-blurhash": "file:../../node_modules/@react-native-ohos/react-native-blurhash/harmony/blurhash.har"
  }
}
4.3 配置 CMakeLists.txt
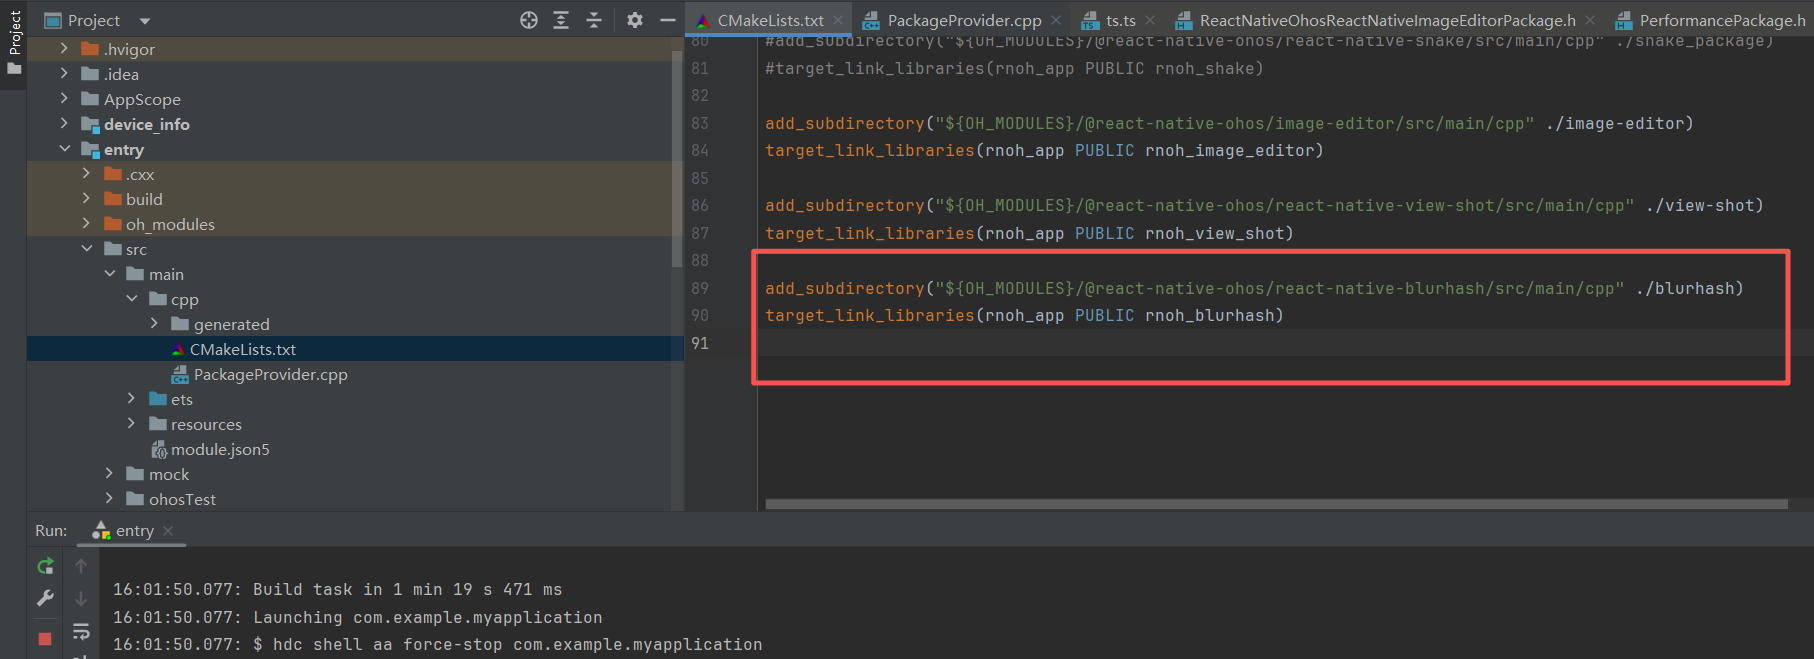
打开 harmony/entry/src/main/cpp/CMakeLists.txt,添加:
set(OH_MODULES "${CMAKE_CURRENT_SOURCE_DIR}/../../../oh_modules")

# RNOH_BEGIN: manual_package_linking_1
add_subdirectory("${OH_MODULES}/@react-native-ohos/react-native-blurhash/src/main/cpp" ./blurhash)
# RNOH_END: manual_package_linking_1

# RNOH_BEGIN: manual_package_linking_2
target_link_libraries(rnoh_app PUBLIC rnoh_blurhash)
# RNOH_END: manual_package_linking_2
4.4 配置 PackageProvider.cpp
打开 harmony/entry/src/main/cpp/PackageProvider.cpp,添加:
#include "RNOH/PackageProvider.h"
#include "generated/RNOHGeneratedPackage.h"
+ #include "BlurhashPackage.h"

using namespace rnoh;

std::vector<std::shared_ptr<Package>> PackageProvider::getPackages(Package::Context ctx) {
    return {
        std::make_shared<RNOHGeneratedPackage>(ctx),
       +  std::make_shared<BlurhashPackage>(ctx),
    };
}
4.5 配置 RNPackagesFactory.ts
打开 harmony/entry/src/main/ets/RNPackagesFactory.ts,添加:
import { BlurhashPackage } from '@react-native-ohos/react-native-blurhash/ts';

export function createRNPackages(ctx: RNPackageContext): RNPackage[] {
  return [
    new BlurhashPackage(ctx)
  ];
}
4.6 同步依赖
在 DevEco Studio 中点击右上角的 sync 按钮,或在命令行执行:
cd harmony/entry
ohpm install
📖 五、API 详解
5.1 Blurhash 组件
核心组件,用于显示 Blurhash 模糊占位图。
基本用法:
import { Blurhash } from 'react-native-blurhash';

<Blurhash
  blurhash="LHK1gsM,rzD+4-xn,vWT~q=_ixS]"
  style={{ width: 300, height: 200 }}
/>
5.2 组件属性
blurhash - Blurhash 字符串
要显示的 Blurhash 编码字符串。
类型: string
必填: 是
<Blurhash
  blurhash="LHK1gsM,rzD+4-xn,vWT~q=_ixS]"
  style={{ width: 300, height: 200 }}
/>
decodeWidth - 解码宽度
解码的目标宽度分辨率。值越高画质越好但性能降低,长列表建议使用 16。
类型: number
默认值: 32
<Blurhash
  blurhash="LHK1gsM,rzD+4-xn,vWT~q=_ixS]"
  decodeWidth={16}
  style={{ width: 300, height: 200 }}
/>
decodeHeight - 解码高度
解码的目标高度分辨率。
类型: number
默认值: 32
<Blurhash
  blurhash="LHK1gsM,rzD+4-xn,vWT~q=_ixS]"
  decodeHeight={16}
  style={{ width: 300, height: 200 }}
/>
decodePunch - 对比度
调整输出图像的对比度。
类型: number
默认值: 1
<Blurhash
  blurhash="LHK1gsM,rzD+4-xn,vWT~q=_ixS]"
  decodePunch={1.5}
  style={{ width: 300, height: 200 }}
/>
decodeAsync - 异步解码
是否在后台线程异步解码,避免阻塞 UI 线程。
类型: boolean
默认值: false
<Blurhash
  blurhash="LHK1gsM,rzD+4-xn,vWT~q=_ixS]"
  decodeAsync={true}
  style={{ width: 300, height: 200 }}
/>
resizeMode - 缩放模式
设置图像的缩放模式。
类型: 'cover' | 'contain' | 'stretch' | 'center'
默认值: 'cover'
注意: 不支持 'repeat'
<Blurhash
  blurhash="LHK1gsM,rzD+4-xn,vWT~q=_ixS]"
  resizeMode="cover"
  style={{ width: 300, height: 200 }}
/>
onLoadStart - 加载开始回调
开始解码时触发。
类型: () => void
<Blurhash
  blurhash="LHK1gsM,rzD+4-xn,vWT~q=_ixS]"
  onLoadStart={() => console.log('开始解码')}
  style={{ width: 300, height: 200 }}
/>
onLoadEnd - 加载完成回调
解码完成并渲染时触发。
类型: () => void
<Blurhash
  blurhash="LHK1gsM,rzD+4-xn,vWT~q=_ixS]"
  onLoadEnd={() => console.log('解码完成')}
  style={{ width: 300, height: 200 }}
/>
onLoadError - 加载错误回调
解码失败时触发。
类型: (message?: string) => void
<Blurhash
  blurhash="invalid"
  onLoadError={(message) => console.log('解码失败:', message)}
  style={{ width: 300, height: 200 }}
/>
5.3 静态方法
Blurhash.encode() - 图片编码
将图片编码为 Blurhash 字符串。
签名:
Blurhash.encode(
  imageUri: string,
  componentsX: number,
  componentsY: number
): Promise<string>
参数:
imageUri: 图片 URIcomponentsX: X 方向组件数(1-9)componentsY: Y 方向组件数(1-9)
返回值: Promise<string> - Blurhash 字符串
const blurhash = await Blurhash.encode(
  'https://example.com/image.jpg',
  4,
  3
);
console.log('编码结果:', blurhash);
Blurhash.isBlurhashValid() - 验证有效性
验证 Blurhash 字符串是否有效。
签名:
Blurhash.isBlurhashValid(blurhash: string): { isValid: boolean }
const result = Blurhash.isBlurhashValid('LHK1gsM,rzD+4-xn,vWT~q=_ixS]');
console.log('是否有效:', result.isValid);
Blurhash.getAverageColor() - 获取平均颜色
获取 Blurhash 的平均颜色。
签名:
Blurhash.getAverageColor(blurhash: string): RGB | undefined
返回值: { r: number, g: number, b: number } | undefined
const color = Blurhash.getAverageColor('LHK1gsM,rzD+4-xn,vWT~q=_ixS]');
console.log('平均颜色:', color); // { r: 123, g: 145, b: 167 }
Blurhash.clearCosineCache() - 清除缓存
清除余弦缓存,释放内存。
签名:
Blurhash.clearCosineCache(): void
Blurhash.clearCosineCache();
💡 六、使用示例
6.1 基础模糊占位图
最简单的使用方式,显示模糊占位图。
适用场景: 图片加载前的占位显示。
import React from 'react';
import { View, StyleSheet } from 'react-native';
import { Blurhash } from '@react-native-ohos/react-native-blurhash';

const BasicBlurhash = () => {
  return (
    <View style={styles.container}>
      <Blurhash
        blurhash="LHK1gsM,rzD+4-xn,vWT~q=_ixS]"
        style={styles.image}
        decodeWidth={32}
        decodeHeight={32}
        decodePunch={1}
      />
    </View>
  );
};

const styles = StyleSheet.create({
  container: {
    flex: 1,
    justifyContent: 'center',
    alignItems: 'center',
    backgroundColor: '#f5f5f5',
  },
  image: {
    width: 300,
    height: 200,
    borderRadius: 12,
  },
});

export default BasicBlurhash;
代码解析:
blurhash为编码后的字符串decodeWidth/Height设置解码分辨率style设置显示尺寸
6.2 图片加载占位
结合图片加载,实现优雅的占位效果。
适用场景: 网络图片加载、列表图片。
import React, { useState } from 'react';
import { View, Image, StyleSheet, ActivityIndicator } from 'react-native';
import { Blurhash } from '@react-native-ohos/react-native-blurhash';

interface ImageWithPlaceholderProps {
  uri: string;
  blurhash: string;
  width: number;
  height: number;
}

const ImageWithPlaceholder: React.FC<ImageWithPlaceholderProps> = ({
  uri,
  blurhash,
  width,
  height,
}) => {
  const [loaded, setLoaded] = useState(false);
  const [error, setError] = useState(false);

  return (
    <View style={[styles.container, { width, height }]}>
      <Blurhash
        blurhash={blurhash}
        decodeWidth={16}
        decodeHeight={16}
        decodeAsync={true}
        style={StyleSheet.absoluteFill}
      />

      {!error && (
        <Image
          source={{ uri }}
          style={StyleSheet.absoluteFill}
          onLoadStart={() => setLoaded(false)}
          onLoadEnd={() => setLoaded(true)}
          onError={() => setError(true)}
        />
      )}

      {!loaded && !error && (
        <View style={styles.loading}>
          <ActivityIndicator color="#fff" />
        </View>
      )}
    </View>
  );
};

const styles = StyleSheet.create({
  container: {
    borderRadius: 12,
    overflow: 'hidden',
  },
  loading: {
    ...StyleSheet.absoluteFillObject,
    justifyContent: 'center',
    alignItems: 'center',
  },
});

export default ImageWithPlaceholder;
代码解析:
- Blurhash 作为背景占位
- Image 覆盖在上层
- 加载完成后图片显示,占位图被遮挡
6.3 图片编码工具

将图片编码为 Blurhash 字符串。
适用场景: 生成 Blurhash 字符串。
import React, { useState } from 'react';
import {
  View,
  Text,
  TextInput,
  TouchableOpacity,
  StyleSheet,
  Alert,
  ActivityIndicator,
} from 'react-native';
import { Blurhash } from '@react-native-ohos/react-native-blurhash';

const EncodeTool = () => {
  const [imageUri, setImageUri] = useState('');
  const [encoding, setEncoding] = useState(false);
  const [result, setResult] = useState('');

  const handleEncode = async () => {
    if (!imageUri) {
      Alert.alert('提示', '请输入图片地址');
      return;
    }

    try {
      setEncoding(true);
      const blurhash = await Blurhash.encode(imageUri, 4, 3);
      console.log('编码结果:', blurhash, '长度:', blurhash?.length);
      if (!blurhash) {
        Alert.alert('失败', '编码返回空结果');
        return;
      }
      setResult(blurhash);
      Alert.alert('成功', `编码完成: ${blurhash.substring(0, 20)}...`);
    } catch (error: any) {
      console.log('编码错误:', error);
      Alert.alert('失败', error?.message || '未知错误');
    } finally {
      setEncoding(false);
    }
  };

  const handleValidate = () => {
    if (!result) {
      Alert.alert('提示', '没有编码结果');
      return;
    }

    const valid = Blurhash.isBlurhashValid(result);
    Alert.alert('验证结果', `是否有效: ${valid.isValid}`);
  };

  const handleGetColor = () => {
    if (!result) {
      Alert.alert('提示', '没有编码结果');
      return;
    }

    const color = Blurhash.getAverageColor(result);
    if (color) {
      Alert.alert('平均颜色', `R:${color.r} G:${color.g} B:${color.b}`);
    }
  };

  return (
    <View style={styles.container}>
      <Text style={styles.title}>Blurhash 编码工具</Text>

      <TextInput
        style={styles.input}
        placeholder="输入图片 URL"
        value={imageUri}
        onChangeText={setImageUri}
        autoCapitalize="none"
      />

      <TouchableOpacity
        style={styles.button}
        onPress={handleEncode}
        disabled={encoding}
      >
        {encoding ? (
          <ActivityIndicator color="#fff" />
        ) : (
          <Text style={styles.buttonText}>编码</Text>
        )}
      </TouchableOpacity>

      {result ? (
        <View style={styles.resultContainer}>
          <Text style={styles.label}>编码结果:</Text>
          <Text style={styles.result}>{result}</Text>

          <View style={styles.previewContainer}>
            <Blurhash
              blurhash={result}
              decodeWidth={32}
              decodeHeight={32}
              style={styles.preview}
            />
          </View>

          <View style={styles.actions}>
            <TouchableOpacity style={styles.actionButton} onPress={handleValidate}>
              <Text style={styles.actionText}>验证</Text>
            </TouchableOpacity>
            <TouchableOpacity style={styles.actionButton} onPress={handleGetColor}>
              <Text style={styles.actionText}>获取颜色</Text>
            </TouchableOpacity>
          </View>
        </View>
      ) : null}
    </View>
  );
};

const styles = StyleSheet.create({
  container: {
    flex: 1,
    padding: 20,
    backgroundColor: '#f5f5f5',
  },
  title: {
    fontSize: 24,
    fontWeight: 'bold',
    color: '#333',
    textAlign: 'center',
    marginBottom: 24,
  },
  input: {
    backgroundColor: '#fff',
    borderRadius: 8,
    padding: 14,
    color: '#333',
    borderWidth: 1,
    borderColor: '#ddd',
    marginBottom: 16,
  },
  button: {
    backgroundColor: '#007AFF',
    padding: 14,
    borderRadius: 8,
    alignItems: 'center',
  },
  buttonText: {
    color: '#fff',
    fontSize: 16,
    fontWeight: '600',
  },
  resultContainer: {
    marginTop: 24,
  },
  label: {
    fontSize: 14,
    color: '#666',
    marginBottom: 8,
  },
  result: {
    fontSize: 14,
    color: '#333',
    backgroundColor: '#fff',
    padding: 16,
    borderRadius: 8,
    borderWidth: 2,
    borderColor: '#007AFF',
  },
  previewContainer: {
    marginTop: 16,
    alignItems: 'center',
  },
  preview: {
    width: 200,
    height: 150,
    borderRadius: 8,
  },
  actions: {
    flexDirection: 'row',
    justifyContent: 'center',
    gap: 12,
    marginTop: 16,
  },
  actionButton: {
    backgroundColor: '#007AFF',
    paddingHorizontal: 24,
    paddingVertical: 10,
    borderRadius: 8,
  },
  actionText: {
    color: '#fff',
    fontWeight: '600',
  },
});

export default EncodeTool;
代码解析:
Blurhash.encode()将图片编码为字符串Blurhash.isBlurhashValid()验证有效性Blurhash.getAverageColor()获取平均颜色
❓ 八、常见问题
8.1 遗留问题
⚠️ 重要提示:当前版本在 HarmonyOS 平台上暂无已知遗留问题。
8.2 常见问题解答
Q1: Blurhash 字符串从哪里获取?
A: 可以使用 Blurhash.encode() 方法从图片生成,或使用在线工具。
Q2: 解码分辨率设置多少合适?
A: 长列表建议 16,其他场景可使用 32。值越大画质越好但性能降低。
Q3: 异步解码有什么好处?
A: 避免阻塞 UI 线程,保持列表滚动流畅。
Q4: 如何生成更清晰的占位图?
A: 增加 componentsX 和 componentsY 参数值(编码时)。
8.3 最佳实践
- 长列表优化:使用
decodeWidth={16}和decodeHeight={16} - 异步解码:设置
decodeAsync={true}避免卡顿 - 缓存管理:大量使用后调用
clearCosineCache()释放内存 - 错误处理:使用
onLoadError处理无效字符串
💻 九、完整示例代码
综合示例
import React, { useState, useCallback } from 'react';
import {
  View,
  Text,
  StyleSheet,
  TouchableOpacity,
  SafeAreaView,
  ScrollView,
  Alert,
  ActivityIndicator,
} from 'react-native';
import { Blurhash } from '@react-native-ohos/react-native-blurhash';

const sampleBlurhashes = [
  { hash: 'LHK1gsM,rzD+4-xn,vWT~q=_ixS]', name: '风景' },
  { hash: 'LKO2?U%2Tw=w]~RBVZRi};RPxuwH', name: '城市' },
  { hash: 'LKO2Nk^2S$S#V?RPRQs,RSRQs,RQ', name: '人物' },
  { hash: 'LEHLh~WB2yk8pyoJadR*.7kCMdnj', name: '抽象' },
];

export default function App() {
  const [decodeAsync, setDecodeAsync] = useState(true);
  const [encoding, setEncoding] = useState(false);

  const onLoadStart = useCallback(() => {
    console.log('开始解码');
  }, []);

  const onLoadEnd = useCallback(() => {
    console.log('解码完成');
  }, []);

  const onLoadError = useCallback((message?: string) => {
    console.log('解码错误:', message);
  }, []);

  const handleValidate = () => {
    const result = Blurhash.isBlurhashValid(sampleBlurhashes[0].hash);
    Alert.alert('验证结果', `是否有效: ${result.isValid}`);
  };

  const handleGetColor = () => {
    const color = Blurhash.getAverageColor(sampleBlurhashes[0].hash);
    if (color) {
      Alert.alert('平均颜色', `RGB(${color.r}, ${color.g}, ${color.b})`);
    }
  };

  const handleClearCache = () => {
    Blurhash.clearCosineCache();
    Alert.alert('成功', '缓存已清除');
  };

  return (
    <SafeAreaView style={styles.container}>
      <ScrollView contentContainerStyle={styles.content}>
        <Text style={styles.title}>Blurhash 示例</Text>

        <View style={styles.toggleContainer}>
          <Text style={styles.toggleLabel}>异步解码:</Text>
          <TouchableOpacity
            style={[styles.toggle, decodeAsync && styles.toggleActive]}
            onPress={() => setDecodeAsync(!decodeAsync)}
          >
            <Text style={styles.toggleText}>{decodeAsync ? '开启' : '关闭'}</Text>
          </TouchableOpacity>
        </View>

        <View style={styles.grid}>
          {sampleBlurhashes.map((item, index) => (
            <View key={index} style={styles.card}>
              <Blurhash
                blurhash={item.hash}
                decodeWidth={32}
                decodeHeight={32}
                decodePunch={1}
                decodeAsync={decodeAsync}
                onLoadStart={onLoadStart}
                onLoadEnd={onLoadEnd}
                onLoadError={onLoadError}
                style={styles.blurhash}
              />
              <Text style={styles.cardName}>{item.name}</Text>
            </View>
          ))}
        </View>

        <View style={styles.actions}>
          <TouchableOpacity style={styles.actionButton} onPress={handleValidate}>
            <Text style={styles.actionText}>验证有效性</Text>
          </TouchableOpacity>
          <TouchableOpacity style={styles.actionButton} onPress={handleGetColor}>
            <Text style={styles.actionText}>获取颜色</Text>
          </TouchableOpacity>
          <TouchableOpacity style={styles.actionButton} onPress={handleClearCache}>
            <Text style={styles.actionText}>清除缓存</Text>
          </TouchableOpacity>
        </View>
      </ScrollView>
    </SafeAreaView>
  );
}

const styles = StyleSheet.create({
  container: {
    flex: 1,
    backgroundColor: '#1a1a2e',
  },
  content: {
    padding: 16,
  },
  title: {
    fontSize: 24,
    fontWeight: 'bold',
    color: '#fff',
    textAlign: 'center',
    marginBottom: 24,
  },
  toggleContainer: {
    flexDirection: 'row',
    alignItems: 'center',
    justifyContent: 'center',
    marginBottom: 24,
  },
  toggleLabel: {
    color: '#888',
    marginRight: 12,
  },
  toggle: {
    backgroundColor: '#16213e',
    paddingHorizontal: 16,
    paddingVertical: 8,
    borderRadius: 8,
  },
  toggleActive: {
    backgroundColor: '#00d4ff',
  },
  toggleText: {
    color: '#fff',
    fontWeight: '600',
  },
  grid: {
    flexDirection: 'row',
    flexWrap: 'wrap',
    gap: 12,
  },
  card: {
    width: '48%',
    backgroundColor: '#16213e',
    borderRadius: 12,
    overflow: 'hidden',
  },
  blurhash: {
    width: '100%',
    height: 120,
  },
  cardName: {
    color: '#fff',
    textAlign: 'center',
    padding: 12,
    fontSize: 14,
  },
  actions: {
    marginTop: 24,
    gap: 12,
  },
  actionButton: {
    backgroundColor: '#4ECDC4',
    padding: 14,
    borderRadius: 8,
    alignItems: 'center',
  },
  actionText: {
    color: '#fff',
    fontSize: 14,
    fontWeight: '600',
  },
});
🔗 十、相关资源

作为“人工智能6S店”的官方数字引擎,为AI开发者与企业提供一个覆盖软硬件全栈、一站式门户。
更多推荐


 0
0 0
0- 0


 已为社区贡献47条内容

所有评论(0)