
ReactNative for OpenHarmony项目鸿蒙化三方库:react-native-netinfo — 网络状态检测
欢迎加入开源鸿蒙跨平台社区:https://openharmonycrossplatform.csdn.net📌:本文基于 React Native 0.72.90 版本进行开发适配。
欢迎加入开源鸿蒙跨平台社区:https://openharmonycrossplatform.csdn.net
📌 开发环境声明:本文基于 React Native 0.72.90 版本进行开发适配
🚀 一、开篇引言
网络状态检测是移动应用开发中的基础能力,无论是显示离线提示、优化数据加载策略,还是实现网络切换时的智能响应,都需要准确获取设备的网络连接状态。本文将带你深入了解如何在 HarmonyOS 平台上集成和使用 @react-native-ohos/netinfo,实现完整的网络状态监控功能。
1.1 你将学到什么?
- ✅ NetInfo 的核心概念与工作原理
- ✅ HarmonyOS 平台的完整集成流程
- ✅ 网络状态检测的多种实现方式
- ✅ NetInfo API 的深度解析
- ✅ 实时网络状态监听的最佳实践
1.2 适用人群
- 正在进行 React Native 鸿蒙化迁移的开发者
- 需要实现网络状态监控功能的应用开发者
- 对跨平台网络编程感兴趣的技术爱好者
📦 二、库概览
2.1 基本信息
| 项目 | 内容 |
|---|---|
| 库名称 | @react-native-ohos/netinfo |
| 原库名称 | @react-native-community/netinfo |
| 版本信息 | 11.1.0 (RN 0.72) / 11.4.2 (RN 0.77) |
| 官方仓库 | https://github.com/react-native-oh-library/react-native-netinfo |
| 开源协议 | MIT |
2.2 核心能力矩阵
| 能力项 | 描述 | HarmonyOS 支持 |
|---|---|---|
| 网络类型检测 | WiFi、蜂窝、以太网等 | ✅ 完全支持 |
| 连接状态检测 | 是否连接、是否可访问互联网 | ✅ 完全支持 |
| 实时状态监听 | 网络状态变化监听 | ✅ 完全支持 |
| WiFi 详细信息 | SSID、信号强度、IP地址等 | ✅ 完全支持 |
| 蜂窝网络信息 | 网络代际、运营商等 | ✅ 完全支持 |
| React Hook API | useNetInfo 等 Hook | ✅ 完全支持 |
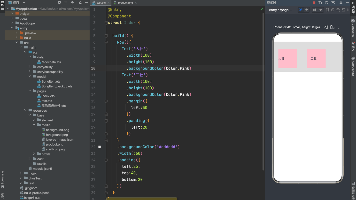
2.3 技术架构图
2.4 典型应用场景
| 场景 | 描述 | 示例 |
|---|---|---|
| 离线提示 | 无网络时显示友好提示 | 📴 当前处于离线状态 |
| 网络切换提示 | WiFi/蜂窝切换时提醒用户 | 🔄 已切换至WiFi网络 |
| 智能加载策略 | 根据网络类型加载不同资源 | 📶 WiFi下加载高清图 |
| 下载任务管理 | 仅在WiFi下执行大文件下载 | 💾 仅WiFi下载 |
| 网络质量监控 | 监控信号强度和网络速度 | 📶 信号强度: 85% |
⚡ 三、快速开始
3.1 环境要求
| 依赖项 | 版本要求 |
|---|---|
| React Native | 0.72.x |
| RNOH (鸿蒙框架) | 0.72.90 |
| HarmonyOS SDK | 6.0.0.47+ (API 20) |
| DevEco Studio | 5.0.3+ / 6.0+ |
| Node.js | 16.18.0+ / 18.x |
3.2 一键安装
创建鸿蒙项目的过程不再进行描述,不懂得看这篇:https://blog.csdn.net/u011178696/article/details/151932277
# RN 0.72 版本
npm install @react-native-ohos/netinfo@11.1.1-rc.1

# RN 0.77 版本
npm install @react-native-ohos/netinfo@11.4.2-rc.1
3.3 验证安装
# 检查 package.json
type package.json | findstr netinfo

# 预期输出
# "@react-native-ohos/netinfo": "^11.1.0-rc.1"
🔧 四、HarmonyOS 集成详解
4.1 配置清单
📌 按顺序完成以下配置,缺一不可
| 步骤 | 配置文件 | 操作 | 重要程度 |
|---|---|---|---|
| 1 | harmony/oh-package.json5 | 添加 overrides | ⭐⭐⭐ |
| 2 | harmony/entry/oh-package.json5 | 添加依赖 | ⭐⭐⭐ |
| 3 | harmony/entry/src/main/cpp/CMakeLists.txt | 配置编译链接 | ⭐⭐⭐ |
| 4 | harmony/entry/src/main/cpp/PackageProvider.cpp | 引入头文件 | ⭐⭐⭐ |
| 5 | harmony/entry/src/main/ets/RNPackagesFactory.ts | 引入包 | ⭐⭐⭐ |
4.2 方式一:HAR 包引入(推荐)
HAR 包引入方式简单快捷,适合大多数场景。
步骤一:配置 overrides
打开 harmony/oh-package.json5,添加以下配置:
{
  "overrides": {
    "@rnoh/react-native-openharmony": "0.72.90"
  }
}
步骤二:添加依赖
打开 harmony/entry/oh-package.json5,添加依赖:
"dependencies": {
  "@rnoh/react-native-openharmony": "0.72.90",
  "@react-native-ohos/netinfo": "file:../../node_modules/@react-native-ohos/netinfo/harmony/netinfo.har"
}
步骤三:同步依赖
点击 DevEco Studio 右上角的 sync 按钮,或者在终端执行:
cd harmony/entry
ohpm install
步骤四:配置 CMakeLists.txt
打开 harmony/entry/src/main/cpp/CMakeLists.txt,添加:
set(OH_MODULES "${CMAKE_CURRENT_SOURCE_DIR}/../../../oh_modules")

add_subdirectory("${OH_MODULES}/@react-native-ohos/netinfo/src/main/cpp" ./netinfo)

target_link_libraries(rnoh_app PUBLIC rnoh_netinfo)
步骤五:修改 PackageProvider.cpp
打开 harmony/entry/src/main/cpp/PackageProvider.cpp,添加:
#include "RNCNetInfoPackage.h"

std::vector<std::shared_ptr<Package>> PackageProvider::getPackages(Package::Context ctx) {
    return {
        std::make_shared<RNOHGeneratedPackage>(ctx),
        std::make_shared<RNCNetInfoPackage>(ctx),
    };
}
步骤六:引入 NetInfoPackage
打开 harmony/entry/src/main/ets/RNPackagesFactory.ts,添加:
import { NetInfoPackage } from '@react-native-ohos/netinfo/ts';

export function createRNPackages(ctx: RNPackageContext): RNPackage[] {
  return [
    new NetInfoPackage(ctx),
  ];
}
4.3 方式二:源码引入
源码引入方式适合需要调试或修改原生代码的场景。
步骤一:配置 overrides
打开 harmony/oh-package.json5,添加以下配置:
{
  "overrides": {
    "@rnoh/react-native-openharmony": "0.72.90"
  }
}
步骤二:复制源码模块
把 node_modules/@react-native-ohos/netinfo/harmony/netinfo 复制到 harmony/ 目录下。
步骤三:添加模块配置
打开 harmony/build-profile.json5,添加模块:
modules: [
  {
    name: 'netinfo',
    srcPath: './netinfo',
  }
]
步骤四:修改 netinfo/oh-package.json5
打开 harmony/netinfo/oh-package.json5,修改 react-native-openharmony 版本与项目版本一致:
{
  "dependencies": {
    "@rnoh/react-native-openharmony": "0.72.90"
  }
}
步骤五:添加依赖
打开 harmony/entry/oh-package.json5,添加依赖:
"dependencies": {
  "@rnoh/react-native-openharmony": "0.72.90",
  "@react-native-ohos/netinfo": "file:../netinfo"
}
步骤六:同步依赖
点击 DevEco Studio 右上角的 sync 按钮,或者在终端执行:
cd harmony/entry
ohpm install
步骤七:配置 CMakeLists.txt
打开 harmony/entry/src/main/cpp/CMakeLists.txt,添加:
set(OH_MODULES "${CMAKE_CURRENT_SOURCE_DIR}/../../../oh_modules")

add_subdirectory("${OH_MODULES}/@react-native-ohos/netinfo/src/main/cpp" ./netinfo)

target_link_libraries(rnoh_app PUBLIC rnoh_netinfo)
步骤八:修改 PackageProvider.cpp
打开 harmony/entry/src/main/cpp/PackageProvider.cpp,添加:
#include "RNCNetInfoPackage.h"

std::vector<std::shared_ptr<Package>> PackageProvider::getPackages(Package::Context ctx) {
    return {
        std::make_shared<RNOHGeneratedPackage>(ctx),
        std::make_shared<RNCNetInfoPackage>(ctx),
    };
}
步骤九:引入 NetInfoPackage
打开 harmony/entry/src/main/ets/RNPackagesFactory.ts,添加:
import { NetInfoPackage } from '@react-native-ohos/netinfo/ts';

export function createRNPackages(ctx: RNPackageContext): RNPackage[] {
  return [
    new NetInfoPackage(ctx),
  ];
}
4.4 同步并运行
点击 DevEco Studio 右上角的 sync 按钮,然后编译、运行即可。
💻 五、实战演练

场景:网络状态监控面板
需求描述:实现一个网络状态监控面板,实时显示当前网络类型、连接状态、WiFi详细信息等。
实现思路:
- 使用
useNetInfo()Hook 获取实时网络状态 - 使用
NetInfo.fetch()获取详细网络信息 - 使用
NetInfo.addEventListener()监听网络变化
实现代码:
import React, { useState, useEffect } from 'react';
import {
  View,
  Text,
  StyleSheet,
  ScrollView,
  SafeAreaView,
} from 'react-native';
import NetInfo, { useNetInfo } from '@react-native-community/netinfo';

export default function App() {
  const netInfo = useNetInfo();
  const [detailedInfo, setDetailedInfo] = useState<any>(null);

  useEffect(() => {
    NetInfo.fetch().then((state) => {
      setDetailedInfo(state);
    });

    const unsubscribe = NetInfo.addEventListener((state) => {
      setDetailedInfo(state);
    });

    return () => unsubscribe();
  }, []);

  const renderNetworkType = () => {
    const typeMap: Record<string, { icon: string; name: string; color: string }> = {
      wifi: { icon: '📶', name: 'WiFi', color: '#4CAF50' },
      cellular: { icon: '📱', name: '蜂窝网络', color: '#2196F3' },
      ethernet: { icon: '🔌', name: '以太网', color: '#FF9800' },
      none: { icon: '📴', name: '无网络', color: '#F44336' },
      unknown: { icon: '❓', name: '未知', color: '#9E9E9E' },
    };
    const type = typeMap[netInfo.type] || typeMap.unknown;
    return (
      <View style={[styles.typeCard, { borderColor: type.color }]}>
        <Text style={styles.typeIcon}>{type.icon}</Text>
        <Text style={[styles.typeName, { color: type.color }]}>{type.name}</Text>
      </View>
    );
  };

  const renderConnectionStatus = () => (
    <View style={styles.statusSection}>
      <Text style={styles.sectionTitle}>连接状态</Text>
      <View style={styles.statusRow}>
        <Text style={styles.statusLabel}>是否连接</Text>
        <Text style={[styles.statusValue, { color: netInfo.isConnected ? '#4CAF50' : '#F44336' }]}>
          {netInfo.isConnected ? '✅ 已连接' : '❌ 未连接'}
        </Text>
      </View>
      <View style={styles.statusRow}>
        <Text style={styles.statusLabel}>互联网可达</Text>
        <Text style={[styles.statusValue, { color: netInfo.isInternetReachable ? '#4CAF50' : '#F44336' }]}>
          {netInfo.isInternetReachable ? '✅ 可达' : '❌ 不可达'}
        </Text>
      </View>
      <View style={styles.statusRow}>
        <Text style={styles.statusLabel}>WiFi开关</Text>
        <Text style={styles.statusValue}>
          {netInfo.isWifiEnabled ? '🟢 已开启' : '🔴 已关闭'}
        </Text>
      </View>
    </View>
  );

  const renderWifiDetails = () => {
    if (netInfo.type !== 'wifi' || !detailedInfo?.details) return null;
    const details = detailedInfo.details;

    return (
      <View style={styles.detailSection}>
        <Text style={styles.sectionTitle}>WiFi 详情</Text>
        <View style={styles.detailRow}>
          <Text style={styles.detailLabel}>SSID</Text>
          <Text style={styles.detailValue}>{details.ssid || '未知'}</Text>
        </View>
        <View style={styles.detailRow}>
          <Text style={styles.detailLabel}>信号强度</Text>
          <Text style={styles.detailValue}>{details.strength || 0}%</Text>
        </View>
        <View style={styles.detailRow}>
          <Text style={styles.detailLabel}>IP地址</Text>
          <Text style={styles.detailValue}>{details.ipAddress || '未知'}</Text>
        </View>
        <View style={styles.detailRow}>
          <Text style={styles.detailLabel}>子网掩码</Text>
          <Text style={styles.detailValue}>{details.subnet || '未知'}</Text>
        </View>
        <View style={styles.detailRow}>
          <Text style={styles.detailLabel}>频率</Text>
          <Text style={styles.detailValue}>{details.frequency ? `${details.frequency} MHz` : '未知'}</Text>
        </View>
        <View style={styles.detailRow}>
          <Text style={styles.detailLabel}>链路速度</Text>
          <Text style={styles.detailValue}>{details.linkSpeed ? `${details.linkSpeed} Mbps` : '未知'}</Text>
        </View>
      </View>
    );
  };

  const renderCellularDetails = () => {
    if (netInfo.type !== 'cellular' || !detailedInfo?.details) return null;
    const details = detailedInfo.details;

    return (
      <View style={styles.detailSection}>
        <Text style={styles.sectionTitle}>蜂窝网络详情</Text>
        <View style={styles.detailRow}>
          <Text style={styles.detailLabel}>网络代际</Text>
          <Text style={styles.detailValue}>{details.cellularGeneration || '未知'}</Text>
        </View>
        <View style={styles.detailRow}>
          <Text style={styles.detailLabel}>运营商</Text>
          <Text style={styles.detailValue}>{details.carrier || '未知'}</Text>
        </View>
        <View style={styles.detailRow}>
          <Text style={styles.detailLabel}>高成本连接</Text>
          <Text style={styles.detailValue}>{details.isConnectionExpensive ? '是' : '否'}</Text>
        </View>
      </View>
    );
  };

  return (
    <SafeAreaView style={styles.container}>
      <ScrollView style={styles.content} contentContainerStyle={styles.scrollContent}>
        <Text style={styles.title}>网络状态监控</Text>

        {renderNetworkType()}
        {renderConnectionStatus()}
        {renderWifiDetails()}
        {renderCellularDetails()}
      </ScrollView>
    </SafeAreaView>
  );
}

const styles = StyleSheet.create({
  container: {
    flex: 1,
    backgroundColor: '#f5f5f5',
  },
  content: {
    flex: 1,
  },
  scrollContent: {
    padding: 20,
  },
  title: {
    fontSize: 24,
    fontWeight: 'bold',
    color: '#333',
    textAlign: 'center',
    marginBottom: 20,
  },
  typeCard: {
    backgroundColor: '#fff',
    borderRadius: 12,
    padding: 20,
    alignItems: 'center',
    marginBottom: 16,
    borderWidth: 2,
  },
  typeIcon: {
    fontSize: 48,
    marginBottom: 8,
  },
  typeName: {
    fontSize: 20,
    fontWeight: 'bold',
  },
  statusSection: {
    backgroundColor: '#fff',
    borderRadius: 12,
    padding: 16,
    marginBottom: 16,
  },
  sectionTitle: {
    fontSize: 18,
    fontWeight: 'bold',
    color: '#333',
    marginBottom: 12,
  },
  statusRow: {
    flexDirection: 'row',
    justifyContent: 'space-between',
    paddingVertical: 8,
    borderBottomWidth: 1,
    borderBottomColor: '#f0f0f0',
  },
  statusLabel: {
    fontSize: 14,
    color: '#666',
  },
  statusValue: {
    fontSize: 14,
    fontWeight: '500',
  },
  detailSection: {
    backgroundColor: '#fff',
    borderRadius: 12,
    padding: 16,
    marginBottom: 16,
  },
  detailRow: {
    flexDirection: 'row',
    justifyContent: 'space-between',
    paddingVertical: 8,
    borderBottomWidth: 1,
    borderBottomColor: '#f0f0f0',
  },
  detailLabel: {
    fontSize: 14,
    color: '#666',
  },
  detailValue: {
    fontSize: 14,
    fontWeight: '500',
    color: '#333',
  },
});
📖 六、API 详解
6.1 NetInfoStateType 网络类型
网络类型的枚举值,表示当前设备连接的网络类型。
| 类型 | 说明 | HarmonyOS 支持 |
|---|---|---|
none |
无有效网络连接 | ✅ |
unknown |
网络状态未知 | ✅ |
cellular |
蜂窝数据网络 | ✅ |
wifi |
WiFi无线网络 | ✅ |
ethernet |
有线以太网 | ✅ |
bluetooth |
蓝牙网络 | ❌ |
wimax |
WiMax网络 | ❌ |
vpn |
VPN网络 | ✅ |
other |
其他网络类型 | ✅ |
调用示例:
import NetInfo from '@react-native-community/netinfo';

NetInfo.fetch().then((state) => {
  console.log('网络类型:', state.type);

  switch (state.type) {
    case 'wifi':
      console.log('当前使用WiFi网络');
      break;
    case 'cellular':
      console.log('当前使用蜂窝网络');
      break;
    case 'none':
      console.log('当前无网络连接');
      break;
    case 'ethernet':
      console.log('当前使用有线网络');
      break;
    case 'vpn':
      console.log('当前使用VPN网络');
      break;
    default:
      console.log('网络类型:', state.type);
  }
});
6.2 NetInfoCellularGeneration 蜂窝网络代际
蜂窝网络代际的枚举值,表示当前蜂窝网络的类型。
| 类型 | 说明 | HarmonyOS 支持 |
|---|---|---|
null |
未连接或无法确定类型 | ✅ |
2g |
2G网络 | ✅ |
3g |
3G网络 | ✅ |
4g |
4G网络 | ✅ |
5g |
5G网络 | ✅ |
调用示例:
import NetInfo from '@react-native-community/netinfo';

NetInfo.fetch().then((state) => {
  if (state.type === 'cellular' && state.details) {
    const generation = state.details.cellularGeneration;

    switch (generation) {
      case '5g':
        console.log('当前使用5G网络,速度最快');
        break;
      case '4g':
        console.log('当前使用4G网络,速度较快');
        break;
      case '3g':
        console.log('当前使用3G网络,速度一般');
        break;
      case '2g':
        console.log('当前使用2G网络,速度较慢');
        break;
      default:
        console.log('无法确定蜂窝网络类型');
    }
  }
});
6.3 NetInfoState 网络状态对象
网络状态对象,包含当前网络的所有信息。
| 属性 | 类型 | 说明 | HarmonyOS 支持 |
|---|---|---|---|
type |
NetInfoStateType | 当前网络类型 | ✅ |
isConnected |
boolean| null | 是否已连接网络 | ✅ |
isInternetReachable |
boolean| null | 互联网是否可达 | ✅ |
isWifiEnabled |
boolean | WiFi是否开启 | ✅ |
details |
object | 详细信息(取决于网络类型) | ✅ |
调用示例:
import NetInfo from '@react-native-community/netinfo';

NetInfo.fetch().then((state) => {
  console.log('=== 网络状态信息 ===');
  console.log('网络类型:', state.type);
  console.log('是否连接:', state.isConnected);
  console.log('互联网可达:', state.isInternetReachable);
  console.log('WiFi开关:', state.isWifiEnabled);
  console.log('详细信息:', JSON.stringify(state.details, null, 2));
});
6.4 WiFi 详细信息
当网络类型为 wifi 时,details 对象包含以下属性:
| 属性 | 类型 | 说明 | HarmonyOS 支持 |
|---|---|---|---|
isConnectionExpensive |
boolean | 是否为高成本连接 | ✅ |
ssid |
string | WiFi名称 | ✅ |
bssid |
string | WiFi BSSID | ✅ |
strength |
number | 信号强度 (0-100) | ✅ |
ipAddress |
string | IP地址 | ✅ |
subnet |
string | 子网掩码 | ✅ |
frequency |
number | 频率 (MHz) | ✅ |
linkSpeed |
number | 链路速度 (Mbps) | ✅ |
rxLinkSpeed |
number | 接收链路速度 (Mbps) | ✅ |
txLinkSpeed |
number | 发送链路速度 (Mbps) | ✅ |
调用示例:
import NetInfo from '@react-native-community/netinfo';

NetInfo.fetch().then((state) => {
  if (state.type === 'wifi' && state.details) {
    const wifi = state.details;

    console.log('=== WiFi 详细信息 ===');
    console.log('WiFi名称:', wifi.ssid);
    console.log('信号强度:', wifi.strength + '%');
    console.log('IP地址:', wifi.ipAddress);
    console.log('子网掩码:', wifi.subnet);
    console.log('频率:', wifi.frequency + ' MHz');
    console.log('链路速度:', wifi.linkSpeed + ' Mbps');
    console.log('接收速度:', wifi.rxLinkSpeed + ' Mbps');
    console.log('发送速度:', wifi.txLinkSpeed + ' Mbps');
    console.log('高成本连接:', wifi.isConnectionExpensive ? '是' : '否');

    if (wifi.strength && wifi.strength > 80) {
      console.log('信号强度优秀');
    } else if (wifi.strength && wifi.strength > 50) {
      console.log('信号强度良好');
    } else {
      console.log('信号强度较弱');
    }
  }
});
6.5 蜂窝网络详细信息
当网络类型为 cellular 时,details 对象包含以下属性:
| 属性 | 类型 | 说明 | HarmonyOS 支持 |
|---|---|---|---|
isConnectionExpensive |
boolean | 是否高成本 | ✅ |
cellularGeneration |
NetInfoCellularGeneration | 网络代际 | ✅ |
carrier |
string | 运营商名称 | ✅ |
调用示例:
import NetInfo from '@react-native-community/netinfo';

NetInfo.fetch().then((state) => {
  if (state.type === 'cellular' && state.details) {
    const cellular = state.details;

    console.log('=== 蜂窝网络详细信息 ===');
    console.log('网络代际:', cellular.cellularGeneration);
    console.log('运营商:', cellular.carrier);
    console.log('高成本连接:', cellular.isConnectionExpensive ? '是' : '否');

    if (cellular.cellularGeneration === '5g') {
      console.log('建议: 可进行高清视频通话');
    } else if (cellular.cellularGeneration === '4g') {
      console.log('建议: 可流畅观看视频');
    } else {
      console.log('建议: 建议使用WiFi进行大流量操作');
    }
  }
});
6.6 NetInfo.fetch()
获取当前网络状态,返回一个 Promise。
语法:
NetInfo.fetch(): Promise<NetInfoState>
调用示例:
import NetInfo from '@react-native-community/netinfo';

// 基本用法
NetInfo.fetch().then((state) => {
  console.log('网络类型:', state.type);
  console.log('是否连接:', state.isConnected);
});

// 使用 async/await
async function checkNetwork() {
  try {
    const state = await NetInfo.fetch();
    if (state.isConnected) {
      console.log('网络已连接');
      return true;
    } else {
      console.log('网络未连接');
      return false;
    }
  } catch (error) {
    console.error('获取网络状态失败:', error);
    return false;
  }
}

// 根据网络状态执行不同操作
async function loadData() {
  const state = await NetInfo.fetch();

  if (!state.isConnected) {
    console.log('无网络连接,显示离线内容');
    return;
  }

  if (state.type === 'wifi') {
    console.log('WiFi环境,加载高清资源');
  } else if (state.type === 'cellular') {
    console.log('蜂窝网络,加载标清资源');
  }
}
6.7 NetInfo.refresh()
刷新网络状态并返回最新信息。
语法:
NetInfo.refresh(): Promise<NetInfoState>
调用示例:
import NetInfo from '@react-native-community/netinfo';

// 基本用法
NetInfo.refresh().then((state) => {
  console.log('刷新后的网络状态:', state.type);
});

// 网络请求失败后刷新状态
async function fetchWithRetry(url: string) {
  try {
    const response = await fetch(url);
    return response.json();
  } catch (error) {
    console.log('请求失败,检查网络状态');
    const state = await NetInfo.refresh();

    if (!state.isConnected) {
      throw new Error('网络未连接');
    }

    if (!state.isInternetReachable) {
      throw new Error('互联网不可达');
    }

    throw error;
  }
}

// 手动刷新网络状态
async function refreshNetworkStatus() {
  const state = await NetInfo.refresh();

  console.log('=== 刷新后的网络状态 ===');
  console.log('类型:', state.type);
  console.log('连接:', state.isConnected);
  console.log('互联网可达:', state.isInternetReachable);

  return state;
}
6.8 NetInfo.addEventListener()
添加网络状态变化监听器。
语法:
NetInfo.addEventListener(callback: (state: NetInfoState) => void): () => void
返回值:返回一个取消订阅的函数。
调用示例:
import NetInfo from '@react-native-community/netinfo';
import { useEffect } from 'react';

// 在 React 组件中使用
function NetworkMonitor() {
  useEffect(() => {
    const unsubscribe = NetInfo.addEventListener((state) => {
      console.log('网络状态变化:', state.type);
      console.log('是否连接:', state.isConnected);

      if (state.isConnected) {
        console.log('网络已连接');
      } else {
        console.log('网络已断开');
      }
    });

    return () => {
      unsubscribe();
    };
  }, []);

  return null;
}

// 监听特定网络类型变化
function WifiMonitor() {
  useEffect(() => {
    const unsubscribe = NetInfo.addEventListener((state) => {
      if (state.type === 'wifi') {
        console.log('WiFi已连接');
        if (state.details) {
          console.log('WiFi名称:', state.details.ssid);
          console.log('信号强度:', state.details.strength);
        }
      } else if (state.type === 'cellular') {
        console.log('已切换到蜂窝网络');
      } else if (state.type === 'none') {
        console.log('网络已断开');
      }
    });

    return () => unsubscribe();
  }, []);

  return null;
}

// 监听连接状态变化并提示用户
function ConnectionAlert() {
  useEffect(() => {
    let wasConnected = true;

    const unsubscribe = NetInfo.addEventListener((state) => {
      if (wasConnected && !state.isConnected) {
        console.log('⚠️ 网络连接已断开');
      } else if (!wasConnected && state.isConnected) {
        console.log('✅ 网络已恢复连接');
      }
      wasConnected = state.isConnected || false;
    });

    return () => unsubscribe();
  }, []);

  return null;
}
6.9 useNetInfo() Hook
React Hook,用于获取最新的网络状态。
语法:
const netInfo: NetInfoState = useNetInfo()
调用示例:
import React from 'react';
import { View, Text, StyleSheet } from 'react-native';
import { useNetInfo } from '@react-native-community/netinfo';

// 基本用法
function NetworkStatus() {
  const netInfo = useNetInfo();

  return (
    <View style={styles.container}>
      <Text>网络类型: {netInfo.type}</Text>
      <Text>是否连接: {netInfo.isConnected ? '是' : '否'}</Text>
      <Text>互联网可达: {netInfo.isInternetReachable ? '是' : '否'}</Text>
    </View>
  );
}

// 根据网络状态显示不同内容
function SmartContent() {
  const netInfo = useNetInfo();

  if (!netInfo.isConnected) {
    return (
      <View style={styles.offlineContainer}>
        <Text style={styles.offlineText}>📴 当前处于离线状态</Text>
      </View>
    );
  }

  return (
    <View style={styles.onlineContainer}>
      <Text style={styles.onlineText}>✅ 网络已连接 ({netInfo.type})</Text>
    </View>
  );
}

// 显示详细网络信息
function NetworkDetails() {
  const netInfo = useNetInfo();

  return (
    <View style={styles.container}>
      <Text style={styles.title}>网络详情</Text>
      <Text>类型: {netInfo.type}</Text>
      <Text>连接: {netInfo.isConnected ? '✅' : '❌'}</Text>
      <Text>互联网: {netInfo.isInternetReachable ? '✅' : '❌'}</Text>

      {netInfo.type === 'wifi' && netInfo.details && (
        <>
          <Text>SSID: {netInfo.details.ssid}</Text>
          <Text>信号: {netInfo.details.strength}%</Text>
        </>
      )}

      {netInfo.type === 'cellular' && netInfo.details && (
        <>
          <Text>代际: {netInfo.details.cellularGeneration}</Text>
          <Text>运营商: {netInfo.details.carrier}</Text>
        </>
      )}
    </View>
  );
}

const styles = StyleSheet.create({
  container: {
    padding: 16,
  },
  title: {
    fontSize: 18,
    fontWeight: 'bold',
    marginBottom: 12,
  },
  offlineContainer: {
    padding: 16,
    backgroundColor: '#ffebee',
  },
  offlineText: {
    color: '#c62828',
  },
  onlineContainer: {
    padding: 16,
    backgroundColor: '#e8f5e9',
  },
  onlineText: {
    color: '#2e7d32',
  },
});
6.10 useNetInfoInstance() Hook
创建独立的网络管理器实例。
语法:
const { netInfo, refresh } = useNetInfoInstance()
返回值:
netInfo: 当前网络状态refresh: 刷新网络状态的函数
调用示例:
import React from 'react';
import { View, Text, TouchableOpacity, StyleSheet } from 'react-native';
import { useNetInfoInstance } from '@react-native-community/netinfo';

// 基本用法
function NetworkManager() {
  const { netInfo, refresh } = useNetInfoInstance();

  return (
    <View style={styles.container}>
      <Text>网络类型: {netInfo.type}</Text>
      <Text>是否连接: {netInfo.isConnected ? '是' : '否'}</Text>

      <TouchableOpacity style={styles.button} onPress={refresh}>
        <Text style={styles.buttonText}>刷新状态</Text>
      </TouchableOpacity>
    </View>
  );
}

// 手动刷新网络状态
function RefreshableNetwork() {
  const { netInfo, refresh } = useNetInfoInstance();

  const handleRefresh = async () => {
    console.log('正在刷新网络状态...');
    await refresh();
    console.log('刷新完成');
  };

  return (
    <View style={styles.container}>
      <Text style={styles.title}>网络状态</Text>
      <Text>类型: {netInfo.type}</Text>
      <Text>连接: {netInfo.isConnected ? '已连接' : '未连接'}</Text>

      <TouchableOpacity style={styles.button} onPress={handleRefresh}>
        <Text style={styles.buttonText}>手动刷新</Text>
      </TouchableOpacity>
    </View>
  );
}

// 创建多个独立实例
function MultiInstanceExample() {
  const instance1 = useNetInfoInstance();
  const instance2 = useNetInfoInstance();

  return (
    <View style={styles.container}>
      <Text style={styles.title}>实例 1</Text>
      <Text>类型: {instance1.netInfo.type}</Text>

      <Text style={styles.title}>实例 2</Text>
      <Text>类型: {instance2.netInfo.type}</Text>

      <TouchableOpacity
        style={styles.button}
        onPress={() => {
          instance1.refresh();
          instance2.refresh();
        }}
      >
        <Text style={styles.buttonText}>刷新所有实例</Text>
      </TouchableOpacity>
    </View>
  );
}

const styles = StyleSheet.create({
  container: {
    padding: 16,
  },
  title: {
    fontSize: 16,
    fontWeight: 'bold',
    marginTop: 12,
    marginBottom: 8,
  },
  button: {
    backgroundColor: '#007AFF',
    padding: 12,
    borderRadius: 8,
    marginTop: 16,
  },
  buttonText: {
    color: '#fff',
    textAlign: 'center',
  },
});
⚠️ 七、注意事项
7.1 HarmonyOS 限制
| 限制项 | 说明 |
|---|---|
| 蓝牙网络 | bluetooth 类型暂不支持 |
| WiMax网络 | wimax 类型暂不支持 |
| WiFi SSID | 需要相应权限才能获取 |
| 信号强度 | 仅 Android/HarmonyOS 支持 |
7.2 权限配置
在 module.json5 中添加必要权限:
{
  "module": {
    "requestPermissions": [
      {
        "name": "ohos.permission.GET_NETWORK_INFO",
        "reason": "获取网络状态信息"
      },
      {
        "name": "ohos.permission.INTERNET",
        "reason": "访问互联网"
      }
    ]
  }
}
7.3 最佳实践
- 使用 Hook 简化代码:优先使用
useNetInfo()Hook - 及时取消订阅:使用
addEventListener时记得取消订阅 - 处理 null 值:
isConnected和isInternetReachable可能为 null - 网络切换优化:根据网络类型优化资源加载策略
🔗 八、相关资源

作为“人工智能6S店”的官方数字引擎,为AI开发者与企业提供一个覆盖软硬件全栈、一站式门户。
更多推荐


 2
2 0
0- 0


 已为社区贡献36条内容

所有评论(0)