
Flutter for OpenHarmony:oauth2 标准化实现第三方登录与 Token 管理(OAuth2.0 认证客户端) 深度解析与鸿蒙适配指南
摘要:本文介绍了如何在OpenHarmony应用中使用Dart官方oauth2库实现安全的第三方认证登录。文章详细讲解了OAuth 2.0协议的三种授权模式(客户端凭据、资源所有者密码和授权码模式),并提供了完整的GitHub授权登录示例代码。重点展示了自动Token刷新、凭证持久化存储等核心功能,同时说明了OpenHarmony平台的网络权限配置和Deep Link回调处理。通过oauth2库的
欢迎加入开源鸿蒙跨平台社区:https://openharmonycrossplatform.csdn.net
前言
在现代 App 开发中,对接第三方认证(如 Google、GitHub 登录)是不可或缺的功能。OAuth 2.0 协议虽然标准,但由于涉及复杂的认证流、Token 刷新和存储,手动实现极易出错。
Dart 官方提供的 oauth2 库封装了完整的客户端认证逻辑,支持多种授权模式,并能自动处理 Access Token 的过期刷新。本文将演示如何在 OpenHarmony 应用中优雅地集成 oauth2,实现安全的身份认证。
一、oauth2 简介
1.1 核心功能
- 多种授权模式:支持 Authorization Code, Client Credentials, Resource Owner Password 等。
- 自动刷新:一旦 Token 过期,自动使用 Refresh Token 获取新凭证。
- 持久化:方便地序列化和反序列化
Credentials对象,以便存储。
1.2 OpenHarmony 适配说明
oauth2 是纯 Dart 实现,通过 http 包进行网络通信。因此在 OpenHarmony 上运行时,只需确保网络权限配置正确即可。
二、配置与准备
2.1 添加依赖
dependencies:
  oauth2: ^2.0.5
  url_launcher: ^6.3.0 # 用于打开系统浏览器进行用户授权
  http: ^1.2.0

dependency_overrides:
  url_launcher_ohos:
    git:
      url: https://atomgit.com/openharmony-sig/flutter_packages.git
      path: packages/url_launcher/url_launcher_ohos
2.2 网络权限
在 module.json5 中添加网络权限:
"requestPermissions": [
   { "name": "ohos.permission.INTERNET" }
]
三、核心授权模式与示例
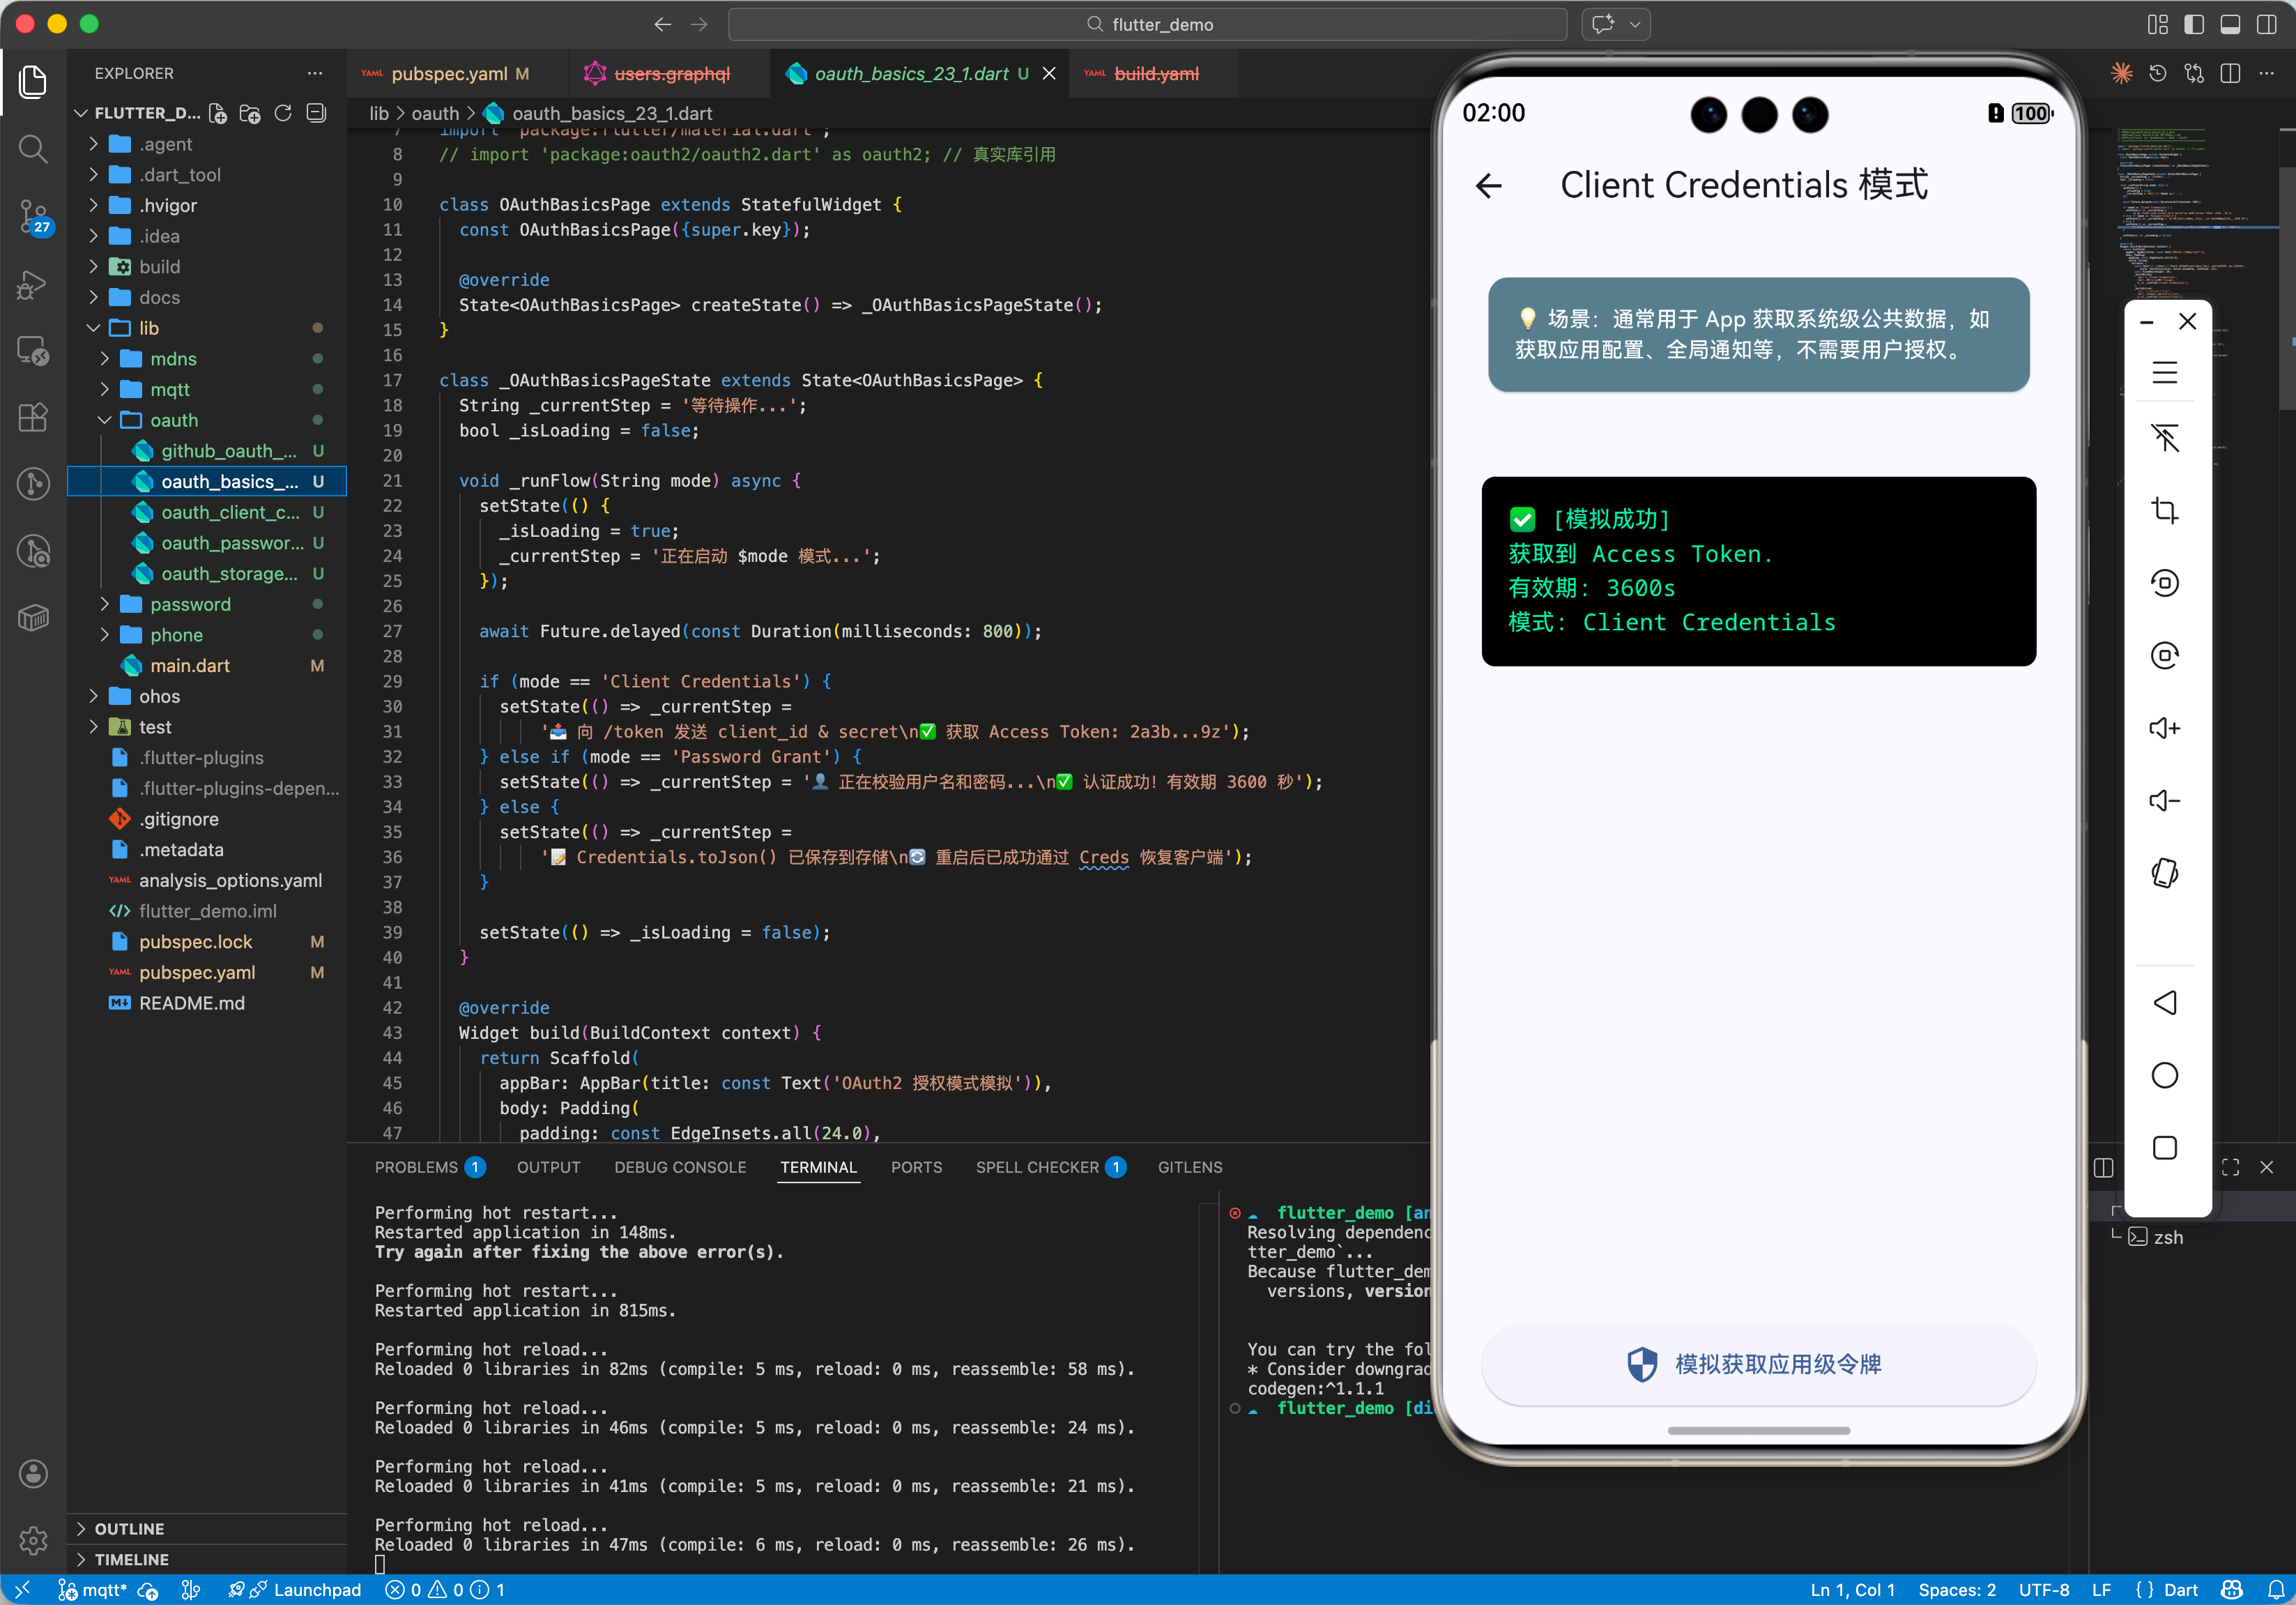
3.1 示例一:客户端凭据模式 (Client Credentials)
适用于服务器对服务器的通信,不涉及用户交互。
import 'package:oauth2/oauth2.dart' as oauth2;

Future<void> clientCredentialsGrant() async {
  final authorizationEndpoint = Uri.parse("https://example.com/oauth2/token");
  final identifier = "my_client_id";
  final secret = "my_client_secret";

  // 创建客户端
  var client = await oauth2.clientCredentialsGrant(
    authorizationEndpoint,
    identifier,
    secret,
  );

  // 使用 client 发起请求,它会自动带上 Bearer Token
  var response = await client.read(Uri.parse("https://example.com/api/resource"));
  print("资源内容: $response");

  // 记得关闭
  client.close();
}
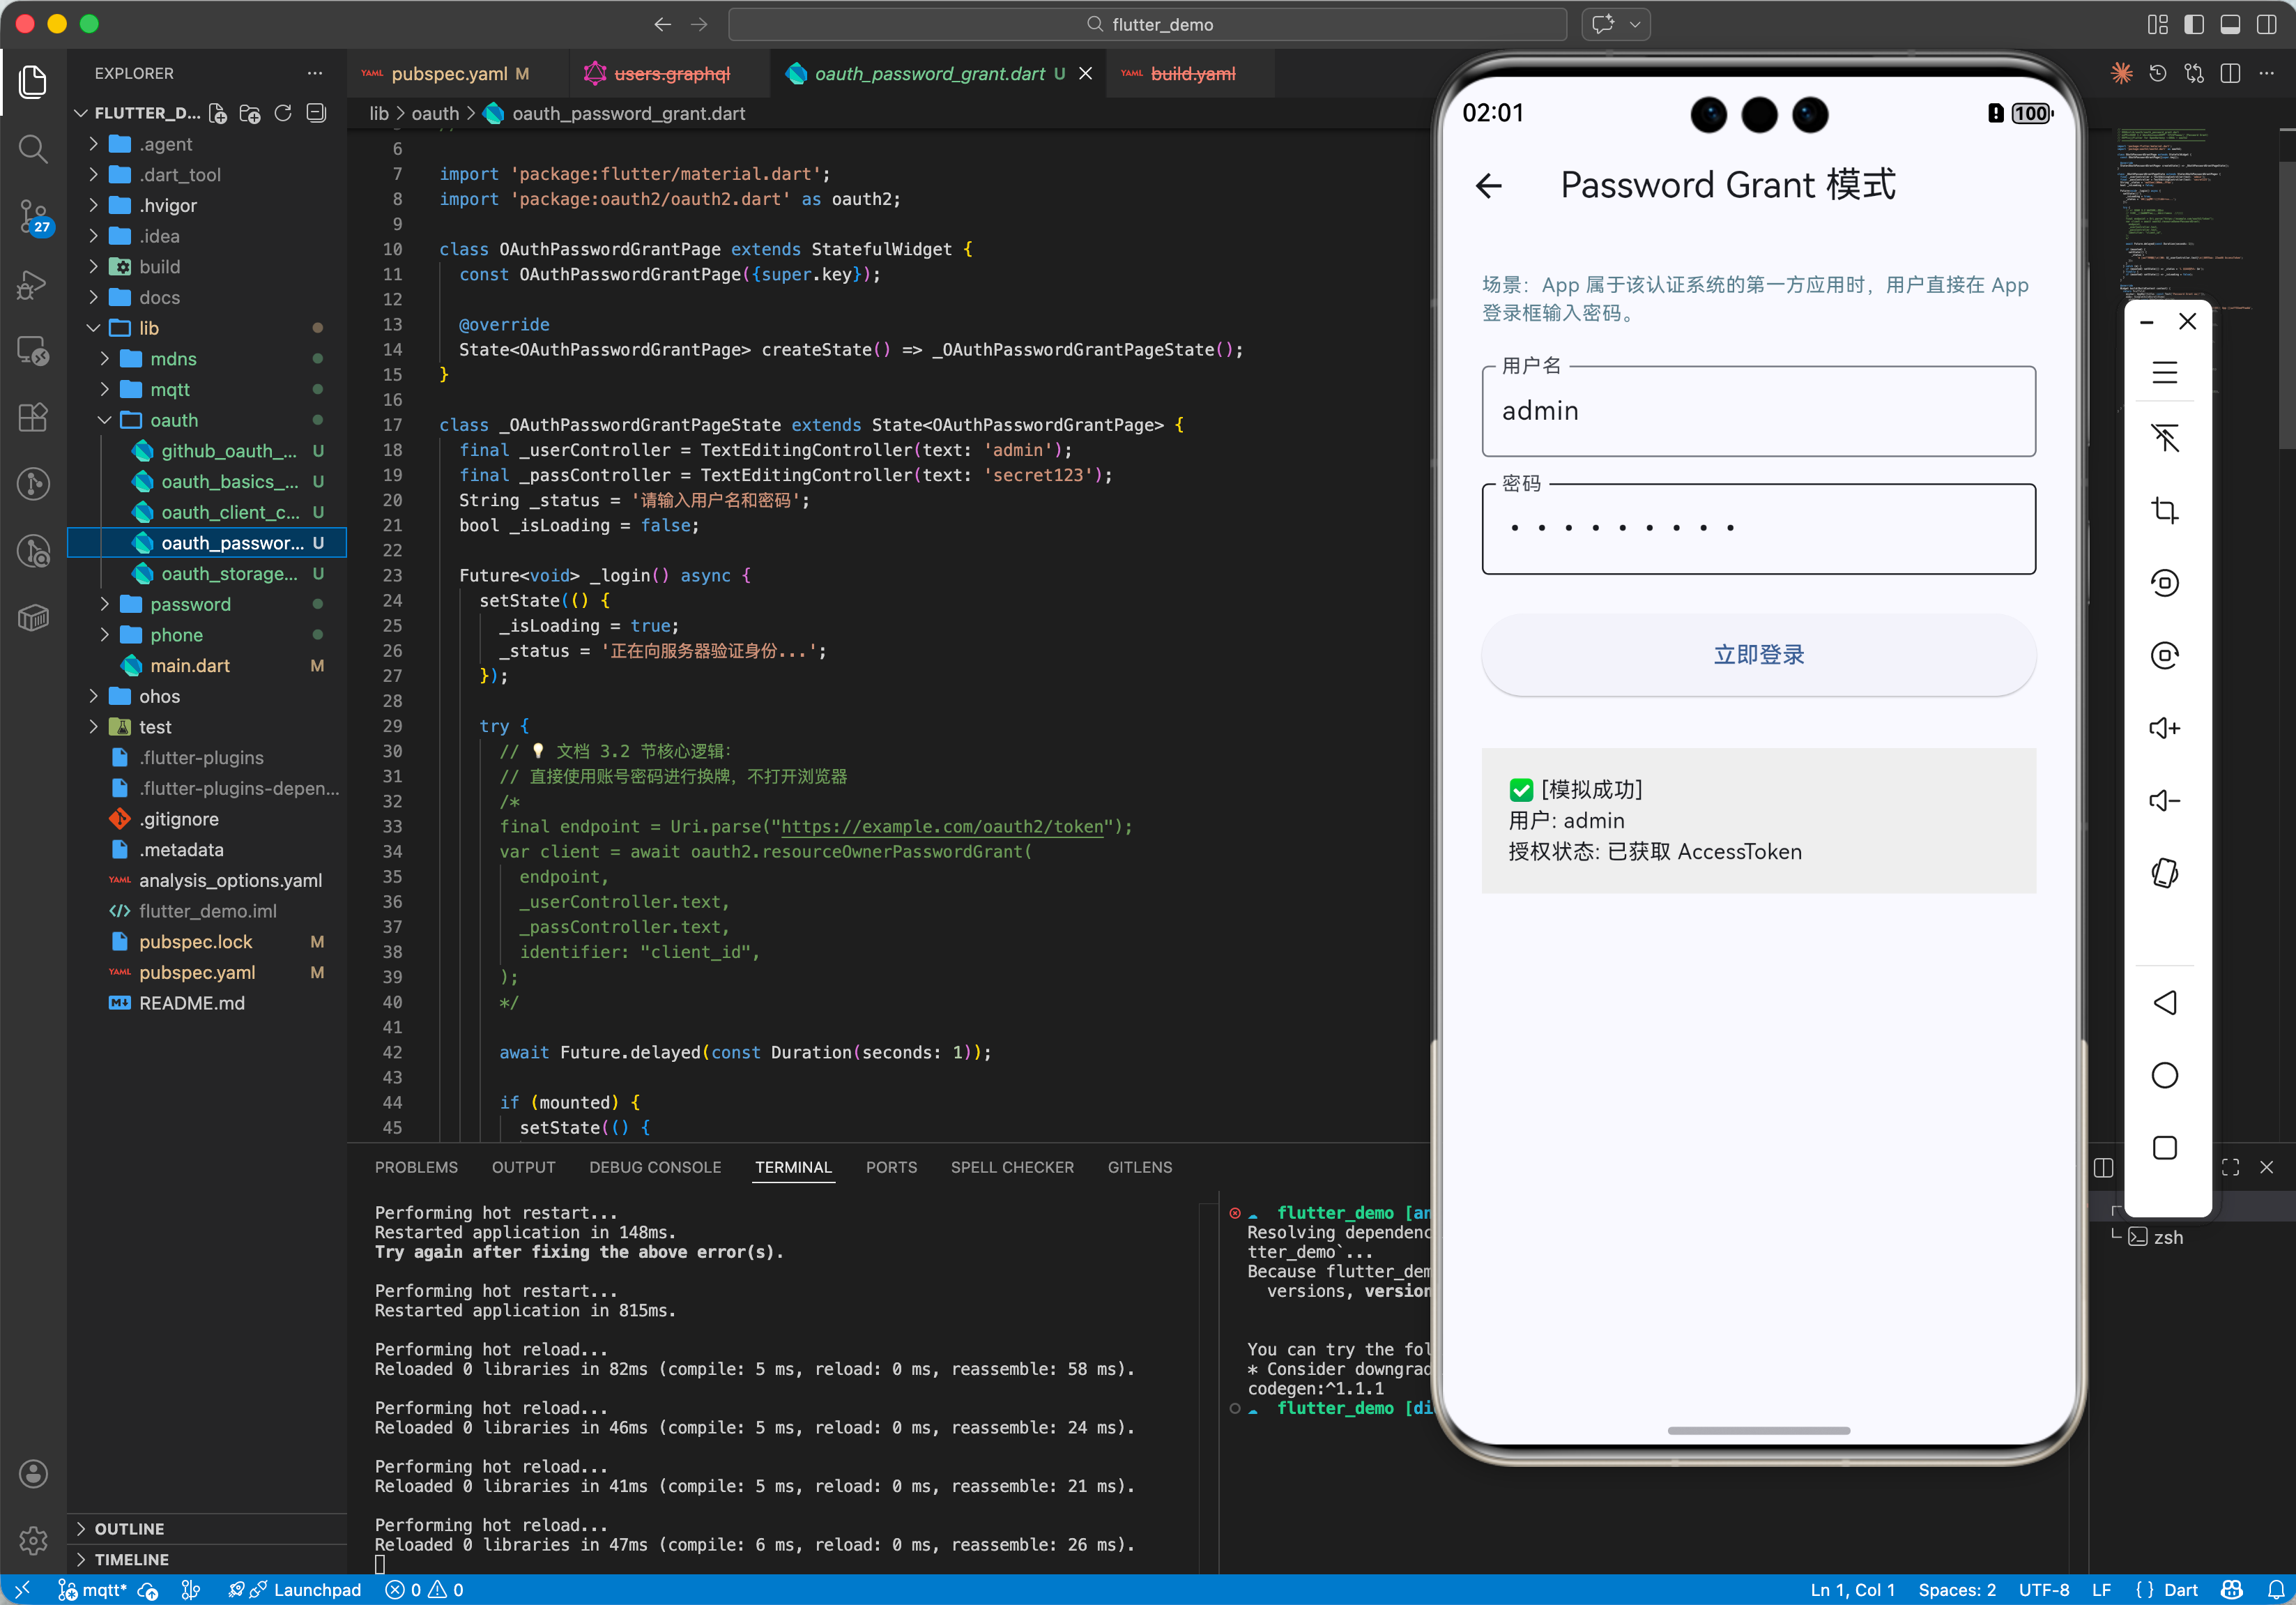
3.2 示例二:资源所有者密码模式 (Resource Owner Password)
用户直接向客户端提供用户名和密码(仅在高度信任的应用中使用)。
import 'package:oauth2/oauth2.dart' as oauth2;

Future<void> passwordGrant(String username, String password) async {
  final endpoint = Uri.parse("https://example.com/oauth2/token");

  try {
    var client = await oauth2.resourceOwnerPasswordGrant(
      endpoint,
      username,
      password,
      identifier: "my_client_id",
      secret: "my_client_secret",
    );

    print("登录成功,AccessToken: ${client.credentials.accessToken}");
  } catch (e) {
    print("认证失败: $e");
  }
}
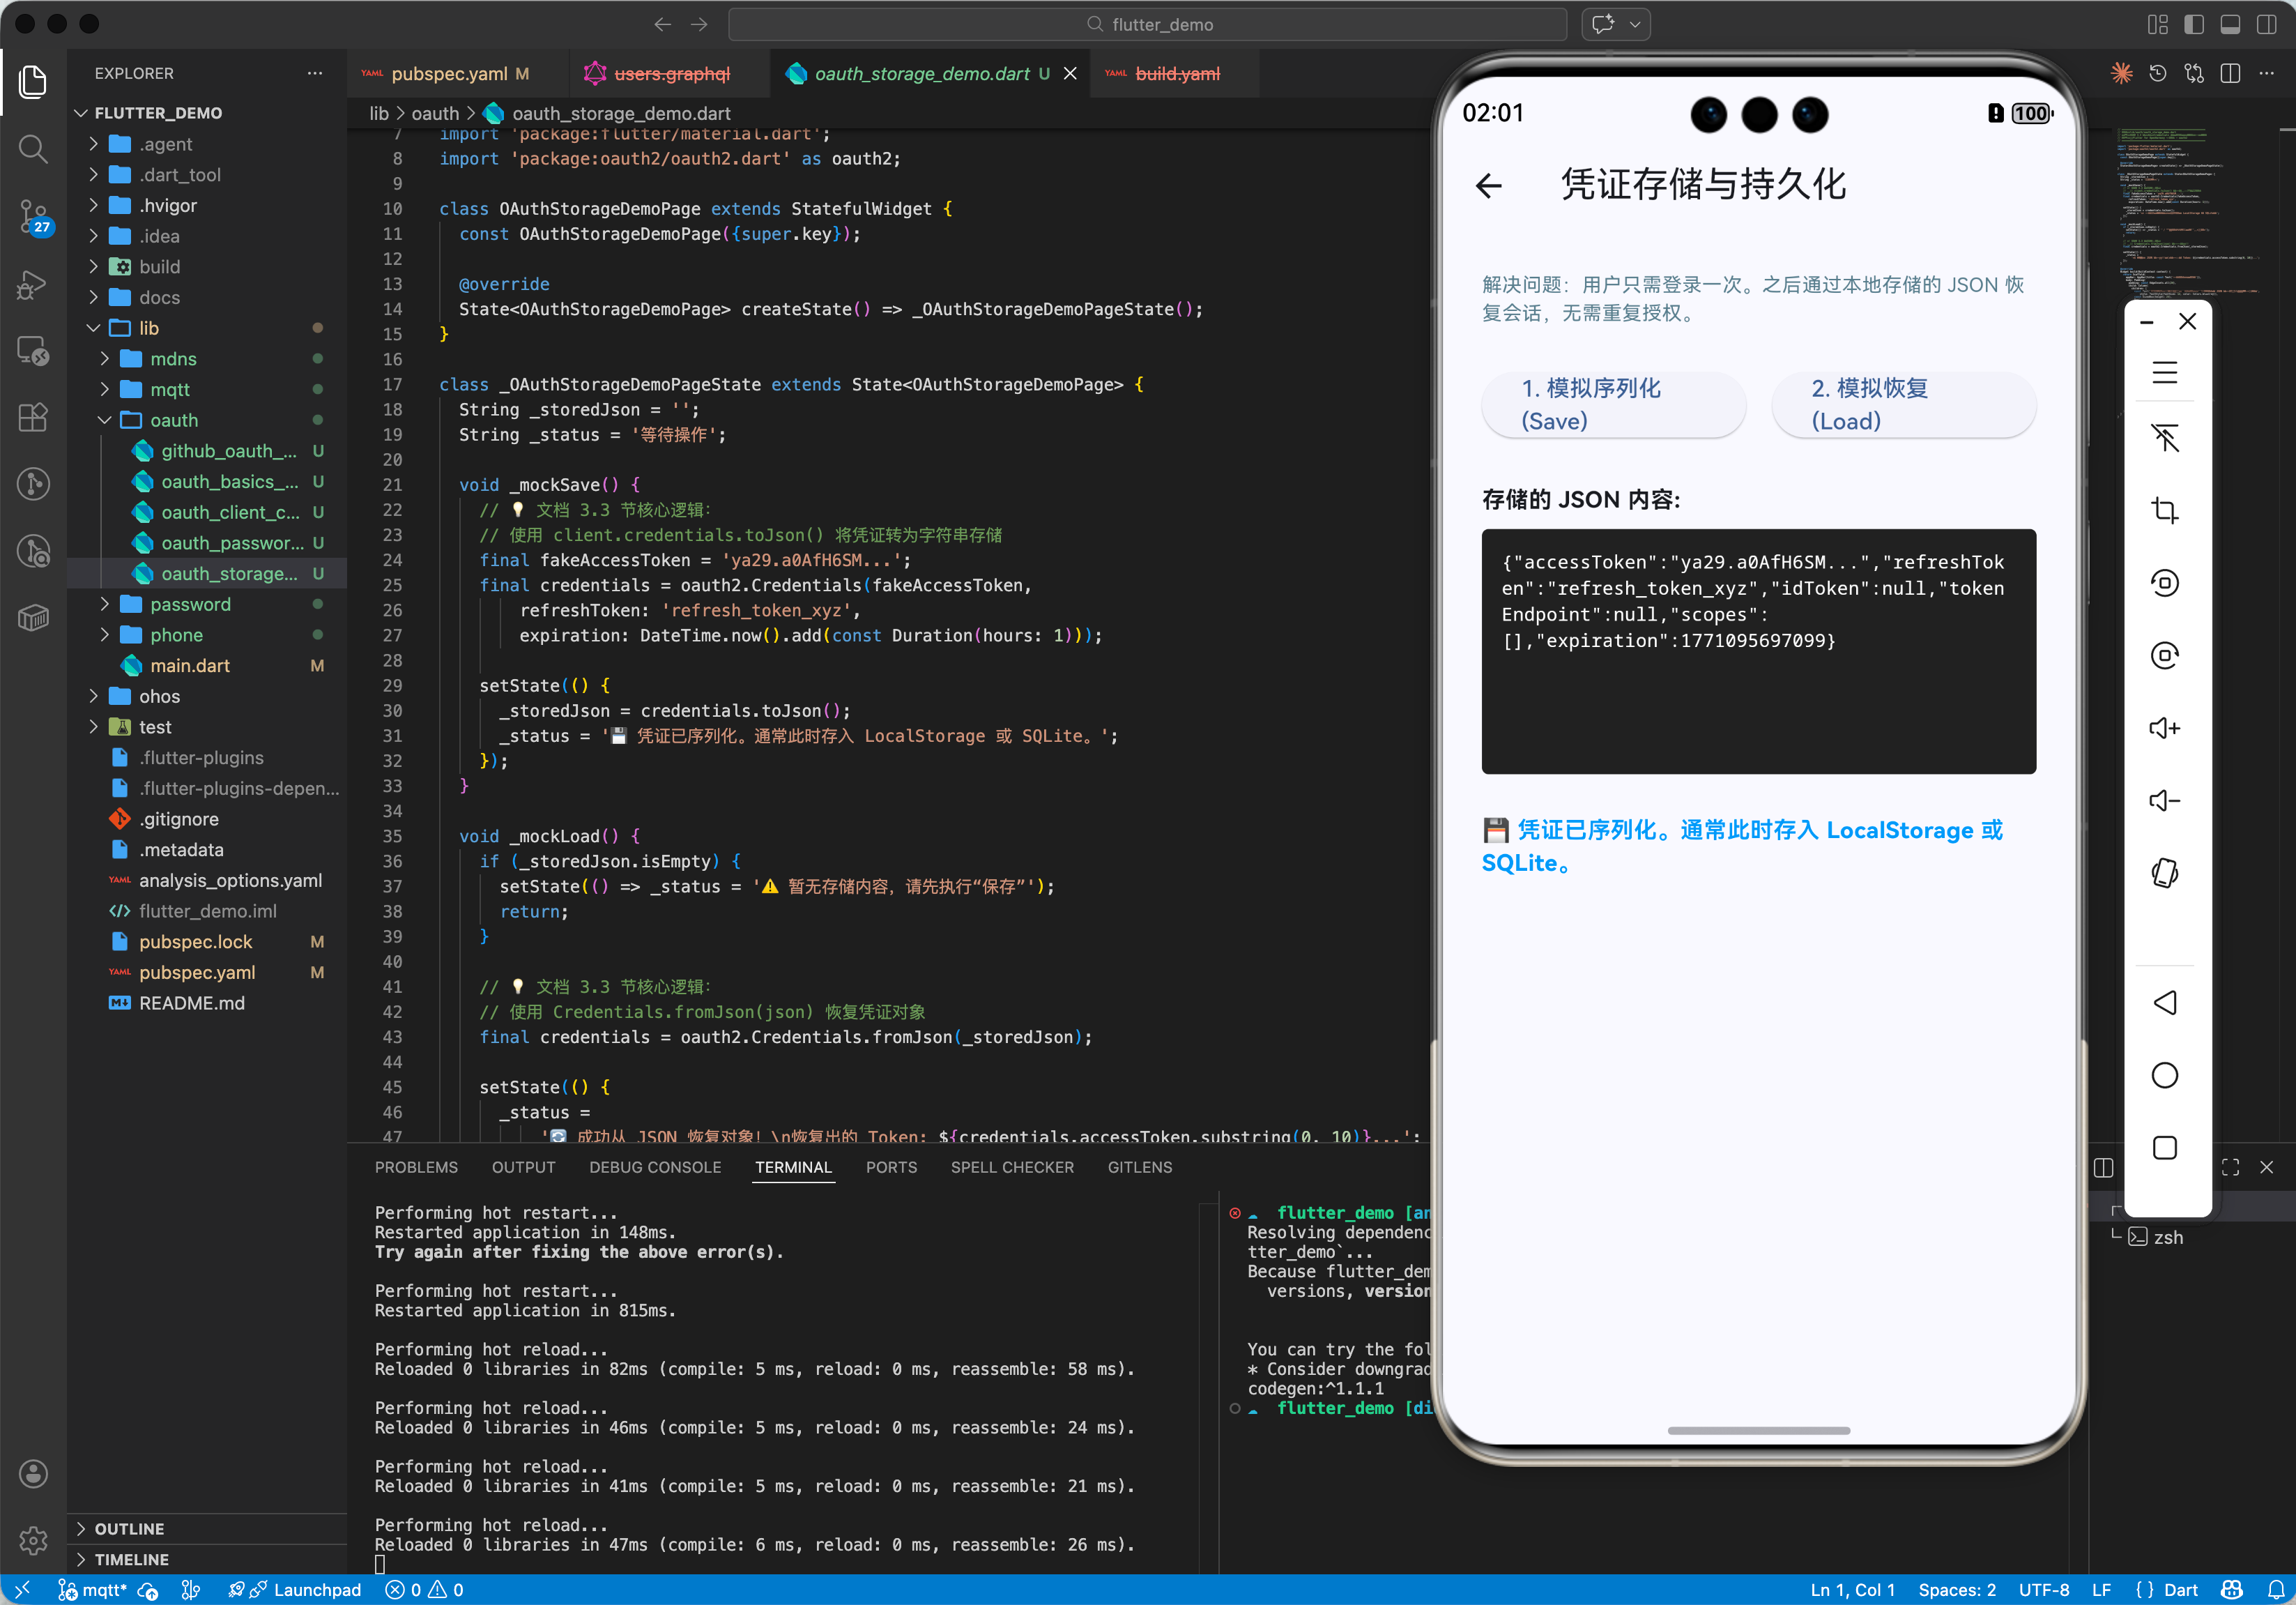
3.3 示例三:凭证存储与恢复
为了避免用户每次打开 App 都要重新登录,我们需要存储 Credentials。
import 'dart:convert';
import 'package:oauth2/oauth2.dart' as oauth2;
// 假设使用 shared_preferences
// import 'package:shared_preferences/shared_preferences.dart';

Future<void> saveCredentials(oauth2.Client client) async {
  // 序列化
  String json = client.credentials.toJson();
  print("保存凭证: $json");
  // await prefs.setString('oauth_credentials', json);
}

Future<oauth2.Client?> loadCredentials() async {
  // String? json = prefs.getString('oauth_credentials');
  String? json = '{"accessToken": "..."}'; // 模拟读取

  if (json != null) {
    var credentials = oauth2.Credentials.fromJson(json);
    return oauth2.Client(credentials, identifier: "client_id", secret: "client_secret");
  }
  return null;
}
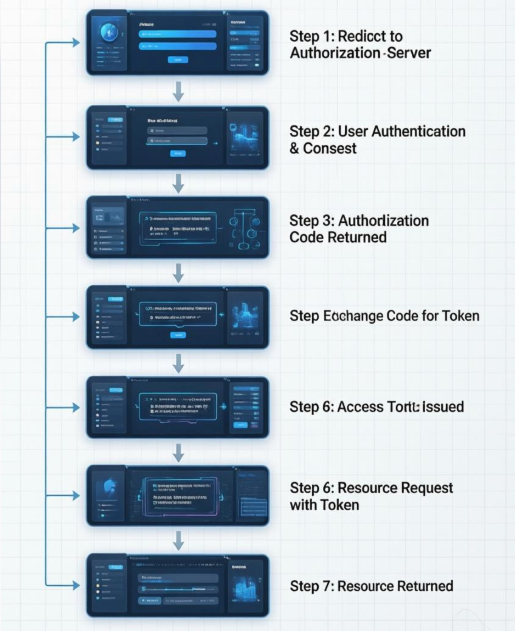
四、完整实战示例:GitHub 授权登录
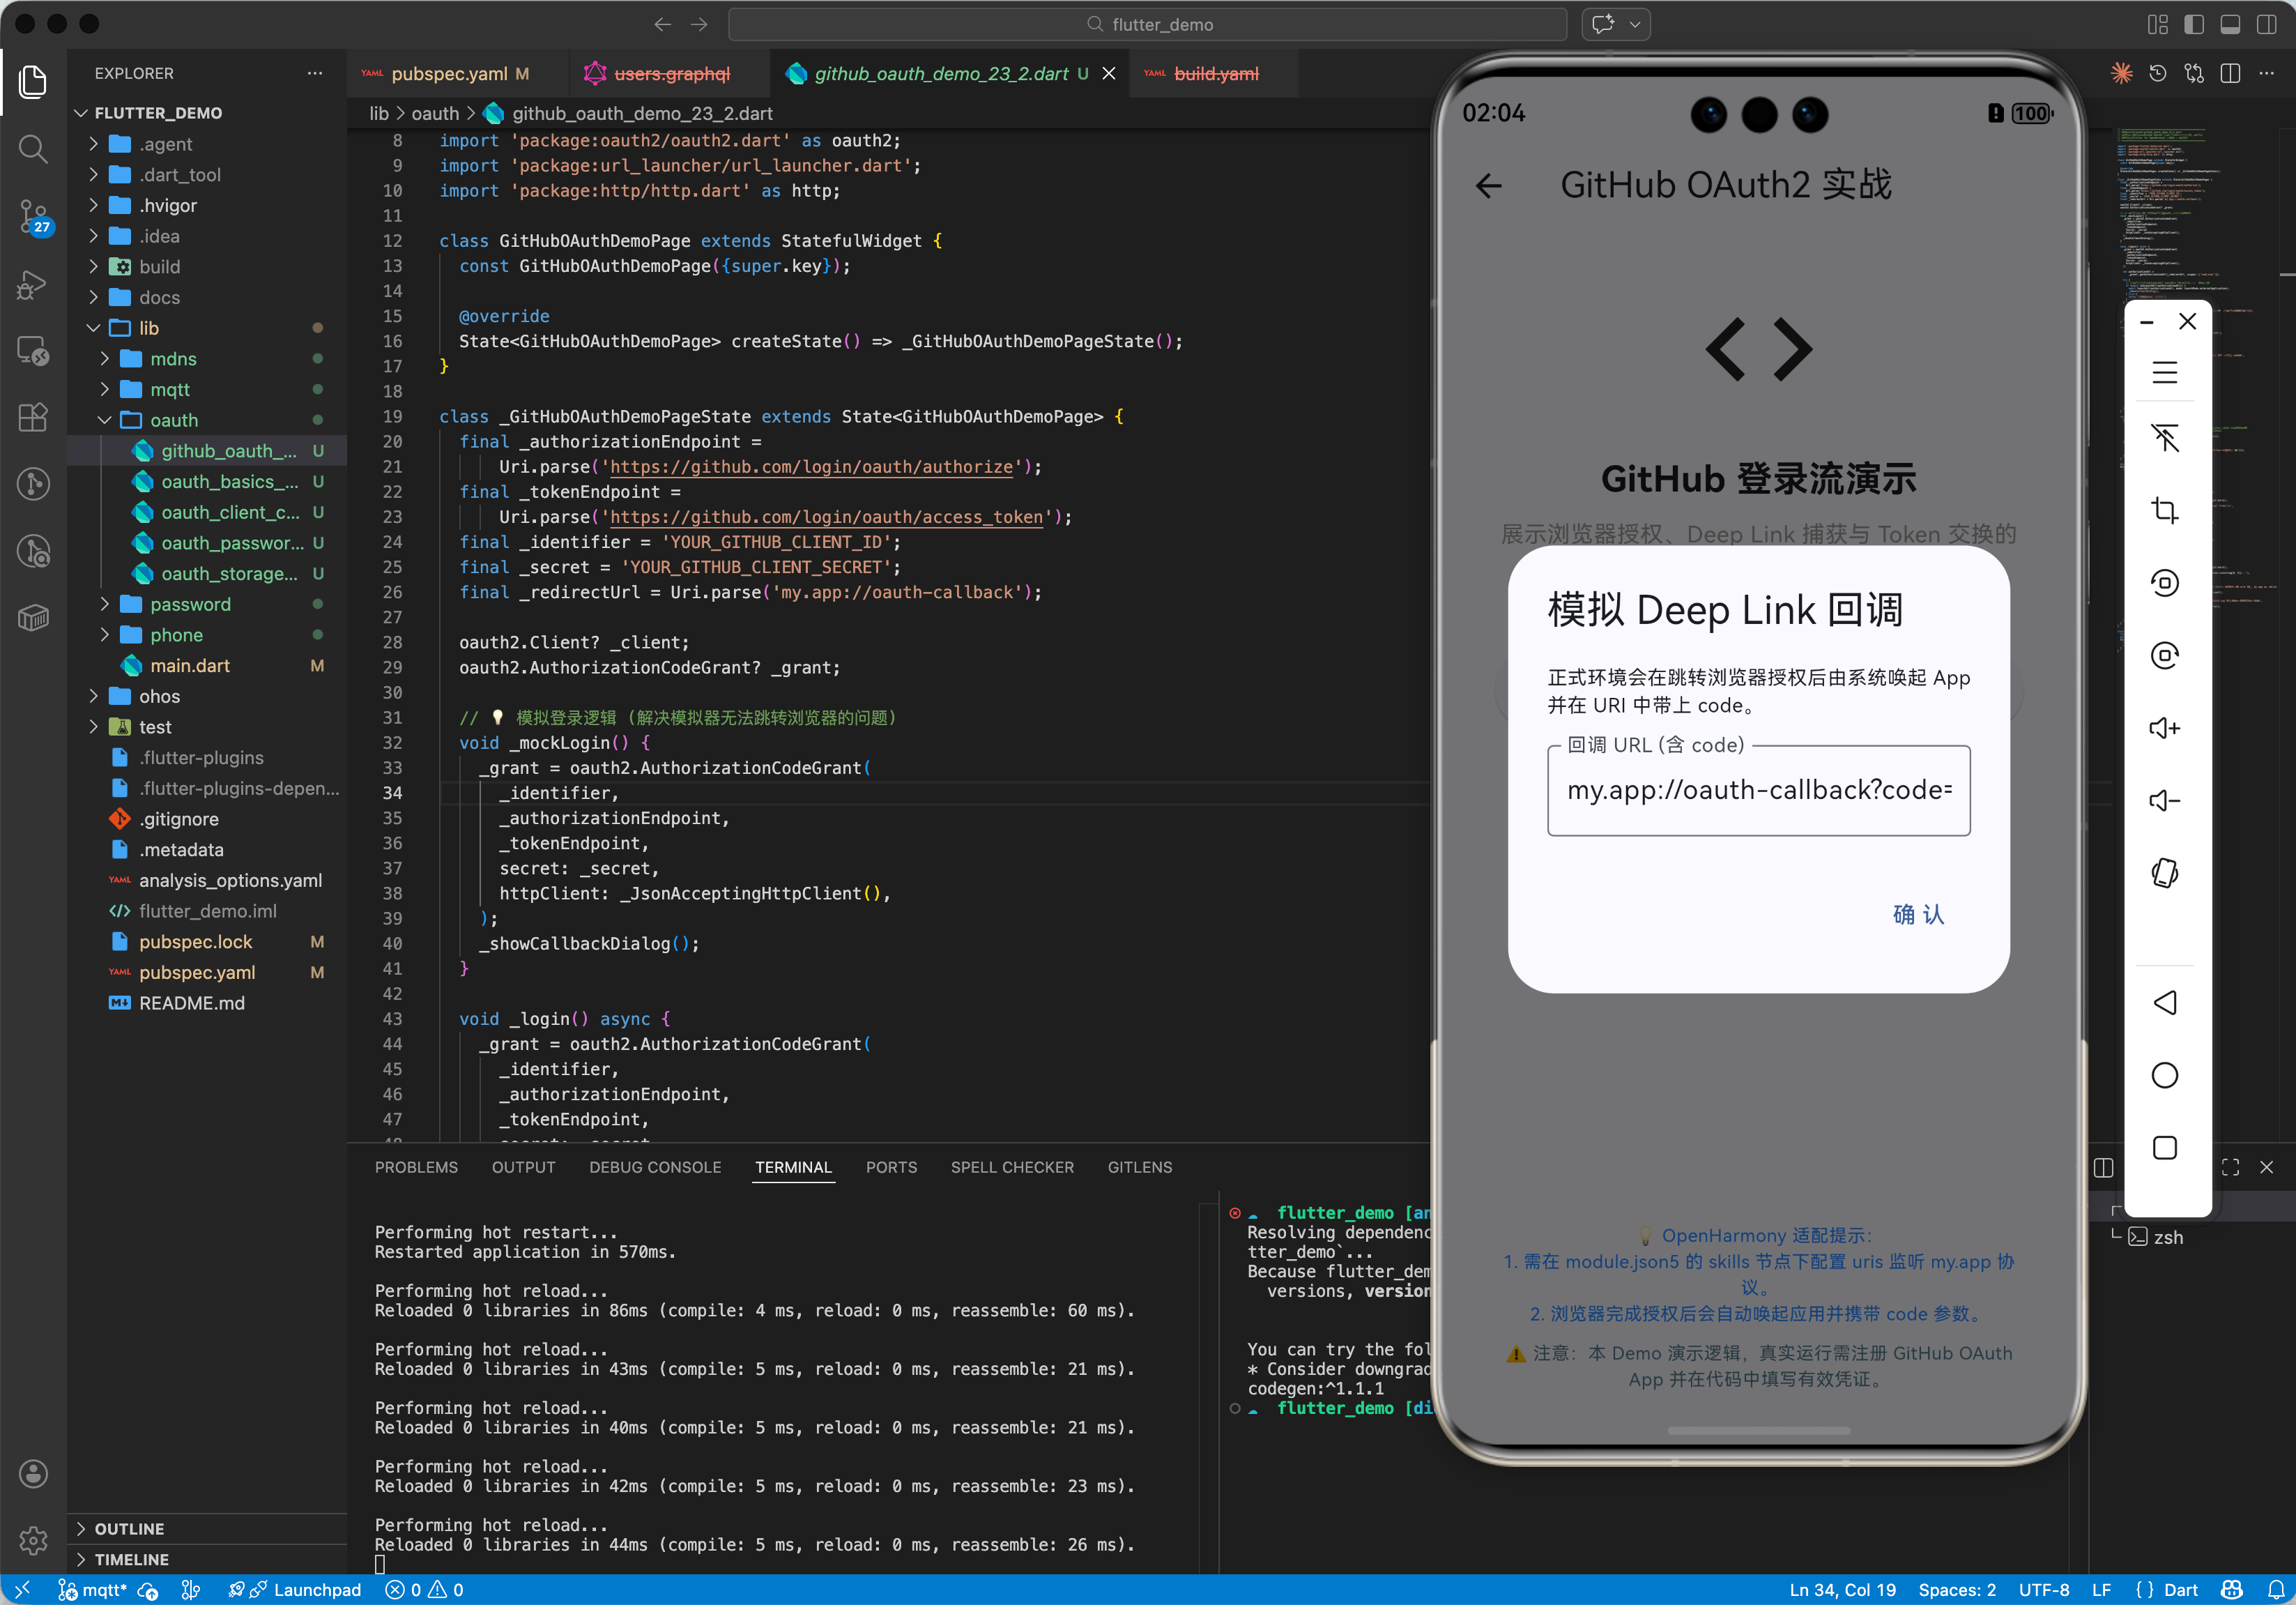
本示例演示最常用的 Authorization Code Grant 模式。用户点击登录 -> 跳转浏览器授权 -> 回调 App -> 获取 Token。
4.1 准备工作
OpenHarmony 需要处理 Deep Link (App Link) 才能从浏览器跳回应用,这部分配置较为复杂。为简化示例,我们将模拟重定向后的 URL 输入,或者在实际设备上配置 skills 里的 uris。
这里展示核心逻辑代码。
4.2 示例代码
import 'package:flutter/material.dart';
import 'package:oauth2/oauth2.dart' as oauth2;
import 'package:url_launcher/url_launcher.dart';
import 'package:http/http.dart' as http;
final _authorizationEndpoint = Uri.parse('https://github.com/login/oauth/authorize');
final _tokenEndpoint = Uri.parse('https://github.com/login/oauth/access_token');
final _identifier = 'YOUR_GITHUB_CLIENT_ID';
final _secret = 'YOUR_GITHUB_CLIENT_SECRET';
final _redirectUrl = Uri.parse('my.app://oauth-callback');
void main() {
runApp(const MaterialApp(home: OAuthLoginPage()));
}
class OAuthLoginPage extends StatefulWidget {
const OAuthLoginPage({super.key});
State<OAuthLoginPage> createState() => _OAuthLoginPageState();
}
class _OAuthLoginPageState extends State<OAuthLoginPage> {
oauth2.Client? _client;
oauth2.AuthorizationCodeGrant? _grant;
Future<void> _login() async {
// 1. 创建授权请求管理对象
_grant = oauth2.AuthorizationCodeGrant(
_identifier,
_authorizationEndpoint,
_tokenEndpoint,
secret: _secret,
httpClient: _JsonAcceptingHttpClient(), // GitHub 需要 Accept: application/json
);
// 2. 获取授权 URL
var authorizationUrl = _grant!.getAuthorizationUrl(_redirectUrl, scopes: ['read:user']);
// 3. 打开浏览器 (OpenHarmony 上 url_launcher 可正常工作)
if (await canLaunchUrl(authorizationUrl)) {
await launchUrl(authorizationUrl, mode: LaunchMode.externalApplication);
}
// ⚠️ 注意:真实场景中,App 需要配置 Deep Link 监听
// 当浏览器跳转回 my.app://oauth-callback?code=... 时,捕获该 URL
// 这里为了演示,我们模拟手动输入回调 URL
_showManualInputCallback();
}
void _handleCallback(Uri responseUrl) async {
try {
// 4. 交换 Token
var client = await _grant!.handleAuthorizationResponse(responseUrl.queryParameters);
setState(() {
_client = client;
});
_getUserInfo();
} catch (e) {
print("授权失败: $e");
}
}
Future<void> _getUserInfo() async {
if (_client == null) return;
try {
var response = await _client!.read(Uri.parse('https://api.github.com/user'));
print("用户信息: $response");
// 显示用户信息...
} catch (e) {
print("获取信息失败: $e");
}
}
void _showManualInputCallback() {
showDialog(
context: context,
builder: (ctx) {
final controller = TextEditingController();
return AlertDialog(
title: const Text("模拟回调"),
content: Column(
mainAxisSize: MainAxisSize.min,
children: [
const Text("在真实 App 中,这一步由 Deep Links 自动完成。现在请手动粘贴浏览器地址栏的回调 URL:"),
TextField(controller: controller, decoration: const InputDecoration(hintText: "my.app://...?code=...")),
],
),
actions: [
TextButton(
onPressed: () {
Navigator.pop(ctx);
if (controller.text.isNotEmpty) {
_handleCallback(Uri.parse(controller.text));
}
},
child: const Text("确定")
)
],
);
}
);
}
Widget build(BuildContext context) {
return Scaffold(
appBar: AppBar(title: const Text('OAuth2 GitHub 登录')),
body: Center(
child: _client == null
? ElevatedButton(
onPressed: _login,
child: const Text('Login with GitHub'),
)
: Column(
mainAxisAlignment: MainAxisAlignment.center,
children: [
const Text("登录成功!"),
const SizedBox(height: 20),
const Text("AccessToken 已获取"),
ElevatedButton(
onPressed: _getUserInfo,
child: const Text("刷新用户信息")
),
],
),
),
);
}
}
// 辅助类:GitHub API 默认返回 XML 格式 Token,需强制要求 JSON
class _JsonAcceptingHttpClient extends http.BaseClient {
final _httpClient = http.Client();
Future<http.StreamedResponse> send(http.BaseRequest request) {
request.headers['Accept'] = 'application/json';
return _httpClient.send(request);
}
}
五、总结
oauth2 库极大简化了在 OpenHarmony 上实现标准认证流程的工作。结合 url_launcher 和 deep links,可以构建流畅的第三方登录体验。
最佳实践:
- 安全存储:不要将
client_secret硬编码在代码中,建议通过混淆或服务端代理获取。 - 凭证管理:务必持久化保存
Credentials,并在 App 启动时尝试恢复,避免用户重复登录。 - OpenHarmony Deep Link:深入研究
module.json5中的uris配置,确保浏览器能正确唤起 App。

作为“人工智能6S店”的官方数字引擎,为AI开发者与企业提供一个覆盖软硬件全栈、一站式门户。
更多推荐
 27
27 0
0- 0


 已为社区贡献61条内容

所有评论(0)