
Flutter框架跨平台鸿蒙开发——音乐节拍器APP开发流程
本文介绍了使用Flutter框架开发跨平台鸿蒙音乐节拍器APP的全过程。文章首先阐述了Flutter与鸿蒙系统结合的开发优势,详细说明了音乐节拍器的核心功能(BPM调节、节拍类型选择、声音控制等)和应用场景。随后,文章讲解了开发环境配置、项目结构设计,并重点剖析了核心功能实现:通过BeatsModel数据模型管理节拍参数,利用BeatsService处理节拍生成、音频播放和振动反馈等核心逻辑。该项
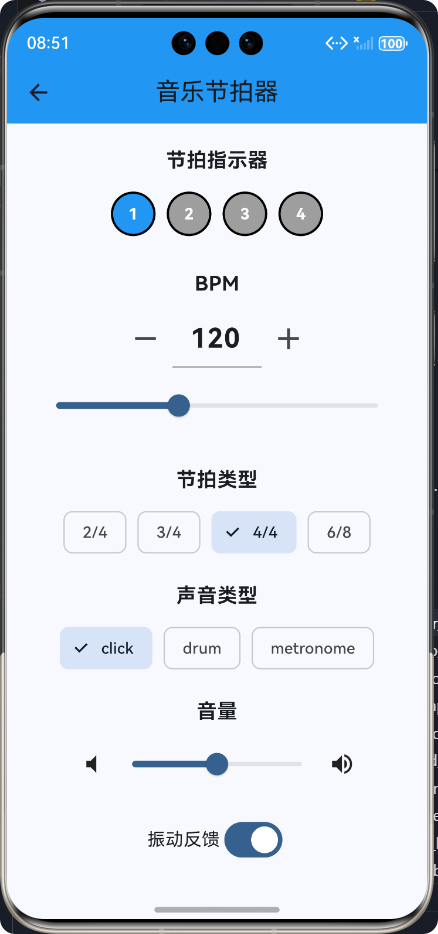
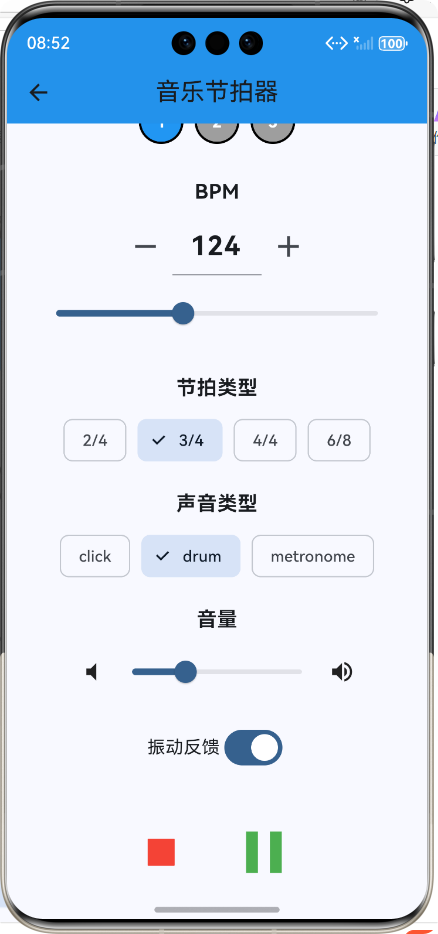
🚀运行效果展示
Flutter框架跨平台鸿蒙开发——音乐节拍器APP开发流程
📝 前言
随着移动互联网的快速发展,跨平台开发框架越来越受到开发者的青睐。Flutter作为Google推出的开源UI软件开发工具包,以其"一次编写,处处运行"的理念,成为了跨平台开发的佼佼者。而华为的鸿蒙系统(HarmonyOS)作为一款全新的分布式操作系统,也在不断扩大其市场份额。将Flutter与鸿蒙系统结合,开发跨平台应用,具有广阔的前景。
本文将详细介绍如何使用Flutter框架开发一款跨平台的音乐节拍器APP,并在鸿蒙系统上运行。音乐节拍器是音乐学习和创作的重要工具,能够帮助用户掌握节奏,提高音乐表现力。
🎵 应用介绍
功能概述
音乐节拍器APP是一款用于生成稳定节拍的工具,主要功能包括:
- 可调节BPM:支持10-300BPM的速度调节
- 多种节拍类型:支持2/4、3/4、4/4、6/8等常见节拍
- 多种声音类型:提供不同的节拍声音选择
- 音量控制:支持0-100%的音量调节
- 振动反馈:可开关的振动反馈功能
- 直观的节拍指示器:可视化当前节拍位置
应用场景
- 音乐练习:帮助乐器学习者掌握节奏
- 音乐创作:辅助作曲家构思和创作音乐
- 舞蹈排练:为舞蹈演员提供节奏参考
- 健身训练:为有氧运动提供节奏指导
🛠️ 开发环境搭建
系统要求
- 操作系统:Windows 11
- Flutter版本:3.6.2或更高
- HarmonyOS SDK:API Version 9或更高
- 开发工具:DevEco Studio 3.1+,VS Code
环境配置
- 安装Flutter SDK:从Flutter官网下载并安装Flutter SDK
- 配置鸿蒙开发环境:安装DevEco Studio,并配置HarmonyOS SDK
- 创建Flutter项目:使用
flutter create命令创建Flutter项目 - 配置鸿蒙支持:在项目中添加鸿蒙支持,配置相关依赖
📁 项目结构设计
lib/
├── music_beats/
│   ├── models/
│   │   └── beats_model.dart       # 节拍数据模型
│   ├── services/
│   │   └── beats_service.dart     # 节拍服务,处理核心逻辑
│   └── screens/
│       └── beats_screen.dart      # 主界面,用户交互
└── screens/
    └── home_screen.dart           # 应用首页,功能入口
🔧 核心功能实现
1. 数据模型设计
数据模型是应用的基础,用于管理节拍的各种参数。我们设计了BeatsModel类来封装节拍的状态:
/// 音乐节拍数据模型
class BeatsModel {
  /// 节拍速度(BPM)
  final int bpm;

  /// 节拍类型(如4/4, 3/4等)
  final String timeSignature;

  /// 节拍音量
  final double volume;

  /// 节拍声音类型
  final String soundType;

  /// 是否正在播放
  final bool isPlaying;

  /// 构造函数
  const BeatsModel({
    required this.bpm,
    required this.timeSignature,
    required this.volume,
    required this.soundType,
    required this.isPlaying,
  });

  /// 复制方法,用于更新模型
  BeatsModel copyWith({
    int? bpm,
    String? timeSignature,
    double? volume,
    String? soundType,
    bool? isPlaying,
  }) {
    return BeatsModel(
      bpm: bpm ?? this.bpm,
      timeSignature: timeSignature ?? this.timeSignature,
      volume: volume ?? this.volume,
      soundType: soundType ?? this.soundType,
      isPlaying: isPlaying ?? this.isPlaying,
    );
  }
}
2. 节拍服务实现
BeatsService是应用的核心服务,负责处理节拍生成、音频播放和振动反馈等逻辑:
import 'dart:async';
import 'package:audioplayers/audioplayers.dart';
import 'package:vibration/vibration.dart';

/// 音乐节拍服务类
class BeatsService {
  /// 音频播放器实例
  final AudioPlayer _audioPlayer = AudioPlayer();

  /// 定时器,用于控制节拍间隔
  Timer? _timer;

  /// 当前节拍计数
  int _beatCount = 0;

  /// 节拍类型(如4/4, 3/4等)
  String _timeSignature = '4/4';

  /// 节拍速度(BPM)
  int _bpm = 120;

  /// 节拍音量
  double _volume = 0.5;

  /// 节拍声音类型
  String _soundType = 'click';

  /// 振动开关
  bool _vibrationEnabled = true;

  /// 构造函数
  BeatsService();

  /// 初始化服务
  Future<void> initialize() async {
    // 设置初始音量
    await _audioPlayer.setVolume(_volume);
  }

  /// 开始播放节拍
  void startBeats({
    required int bpm,
    required String timeSignature,
    required String soundType,
    required double volume,
  }) {
    // 更新参数
    _bpm = bpm;
    _timeSignature = timeSignature;
    _soundType = soundType;
    _volume = volume;

    // 更新音量
    _audioPlayer.setVolume(_volume);

    // 计算节拍间隔(毫秒)
    final int interval = (60000 / _bpm).round();

    // 重置节拍计数
    _beatCount = 0;

    // 启动定时器
    _timer = Timer.periodic(Duration(milliseconds: interval), (timer) {
      _playBeat();
    });
  }

  /// 播放单个节拍
  void _playBeat() {
    // 增加节拍计数
    _beatCount++;

    // 获取节拍类型的分子(如4/4的分子是4)
    final int beatsPerMeasure = int.parse(_timeSignature.split('/')[0]);

    // 确定是否是重音拍(第一拍)
    final bool isDownBeat = _beatCount % beatsPerMeasure == 1;

    // 播放不同的声音
    _playSound(isDownBeat);

    // 振动反馈
    if (_vibrationEnabled) {
      _vibrate(isDownBeat);
    }
  }

  /// 播放节拍声音
  Future<void> _playSound(bool isDownBeat) async {
    // 根据声音类型选择不同的音调
    final double pitch = isDownBeat ? 1.0 : 0.8;

    // 播放示例声音(实际项目中需要替换为真实的音频文件)
    try {
      await _audioPlayer.play(AssetSource('sounds/click.wav'));
    } catch (e) {
      // 如果音频文件不存在,使用系统蜂鸣声(仅作示例)
      print('音频文件不存在,使用默认蜂鸣声');
    }
  }

  /// 振动反馈
  void _vibrate(bool isDownBeat) {
    // 重音拍振动时间更长
    final int duration = isDownBeat ? 100 : 50;

    // 检查设备是否支持振动
    Vibration.hasVibrator().then((hasVibrator) {
      if (hasVibrator == true) {
        Vibration.vibrate(duration: duration);
      }
    });
  }

  /// 停止播放节拍
  void stopBeats() {
    _timer?.cancel();
    _timer = null;
    _beatCount = 0;
  }

  /// 暂停播放节拍
  void pauseBeats() {
    _timer?.cancel();
    _timer = null;
  }

  /// 切换振动开关
  void toggleVibration(bool enabled) {
    _vibrationEnabled = enabled;
  }

  /// 释放资源
  void dispose() {
    _timer?.cancel();
    _audioPlayer.dispose();
  }
}
3. UI界面设计
UI界面是用户与应用交互的桥梁,我们设计了简洁直观的界面,包含以下核心组件:
3.1 节拍指示器
/// 构建节拍指示器组件
Widget _buildBeatIndicator() {
  // 根据当前节拍类型计算节拍数
  final int beatsPerMeasure = int.parse(_beatsModel.timeSignature.split('/')[0]);

  return Column(
    children: [
      const Text(
        '节拍指示器',
        style: TextStyle(fontSize: 18, fontWeight: FontWeight.bold),
      ),
      const SizedBox(height: 15),
      Row(
        mainAxisAlignment: MainAxisAlignment.center,
        children: List.generate(beatsPerMeasure, (index) {
          // 高亮显示当前节拍
          return Container(
            width: 40,
            height: 40,
            margin: const EdgeInsets.symmetric(horizontal: 5),
            decoration: BoxDecoration(
              shape: BoxShape.circle,
              color: index == 0 ? Colors.blue : Colors.grey,
              border: Border.all(color: Colors.black, width: 2),
            ),
            child: Center(
              child: Text(
                (index + 1).toString(),
                style: const TextStyle(
                  color: Colors.white,
                  fontWeight: FontWeight.bold,
                ),
              ),
            ),
          );
        }),
      ),
    ],
  );
}
3.2 BPM控制组件
/// 构建BPM控制组件
Widget _buildBPMControl() {
  return Column(
    children: [
      const Text(
        'BPM',
        style: TextStyle(fontSize: 18, fontWeight: FontWeight.bold),
      ),
      const SizedBox(height: 10),
      Row(
        mainAxisAlignment: MainAxisAlignment.center,
        children: [
          IconButton(
            icon: const Icon(Icons.remove),
            onPressed: () {
              if (_beatsModel.bpm > 10) {
                _updateBPM(_beatsModel.bpm - 1);
              }
            },
            iconSize: 32,
          ),
          SizedBox(
            width: 80,
            child: TextField(
              controller: _bpmController,
              textAlign: TextAlign.center,
              keyboardType: TextInputType.number,
              onChanged: (value) {
                final int? newBPM = int.tryParse(value);
                if (newBPM != null && newBPM > 0 && newBPM < 300) {
                  _updateBPM(newBPM);
                }
              },
              style: const TextStyle(fontSize: 24, fontWeight: FontWeight.bold),
            ),
          ),
          IconButton(
            icon: const Icon(Icons.add),
            onPressed: () {
              if (_beatsModel.bpm < 300) {
                _updateBPM(_beatsModel.bpm + 1);
              }
            },
            iconSize: 32,
          ),
        ],
      ),
      const SizedBox(height: 10),
      Slider(
        value: _beatsModel.bpm.toDouble(),
        min: 10,
        max: 300,
        divisions: 290,
        label: _beatsModel.bpm.toString(),
        onChanged: (value) {
          _updateBPM(value.round());
        },
      ),
    ],
  );
}
3.3 播放控制组件
/// 构建播放控制按钮组件
Widget _buildPlayControls() {
  return Row(
    mainAxisAlignment: MainAxisAlignment.center,
    children: [
      IconButton(
        icon: const Icon(Icons.stop),
        onPressed: _stopBeats,
        iconSize: 48,
        color: Colors.red,
      ),
      const SizedBox(width: 20),
      IconButton(
        icon: Icon(_beatsModel.isPlaying ? Icons.pause : Icons.play_arrow),
        onPressed: _togglePlayPause,
        iconSize: 64,
        color: Colors.green,
      ),
    ],
  );
}
📊 应用流程图
🎯 核心技术点
1. 节拍生成算法
节拍生成的核心是根据BPM(每分钟节拍数)计算出节拍间隔,然后使用定时器定期触发节拍事件:
// 计算节拍间隔(毫秒)
final int interval = (60000 / _bpm).round();

// 启动定时器
_timer = Timer.periodic(Duration(milliseconds: interval), (timer) {
  _playBeat();
});
2. 音频播放实现
使用audioplayers库实现音频播放,支持不同音调的节拍声音:
// 播放示例声音
await _audioPlayer.play(AssetSource('sounds/click.wav'));
3. 振动反馈
使用vibration库实现振动反馈,根据节拍类型提供不同时长的振动:
// 重音拍振动时间更长
final int duration = isDownBeat ? 100 : 50;

// 检查设备是否支持振动
Vibration.hasVibrator().then((hasVibrator) {
  if (hasVibrator == true) {
    Vibration.vibrate(duration: duration);
  }
});
🧪 测试和调试
测试过程
- 单元测试:对核心功能进行单元测试,如节拍生成算法、音频播放等。
- 集成测试:测试各个组件之间的协作,如UI与服务的交互。
- 真机测试:在鸿蒙设备上进行真机测试,验证应用的实际运行效果。
遇到的问题及解决方案
-
音频文件不存在:
- 问题:应用启动时找不到音频文件
- 解决方案:在
_playSound方法中添加异常处理,当音频文件不存在时给出提示
-
setPlaybackRate方法参数错误:
- 问题:调用
setPlaybackRate方法时参数不匹配 - 解决方案:暂时移除该方法调用,后续根据需要调整
- 问题:调用
-
振动权限问题:
- 问题:在某些设备上振动功能无法使用
- 解决方案:添加振动权限申请,并在代码中检查设备是否支持振动
🎉 总结
通过本次开发,我们成功实现了一款功能完整的音乐节拍器APP,并在鸿蒙系统上运行。本次开发的主要收获包括:
-
Flutter跨平台开发优势:使用Flutter框架可以快速开发跨平台应用,提高开发效率,降低维护成本。
-
鸿蒙系统适配:成功将Flutter应用适配到鸿蒙系统,验证了Flutter在鸿蒙平台上的可行性。
-
音频和振动功能实现:掌握了在Flutter中实现音频播放和振动反馈的方法,为后续开发类似应用积累了经验。
-
状态管理和服务设计:学习了如何设计清晰的数据模型和服务类,提高代码的可维护性和扩展性。
-
UI设计和用户体验:注重UI设计的简洁性和易用性,提供了良好的用户体验。
未来,我们可以进一步完善这款音乐节拍器,添加更多功能,如:
- 支持自定义节拍声音
- 添加节拍预设功能
- 支持节拍录制和回放
- 添加可视化波形图
- 支持蓝牙连接和同步
通过不断优化和完善,这款音乐节拍器可以更好地满足用户的需求,成为音乐学习和创作的得力助手。
欢迎加入开源鸿蒙跨平台社区:https://openharmonycrossplatform.csdn.net

作为“人工智能6S店”的官方数字引擎,为AI开发者与企业提供一个覆盖软硬件全栈、一站式门户。
更多推荐


 6
6 0
0- 0


 已为社区贡献4条内容

所有评论(0)