
在React Native中开发鸿组件(这里指的是鸿蒙(HarmonyOS)组件),你需要了解鸿蒙开发的基础以及如何在React Native项目中集成鸿蒙应用。鸿蒙OS是由华为开发的一个分布式操作
本文介绍了在React Native中开发鸿蒙(HarmonyOS)组件的两种主要方法:使用WebView加载鸿蒙应用网页版或创建Native Module桥接原生代码。同时提供了开发"植物养护智能助手"应用的完整指南,包括环境搭建、项目结构、界面组件开发以及导航设置。文章还包含具体的代码示例,如WebView集成、原生模块调用以及应用界面实现,为开发者提供了从基础到实践的全面
在React Native中开发鸿组件(这里指的是鸿蒙(HarmonyOS)组件),你需要了解鸿蒙开发的基础以及如何在React Native项目中集成鸿蒙应用。鸿蒙OS是由华为开发的一个分布式操作系统,主要用于其智能设备,如手机、平板、智能手表等。
- 了解鸿蒙开发基础
首先,你需要熟悉鸿蒙OS的开发环境设置和基本开发流程。这包括:
- 开发工具:使用DevEco Studio作为开发IDE。
- SDK:下载并安装HarmonyOS SDK。
- 语言与框架:主要使用Java/Kotlin进行应用开发,但也可以通过C/C++扩展功能。
- 在React Native中集成鸿蒙应用
React Native本身主要用于Harmony和Harmony平台的开发,但你可以通过以下几种方式将鸿蒙应用集成到React Native项目中:
A. 使用WebView
一种简单的方法是使用WebView来加载鸿蒙应用的网页版或通过一个WebView桥接本地代码与鸿蒙应用。
-
在React Native中添加WebView:
npm install react-native-webview -
使用WebView加载鸿蒙应用的URL:
import React from 'react';
import { WebView } from 'react-native-webview';

const HarmonyApp = () => {
  return (
    <WebView
      source={{ uri: 'https://your-harmony-app-url.com' }}
      style={{ flex: 1 }}
    />
  );
};

export default HarmonyApp;
B. 使用Native Modules
创建一个Native Module来桥接React Native和鸿蒙原生应用。
-
在DevEco Studio中创建一个鸿蒙应用。
-
开发Native Module:创建一个Java/Kotlin模块,在其中实现与鸿蒙应用交互的逻辑。
-
在React Native中调用Native Module:使用
react-native-bridge或其他桥接库来调用鸿蒙原生模块。例如,使用
react-native-bridge:npm install react-native-bridge然后在JavaScript中调用:
import { NativeModules } from 'react-native';
const { HarmonyModule } = NativeModules;
C. 使用Deep Linking或Intent传递数据
如果你的鸿蒙应用支持Deep Linking或Intent传递数据,你可以在React Native中处理这些链接或Intent,并据此与鸿蒙应用交互。
- 职业发展规划和开发代码详情
对于职业发展规划,你可以考虑以下步骤:
- 学习鸿蒙开发:深入学习鸿蒙OS的APIs和开发工具。
- 实践项目:在项目中实践鸿蒙应用的开发与集成。
- 优化集成方案:不断优化React Native与鸿蒙应用的集成方案,提高用户体验和性能。
- 持续学习:关注鸿蒙OS的最新动态和更新,持续学习新技术和新特性。
- 分享和交流:参与开源项目,分享你的经验,与其他开发者交流。
通过这些步骤,你可以有效地在React Native项目中开发并集成鸿蒙组件,同时规划你的职业发展路径。
开发一个名为“植物养护智能助手”的React Native应用,涉及到多个技术层面,包括前端UI设计、后端数据处理以及可能的硬件接口(例如传感器数据采集)。下面,我将提供一个基本的开发指南和代码示例,帮助你开始这个项目。
- 环境准备
首先,确保你的开发环境已经安装了Node.js和React Native。你可以通过以下步骤安装React Native环境:
安装Node.js (如果尚未安装)
安装React Native CLI
npm install -g react-native-cli

创建一个新的React Native项目
react-native init PlantCareAssistant

进入项目目录
cd PlantCareAssistant
- 安装依赖
为了简化开发,可以使用一些现成的库来帮助处理植物养护相关的功能,例如使用react-native-vector-icons来添加图标、react-native-camera来处理图像识别等。
安装图标库
npm install react-native-vector-icons

安装相机库(可选,根据需求)
npm install react-native-camera
- 项目结构规划
创建一个基本的项目结构,例如:
PlantCareAssistant/
|-- Harmony/
|-- Harmony/
|-- src/
    |-- components/
    |-- screens/
        |-- HomeScreen.js
        |-- CareTipsScreen.js
    |-- App.js
|-- package.json
- 开发界面组件
HomeScreen.js
import React from 'react';
import { View, Text, StyleSheet, Button } from 'react-native';
import Icon from 'react-native-vector-icons/FontAwesome'; // 假设使用FontAwesome图标库

const HomeScreen = ({ navigation }) => {
  return (
    <View style={styles.container}>
      <Text style={styles.title}>植物养护智能助手</Text>
      <Button title="查看养护建议" onPress={() => navigation.navigate('CareTips')} />
      <Icon name="leaf" size={50} color="green" /> {/* 显示一个叶子图标 */}
    </View>
  );
};

const styles = StyleSheet.create({
  container: {
    flex: 1,
    justifyContent: 'center',
    alignItems: 'center',
  },
  title: {
    fontSize: 24,
    marginBottom: 20,
  },
});

export default HomeScreen;
CareTipsScreen.js
import React from 'react';
import { View, Text, StyleSheet } from 'react-native';
import Icon from 'react-native-vector-icons/FontAwesome'; // 使用相同图标库

const CareTipsScreen = () => {
  return (
    <View style={styles.container}>
      <Text style={styles.title}>养护建议</Text>
      <Text>请每天给植物浇水。</Text> {/* 示例文本 */}
      <Icon name="info-circle" size={30} color="blue" /> {/* 信息图标 */}
    </View>
  );
};

const styles = StyleSheet.create({
  container: {
    flex: 1,
    justifyContent: 'center',
    alignItems: 'center',
  },
  title: {
    fontSize: 24,
    marginBottom: 20,
  },
});
export default CareTipsScreen;
- 导航设置(使用React Navigation)
安装React Navigation:
npm install @react-navigation/native @react-navigation/stack react-native-screens react-native-safe-area-context @react-navigation/native-stack @react-navigation/stack @react-navigation/bottom-tabs @react-navigation/material-top-tabs @react-navigation/material-bottom-tabs @react-navigation/drawer @react-navigation/elements @react-navigation/routers @react-navigation/web react-native-tab-view react-native-pager-view react-native-reanimated react-native-gesture-handler react-native-screens react-native-safe-area-context react-native-svg expo @expo/vector-icons expo-linear-gradient expo-constants expo-linking --save` 确保所有依赖都正确安装。`npm install`。`npx pod-install
真实演示案例代码:
// app.tsx
import React, { useState } from 'react';
import { SafeAreaView, View, Text, StyleSheet, TouchableOpacity, ScrollView, Dimensions, Alert, FlatList } from 'react-native';

// 图标库
const ICONS = {
  pet: '🐶',
  message: '💬',
  sent: '📤',
  delivered: '📥',
  read: '👁️',
  error: '❌',
  activity: '⚡',
  stats: '📊',
};

const { width } = Dimensions.get('window');

// 消息类型
type PetMessage = {
  id: string;
  petName: string;
  content: string;
  timestamp: string;
  status: 'sent' | 'delivered' | 'read' | 'error';
  readTime?: string;
  deliveryTime?: string;
  activityLevel: number; // 活跃度
};

// 状态统计类型
type StatusStat = {
  status: string;
  count: number;
  percentage: number;
  color: string;
};

// 消息项组件
const MessageItem = ({ message }: { message: PetMessage }) => {
  const getStatusIcon = () => {
    switch (message.status) {
      case 'sent': return ICONS.sent;
      case 'delivered': return ICONS.delivered;
      case 'read': return ICONS.read;
      case 'error': return ICONS.error;
      default: return ICONS.message;
    }
  };

  const getStatusColor = () => {
    switch (message.status) {
      case 'sent': return '#f59e0b';
      case 'delivered': return '#3b82f6';
      case 'read': return '#10b981';
      case 'error': return '#ef4444';
      default: return '#6b7280';
    }
  };

  const getStatusText = () => {
    switch (message.status) {
      case 'sent': return '已发送';
      case 'delivered': return '已送达';
      case 'read': return '已读';
      case 'error': return '发送失败';
      default: return '未知';
    }
  };

  return (
    <View style={styles.messageItem}>
      <View style={styles.messageHeader}>
        <View style={[styles.statusIcon, { backgroundColor: `${getStatusColor()}20` }]}>
          <Text style={[styles.statusIconText, { color: getStatusColor() }]}>
            {getStatusIcon()}
          </Text>
        </View>
        <View style={styles.messageInfo}>
          <Text style={styles.petName}>{message.petName}</Text>
          <Text style={styles.timestamp}>{message.timestamp}</Text>
        </View>
        <Text style={[styles.statusText, { color: getStatusColor() }]}>
          {getStatusText()}
        </Text>
      </View>
      <Text style={styles.messageContent}>{message.content}</Text>
      <View style={styles.messageFooter}>
        <View style={styles.activityContainer}>
          <Text style={styles.activityLabel}>活跃度</Text>
          <View style={styles.activityBar}>
            <View
              style={[
                styles.activityFill,
                {
                  width: `${message.activityLevel}%`,
                  backgroundColor: message.activityLevel > 70 ? '#10b981' : message.activityLevel > 40 ? '#f59e0b' : '#ef4444'
                }
              ]}
            />
          </View>
          <Text style={styles.activityValue}>{message.activityLevel}%</Text>
        </View>
        {message.readTime && (
          <Text style={styles.readTime}>阅读时间: {message.readTime}</Text>
        )}
      </View>
    </View>
  );
};

// 状态统计卡片组件
const StatusStatCard = ({ stat }: { stat: StatusStat }) => {
  return (
    <View style={styles.statCard}>
      <View style={[styles.statIcon, { backgroundColor: `${stat.color}20` }]}>
        <Text style={[styles.statIconText, { color: stat.color }]}>
          {stat.status === 'sent' ? ICONS.sent :
           stat.status === 'delivered' ? ICONS.delivered :
           stat.status === 'read' ? ICONS.read : ICONS.error}
        </Text>
      </View>
      <View style={styles.statInfo}>
        <Text style={styles.statValue}>{stat.count}</Text>
        <Text style={styles.statLabel}>{stat.status}</Text>
        <View style={styles.progressBar}>
          <View
            style={[
              styles.progressFill,
              {
                width: `${stat.percentage}%`,
                backgroundColor: stat.color
              }
            ]}
          />
        </View>
        <Text style={styles.progressText}>{stat.percentage}%</Text>
      </View>
    </View>
  );
};

// 活跃度趋势组件
const ActivityTrendChart = () => {
  const data = [
    { day: '周一', level: 75 },
    { day: '周二', level: 82 },
    { day: '周三', level: 68 },
    { day: '周四', level: 90 },
    { day: '周五', level: 78 },
    { day: '周六', level: 85 },
    { day: '周日', level: 92 },
  ];

  const maxValue = 100;

  return (
    <View style={styles.chartContainer}>
      <Text style={styles.chartTitle}>宠物活跃度趋势</Text>
      <View style={styles.chart}>
        {data.map((item, index) => (
          <View key={index} style={styles.chartItem}>
            <Text style={styles.chartDay}>{item.day}</Text>
            <View style={styles.chartBar}>
              <View
                style={[
                  styles.chartFill,
                  {
                    height: `${(item.level / maxValue) * 100}%`,
                    backgroundColor: item.level > 80 ? '#10b981' : item.level > 60 ? '#f59e0b' : '#ef4444'
                  }
                ]}
              />
            </View>
            <Text style={styles.chartValue}>{item.level}%</Text>
          </View>
        ))}
      </View>
    </View>
  );
};

// 主页面组件
const PetMessageReceiptSystemApp: React.FC = () => {
  const [messages, setMessages] = useState<PetMessage[]>([
    {
      id: '1',
      petName: '豆豆',
      content: '主人,我在后院发现了一个新玩具,快来陪我玩!',
      timestamp: '10:30',
      status: 'read',
      readTime: '10:32',
      activityLevel: 85
    },
    {
      id: '2',
      petName: '小白',
      content: '我饿了,什么时候开饭呀?',
      timestamp: '11:15',
      status: 'delivered',
      deliveryTime: '11:16',
      activityLevel: 72
    },
    {
      id: '3',
      petName: '小黑',
      content: '今天散步走了好多路,好累呀...',
      timestamp: '14:20',
      status: 'sent',
      activityLevel: 65
    },
    {
      id: '4',
      petName: '花花',
      content: '汪汪!看见一只蝴蝶飞过去了!',
      timestamp: '15:45',
      status: 'read',
      readTime: '15:47',
      activityLevel: 90
    },
    {
      id: '5',
      petName: '球球',
      content: '呜呜...我想你了,什么时候回家?',
      timestamp: '16:30',
      status: 'error',
      activityLevel: 45
    }
  ]);

  const [stats] = useState<StatusStat[]>([
    { status: '已发送', count: 12, percentage: 75, color: '#f59e0b' },
    { status: '已送达', count: 10, percentage: 62.5, color: '#3b82f6' },
    { status: '已读', count: 8, percentage: 50, color: '#10b981' },
    { status: '失败', count: 2, percentage: 12.5, color: '#ef4444' },
  ]);

  const refreshMessages = () => {
    Alert.alert('刷新', '正在更新消息状态...');
  };

  const retryFailedMessage = (id: string) => {
    Alert.alert('重试', `重试发送消息给 ${messages.find(m => m.id === id)?.petName}`);
  };

  return (
    <SafeAreaView style={styles.container}>
      {/* 头部 */}
      <View style={styles.header}>
        <Text style={styles.title}>宠物消息回执系统</Text>
        <TouchableOpacity style={styles.refreshButton} onPress={refreshMessages}>
          <Text style={styles.refreshText}>{ICONS.stats} 刷新</Text>
        </TouchableOpacity>
      </View>

      {/* 统计卡片 */}
      <ScrollView style={styles.content}>
        <View style={styles.statsContainer}>
          {stats.map((stat, index) => (
            <StatusStatCard key={index} stat={stat} />
          ))}
        </View>

        {/* 活跃度趋势图表 */}
        <ActivityTrendChart />

        {/* 消息列表标题 */}
        <View style={styles.sectionHeader}>
          <Text style={styles.sectionTitle}>消息列表</Text>
          <Text style={styles.messageCount}>({messages.length} 条消息)</Text>
        </View>

        {/* 消息列表 */}
        <FlatList
          data={messages}
          keyExtractor={item => item.id}
          renderItem={({ item }) => (
            <MessageItem message={item} />
          )}
          showsVerticalScrollIndicator={false}
        />

        {/* 操作说明 */}
        <View style={styles.instructionCard}>
          <Text style={styles.instructionTitle}>使用说明</Text>
          <Text style={styles.instructionText}>• 绿色表示消息已被宠物主人阅读</Text>
          <Text style={styles.instructionText}>• 蓝色表示消息已送达宠物设备</Text>
          <Text style={styles.instructionText}>• 黄色表示消息已发送</Text>
          <Text style={styles.instructionText}>• 红色表示消息发送失败,可点击重试</Text>
        </View>
      </ScrollView>

      {/* 底部导航 */}
      <View style={styles.bottomNav}>
        <TouchableOpacity style={styles.navItem}>
          <Text style={styles.navIcon}>{ICONS.pet}</Text>
          <Text style={styles.navText}>宠物</Text>
        </TouchableOpacity>
        <TouchableOpacity style={styles.navItem}>
          <Text style={styles.navIcon}>{ICONS.message}</Text>
          <Text style={styles.navText}>消息</Text>
        </TouchableOpacity>
        <TouchableOpacity style={[styles.navItem, styles.activeNavItem]}>
          <Text style={styles.navIcon}>{ICONS.stats}</Text>
          <Text style={styles.navText}>状态</Text>
        </TouchableOpacity>
        <TouchableOpacity style={styles.navItem}>
          <Text style={styles.navIcon}>{ICONS.activity}</Text>
          <Text style={styles.navText}>活跃</Text>
        </TouchableOpacity>
      </View>
    </SafeAreaView>
  );
};

const styles = StyleSheet.create({
  container: {
    flex: 1,
    backgroundColor: '#f8fafc',
  },
  header: {
    flexDirection: 'row',
    alignItems: 'center',
    justifyContent: 'space-between',
    padding: 20,
    backgroundColor: '#ffffff',
    borderBottomWidth: 1,
    borderBottomColor: '#e2e8f0',
  },
  title: {
    fontSize: 20,
    fontWeight: 'bold',
    color: '#1e293b',
  },
  refreshButton: {
    backgroundColor: '#3b82f6',
    paddingHorizontal: 16,
    paddingVertical: 8,
    borderRadius: 20,
  },
  refreshText: {
    color: '#ffffff',
    fontSize: 14,
    fontWeight: '500',
  },
  content: {
    flex: 1,
    padding: 16,
  },
  statsContainer: {
    flexDirection: 'row',
    flexWrap: 'wrap',
    justifyContent: 'space-between',
    marginBottom: 16,
  },
  statCard: {
    backgroundColor: '#ffffff',
    borderRadius: 12,
    padding: 16,
    width: (width - 48) / 2,
    marginBottom: 12,
    elevation: 1,
    shadowColor: '#000',
    shadowOffset: { width: 0, height: 1 },
    shadowOpacity: 0.1,
    shadowRadius: 2,
    flexDirection: 'row',
    alignItems: 'center',
  },
  statIcon: {
    width: 36,
    height: 36,
    borderRadius: 18,
    alignItems: 'center',
    justifyContent: 'center',
    marginRight: 12,
  },
  statIconText: {
    fontSize: 18,
  },
  statInfo: {
    flex: 1,
  },
  statValue: {
    fontSize: 20,
    fontWeight: 'bold',
    color: '#1e293b',
  },
  statLabel: {
    fontSize: 12,
    color: '#64748b',
    marginTop: 4,
  },
  progressBar: {
    width: '100%',
    height: 6,
    backgroundColor: '#e2e8f0',
    borderRadius: 3,
    marginTop: 8,
    overflow: 'hidden',
  },
  progressFill: {
    height: '100%',
    borderRadius: 3,
  },
  progressText: {
    fontSize: 10,
    color: '#64748b',
    marginTop: 4,
    alignSelf: 'flex-end',
  },
  chartContainer: {
    backgroundColor: '#ffffff',
    borderRadius: 12,
    padding: 16,
    marginBottom: 16,
    elevation: 1,
    shadowColor: '#000',
    shadowOffset: { width: 0, height: 1 },
    shadowOpacity: 0.1,
    shadowRadius: 2,
  },
  chartTitle: {
    fontSize: 16,
    fontWeight: 'bold',
    color: '#1e293b',
    marginBottom: 12,
  },
  chart: {
    flexDirection: 'row',
    justifyContent: 'space-around',
  },
  chartItem: {
    alignItems: 'center',
    flex: 1,
    marginHorizontal: 2,
  },
  chartDay: {
    fontSize: 10,
    color: '#64748b',
    marginBottom: 8,
  },
  chartBar: {
    width: 20,
    height: 80,
    backgroundColor: '#e2e8f0',
    borderRadius: 4,
    justifyContent: 'flex-end',
    alignItems: 'center',
  },
  chartFill: {
    width: '100%',
    borderRadius: 4,
  },
  chartValue: {
    fontSize: 10,
    color: '#64748b',
    marginTop: 4,
  },
  sectionHeader: {
    flexDirection: 'row',
    justifyContent: 'space-between',
    alignItems: 'center',
    marginBottom: 12,
  },
  sectionTitle: {
    fontSize: 18,
    fontWeight: 'bold',
    color: '#1e293b',
  },
  messageCount: {
    fontSize: 14,
    color: '#64748b',
  },
  messageItem: {
    backgroundColor: '#ffffff',
    borderRadius: 12,
    padding: 16,
    marginBottom: 12,
    elevation: 1,
    shadowColor: '#000',
    shadowOffset: { width: 0, height: 1 },
    shadowOpacity: 0.1,
    shadowRadius: 2,
  },
  messageHeader: {
    flexDirection: 'row',
    alignItems: 'center',
    marginBottom: 12,
  },
  statusIcon: {
    width: 32,
    height: 32,
    borderRadius: 16,
    alignItems: 'center',
    justifyContent: 'center',
    marginRight: 12,
  },
  statusIconText: {
    fontSize: 16,
  },
  messageInfo: {
    flex: 1,
  },
  petName: {
    fontSize: 14,
    fontWeight: 'bold',
    color: '#1e293b',
  },
  timestamp: {
    fontSize: 12,
    color: '#64748b',
  },
  statusText: {
    fontSize: 12,
    fontWeight: '500',
  },
  messageContent: {
    fontSize: 14,
    color: '#334155',
    lineHeight: 20,
    marginBottom: 12,
  },
  messageFooter: {
    borderTopWidth: 1,
    borderTopColor: '#e2e8f0',
    paddingTop: 12,
  },
  activityContainer: {
    flexDirection: 'row',
    alignItems: 'center',
    marginBottom: 8,
  },
  activityLabel: {
    fontSize: 12,
    color: '#64748b',
    width: 50,
  },
  activityBar: {
    flex: 1,
    height: 6,
    backgroundColor: '#e2e8f0',
    borderRadius: 3,
    marginRight: 8,
    overflow: 'hidden',
  },
  activityFill: {
    height: '100%',
    borderRadius: 3,
  },
  activityValue: {
    fontSize: 10,
    color: '#64748b',
    width: 30,
  },
  readTime: {
    fontSize: 12,
    color: '#64748b',
  },
  instructionCard: {
    backgroundColor: '#ffffff',
    borderRadius: 12,
    padding: 16,
    marginTop: 16,
    elevation: 1,
    shadowColor: '#000',
    shadowOffset: { width: 0, height: 1 },
    shadowOpacity: 0.1,
    shadowRadius: 2,
  },
  instructionTitle: {
    fontSize: 16,
    fontWeight: 'bold',
    color: '#1e293b',
    marginBottom: 8,
  },
  instructionText: {
    fontSize: 12,
    color: '#64748b',
    lineHeight: 18,
    marginBottom: 4,
  },
  bottomNav: {
    flexDirection: 'row',
    justifyContent: 'space-around',
    backgroundColor: '#ffffff',
    borderTopWidth: 1,
    borderTopColor: '#e2e8f0',
    paddingVertical: 12,
  },
  navItem: {
    alignItems: 'center',
    flex: 1,
  },
  activeNavItem: {
    paddingBottom: 2,
    borderBottomWidth: 2,
    borderBottomColor: '#3b82f6',
  },
  navIcon: {
    fontSize: 20,
    color: '#94a3b8',
    marginBottom: 4,
  },
  activeNavIcon: {
    color: '#3b82f6',
  },
  navText: {
    fontSize: 12,
    color: '#94a3b8',
  },
  activeNavText: {
    color: '#3b82f6',
    fontWeight: '500',
  },
});

export default PetMessageReceiptSystemApp;
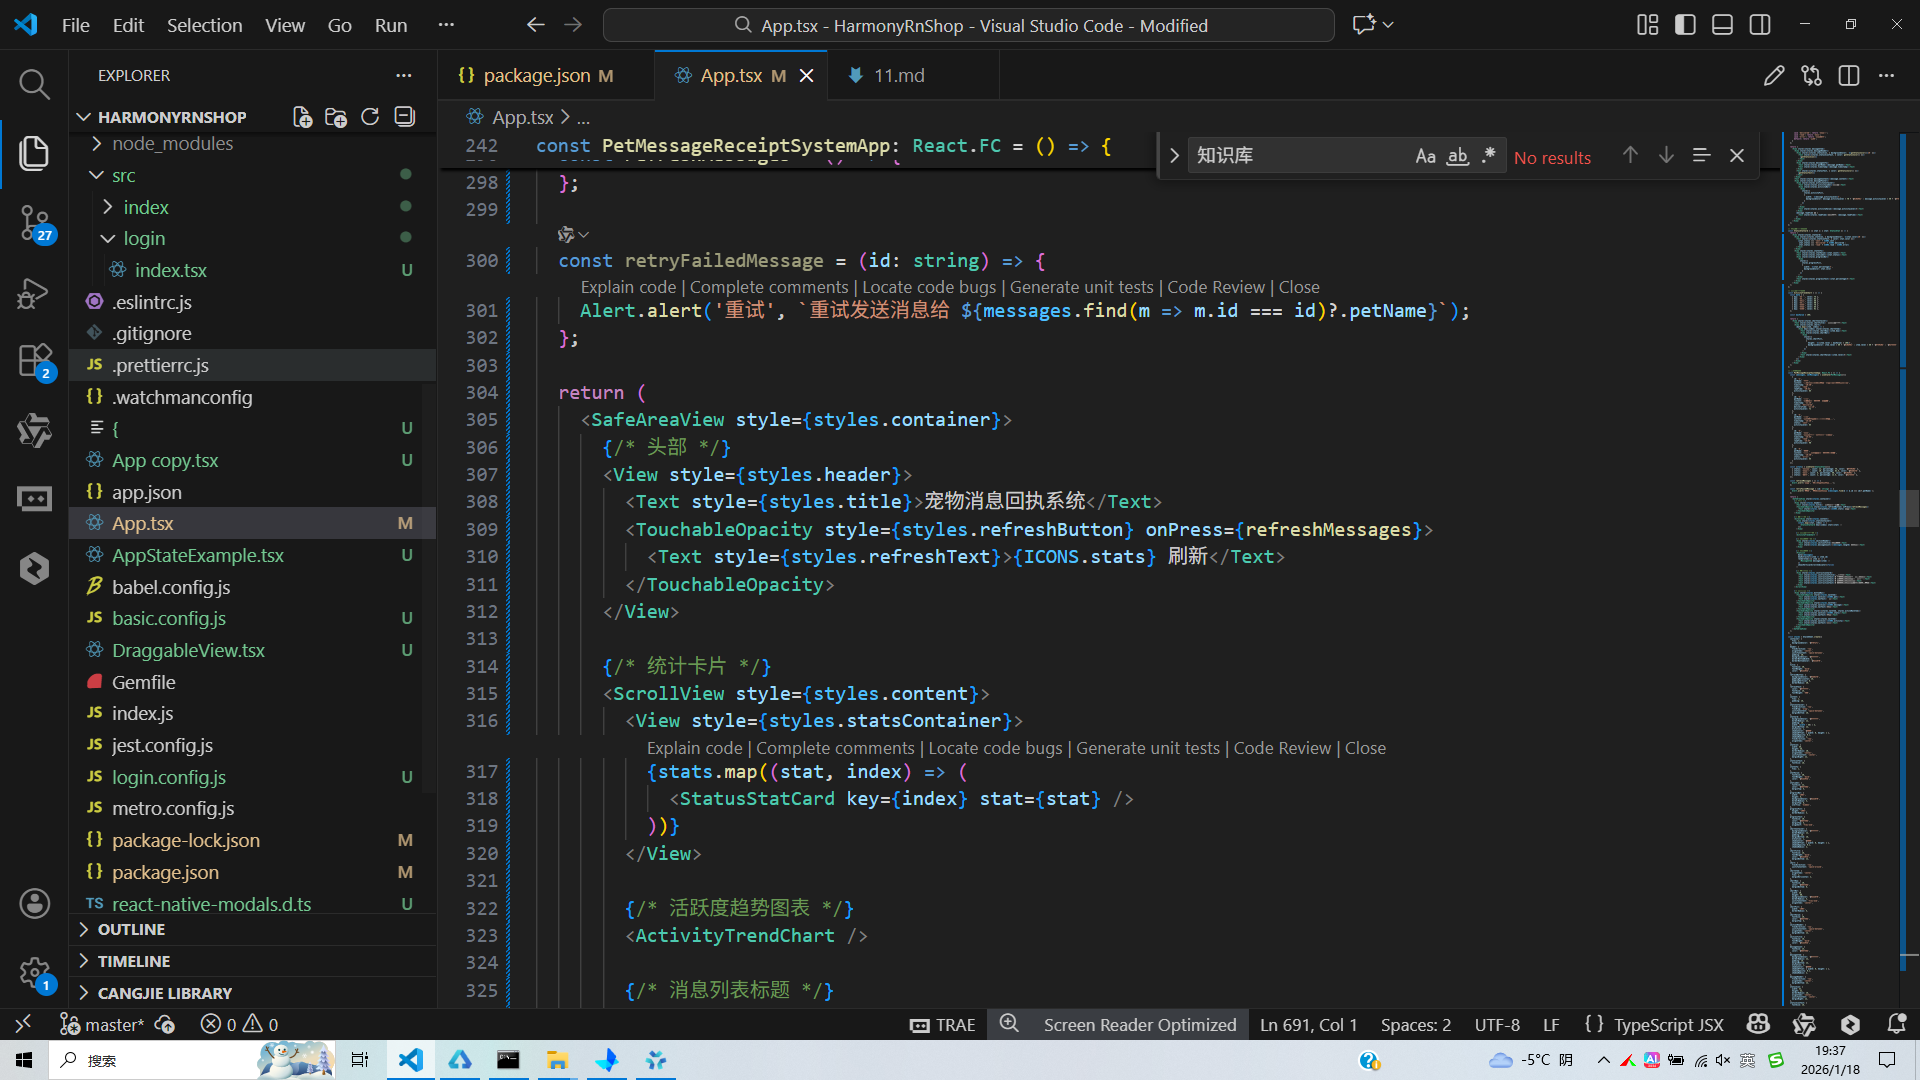
打包
接下来通过打包命令npn run harmony将reactNative的代码打包成为bundle,这样可以进行在开源鸿蒙OpenHarmony中进行使用。

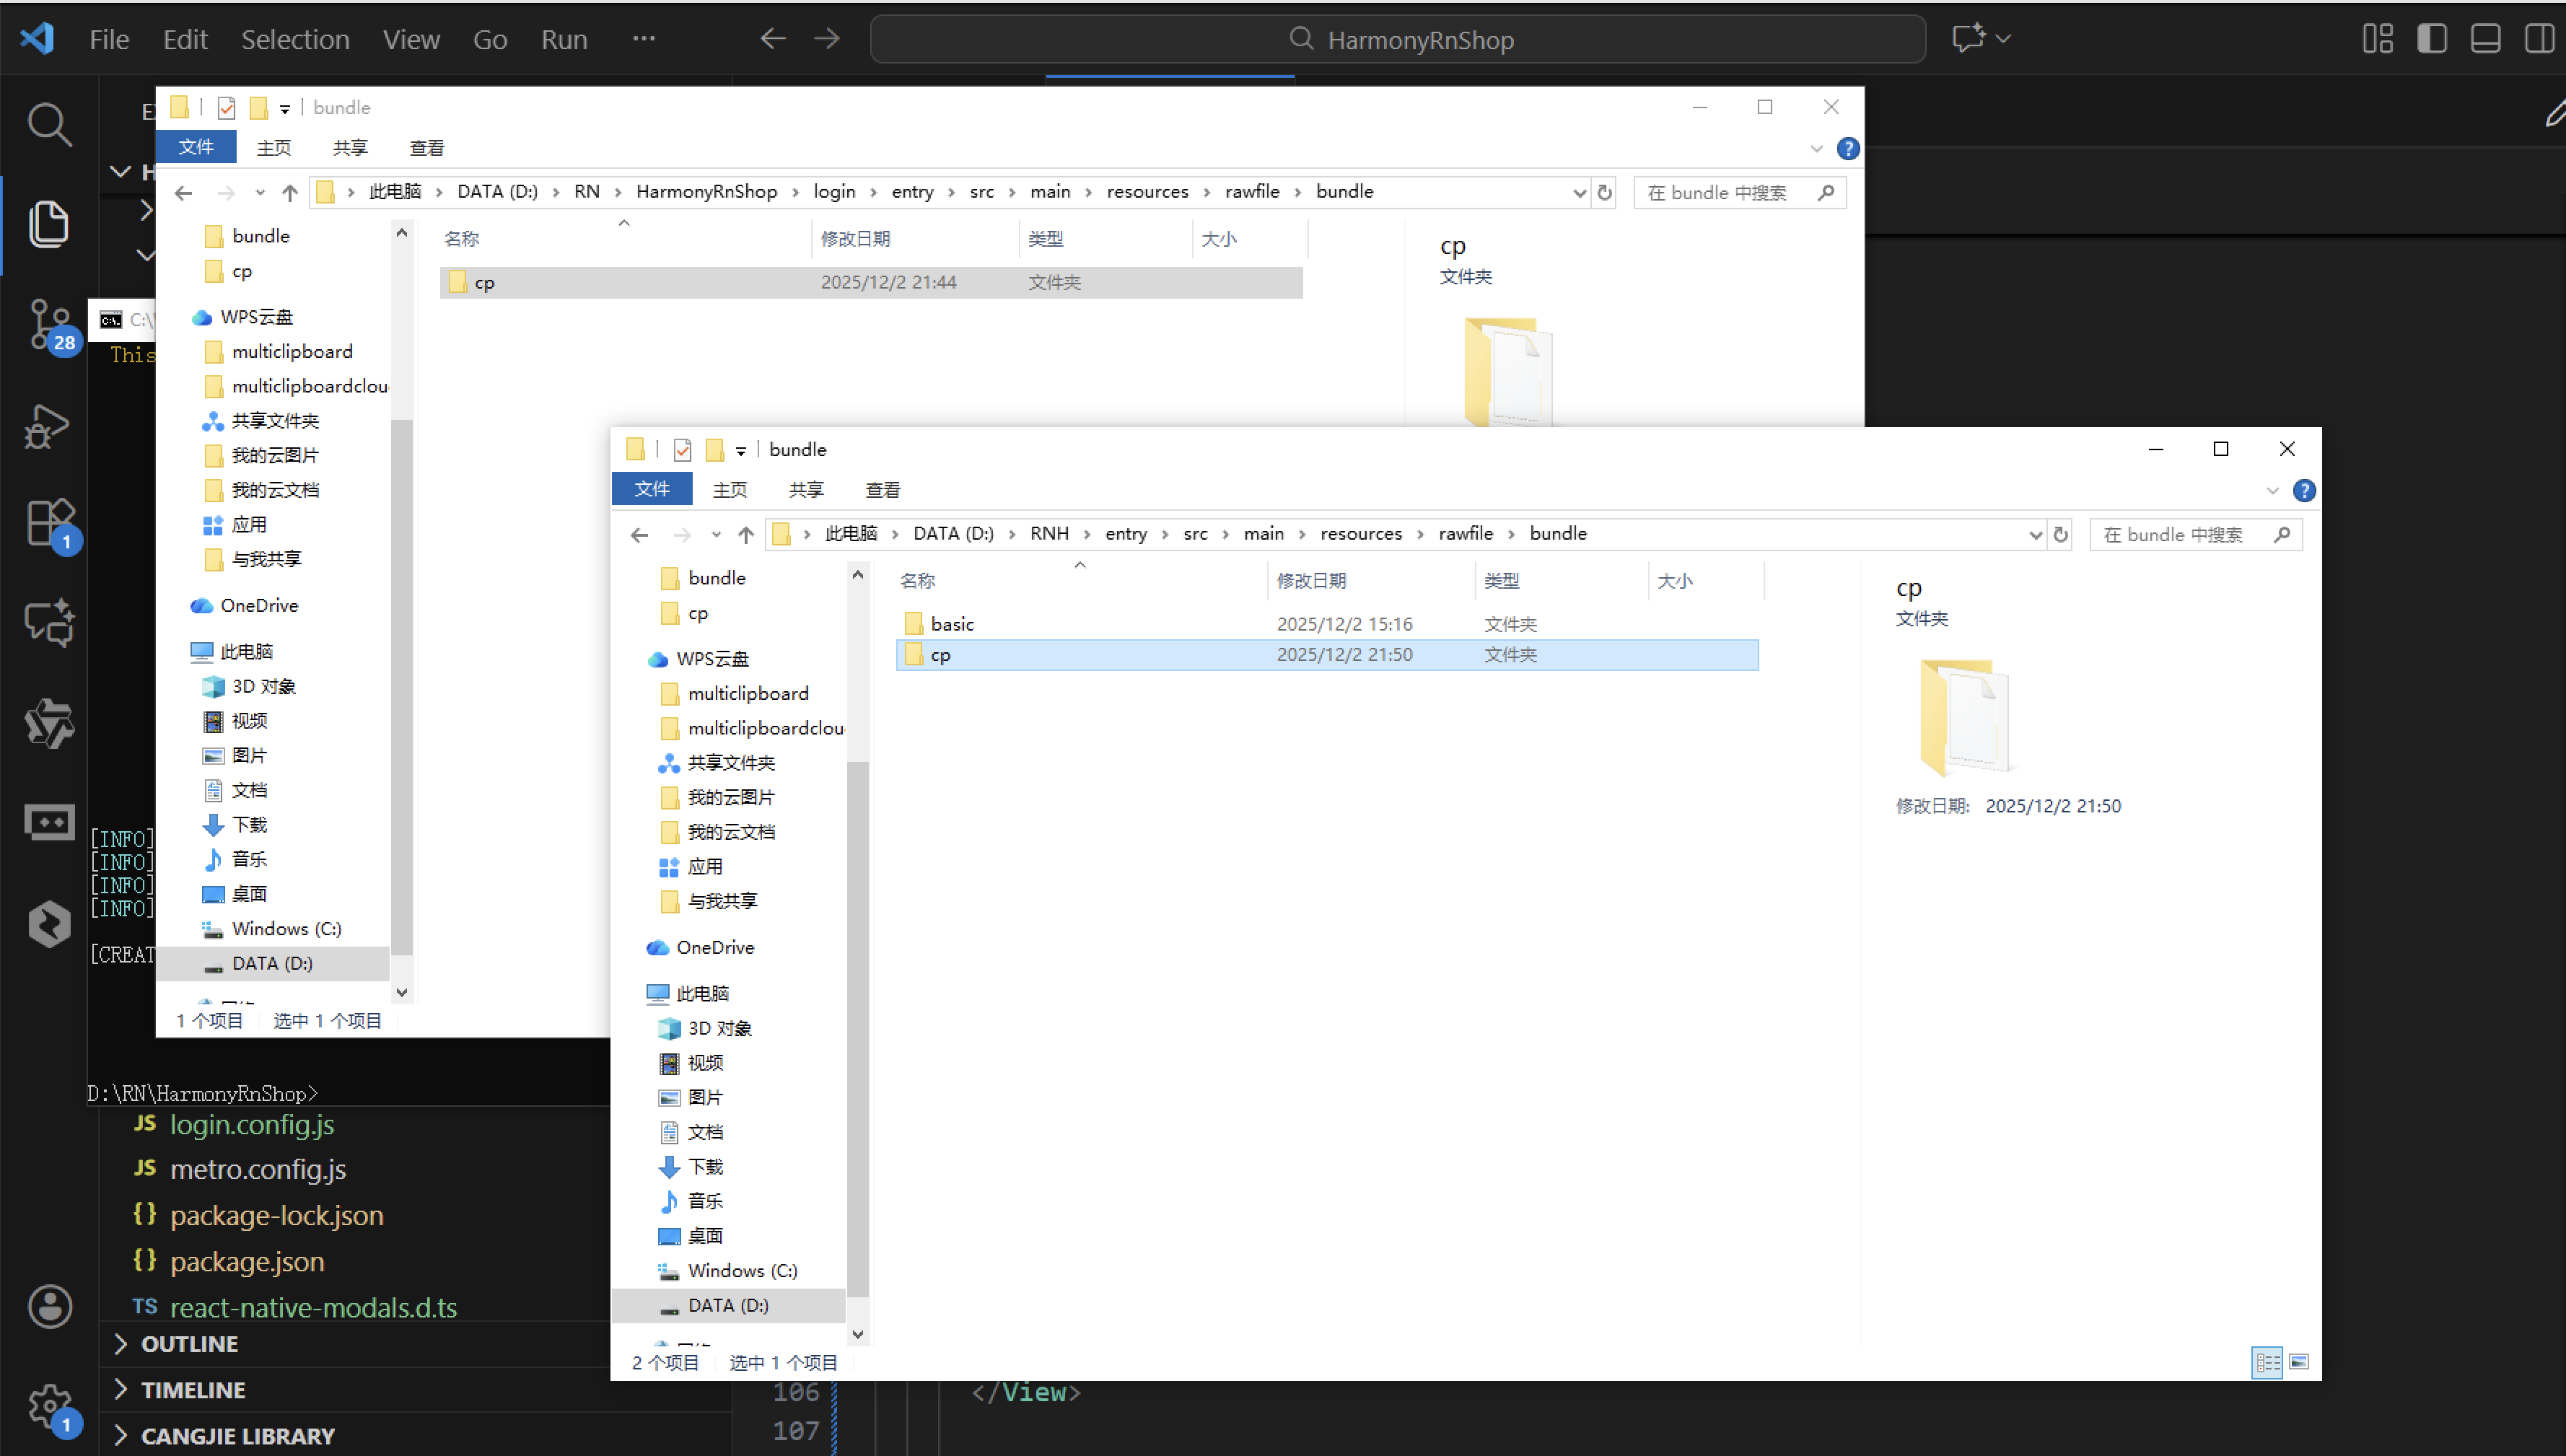
打包之后再将打包后的鸿蒙OpenHarmony文件拷贝到鸿蒙的DevEco-Studio工程目录去:
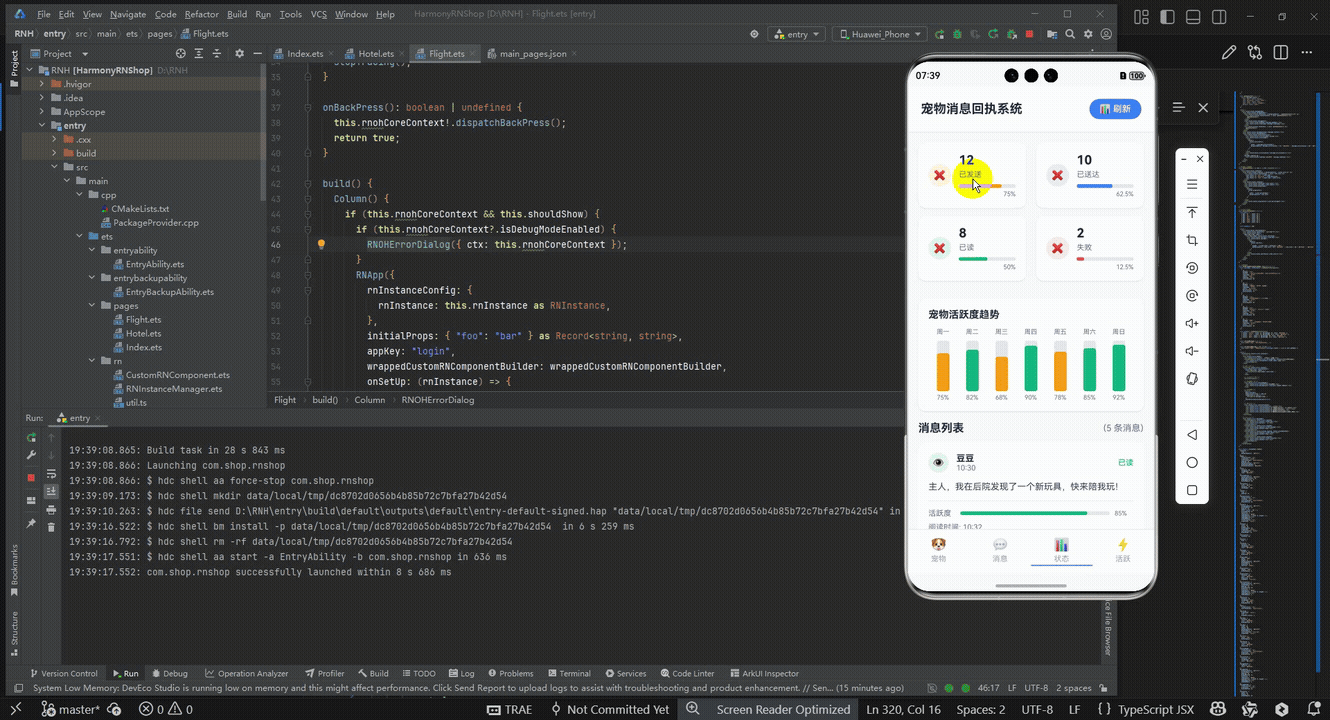
最后运行效果图如下显示:
欢迎大家加入开源鸿蒙跨平台开发者社区,一起共建开源鸿蒙跨平台生态。

作为“人工智能6S店”的官方数字引擎,为AI开发者与企业提供一个覆盖软硬件全栈、一站式门户。
更多推荐
 9
9 0
0- 0


 已为社区贡献3条内容

所有评论(0)