
Flutter 框架跨平台鸿蒙开发 - 打造专业级图片滤镜应用
override_buildSlider('红色', _red, (v) => setState(() => _red = v)),_buildSlider('绿色', _green, (v) => setState(() => _green = v)),_buildSlider('蓝色', _blue, (v) => setState(() => _blue = v)),
Flutter实战:打造专业级图片滤镜应用
前言
图片滤镜是现代图片编辑应用的核心功能之一。本文将带你从零开始,使用Flutter开发一个功能完整的图片滤镜应用,支持11种滤镜效果、强度调节、实时预览等功能。
应用特色
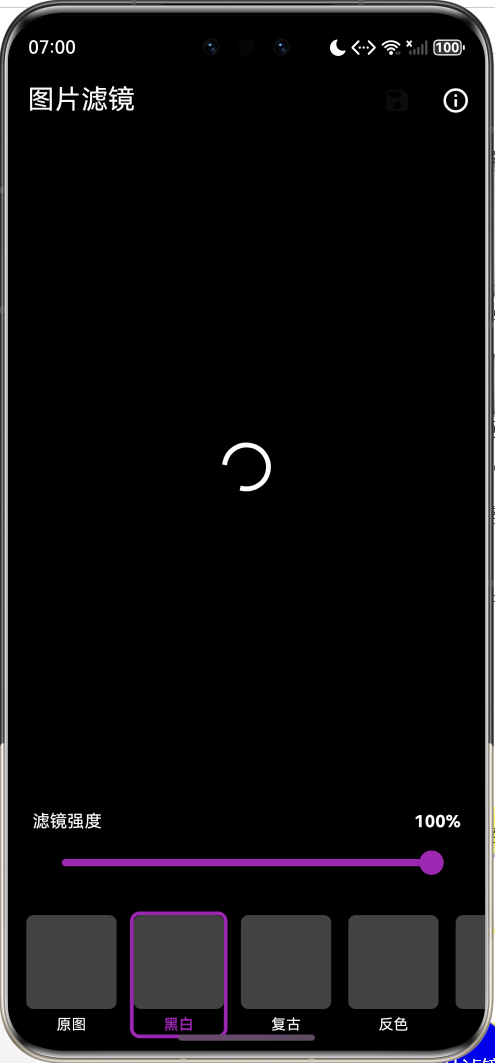
- 🎨 11种滤镜效果:黑白、复古、反色、暖色、冷色、高对比、模糊、怀旧、增亮、变暗、饱和
- 🎚️ 强度调节:滑块控制滤镜强度(0-100%)
- 🖼️ 实时预览:横向滚动查看所有滤镜缩略图
- 🎭 混合模式:支持原图与滤镜效果混合
- 🌈 渐变示例:内置彩色渐变图片作为演示
效果展示
核心知识点
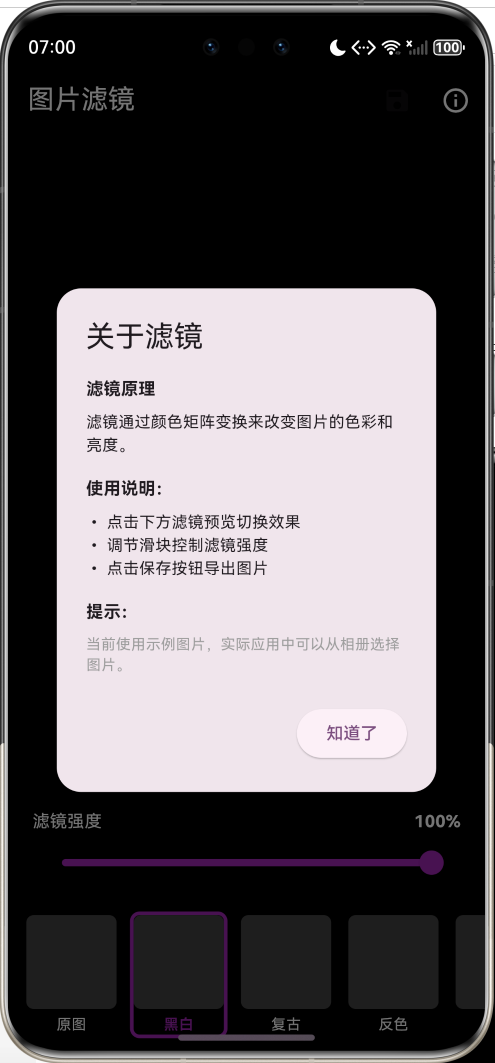
1. 颜色矩阵原理
滤镜的核心是颜色矩阵变换。一个5×4的矩阵可以控制RGB和Alpha通道:
$$
\begin{bmatrix}
R’ \
G’ \
B’ \
A’
\end{bmatrix}
\begin{bmatrix}
a_{00} & a_{01} & a_{02} & a_{03} & a_{04} \
a_{10} & a_{11} & a_{12} & a_{13} & a_{14} \
a_{20} & a_{21} & a_{22} & a_{23} & a_{24} \
a_{30} & a_{31} & a_{32} & a_{33} & a_{34}
\end{bmatrix}
\times
\begin{bmatrix}
R \
G \
B \
A \
1
\end{bmatrix}
$$
其中:
- 前3列控制RGB通道的混合
- 第4列控制Alpha透明度
- 第5列是偏移量(加法)
2. 常见滤镜矩阵
黑白滤镜
使用人眼对RGB的感知权重:
[
  0.2126, 0.7152, 0.0722, 0, 0,  // R = 0.2126R + 0.7152G + 0.0722B
  0.2126, 0.7152, 0.0722, 0, 0,  // G = 0.2126R + 0.7152G + 0.0722B
  0.2126, 0.7152, 0.0722, 0, 0,  // B = 0.2126R + 0.7152G + 0.0722B
  0,      0,      0,      1, 0,  // A = A
]
复古滤镜(Sepia)
模拟老照片的棕褐色调:
[
  0.393, 0.769, 0.189, 0, 0,
  0.349, 0.686, 0.168, 0, 0,
  0.272, 0.534, 0.131, 0, 0,
  0,     0,     0,     1, 0,
]
反色滤镜
将颜色值取反:
[
  -1, 0,  0,  0, 255,  // R' = 255 - R
  0,  -1, 0,  0, 255,  // G' = 255 - G
  0,  0,  -1, 0, 255,  // B' = 255 - B
  0,  0,  0,  1, 0,
]
完整代码实现
1. 滤镜数据模型
/// 滤镜类型
class FilterType {
  final String id;
  final String name;
  final ColorFilter? colorFilter;
  final ui.ImageFilter? imageFilter;

  const FilterType({
    required this.id,
    required this.name,
    this.colorFilter,
    this.imageFilter,
  });
}
2. 滤镜预设配置
/// 预设滤镜
class FilterPresets {
  static final List<FilterType> filters = [
    const FilterType(
      id: 'original',
      name: '原图',
    ),
    FilterType(
      id: 'grayscale',
      name: '黑白',
      colorFilter: const ColorFilter.matrix([
        0.2126, 0.7152, 0.0722, 0, 0,
        0.2126, 0.7152, 0.0722, 0, 0,
        0.2126, 0.7152, 0.0722, 0, 0,
        0,      0,      0,      1, 0,
      ]),
    ),
    FilterType(
      id: 'warm',
      name: '暖色',
      colorFilter: const ColorFilter.matrix([
        1.2, 0,   0,   0, 0,  // 增强红色
        0,   1.0, 0,   0, 0,
        0,   0,   0.8, 0, 0,  // 减弱蓝色
        0,   0,   0,   1, 0,
      ]),
    ),
    FilterType(
      id: 'cool',
      name: '冷色',
      colorFilter: const ColorFilter.matrix([
        0.8, 0,   0,   0, 0,  // 减弱红色
        0,   1.0, 0,   0, 0,
        0,   0,   1.2, 0, 0,  // 增强蓝色
        0,   0,   0,   1, 0,
      ]),
    ),
    FilterType(
      id: 'blur',
      name: '模糊',
      imageFilter: ui.ImageFilter.blur(sigmaX: 5, sigmaY: 5),
    ),
    // ... 更多滤镜
  ];
}
3. 主界面实现
class _ImageFilterAppState extends State<ImageFilterApp> {
ui.Image? _image;
FilterType _selectedFilter = FilterPresets.filters[0];
double _filterIntensity = 1.0;
void initState() {
super.initState();
_createGradientImage();
}
/// 创建渐变示例图片
Future<void> _createGradientImage() async {
final recorder = ui.PictureRecorder();
final canvas = Canvas(recorder);
final size = const Size(800, 600);
final paint = Paint()
..shader = ui.Gradient.linear(
Offset.zero,
Offset(size.width, size.height),
[Colors.purple, Colors.blue, Colors.cyan, Colors.green],
);
canvas.drawRect(Offset.zero & size, paint);
final picture = recorder.endRecording();
final image = await picture.toImage(
size.width.toInt(),
size.height.toInt(),
);
setState(() {
_image = image;
_isLoading = false;
});
}
Widget build(BuildContext context) {
return Scaffold(
backgroundColor: Colors.black,
appBar: AppBar(
title: const Text('图片滤镜'),
backgroundColor: Colors.black,
foregroundColor: Colors.white,
actions: [
IconButton(
icon: const Icon(Icons.save),
onPressed: _saveImage,
),
],
),
body: Column(
children: [
Expanded(child: _buildImagePreview()),
if (_selectedFilter.id != 'original') _buildIntensitySlider(),
_buildFilterSelector(),
],
),
);
}
}
4. 滤镜应用逻辑
Widget _buildFilteredImage() {
  Widget imageWidget = RawImage(
    image: _image,
    fit: BoxFit.contain,
  );

  // 应用颜色滤镜
  if (_selectedFilter.colorFilter != null) {
    imageWidget = ColorFiltered(
      colorFilter: _selectedFilter.colorFilter!,
      child: imageWidget,
    );
  }

  // 应用图像滤镜(如模糊)
  if (_selectedFilter.imageFilter != null) {
    imageWidget = ImageFiltered(
      imageFilter: _selectedFilter.imageFilter!,
      child: imageWidget,
    );
  }

  // 应用强度混合
  if (_filterIntensity < 1.0 && _selectedFilter.id != 'original') {
    imageWidget = Opacity(
      opacity: _filterIntensity,
      child: Stack(
        children: [
          Opacity(
            opacity: 1 - _filterIntensity,
            child: RawImage(image: _image, fit: BoxFit.contain),
          ),
          imageWidget,
        ],
      ),
    );
  }

  return imageWidget;
}
5. 强度调节滑块
Widget _buildIntensitySlider() {
  return Container(
    padding: const EdgeInsets.symmetric(horizontal: 20, vertical: 8),
    color: Colors.black87,
    child: Column(
      children: [
        Row(
          mainAxisAlignment: MainAxisAlignment.spaceBetween,
          children: [
            const Text(
              '滤镜强度',
              style: TextStyle(color: Colors.white, fontSize: 14),
            ),
            Text(
              '${(_filterIntensity * 100).toInt()}%',
              style: const TextStyle(
                color: Colors.white,
                fontWeight: FontWeight.bold,
              ),
            ),
          ],
        ),
        Slider(
          value: _filterIntensity,
          onChanged: (value) {
            setState(() => _filterIntensity = value);
          },
          activeColor: Colors.purple,
          inactiveColor: Colors.grey.shade700,
        ),
      ],
    ),
  );
}
6. 滤镜选择器
Widget _buildFilterSelector() {
  return Container(
    height: 120,
    color: Colors.black87,
    child: ListView.builder(
      scrollDirection: Axis.horizontal,
      padding: const EdgeInsets.symmetric(horizontal: 8, vertical: 8),
      itemCount: FilterPresets.filters.length,
      itemBuilder: (context, index) {
        return _buildFilterItem(FilterPresets.filters[index]);
      },
    ),
  );
}

Widget _buildFilterItem(FilterType filter) {
  final isSelected = _selectedFilter.id == filter.id;

  return GestureDetector(
    onTap: () => _selectFilter(filter),
    child: Container(
      width: 80,
      margin: const EdgeInsets.symmetric(horizontal: 4),
      decoration: BoxDecoration(
        border: Border.all(
          color: isSelected ? Colors.purple : Colors.transparent,
          width: 3,
        ),
        borderRadius: BorderRadius.circular(8),
      ),
      child: Column(
        children: [
          Expanded(
            child: ClipRRect(
              borderRadius: BorderRadius.circular(6),
              child: _buildFilterThumbnail(filter),
            ),
          ),
          const SizedBox(height: 4),
          Text(
            filter.name,
            style: TextStyle(
              color: isSelected ? Colors.purple : Colors.white,
              fontSize: 12,
              fontWeight: isSelected ? FontWeight.bold : FontWeight.normal,
            ),
          ),
        ],
      ),
    ),
  );
}
技术要点详解
1. ColorFilter vs ImageFilter
| 特性 | ColorFilter | ImageFilter |
|---|---|---|
| 用途 | 颜色变换 | 图像效果 |
| 性能 | 高 | 中等 |
| 典型应用 | 黑白、复古、色温 | 模糊、锐化 |
| 实现方式 | 矩阵运算 | 卷积核 |
2. 滤镜强度混合技术
通过Stack叠加原图和滤镜图,使用Opacity控制混合比例:
Stack(
  children: [
    Opacity(
      opacity: 1 - intensity,  // 原图透明度
      child: originalImage,
    ),
    Opacity(
      opacity: intensity,      // 滤镜图透明度
      child: filteredImage,
    ),
  ],
)
3. ui.Image的创建
Flutter提供多种方式创建ui.Image:
// 方式1:从资源加载
final ByteData data = await rootBundle.load('assets/image.jpg');
final Uint8List bytes = data.buffer.asUint8List();
final ui.Codec codec = await ui.instantiateImageCodec(bytes);
final ui.FrameInfo frameInfo = await codec.getNextFrame();
final ui.Image image = frameInfo.image;

// 方式2:通过Canvas绘制
final recorder = ui.PictureRecorder();
final canvas = Canvas(recorder);
// ... 绘制操作
final picture = recorder.endRecording();
final image = await picture.toImage(width, height);
4. RepaintBoundary优化
使用RepaintBoundary包裹图片,避免不必要的重绘:
RepaintBoundary(
  key: _imageKey,
  child: _buildFilteredImage(),
)
功能扩展建议
1. 图片选择功能
集成image_picker包:
import 'package:image_picker/image_picker.dart';

Future<void> _pickImage() async {
  final picker = ImagePicker();
  final XFile? file = await picker.pickImage(source: ImageSource.gallery);

  if (file != null) {
    final bytes = await file.readAsBytes();
    final codec = await ui.instantiateImageCodec(bytes);
    final frame = await codec.getNextFrame();
    setState(() => _image = frame.image);
  }
}
2. 图片保存功能
使用image_gallery_saver包:
import 'package:image_gallery_saver/image_gallery_saver.dart';

Future<void> _saveImage() async {
  final boundary = _imageKey.currentContext!.findRenderObject()
      as RenderRepaintBoundary;
  final image = await boundary.toImage(pixelRatio: 3.0);
  final byteData = await image.toByteData(format: ui.ImageByteFormat.png);
  final bytes = byteData!.buffer.asUint8List();

  await ImageGallerySaver.saveImage(bytes);
}
3. 自定义滤镜
允许用户调整矩阵参数:
class CustomFilter extends StatefulWidget {
State<CustomFilter> createState() => _CustomFilterState();
}
class _CustomFilterState extends State<CustomFilter> {
double _red = 1.0;
double _green = 1.0;
double _blue = 1.0;
double _brightness = 0.0;
ColorFilter get customFilter => ColorFilter.matrix([
_red, 0, 0, 0, _brightness,
0, _green, 0, 0, _brightness,
0, 0, _blue, 0, _brightness,
0, 0, 0, 1, 0,
]);
Widget build(BuildContext context) {
return Column(
children: [
_buildSlider('红色', _red, (v) => setState(() => _red = v)),
_buildSlider('绿色', _green, (v) => setState(() => _green = v)),
_buildSlider('蓝色', _blue, (v) => setState(() => _blue = v)),
_buildSlider('亮度', _brightness, (v) => setState(() => _brightness = v)),
],
);
}
}
4. 滤镜组合
支持多个滤镜叠加:
Widget _buildMultipleFilters(List<FilterType> filters) {
  Widget result = RawImage(image: _image);

  for (var filter in filters) {
    if (filter.colorFilter != null) {
      result = ColorFiltered(
        colorFilter: filter.colorFilter!,
        child: result,
      );
    }
  }

  return result;
}
性能优化建议
1. 缩略图优化
为滤镜选择器生成低分辨率缩略图:
Future<ui.Image> _createThumbnail(ui.Image source, int maxSize) async {
  final ratio = maxSize / math.max(source.width, source.height);
  final width = (source.width * ratio).toInt();
  final height = (source.height * ratio).toInt();

  final recorder = ui.PictureRecorder();
  final canvas = Canvas(recorder);
  canvas.drawImageRect(
    source,
    Rect.fromLTWH(0, 0, source.width.toDouble(), source.height.toDouble()),
    Rect.fromLTWH(0, 0, width.toDouble(), height.toDouble()),
    Paint(),
  );

  final picture = recorder.endRecording();
  return await picture.toImage(width, height);
}
2. 异步处理
将滤镜应用放到Isolate中:
import 'dart:isolate';

Future<Uint8List> _applyFilterAsync(ui.Image image, ColorFilter filter) async {
  final receivePort = ReceivePort();

  await Isolate.spawn(_filterIsolate, {
    'sendPort': receivePort.sendPort,
    'image': image,
    'filter': filter,
  });

  return await receivePort.first as Uint8List;
}

void _filterIsolate(Map<String, dynamic> params) {
  // 在独立线程中处理滤镜
}
3. 缓存机制
缓存已应用的滤镜结果:
final Map<String, ui.Image> _filterCache = {};

ui.Image? _getCachedFilter(String filterId) {
  return _filterCache[filterId];
}

void _cacheFilter(String filterId, ui.Image image) {
  _filterCache[filterId] = image;
}
常见问题解答
Q1: 为什么滤镜效果不明显?
A: 检查颜色矩阵的值是否正确,特别是对角线的缩放系数和最后一列的偏移量。
Q2: 如何实现Instagram风格的滤镜?
A: Instagram滤镜通常是多个效果的组合,包括:
- 色温调整
- 对比度增强
- 饱和度调整
- 暗角效果(vignette)
Q3: 滤镜应用后图片质量下降?
A: 使用toImage(pixelRatio: 3.0)提高输出分辨率,或直接操作原始字节数据。
Q4: 如何实现实时相机滤镜?
A: 使用camera包获取相机流,结合StreamBuilder实时应用滤镜:
StreamBuilder<CameraImage>(
  stream: cameraController.imageStream,
  builder: (context, snapshot) {
    if (!snapshot.hasData) return Container();
    return ColorFiltered(
      colorFilter: selectedFilter,
      child: CameraPreview(cameraController),
    );
  },
)
项目结构
lib/
├── main.dart                 # 主程序入口
├── models/
│   └── filter_type.dart      # 滤镜数据模型
├── presets/
│   └── filter_presets.dart   # 预设滤镜配置
├── widgets/
│   ├── filter_selector.dart  # 滤镜选择器
│   ├── intensity_slider.dart # 强度滑块
│   └── image_preview.dart    # 图片预览
└── utils/
    ├── image_utils.dart      # 图片工具
    └── matrix_utils.dart     # 矩阵工具
总结
本文实现了一个功能完整的图片滤镜应用,涵盖了以下核心技术:
- 颜色矩阵变换:理解RGB通道的数学原理
- 滤镜强度混合:通过Stack和Opacity实现平滑过渡
- 性能优化:使用RepaintBoundary和缩略图技术
- UI设计:横向滚动选择器和实时预览
通过本项目,你不仅学会了如何实现图片滤镜,还掌握了Flutter中图像处理的核心技术。这些知识可以应用到更多场景,如视频滤镜、AR特效、图像识别等领域。
滤镜的世界充满创意,你可以尝试设计自己的独特滤镜效果,打造个性化的图片编辑应用!
欢迎加入开源鸿蒙跨平台社区:https://openharmonycrossplatform.csdn.net

作为“人工智能6S店”的官方数字引擎,为AI开发者与企业提供一个覆盖软硬件全栈、一站式门户。
更多推荐

 13
13 0
0- 0


 已为社区贡献4条内容

所有评论(0)