
鸿蒙端云一体化开发实战指南:从零到一构建云服务应用
配置一致性:确保AGC包名与端侧项目包名完全一致服务开启:所有相关云服务必须在控制台手动开启凭证管理:SDK凭证和数据库对象文件需正确放置错误处理:完善的异常捕获和用户提示日志记录:关键操作添加日志,便于调试。
本文记录了作者第一次开发端云一体化的流程,旨在为开发者提供一个鸿蒙端云一体化开发的流程指引。即使你是初学者,也能够按照步骤快速上手,实现端侧与云服务的无缝对接。
开发准备
在开始开发前,我们需要在AppGallery Connect中完成项目的基础配置。
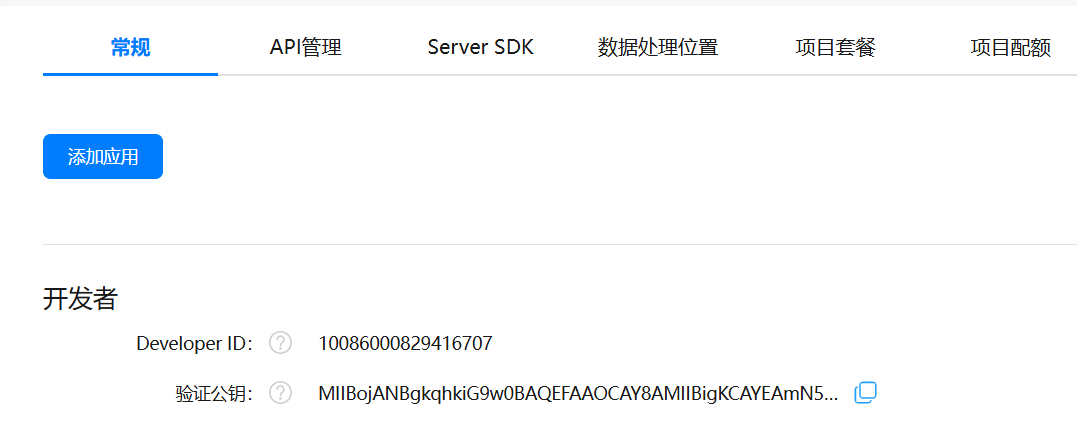
1. AGC项目创建与配置
-
创建项目:登录AGC控制台,创建一个新项目。
-
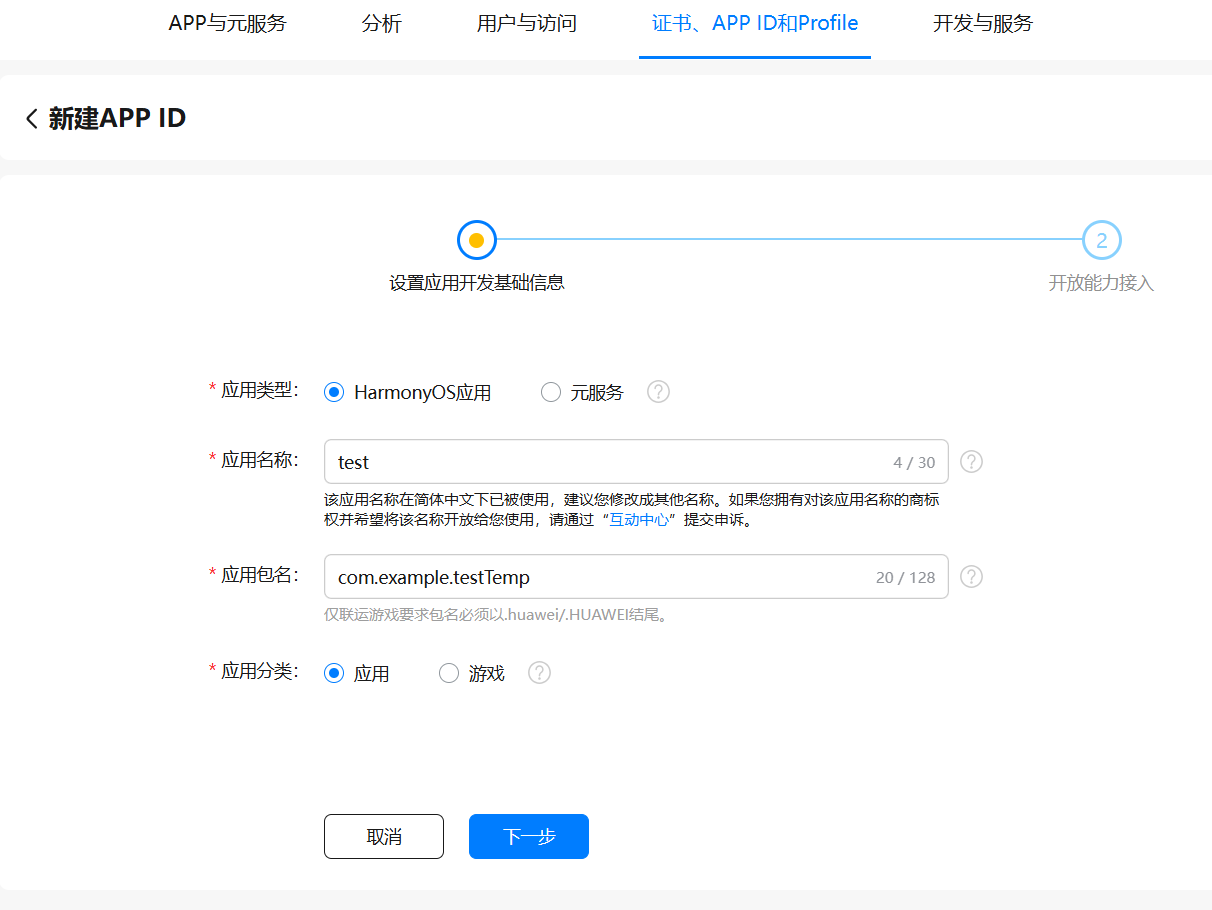
添加应用:
-
应用类型选择"HarmonyOS"
-
包名自定义(需牢记,后续端侧项目将使用此包名进行关联)
-
应用名称按需填写
-
-
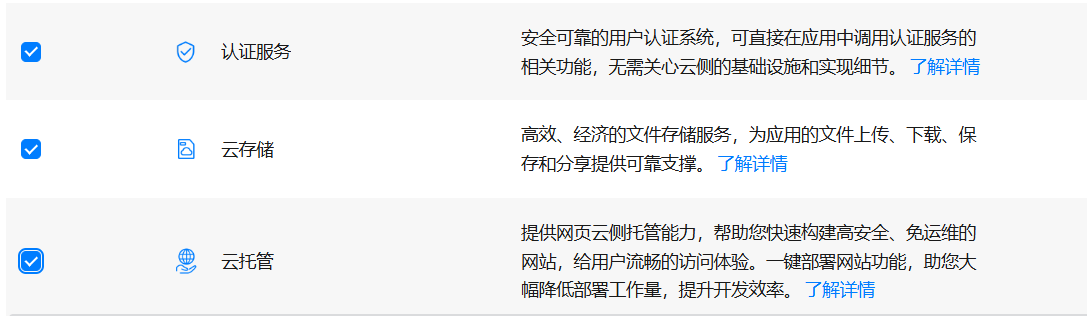
开通服务:
-
勾选"认证服务"、"云存储"和"云托管"
-
重要:点击"保存"后再点击"完成"
-
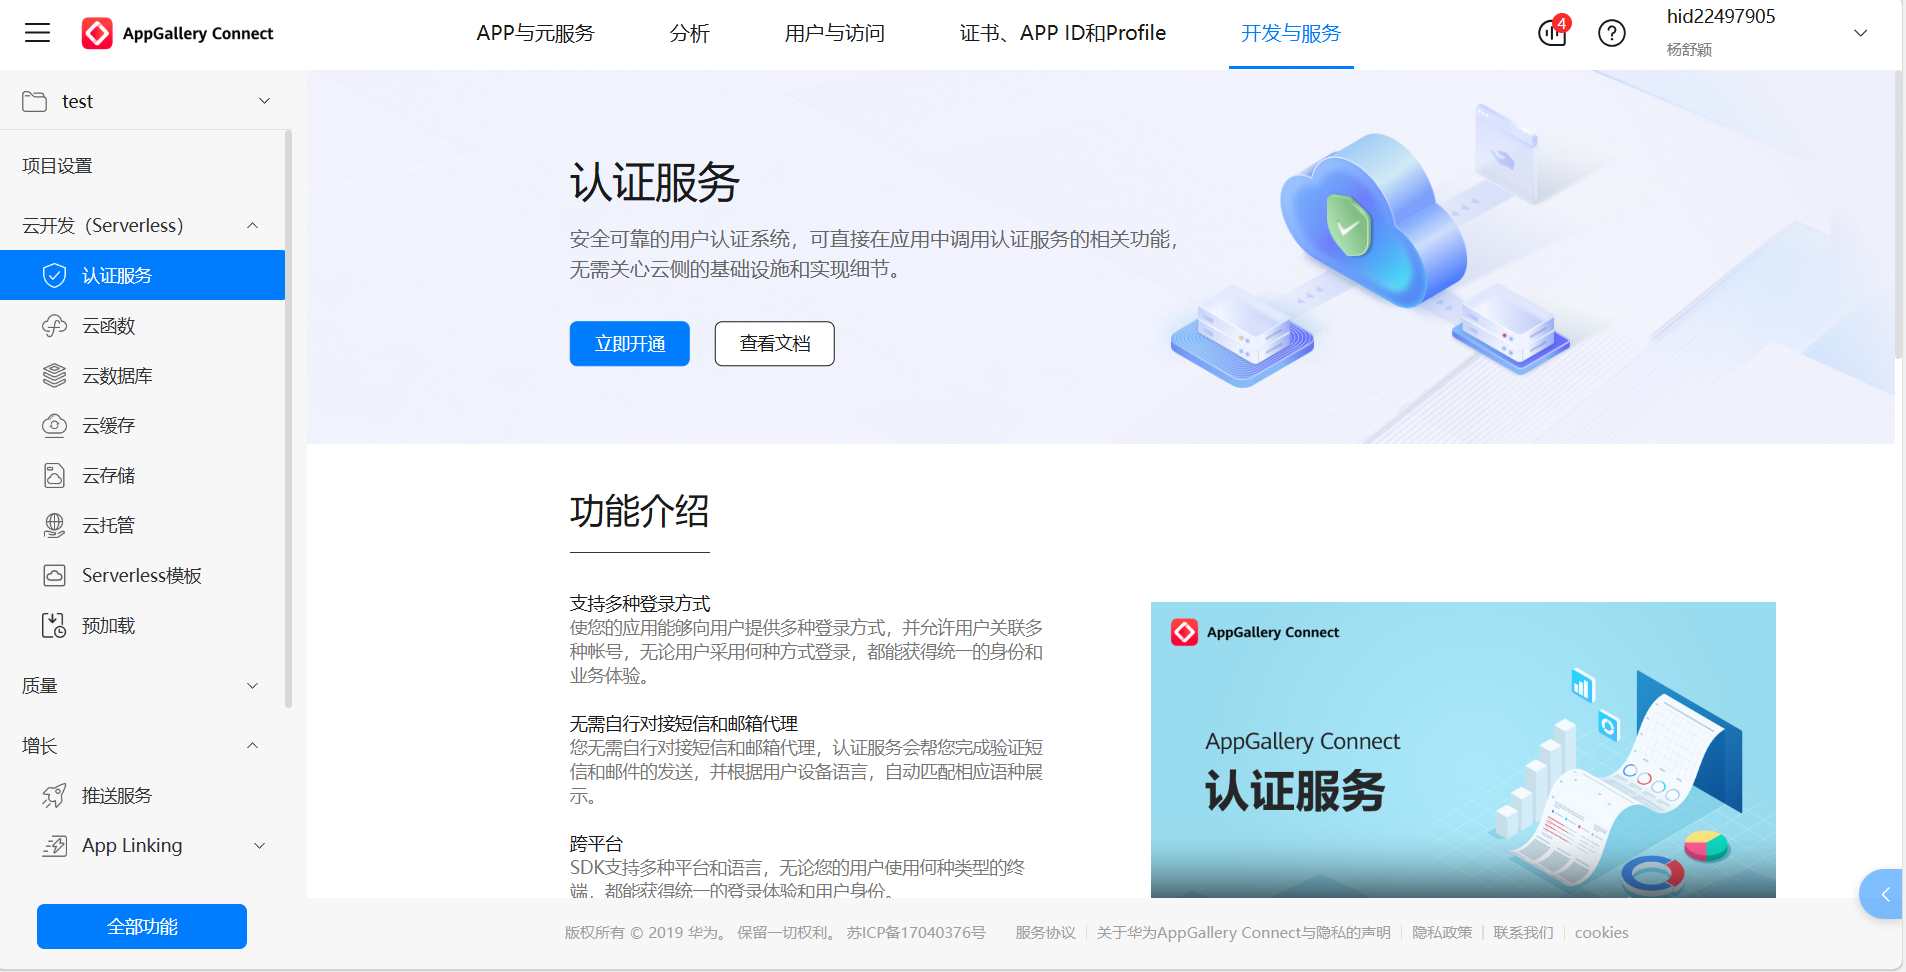
2. 服务启用
在控制台中逐个开启以下服务(必须操作,否则无法创建端云一体化项目):
-
认证服务
-
云函数
-
云数据库
-
云存储
在端侧创建云项目
开发环境:本文基于DevEco Studio 6.0.0版本和SDK 20进行演示。
1、创建项目
-
新建项目时选择
CloudDev Empty Project模板 -
包名填写之前在AGC创建应用时设置的包名
-
登录华为账号(如已登录可跳过)

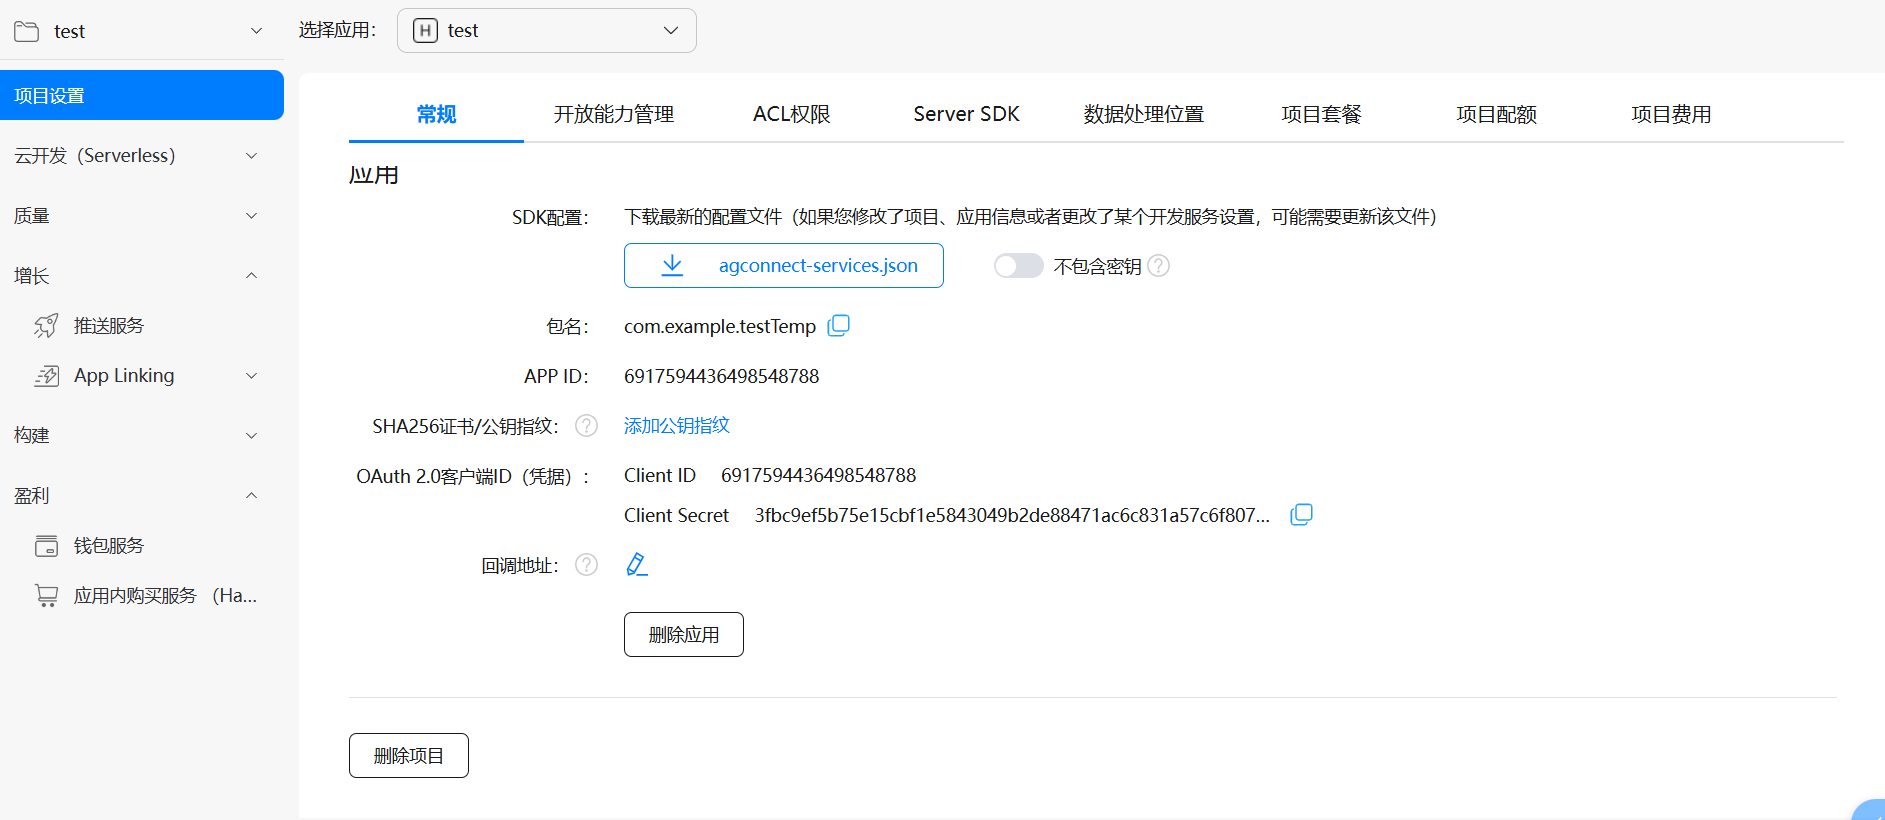
2、配置文件下载
从AGC控制台下载配置文件,放置于项目目录:
-
在AGC应用页面,点击"项目设置"
-
下载
agconnect-services.json配置文件 -
放置路径:
AppStorage/resource/rawfile/

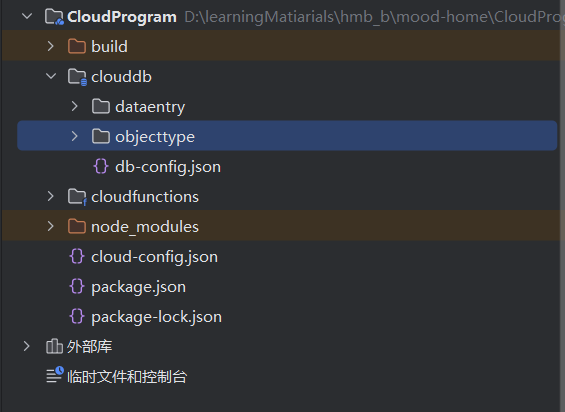
云数据库开发
接下来在端侧创建数据库表,并部署到云侧。
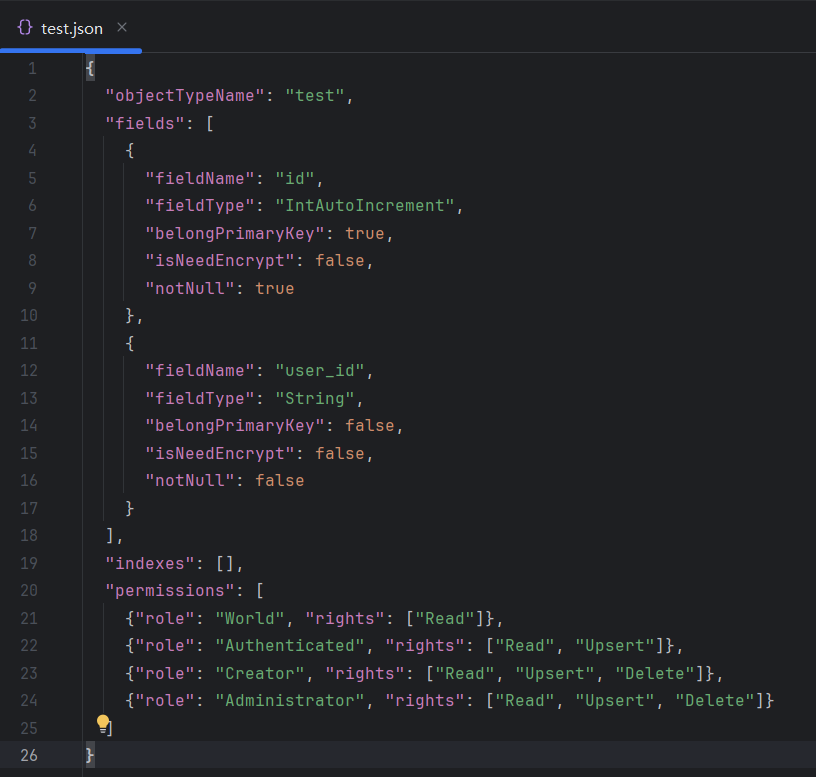
1. 数据库表创建
-
端侧创建:右键
objecttype→ 新建云数据库对象 -
依据模板:填写预定义的数据库表结构
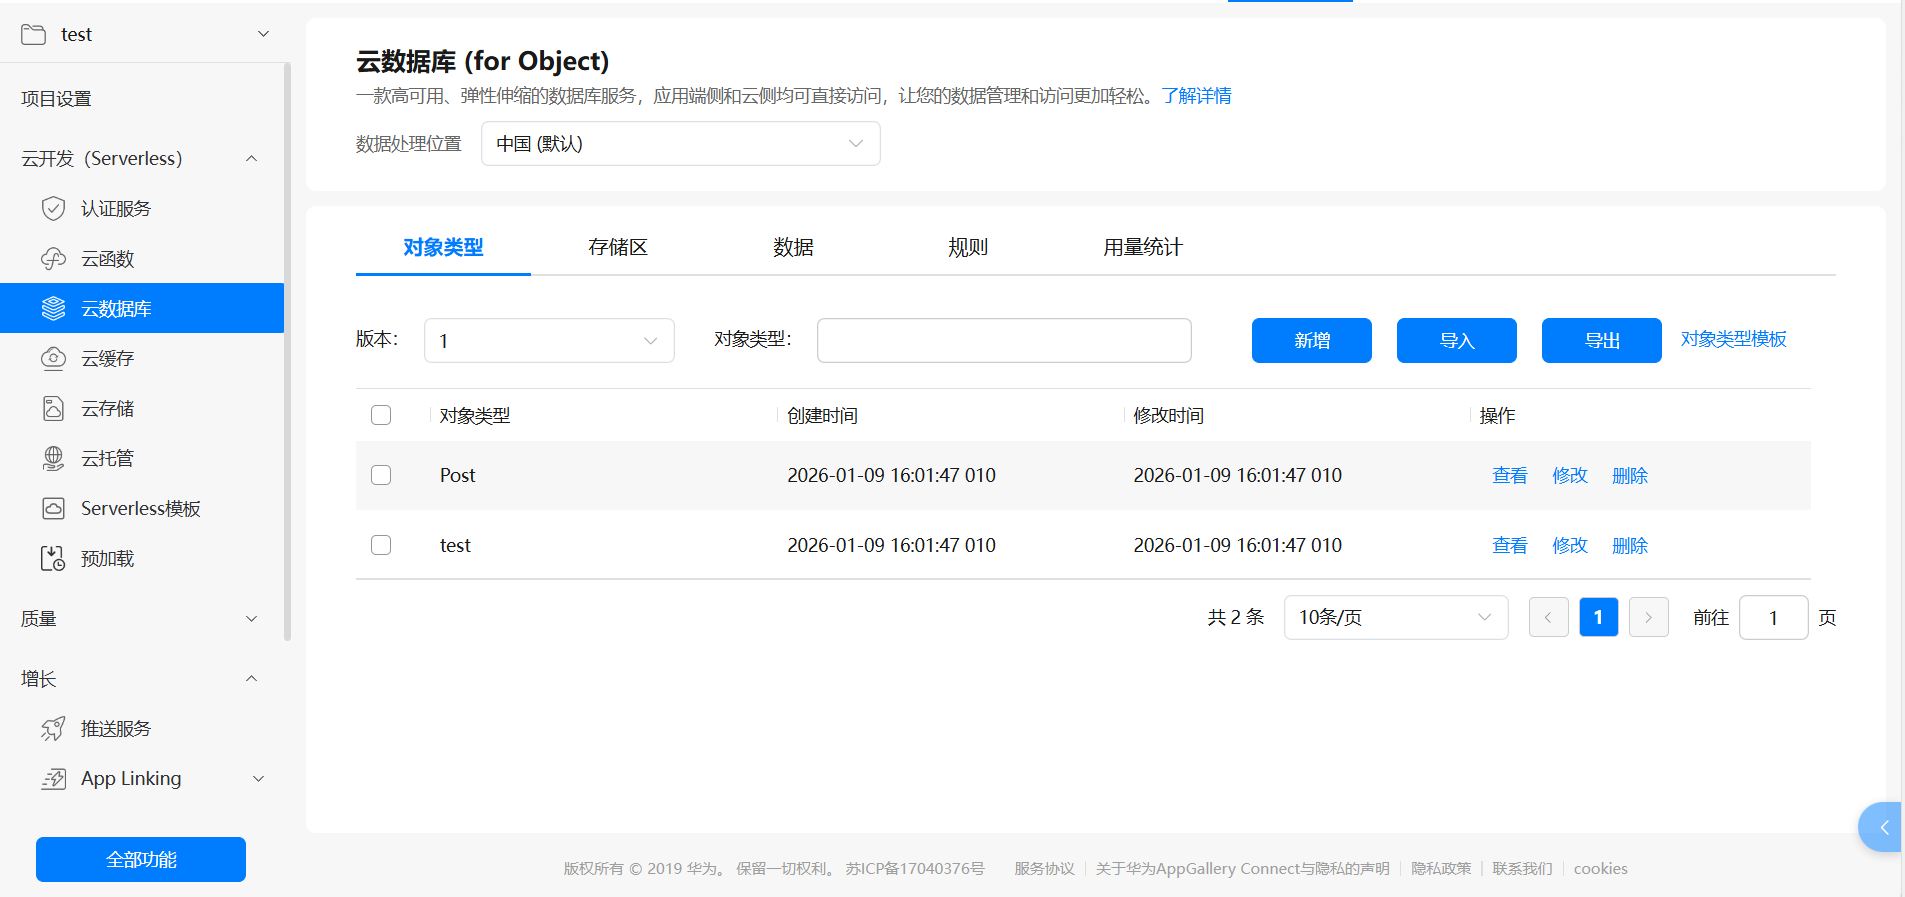
2. 数据库部署
-
部署:右键
clouddb→ 部署云数据库 -
验证:部署后在AGC控制台的云数据库中可看到新建的对象
3. 数据管理
提供多种数据添加方式:
-
在
dataentry文件夹新建文件后批量添加 -
在AGC控制台可视化逐个添加(如上图所示的数据选项那里新增)
-
通过云函数API操作
云函数开发
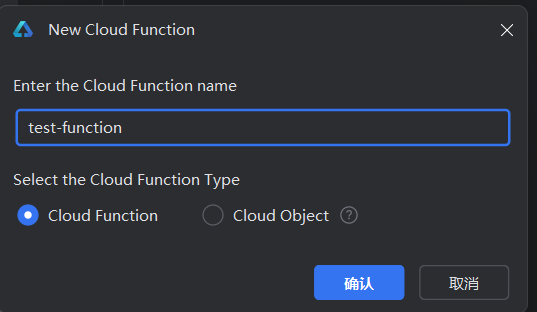
1. 云函数创建
-
端侧创建:右键
cloudfunction→ 新建云函数 -
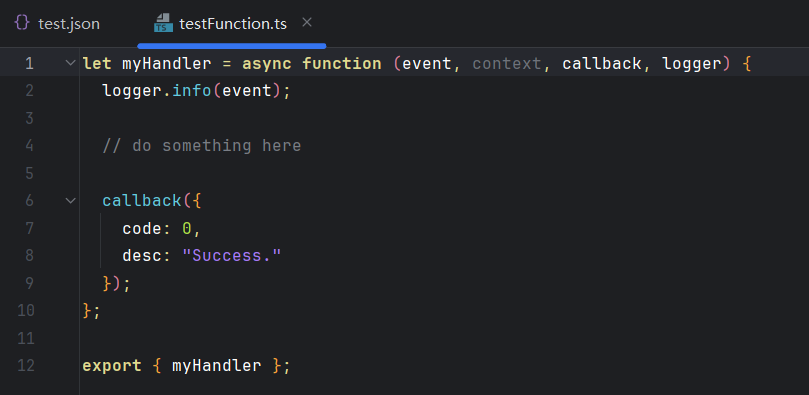
函数入口:默认导出的
myHandler函数为云函数入口点
说明
-
函数入口默认为
myHandler(可自定义名字) -
部署到云侧后,端侧调用云函数时,云函数只会执行
export出来的myHandler函数 -
注意:只能有一个入口,即不能导出多个函数
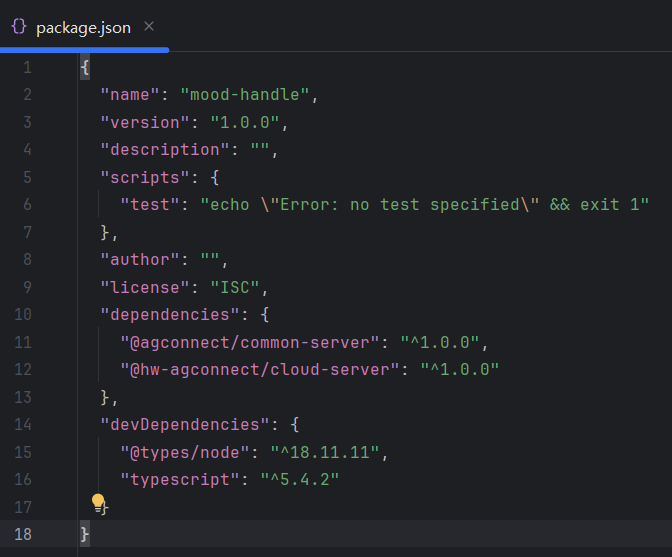
2、云函数配置
在云函数的package.json中添加必要的依赖:
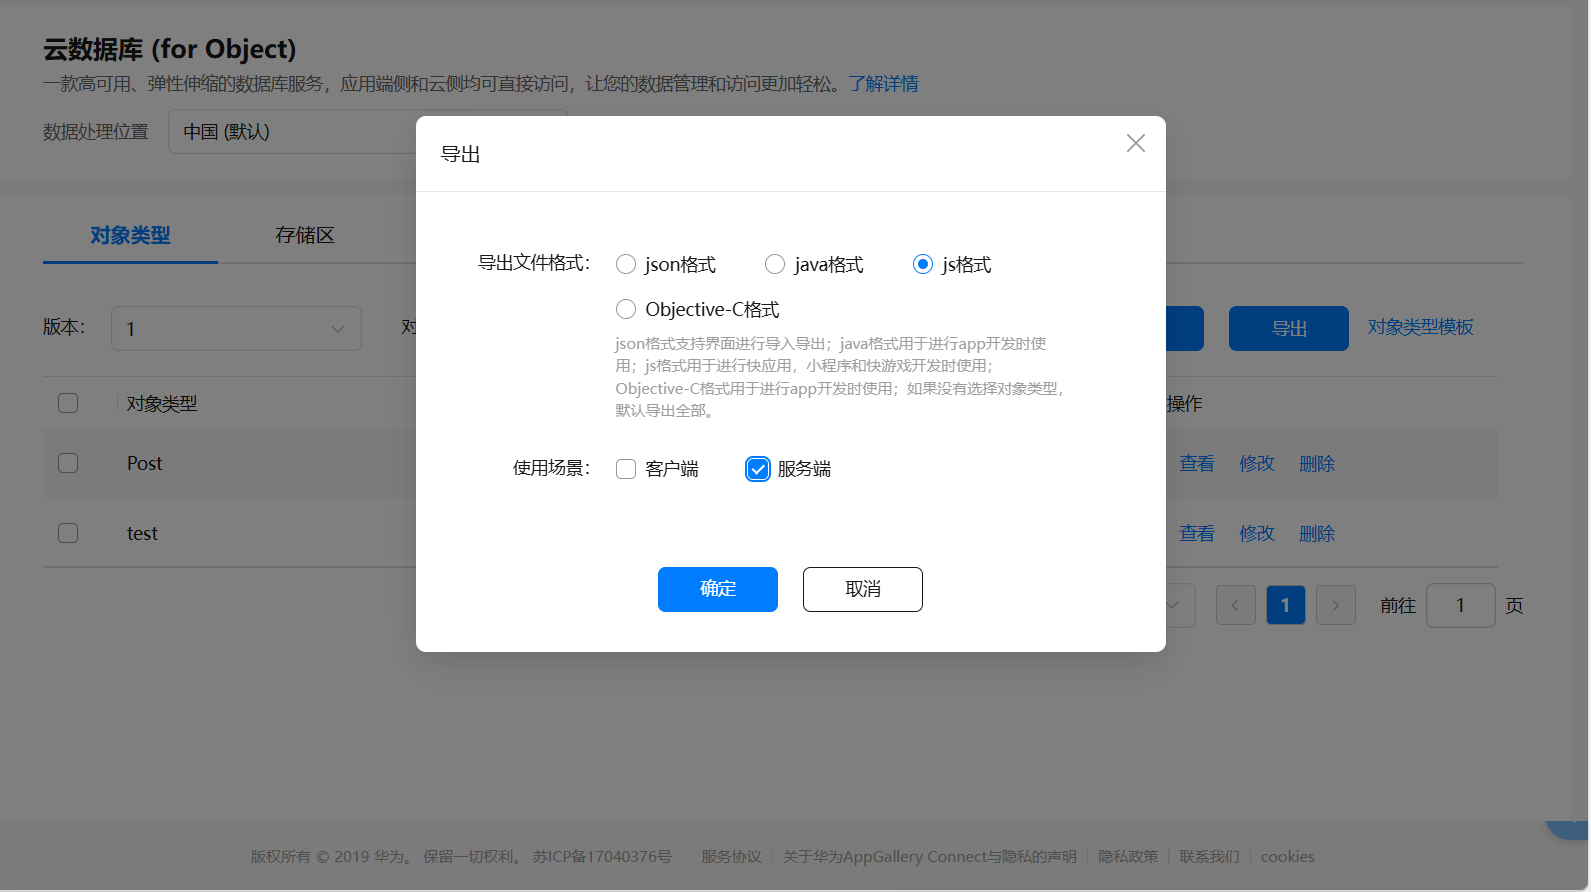
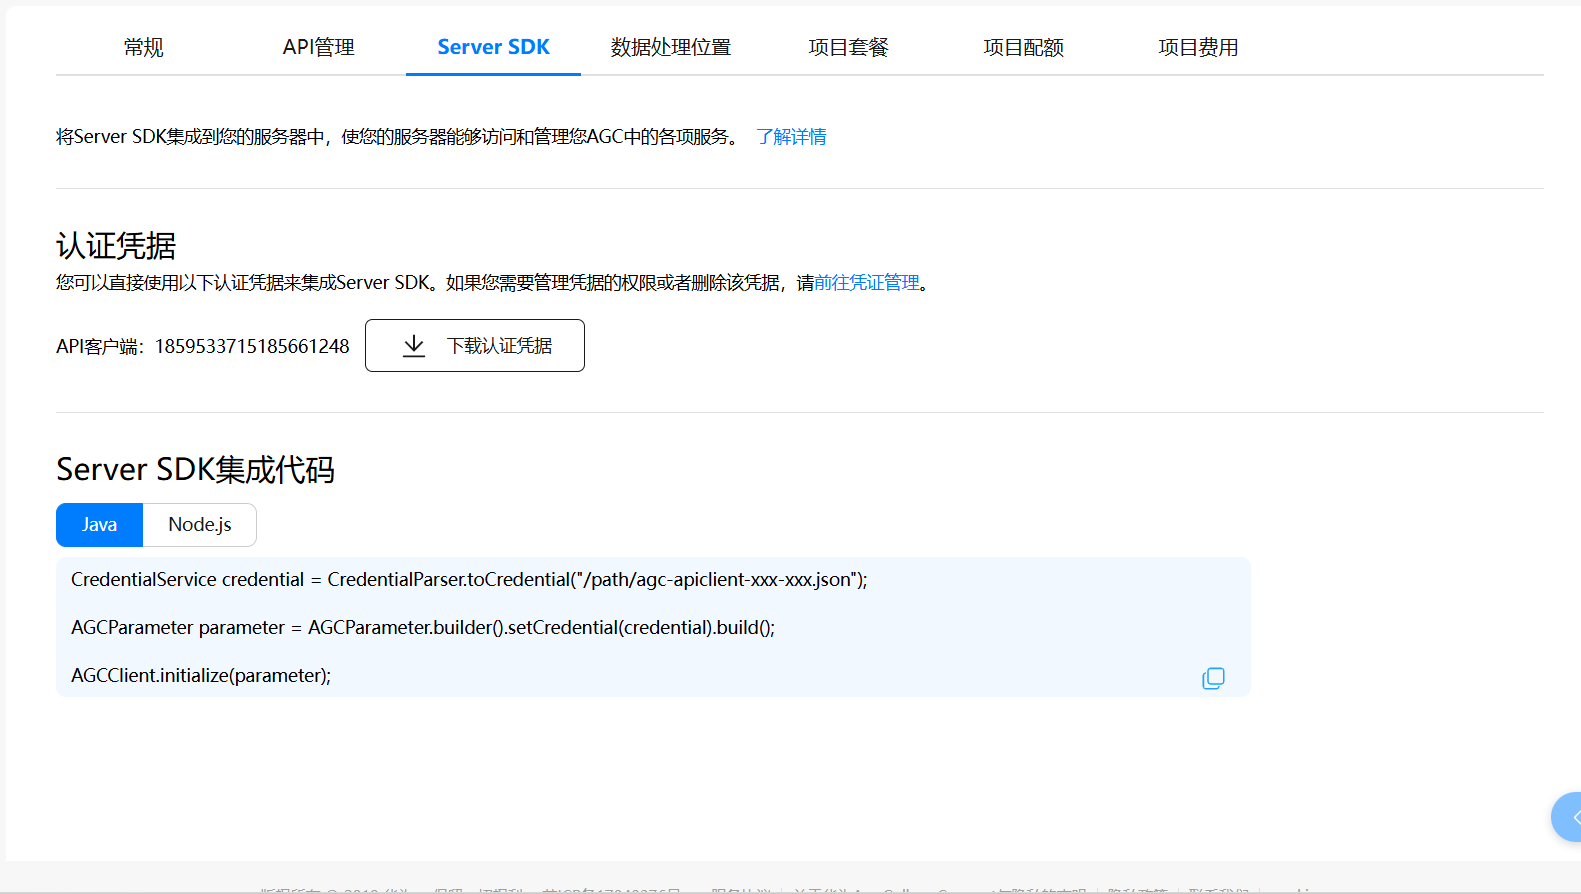
3. 凭证配置
-
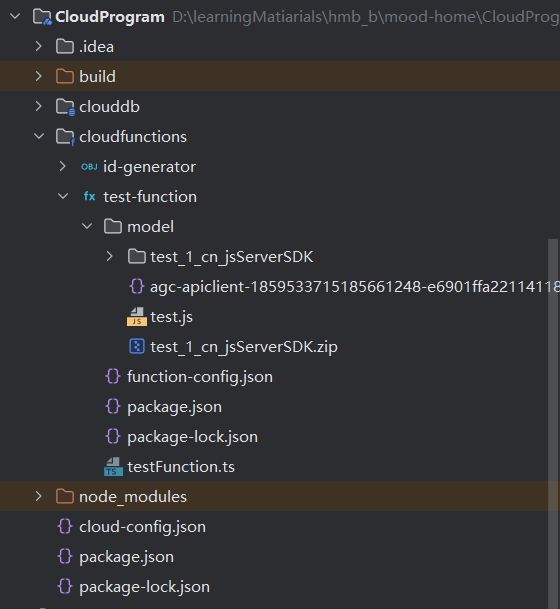
下载云数据库对象:从AGC导出,解压后放入云函数的
model目录 -
下载SDK凭证:从AGC下载,同样放入
model目录
云函数代码
在云函数中连接数据库,实现对数据的增删改查操作。
import { AGCClient, CredentialParser } from '@agconnect/common-server';
import { cloud, CloudDBCollection } from '@hw-agconnect/cloud-server';
import * as path from 'path';
import * as fs from 'fs';
// 导入现有的 Test 模型
const testModule = require('./model/test.js');
const Test = testModule.test;
// ==================== 数据库连接管理 ====================
let globalCollection: CloudDBCollection<any> | null = null;
let isInitializing = false;
const ZONE_NAME = "Demo"; // 数据库存储区
async function getDBConnection(): Promise<CloudDBCollection<any>> {
if (globalCollection) {
return globalCollection;
}
if (isInitializing) {
await new Promise(resolve => setTimeout(resolve, 100));
return getDBConnection();
}
isInitializing = true;
try {
console.info('开始初始化数据库连接...');
// 刚下载的sdk凭据文件路径
const credentialPath = path.join(__dirname, 'model', 'agc-apiclient-1859533715185661248-e6901ffa2211411896f753b8fe38cb0c.json');
if (!fs.existsSync(credentialPath)) {
throw new Error(`凭据文件不存在: ${credentialPath}`);
}
const credential = CredentialParser.toCredential(credentialPath);
try {
AGCClient.initialize(credential);
} catch (initError: any) {
if (!initError.message.includes('already')) {
throw initError;
}
}
const db = cloud.database({ zoneName: ZONE_NAME });
globalCollection = db.collection(Test);
console.info('数据库连接创建成功');
return globalCollection;
} catch (error: any) {
console.error('数据库连接失败:', error.message);
globalCollection = null;
throw error;
} finally {
isInitializing = false;
}
}
// ==================== Test 服务类 ====================
class TestDBService {
checkConnection(): boolean {
return globalCollection !== null;
}
/**
* 查询所有 Test 记录
*/
async queryAllTests(): Promise<any> {
try {
const collection = await getDBConnection();
const query = collection.query();
query.orderByAsc('id');
const result = await query.get();
const formattedResult = result.map((test: any) => ({
id: test.getId(),
user_id: test.getUser_id()
}));
return {
code: 0,
desc: "查询成功",
data: formattedResult,
isMock: false
};
} catch (error: any) {
return {
code: -1,
desc: `查询失败: ${error.message}`,
data: null,
isMock: false
};
}
}
/**
* 根据 id 查询单个 Test 记录
*/
async queryTestById(id: number): Promise<any> {
try {
const collection = await getDBConnection();
const query = collection.query();
query.equalTo('id', id);
const result = await query.get();
if (result.length === 0) {
return {
code: -1,
desc: `未找到 ID 为 ${id} 的记录`,
data: null,
isMock: false
};
}
const test = result[0];
const formattedResult = {
id: test.getId(),
user_id: test.getUser_id()
};
return {
code: 0,
desc: "查询成功",
data: formattedResult,
isMock: false
};
} catch (error: any) {
return {
code: -1,
desc: `查询失败: ${error.message}`,
data: null,
isMock: false
};
}
}
}
// ==================== 云函数主处理器 ====================
const myHandler = async function (event: any, context: any, callback: any, logger: any): Promise<void> {
logger.info("========== 收到 Test 服务请求 ==========");
let operation, queryCondition;
// 解析请求参数
if (event.body) {
try {
const bodyData = typeof event.body === 'string' ? JSON.parse(event.body) : event.body;
operation = bodyData.operation;
queryCondition = bodyData.queryCondition || {};
} catch (parseError: any) {
logger.error("解析event.body失败:", parseError.message);
}
}
if (!operation) {
operation = event.operation;
queryCondition = event.queryCondition || {};
}
logger.info("操作类型:", operation);
logger.info("查询条件:", JSON.stringify(queryCondition));
try {
const dbService = new TestDBService();
let result: any;
// 根据操作类型调用相应的方法
switch (operation) {
// 查询所有记录
case 'queryAllTests':
result = await dbService.queryAllTests();
break;
// 查询单个记录
case 'queryTestById':
if (queryCondition.id !== undefined) {
result = await dbService.queryTestById(Number(queryCondition.id));
} else {
result = { code: -1, desc: "需要提供 id", data: null };
}
break;
// 健康检查
case 'healthCheck':
result = {
code: 0,
desc: "Test 服务正常",
data: {
timestamp: new Date().toISOString(),
connectionStatus: dbService.checkConnection(),
supportedOperations: ['queryAllTests', 'queryTestById', 'healthCheck']
}
};
break;
// 不支持的操作
default:
result = {
code: -1,
desc: `不支持的操作: ${operation}`,
data: null,
supportedOperations: ['queryAllTests', 'queryTestById', 'healthCheck']
};
}
// 返回成功响应
const res = new context.HTTPResponse(result, {
"Content-Type": "application/json",
"Access-Control-Allow-Origin": "*"
}, "application/json", "200");
callback(res);
} catch (error: any) {
logger.error('Test 服务执行错误:', error);
// 返回错误响应
const res = new context.HTTPResponse({
code: -1,
desc: `服务执行错误: ${error.message}`,
data: null
}, {
"Content-Type": "application/json"
}, "application/json", "500");
callback(res);
}
};
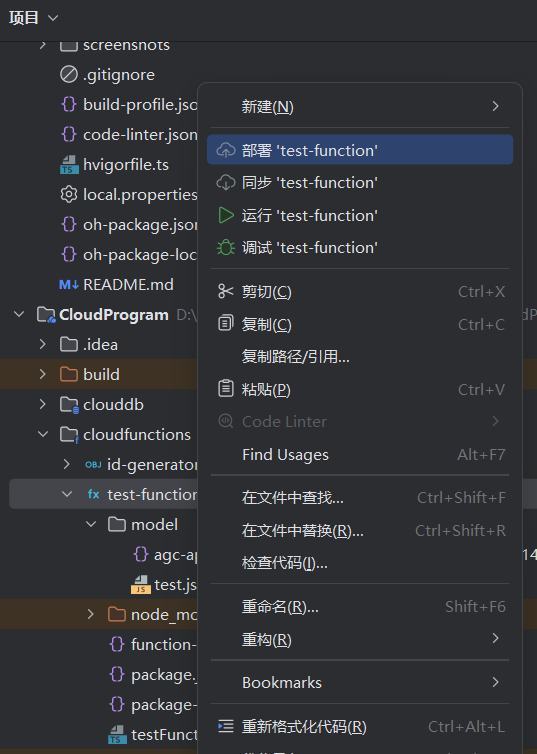
module.exports = { myHandler };云函数部署
-
部署:右键云函数文件夹 → 部署
-
验证:在AGC云函数控制台中可看到部署的函数
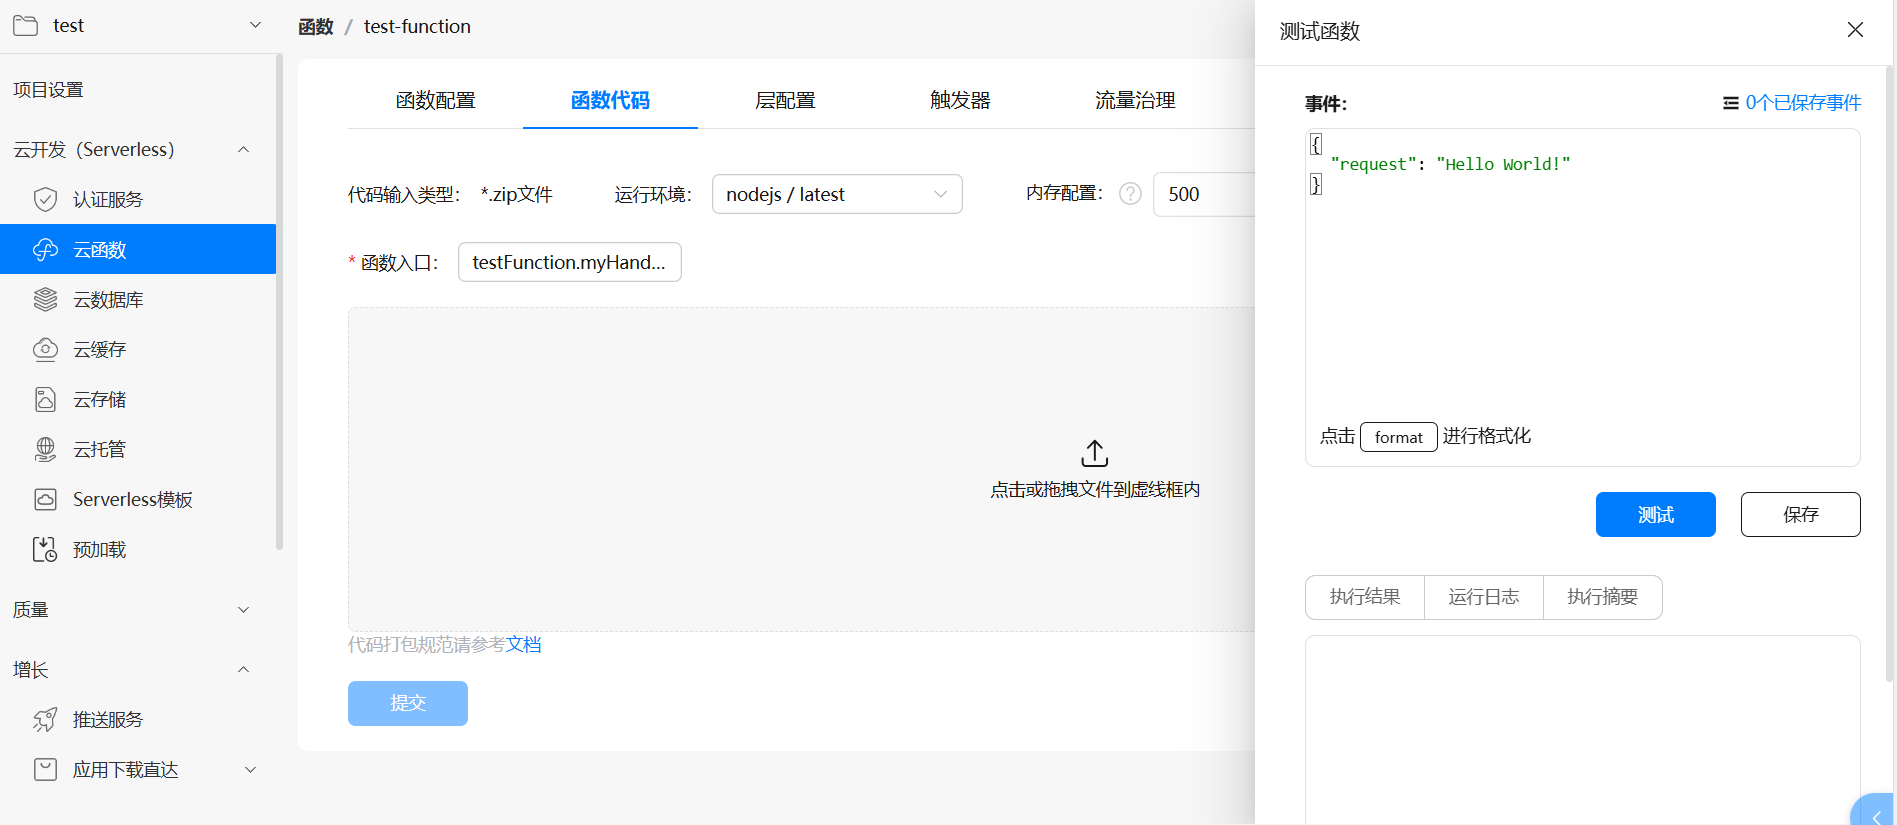
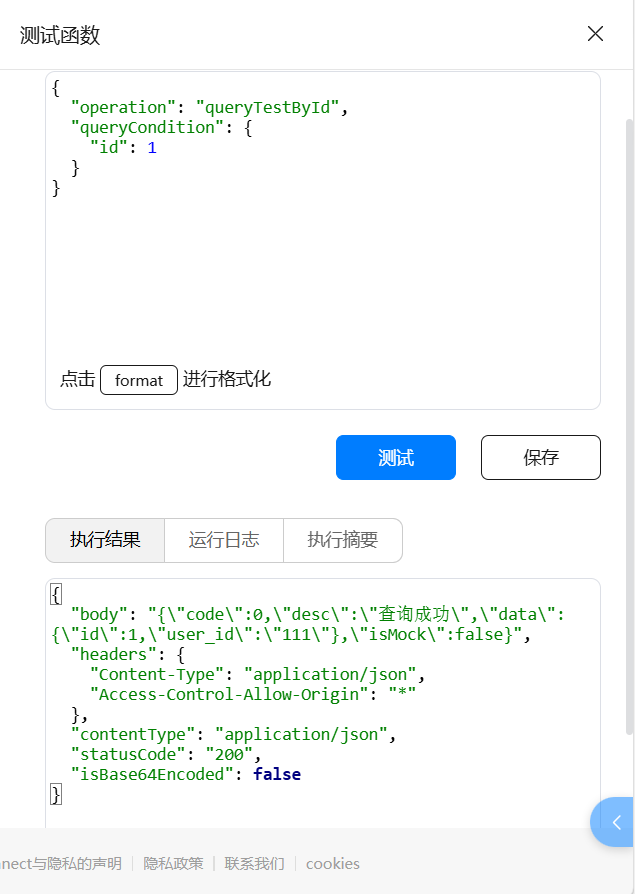
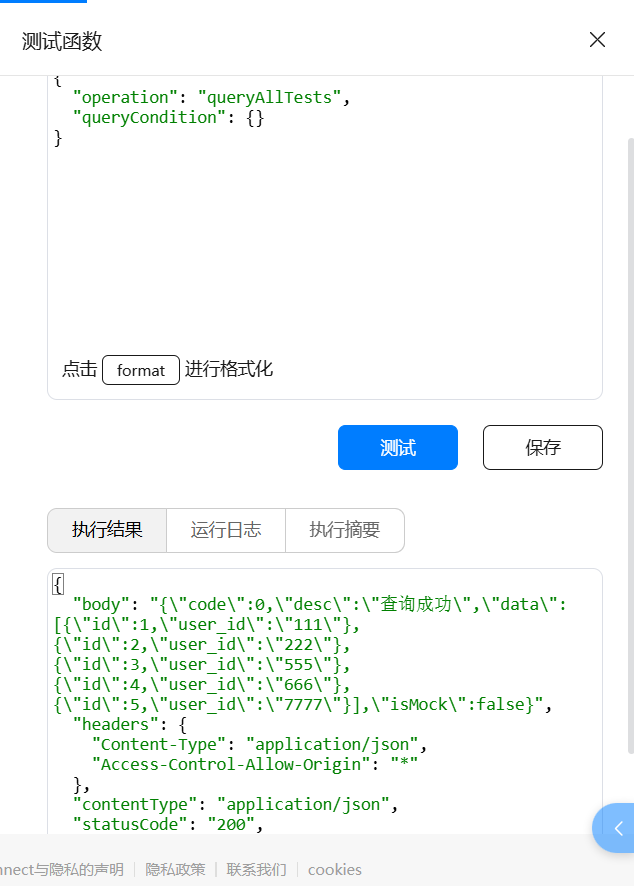
云函数测试
在云函数控制台中提供类似Postman的测试界面:
-
构造JSON请求数据
-
查看实时响应
-
调试日志查看
端侧调用云函数
1. 调用方式
端侧通过cloud.callFunction()调用云函数
2. 响应解析
云函数返回的数据需要特殊处理
关于callFunction的具体参数以及返回值解释请参考官方文档Cloud-Cloud-ArkTS(API 9至API 11)-HarmonyOS-公共 - 华为HarmonyOS开发者
interface TestData {
  id: number;
  user_id: string;
}

// 泛型响应接口
interface CloudResponse<T> {
  code: number;
  desc: string;
  data: T;
  isMock?: boolean;
}

// 查询所有响应的具体类型
type QueryAllResponse = CloudResponse<TestData[]>;

// 查询单个响应的具体类型
type QueryByIdResponse = CloudResponse<TestData>;

// RawResponse接口,使用联合类型替代any
interface RawResponse {
  body?: string | QueryAllResponse | QueryByIdResponse;
  headers?: Record<string, string>;
  contentType?: string;
  statusCode?: string;
  isBase64Encoded?: boolean;
}
// 查询所有Test记录
async queryAllTests() {
try {
const response = await cloud.callFunction({
name: "testFunction",
params: {
operation: 'queryAllTests',
queryCondition: {}
}
})
// 使用 getValue() 获取返回数据
const responseData: RawResponse = response.getValue() as RawResponse
console.log('queryAllTests 响应数据:', JSON.stringify(responseData))
// 解析响应 - 查询所有返回的是数组
let finalData: QueryAllResponse
if (responseData && responseData.body) {
if (typeof responseData.body === 'string') {
try {
const parsedBody = JSON.parse(responseData.body) as QueryAllResponse
finalData = parsedBody
} catch (error) {
console.error('解析body失败:', error)
return
}
} else {
// 使用类型守卫进行类型检查
if (Array.isArray(responseData.body.data)) {
finalData = responseData.body as QueryAllResponse
} else {
console.error('响应数据类型错误,期望数组但得到对象')
return
}
}
} else {
console.error('响应数据格式不正确')
return
}
console.log('最终解析数据:', finalData)
if (finalData && finalData.code === 0) {
// 将TestData[]转换为test[]
this.allTests = finalData.data.map((item: TestData) => {
const newTest = new test()
newTest.id = item.id
newTest.user_id = item.user_id
return newTest
})
console.log(`查询成功,获取到 ${this.allTests.length} 条记录`)
}
} catch (error) {
console.error('查询失败:', error)
}
}
// 查询单个Test记录
async queryTestById() {
try {
const response = await cloud.callFunction({
name: "testFunction",
params: {
operation: 'queryTestById',
queryCondition: {
id: 1 // 这里固定查询ID=1
}
}
})
// 使用 getValue() 获取返回数据
const responseData: RawResponse = response.getValue() as RawResponse
console.log('queryTestById 响应数据:', JSON.stringify(responseData))
// 解析响应 - 查询单个返回的是对象
let finalData: QueryByIdResponse
if (responseData && responseData.body) {
if (typeof responseData.body === 'string') {
try {
const parsedBody = JSON.parse(responseData.body) as QueryByIdResponse
finalData = parsedBody
} catch (error) {
console.error('解析body失败:', error)
return
}
} else {
// 使用类型守卫进行类型检查
if (!Array.isArray(responseData.body.data) && responseData.body.data !== null) {
finalData = responseData.body as QueryByIdResponse
} else {
console.error('响应数据类型错误,期望对象但得到数组')
return
}
}
} else {
console.error('响应数据格式不正确')
return
}
console.log('最终解析数据:', finalData)
if (finalData && finalData.code === 0 && finalData.data) {
const singleData: TestData = finalData.data
const newTest = new test()
newTest.id = singleData.id
newTest.user_id = singleData.user_id
this.singleTest = newTest
console.log(`查询成功,ID: ${singleData.id}`)
}
} catch (error) {
console.error('查询失败:', error)
}
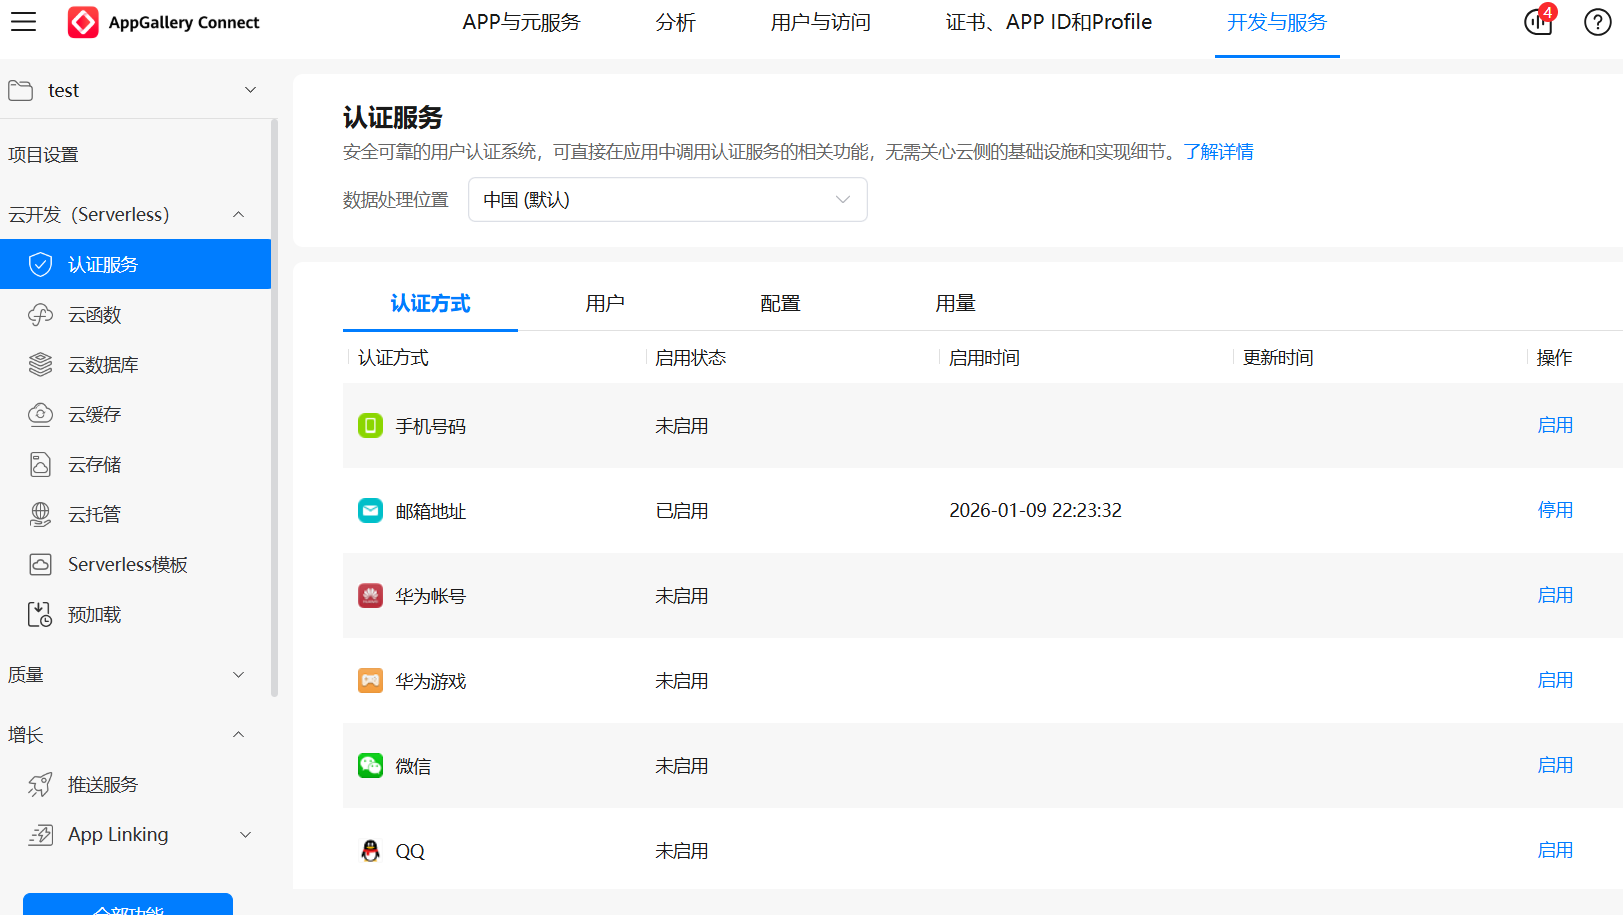
}认证服务
开通认服务的邮箱形式
-
进入认证服务页面
-
选择"邮箱"认证方式
注册功能
需要先调用cloud的函数,使用邮箱获取验证码,用户获取验证码后进行注册。
// 获取验证码
  private getVerifyCode() {
    console.info("获取验证码");

    try {
      const verifyCodeParam: VerifyCodeParam = {
        verifyCodeType: {
          kind: 'email',  // 必须的字段,代表我们是使用邮箱进行登陆验证的
          email: this.email
        } as EmailVerifyCode,
        action: VerifyCodeAction.REGISTER_LOGIN, // 使用枚举值
        lang: 'zh_CN',
        sendInterval: 30
      };

      const auth = cloud.auth();
      auth.requestVerifyCode(verifyCodeParam) // 获取验证码
        .then((result) => {
          promptAction.showToast({ message: '验证码已发送至邮箱' });
        })
        .catch((error: BusinessError) => {
          promptAction.showToast({ message: '验证码发送失败,请重试' });
        });
    } catch (err) {
      console.log('getVerifyCode fail,error:', `${JSON.stringify(err)}`)
    }
  }

  // 注册功能实现
  private async register() {
    console.info("注册功能实现");
    try {
      const credentialInfo: EmailCredentialInfo = {
        kind: 'email',
        email: this.email,
        password: this.password,
        verifyCode: this.code // 从输入框中获取的用户输入的验证码
      };
      const auth = cloud.auth();
      // 注册,然后获取注册返回的用户信息
      let result: SignInResult = await auth.createUser(credentialInfo);
      if (result) {
        // 获取用户信息
        const user = result.getUser();
        console.info('121212 '+user.getEmail());
        console.info(JSON.stringify(user));
        // 新用户设置显示名称
        if (this.name) {
          user.updateProfile({
            displayName: this.name,// 设置用户昵称
            photoUrl: ''// 用户头像,这里还需要用到云存储,不作拓展
          });
        }
        this.storagePicture()
      }
      console.info("register over");
    } catch (err) {
      console.log('register fail,error:', `${JSON.stringify(err)}`)
    }
  }
登录功能
调用cloud的函数进行登录。
// 登录功能实现
  private async signIn() {
    console.info("登录功能实现");
    try {
      const userNow = await cloud.auth().getCurrentUser()
      // 如果用户还在登陆状态就登出
      if (userNow) {
        await cloud.auth().signOut().then(() => {
          console.log('登出成功')
        }).catch((err:BusinessError) => {
          console.log('登出失败,err:', `${JSON.stringify(err)}`)
        })
      }
      const credentialInfo: EmailCredentialInfo = {
        kind: 'email',
        email: this.email,
        password: this.password
      };
      // 进行登录,并获取登陆后返回的用户数据
      let signResult: SignInResult = await cloud.auth().signIn({
        credentialInfo: credentialInfo
      });
      if (signResult.getUser()) {
        const user = signResult.getUser();
        AppStorage.setOrCreate('user', user); // 对返回的数据进行存储
        console.info(user.getEmail());
        console.info(JSON.stringify(user));
        // 登陆后前往下一个页面
        router.pushUrl({
          url: ''
        })
      }
    } catch (err) {
      console.log('signIn fail,error:', `${JSON.stringify(err)}`)
    }
  }
开发要点总结
-
配置一致性:确保AGC包名与端侧项目包名完全一致
-
服务开启:所有相关云服务必须在控制台手动开启
-
凭证管理:SDK凭证和数据库对象文件需正确放置
-
错误处理:完善的异常捕获和用户提示
-
日志记录:关键操作添加日志,便于调试

作为“人工智能6S店”的官方数字引擎,为AI开发者与企业提供一个覆盖软硬件全栈、一站式门户。
更多推荐


 13
13 0
0- 0


 已为社区贡献1条内容

所有评论(0)