
Qwen3-VL在华为昇腾 NPU 910B4 vLLM-Ascend完整部署指南
创建HwHiAiUser(UID 981) 和hisi组 (GID 1000),与 NPU 设备文件权限匹配配置环境脚本优化容器启动配置cd /root/qwen3vl # 构建镜像,标记为 latest docker build -t qwen3-vl-custom:latest . # 验证构建结果 docker images | grep qwen3-vl-custom。
Qwen3-VL在华为昇腾 NPU 910B4 vLLM-Ascend完整部署指南
本文档详细说明如何在华为昇腾 NPU (910B4) 上部署和运行 Qwen3-VL-8B-Instruct 多模态大语言模型,基于 vLLM Ascend 推理框架。
目录
- 系统环境
- 前置要求
- 第一步:安装 CANN 环境
- 第二步:拉取 vLLM Ascend 镜像
- 第三步:创建自定义 Dockerfile
- 第四步:构建自定义镜像
- 第五步:运行容器
- 第六步:验证部署
- 故障排查
系统环境
| 组件 | 版本/型号 |
|---|---|
| 操作系统 | Linux 22.03 (openEuler) |
| 架构 | ARM64 (aarch64) |
| NPU 硬件 | 910B4 (davinci2 和 davinci5 两张卡) |
| Docker | 已安装 |
| 驱动固件 | 24.1.rc3 |
| CANN 版本 | 8.3.RC1 (必须) |
前置要求
必要条件
- NPU 驱动和固件已正确安装
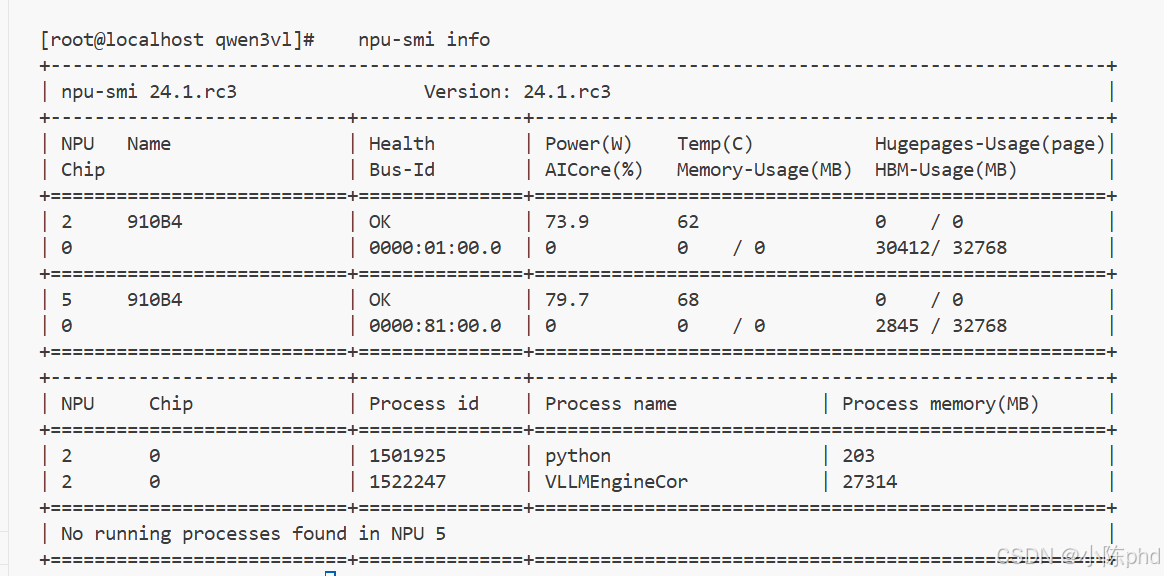
# 查看驱动和固件版本
npu-smi info
2. CANN 环境(见下一步安装)
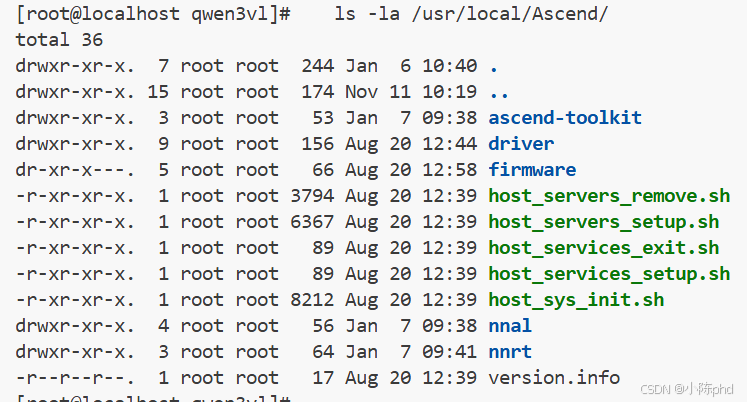
# 查看 CANN 是否已安装
ls -la /usr/local/Ascend/
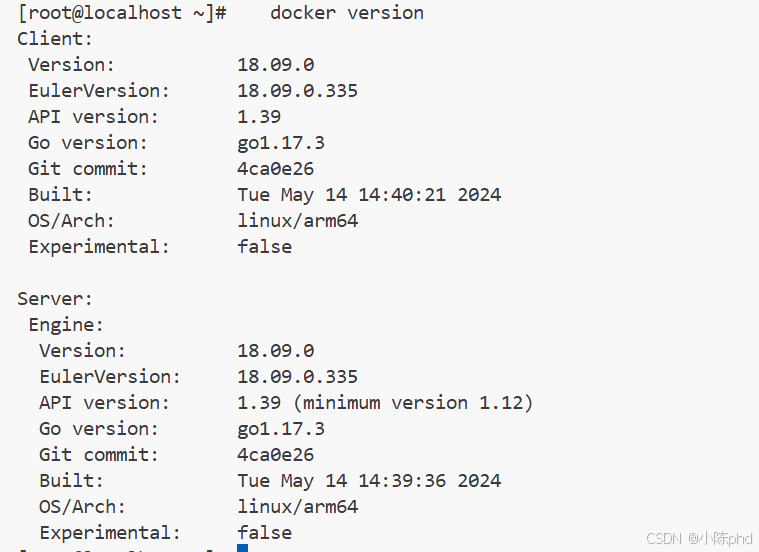
- Docker 已安装并可用
docker version
docker ps
- 模型文件已下载
- 模型位置:
/root/qwen3vl/models/Qwen3-VL-8B-Instruct/ - 模型大小: 约 17GB
- 模型位置:
第一步:安装 CANN 环境
CANN (Compute Architecture for Neural Networks) 是华为昇腾的计算架构,包含驱动库、运行时和工具。
1.1 检查当前 CANN 版本
# 查看已安装的 CANN 版本
ls -la /usr/local/Ascend/
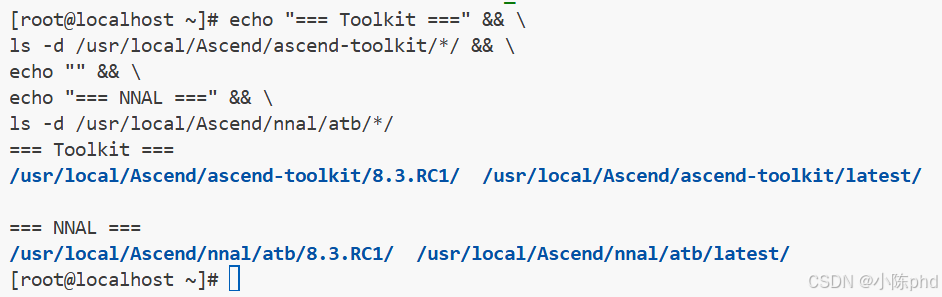
echo "=== Toolkit ===" && \
ls -d /usr/local/Ascend/ascend-toolkit/*/ && \
echo "" && \
echo "=== NNAL ===" && \
ls -d /usr/local/Ascend/nnal/atb/*/
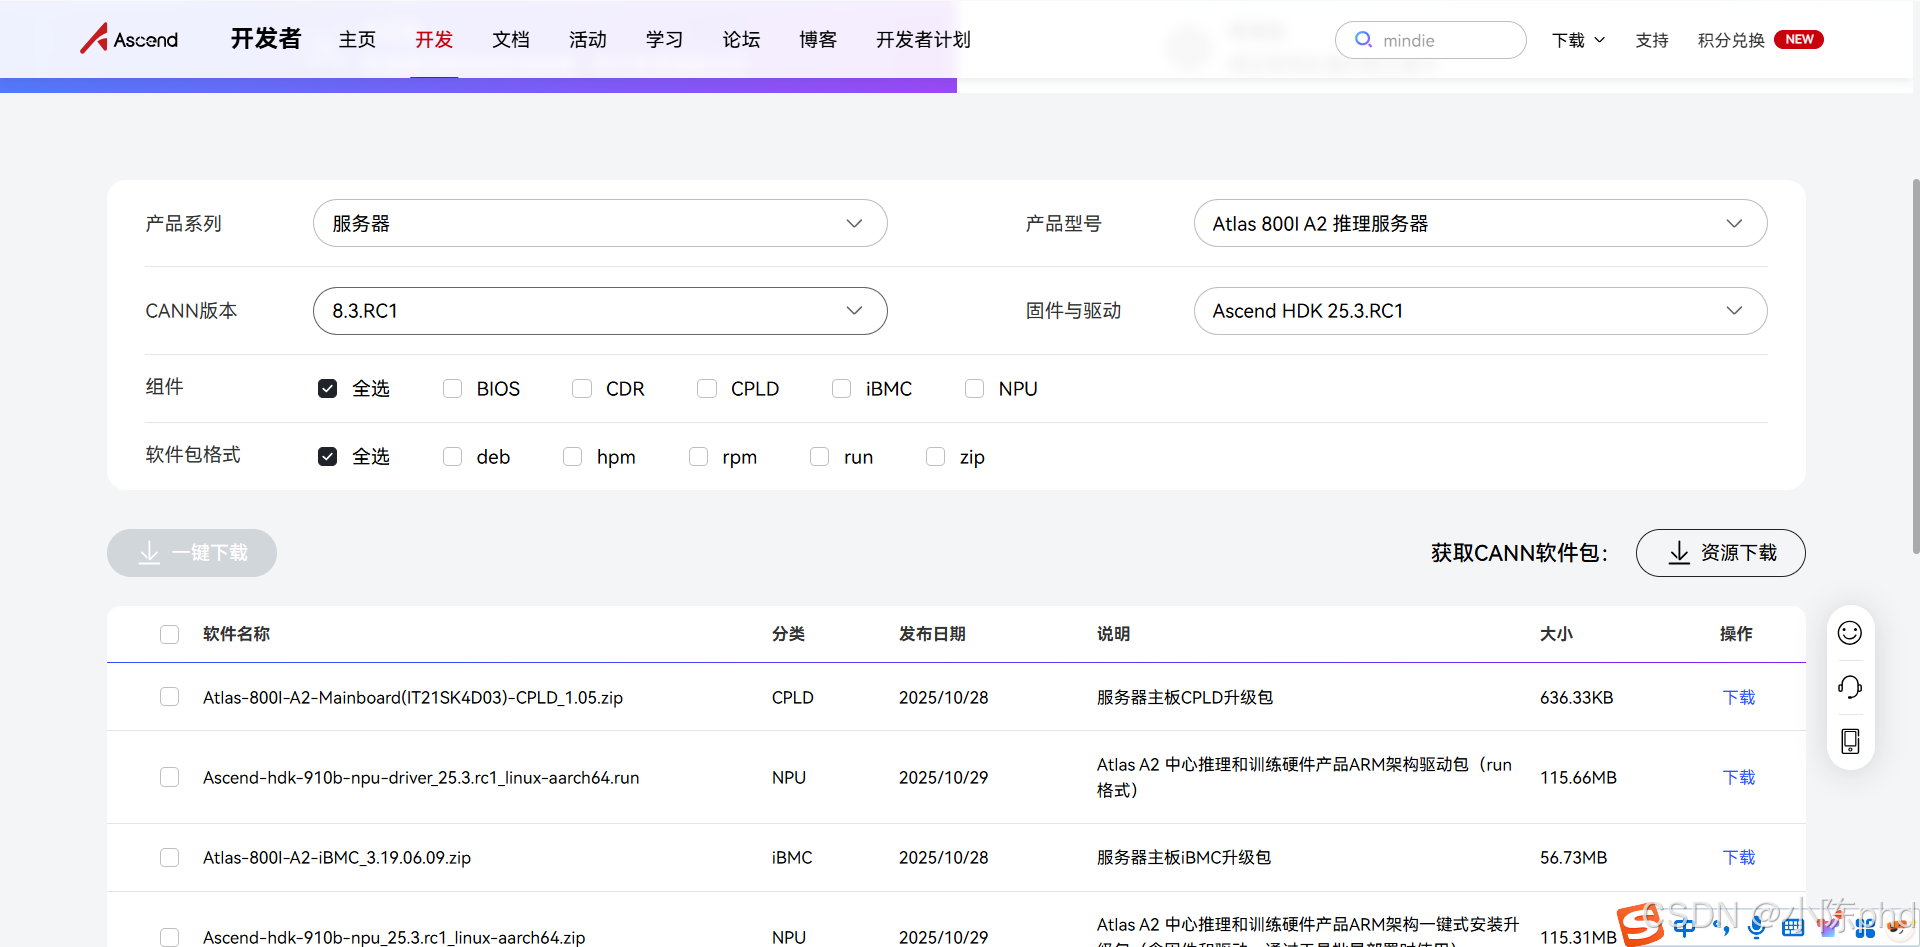
1.2 安装 CANN 8.3.RC1(如果未安装)
# 1. 添加 yum 仓库
yum-config-manager --add-repo https://repo.huaweicloud.com/ascend/ascend_install
# 2. 安装 CANN Toolkit
yum install -y Ascend-cann-toolkit-8.3.RC1
# 3. 安装 NNRT (运行时库)
yum install -y Ascend-cann-nnrt-8.3.RC1
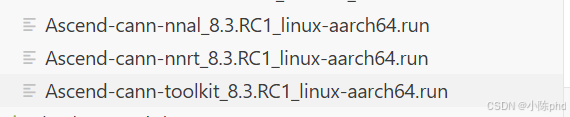
# 4. 安装 NNAL (神经网络抽象层)
yum install -y Ascend-cann-nnal-8.3.RC1
建议去 昇腾软件官方下载根据自己的服务器类型和HDK版本下载对应的驱动。
1.3 配置环境变量
# 加载环境变量
source /usr/local/Ascend/ascend-toolkit/set_env.sh
source /usr/local/Ascend/nnal/atb/set_env.sh
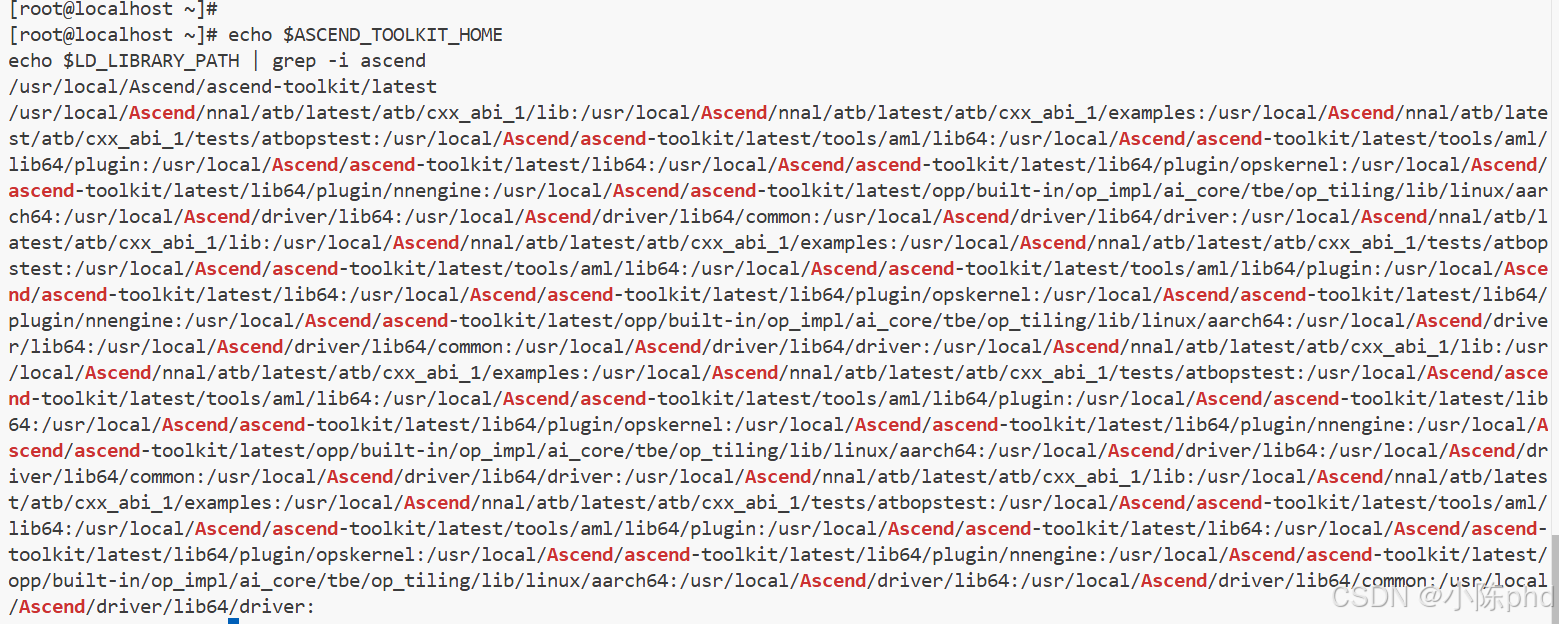
# 验证安装
echo $ASCEND_TOOLKIT_HOME
echo $LD_LIBRARY_PATH | grep -i ascend
1.4 永久化环境变量(可选)
添加到 /root/.bashrc:
cat >> /root/.bashrc << 'EOF'
# Ascend environment
source /usr/local/Ascend/ascend-toolkit/set_env.sh
source /usr/local/Ascend/nnal/atb/set_env.sh
EOF

source /root/.bashrc
第二步:拉取 vLLM Ascend 镜像
vLLM Ascend 是华为昇腾官方提供的优化版本,内置了对 NPU 的完整支持。
2.1 从 Quay.io 拉取镜像
# 拉取最新的 vLLM Ascend v0.11.0rc1
docker pull quay.io/ascend/vllm-ascend:v0.11.0rc1

# 验证镜像
docker images | grep quay.io/ascend/vllm-ascend

2.2 镜像信息
| 属性 | 值 |
|---|---|
| 完整 URI | quay.io/ascend/vllm-ascend:v0.11.0rc1 |
| 大小 | 约 16.3 GB |
| 架构 | arm64/linux |
| 包含内容 | vLLM 0.11.0, NNAL 8.3.RC1, torch_npu 2.7.1 |
| 官方仓库 | https://quay.io/repository/ascend/vllm-ascend |
2.3 其他版本
# 拉取 v0.10.1rc1 版本
docker pull quay.io/ascend/vllm-ascend:v0.10.1rc1

# 从华为云镜像源拉取(国内加速)
docker pull swr.cn-south-1.myhuaweicloud.com/ascendhub/vllm-ascend:v0.11.0rc1
第三步:创建自定义 Dockerfile
自定义 Dockerfile 基于官方镜像,添加以下功能:
- 创建
HwHiAiUser(UID 981) 和hisi组 (GID 1000),与 NPU 设备文件权限匹配 - 配置环境脚本
/etc/profile.d/ascend-env.sh - 优化容器启动配置
3.1 Dockerfile 内容
创建 /root/qwen3vl/Dockerfile:
FROM quay.io/ascend/vllm-ascend:v0.11.0rc1

USER root

# 创建 hisi 组 (GID 1000)
RUN groupadd -g 1000 hisi 2>/dev/null || true

# 创建 HwHiAiUser (UID 981),加入 hisi 组
RUN useradd -d /home/HwHiAiUser -m -u 981 -g 1000 -s /bin/bash HwHiAiUser 2>/dev/null || true

# 设置主目录权限
RUN chmod 750 /home/HwHiAiUser

# 配置环境脚本
RUN mkdir -p /etc/profile.d && \
    echo '#!/bin/bash' > /etc/profile.d/ascend-env.sh && \
    echo 'source /usr/local/Ascend/ascend-toolkit/set_env.sh' >> /etc/profile.d/ascend-env.sh && \
    echo 'source /usr/local/Ascend/nnal/atb/set_env.sh' >> /etc/profile.d/ascend-env.sh && \
    echo 'export LD_LIBRARY_PATH=/usr/local/Ascend/driver/lib64/driver:${LD_LIBRARY_PATH}' >> /etc/profile.d/ascend-env.sh && \
    chmod +x /etc/profile.d/ascend-env.sh

# 验证用户和组
RUN grep HwHiAiUser /etc/passwd && grep hisi /etc/group

USER root
ENTRYPOINT []
CMD ["/bin/bash", "-c", "tail -f /dev/null"]
第四步:构建自定义镜像
4.1 构建镜像
cd /root/qwen3vl

# 构建镜像,标记为 latest
docker build -t qwen3-vl-custom:latest .

# 验证构建结果
docker images | grep qwen3-vl-custom
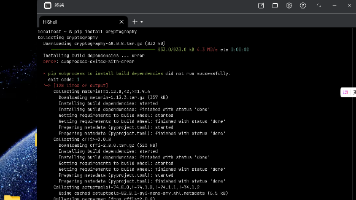
4.2 构建输出示例
Sending build context to Docker daemon  40.61GB
Step 1/10 : FROM quay.io/ascend/vllm-ascend:v0.11.0rc1
 ---> 49bc5b2c530a
Step 2/10 : USER root
 ---> Using cache
...
Successfully built cba5d4f9b4b1
Successfully tagged qwen3-vl-custom:latest
第五步:运行容器
5.1 使用启动脚本(推荐)
# 直接运行启动脚本
bash docker_run_start.sh

# 脚本会自动:
# 1. 停止并删除旧容器
# 2. 启动新容器,挂载所有必要的设备和路径
# 3. 启动 vLLM 服务
# 4. 等待 30 秒让模型加载
# 5. 检查 API 可用性
5.2 启动脚本内容参考
编写脚本docker_run_start.sh
关键参数:
- 容器名:
qwen3-vl - 镜像:
qwen3-vl-custom:latest - 设备挂载:
/dev/davinci2- NPU 2/dev/davinci5- NPU 5/dev/davinci_manager- NPU 管理设备/dev/devmm_svm- 内存虚拟化设备/dev/hisi_hdc- 硬件诊断通道
- 路径挂载:
/usr/local/dcmi- DCM 接口库/usr/local/bin/npu-smi- NPU 状态工具/usr/local/Ascend/driver/lib64- 驱动库/usr/local/Ascend/nnrt- 运行时库/etc/ascend_install.info- 安装配置/root/qwen3vl/models:/root/models- 模型文件
- 端口:
20240:8000(API 端口映射) - vLLM 启动参数:
--model /root/models/Qwen3-VL-8B-Instruct--port 8000 --host 0.0.0.0--gpu-memory-utilization 0.9- 显存利用率 90%--max-model-len 32768- 最大序列长度--dtype float16- 半精度浮点--trust-remote-code- 信任远程代码
5.3 手动启动容器(如需自定义)
# 第1步:启动容器保活
docker run -dit \
  --name qwen3-vl \
  --device=/dev/davinci2 \
  --device=/dev/davinci5 \
  --device=/dev/davinci_manager \
  --device=/dev/devmm_svm \
  --device=/dev/hisi_hdc \
  -v /usr/local/dcmi:/usr/local/dcmi \
  -v /usr/local/bin/npu-smi:/usr/local/bin/npu-smi \
  -v /usr/local/Ascend/driver/lib64:/usr/local/Ascend/driver/lib64 \
  -v /usr/local/Ascend/driver/tools:/usr/local/Ascend/driver/tools \
  -v /usr/local/Ascend/driver/version.info:/usr/local/Ascend/driver/version.info \
  -v /usr/local/Ascend/nnrt:/usr/local/Ascend/nnrt \
  -v /etc/ascend_install.info:/etc/ascend_install.info \
  -v /root/qwen3vl/models:/root/models \
  -p 20240:8000 \
  qwen3-vl-custom:latest \
  tail -f /dev/null

# 第2步:进入容器启动 vLLM
docker exec -it qwen3-vl bash -c "
source /etc/profile.d/ascend-env.sh
python -m vllm.entrypoints.openai.api_server \
  --model /root/models/Qwen3-VL-8B-Instruct \
  --port 8000 \
  --host 0.0.0.0 \
  --gpu-memory-utilization 0.9 \
  --max-model-len 32768 \
  --dtype float16 \
  --trust-remote-code
"
第六步:验证部署
6.1 检查容器状态
# 查看容器是否运行
docker ps | grep qwen3-vl

# 查看容器日志
docker logs qwen3-vl

# 查看容器内 vLLM 进程
docker exec qwen3-vl ps aux | grep vllm
6.2 检查 NPU 显存占用
# 查看 NPU 状态
npu-smi info

# 预期输出应显示:
# - NPU 2: ~23GB 显存被 vLLM 占用(加载了 17GB 模型)
# - NPU 5: 空闲 (可用于其他任务)
6.3 测试 API
# 测试模型列表接口
curl -s http://localhost:20240/v1/models | python -m json.tool

# 预期返回:
# {
#   "object": "list",
#   "data": [
#     {
#       "id": "/root/models/Qwen3-VL-8B-Instruct",
#       "object": "model",
#       "created": ...,
#       "max_model_len": 32768,
#       ...
#     }
#   ]
# }
6.4 测试推理
# 发送对话请求
curl -s http://localhost:20240/v1/chat/completions \
  -H "Content-Type: application/json" \
  -d '{
    "model": "/root/models/Qwen3-VL-8B-Instruct",
    "messages": [
      {"role": "user", "content": "你好,请自我介绍一下"}
    ],
    "max_tokens": 150,
    "temperature": 0.7
  }' | python -m json.tool

# 预期返回:模型的中文自我介绍

故障排查
问题 1:CANN 版本冲突
症状: RuntimeError: ExchangeDevice:... error code is 507033
原因: 容器内 CANN 版本与宿主机不匹配
解决方案:
# 确保宿主机和容器都使用 8.3.RC1
# 升级宿主机 CANN
yum upgrade -y Ascend-cann-*-8.3.RC1
问题 2:vllm._C 模块找不到
症状: ModuleNotFoundError: No module named 'vllm._C'
原因: 使用了编译不完整的 vllm 包,应使用 vllm-ascend
解决方案:
# 在容器内查看安装的 vLLM 版本
docker exec qwen3-vl pip list | grep vllm

# 确保使用 vllm-ascend 而不是 vllm
# 若不对,需要重建镜像
问题 3:显存不足
症状: KV cache memory is larger than available
原因: 模型序列长度太长,超过单卡显存
解决方案:
# 减少 max-model-len 参数
--max-model-len 16384  # 改为 16384 或更小

# 或降低 gpu-memory-utilization
--gpu-memory-utilization 0.85
问题 4:NPU 设备权限错误
症状: Permission denied 访问 /dev/davinci*
原因: 容器内用户权限不匹配
解决方案:
# 确保 Dockerfile 中创建了正确的用户
# HwHiAiUser (UID 981), hisi 组 (GID 1000)
docker exec qwen3-vl grep HwHiAiUser /etc/passwd
docker exec qwen3-vl grep hisi /etc/group
问题 5:8000 端口未监听
症状: Connection refused 连接 API
原因: vLLM 还在启动或已崩溃
解决方案:
# 检查 vLLM 进程是否运行
docker exec qwen3-vl ps aux | grep vllm

# 查看进程详情
docker exec qwen3-vl ps aux | grep "vllm.entrypoints"

# 等待更长时间(模型加载可能需要 2-5 分钟)
sleep 300
问题 6:模型文件路径错误
症状: FileNotFoundError: /root/models/... not found
原因: 模型文件未正确挂载或不存在
解决方案:
# 验证模型文件存在
ls -la /root/qwen3vl/models/Qwen3-VL-8B-Instruct/

# 验证容器内的挂载
docker exec qwen3-vl ls -la /root/models/Qwen3-VL-8B-Instruct/

# 确保启动脚本中的挂载正确
# -v /root/qwen3vl/models:/root/models
完整部署流程总结
# 1. 安装 CANN 环境
yum install -y Ascend-cann-toolkit-8.3.RC1 Ascend-cann-nnrt-8.3.RC1 Ascend-cann-nnal-8.3.RC1
source /usr/local/Ascend/ascend-toolkit/set_env.sh

# 2. 拉取 vLLM Ascend 镜像
docker pull quay.io/ascend/vllm-ascend:v0.11.0rc1

# 3. 创建 Dockerfile (已在 /root/qwen3vl/Dockerfile)

# 4. 构建自定义镜像
cd /root/qwen3vl
docker build -t qwen3-vl-custom:latest .

# 5. 运行启动脚本
bash /root/qwen3vl/docker_run_start.sh

# 6. 验证 API
curl -s http://localhost:20240/v1/models

# 7. 测试推理
curl -s http://localhost:20240/v1/chat/completions \
  -H "Content-Type: application/json" \
  -d '{...}'
API 使用示例
文本对话
curl -X POST http://localhost:20240/v1/chat/completions \
  -H "Content-Type: application/json" \
  -d '{
    "model": "/root/models/Qwen3-VL-8B-Instruct",
    "messages": [
      {"role": "user", "content": "解释一下机器学习"}
    ],
    "max_tokens": 200,
    "temperature": 0.7
  }'
多轮对话
curl -X POST http://localhost:20240/v1/chat/completions \
  -H "Content-Type: application/json" \
  -d '{
    "model": "/root/models/Qwen3-VL-8B-Instruct",
    "messages": [
      {"role": "user", "content": "你是谁?"},
      {"role": "assistant", "content": "我是通义千问..."},
      {"role": "user", "content": "你能做什么?"}
    ],
    "max_tokens": 200
  }'
性能指标
部署完成后的预期性能:
| 指标 | 数值 |
|---|---|
| 模型大小 | 17 GB |
| NPU 显存占用 | ~23 GB (NPU 2) |
| 推理延迟 | 取决于输入长度 |
| 吞吐量 | 取决于硬件配置 |
| 最大序列长度 | 32,768 tokens |
| 数据类型 | float16 (半精度) |
参考资源
- vLLM 官方文档: https://docs.vllm.ai/
- Qwen3-VL 模型卡: https://huggingface.co/Qwen/Qwen3-VL-8B-Instruct
- 华为昇腾 Ascend 官网: https://www.hiascend.com/
- Quay.io vLLM Ascend 仓库: https://quay.io/repository/ascend/vllm-ascend
许可证和声明
- Qwen3-VL 模型: 遵循阿里巴巴许可证
- vLLM: Apache 2.0 License
- 华为昇腾 CANN: 华为许可证
常用命令速查表
# 容器管理
docker ps                               # 查看运行中的容器
docker stop qwen3-vl                    # 停止容器
docker start qwen3-vl                   # 启动容器
docker rm qwen3-vl                      # 删除容器
docker logs qwen3-vl                    # 查看日志
docker exec -it qwen3-vl bash          # 进入容器

# 镜像管理
docker images                           # 查看镜像
docker build -t qwen3-vl-custom:latest . # 构建镜像
docker rmi qwen3-vl-custom:latest      # 删除镜像
docker pull quay.io/ascend/vllm-ascend:v0.11.0rc1 # 拉取镜像

# NPU 管理
npu-smi info                           # 查看 NPU 状态
npu-smi query                          # 查询 NPU 信息

# CANN 环境
source /usr/local/Ascend/ascend-toolkit/set_env.sh
source /usr/local/Ascend/nnal/atb/set_env.sh

# API 测试
curl -s http://localhost:20240/v1/models
curl -s http://localhost:20240/v1/chat/completions -H "Content-Type: application/json" -d '{...}'

作为“人工智能6S店”的官方数字引擎,为AI开发者与企业提供一个覆盖软硬件全栈、一站式门户。
更多推荐

 16
16 0
0- 0


 已为社区贡献1条内容

所有评论(0)