
【HarmonyOS NEXT】沉浸式页面实现(两种方案实现效果与对比)
一、背景
在鸿蒙APP开发过程中,为了让用户有更好的视觉体验,提供了沉浸式页面的实现,主要有两种实现方案,整理了两种方案的用法及使用场景
二、概念
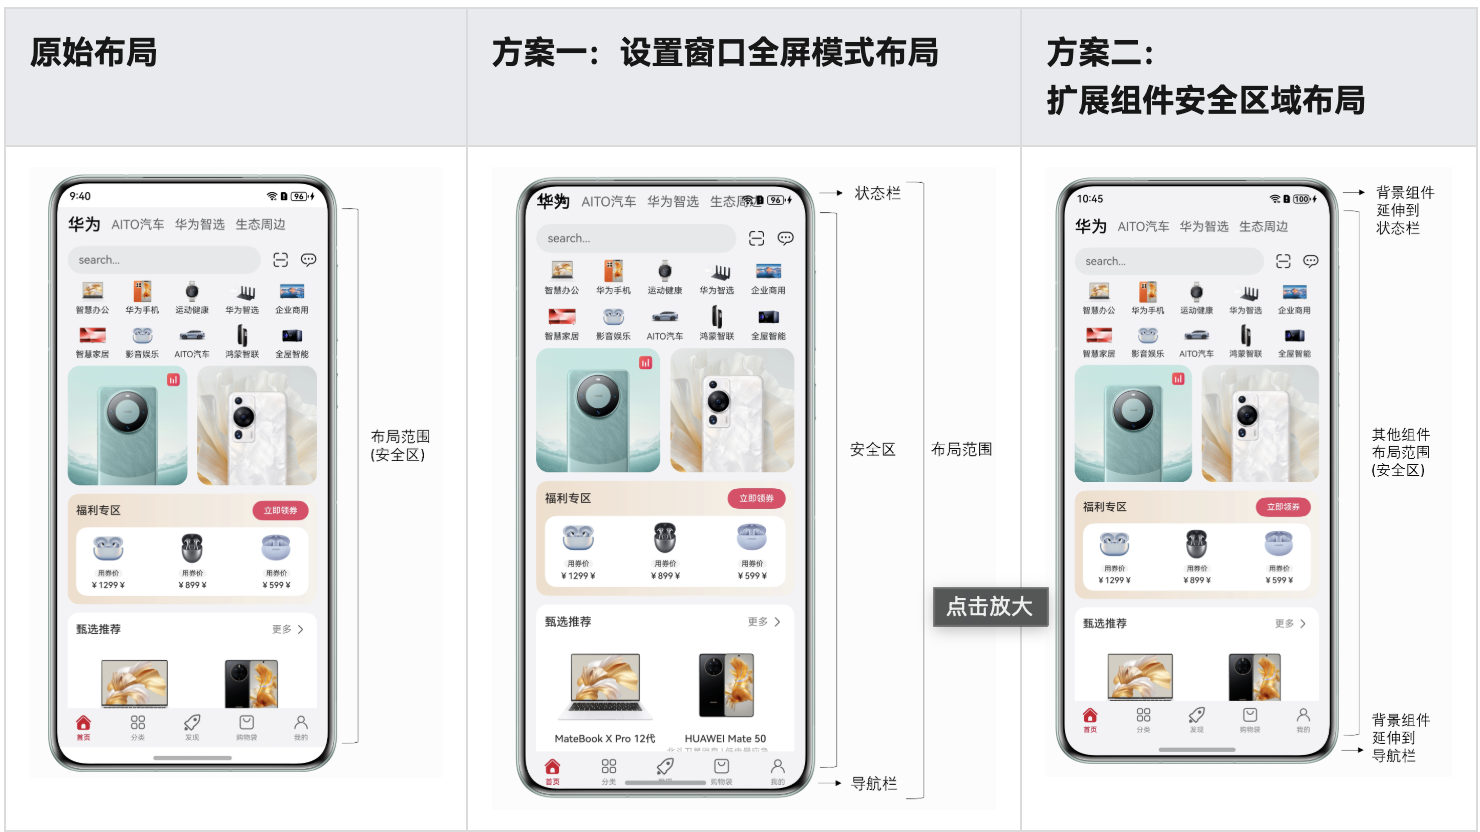
沉浸式页面指页面内容延伸至状态栏 / 底部导航栏区域,同时保证核心内容不被系统栏遮挡的布局形式
官方提供了两种实现方案:
方案一:使用Window.setWindowLayoutFullScreen()方法设置窗口为全屏模式。
方案二:设置组件的expandSafeArea属性,扩展组件的安全区域到状态栏和导航栏,从而实现沉浸式。
三、两种方案具体实现
3.1、方案1:窗口全屏 + 手动安全区域管理
核心逻辑:通过设置窗口全屏,手动获取状态栏 / 导航栏高度,再通过布局属性(如padding)避开系统栏区域。
3.1.1、实现步骤
步骤 1:窗口初始化时设置全屏 + 获取安全区域高度
在UIAbility的窗口创建阶段,设置窗口全屏,并读取状态栏 / 导航栏的安全区域高度(存入全局存储):
  // 窗口创建初始化
  onWindowCreateInit(windowStage: window.WindowStage) {
    windowStage.getMainWindow(async (err: BusinessError, data) => {
      if (err.code) {
        console.error(`Failed to obtain the main window. Cause code: ${err.code}, message: ${err.message}`);
        return;
      }
      let windowClass: window.Window = data
      // 1. 设置窗口全屏(内容延伸到系统栏)
      try {
        await windowClass.setWindowLayoutFullScreen(true)
      } catch (error) {
        console.error('Failed to setting the full screen. Cause: ' + JSON.stringify(err));
      }
      // 2. 获取状态栏/导航栏高度(转成vp单位)
      try {
        let statusBarArea = windowClass.getWindowAvoidArea(window.AvoidAreaType.TYPE_SYSTEM);
        let navBarArea = windowClass.getWindowAvoidArea(window.AvoidAreaType.TYPE_NAVIGATION_INDICATOR);
        let uiContext = windowStage.getMainWindowSync().getUIContext();
        //顶部导航栏高度,存入全局存储(供页面调用)
        const statusBarHeight = uiContext.px2vp(statusBarArea.topRect.height)
        AppStorageV2.connect(Number, 'statusBarHeight', () => new Number(statusBarHeight))
        //底部导航栏高度,存入全局存储(供页面调用)
        const navBarHeight = uiContext.px2vp(navBarArea.topRect.height)
        AppStorageV2.connect(Number, 'navigationBarHeight', () => new Number(navBarHeight))
      } catch (exception) {
        console.error(`Failed to obtain the area. Cause code: ${exception.code}, message: ${exception.message}`);
      }

      //在页面显示或隐藏时,设置状态栏内容的颜色
      windowClass.setWindowSystemBarProperties({
        statusBarContentColor: '#ffffff'
      }).catch((err: BusinessError) => {
        console.error('Failed to setting the system bar properties. Cause: ' + JSON.stringify(err));
      });
    })
  }
窗口创建阶段引入窗口创建初始化逻辑
  onWindowStageCreate(windowStage: window.WindowStage): void {
    // Main window is created, set main page for this ability
    // 初始化保存窗口数据,沉浸式页面实现,状态栏样式设置
    EntryManager.getInstance().onWindowCreateInit(windowStage)
    windowStage.loadContent('pages/Index', (err) => {
      if (err.code) {
        hilog.error(DOMAIN, 'testTag', 'Failed to load the content. Cause: %{public}s', JSON.stringify(err));
        return;
      }
      hilog.info(DOMAIN, 'testTag', 'Succeeded in loading the content.');
    });
  }
添加工具类读取全局存储到高度
import { AppStorageV2 } from "@kit.ArkUI";

export class ScreenUtils {
  private static instance: ScreenUtils;

  public static getInstance(): ScreenUtils {
    if (!ScreenUtils.instance) {
      ScreenUtils.instance = new ScreenUtils();
    }
    return ScreenUtils.instance;
  }
  //获取顶部状态栏的高度
  getStatusBarHeight(): number {
    return AppStorageV2.connect(Number, 'statusBarHeight', () => new Number(0))?.valueOf() as number
  }
  //获取底部栏的高度
  getSafeBottomHeight() {
    return AppStorageV2.connect(Number, 'navigationBarHeight', () => new Number(0))?.valueOf() as number
  }
}
步骤 2:页面中手动添加安全区域间距
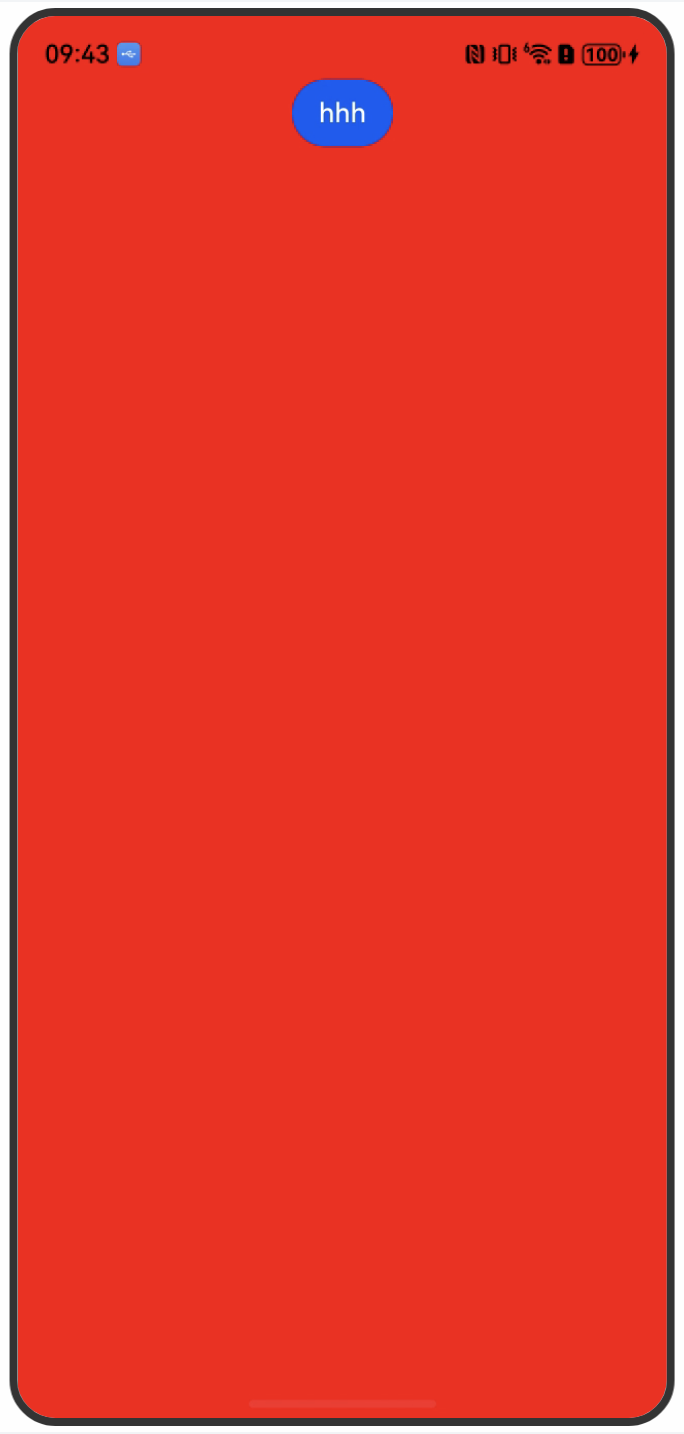
1、没有给状态栏高度添加避让处理的效果
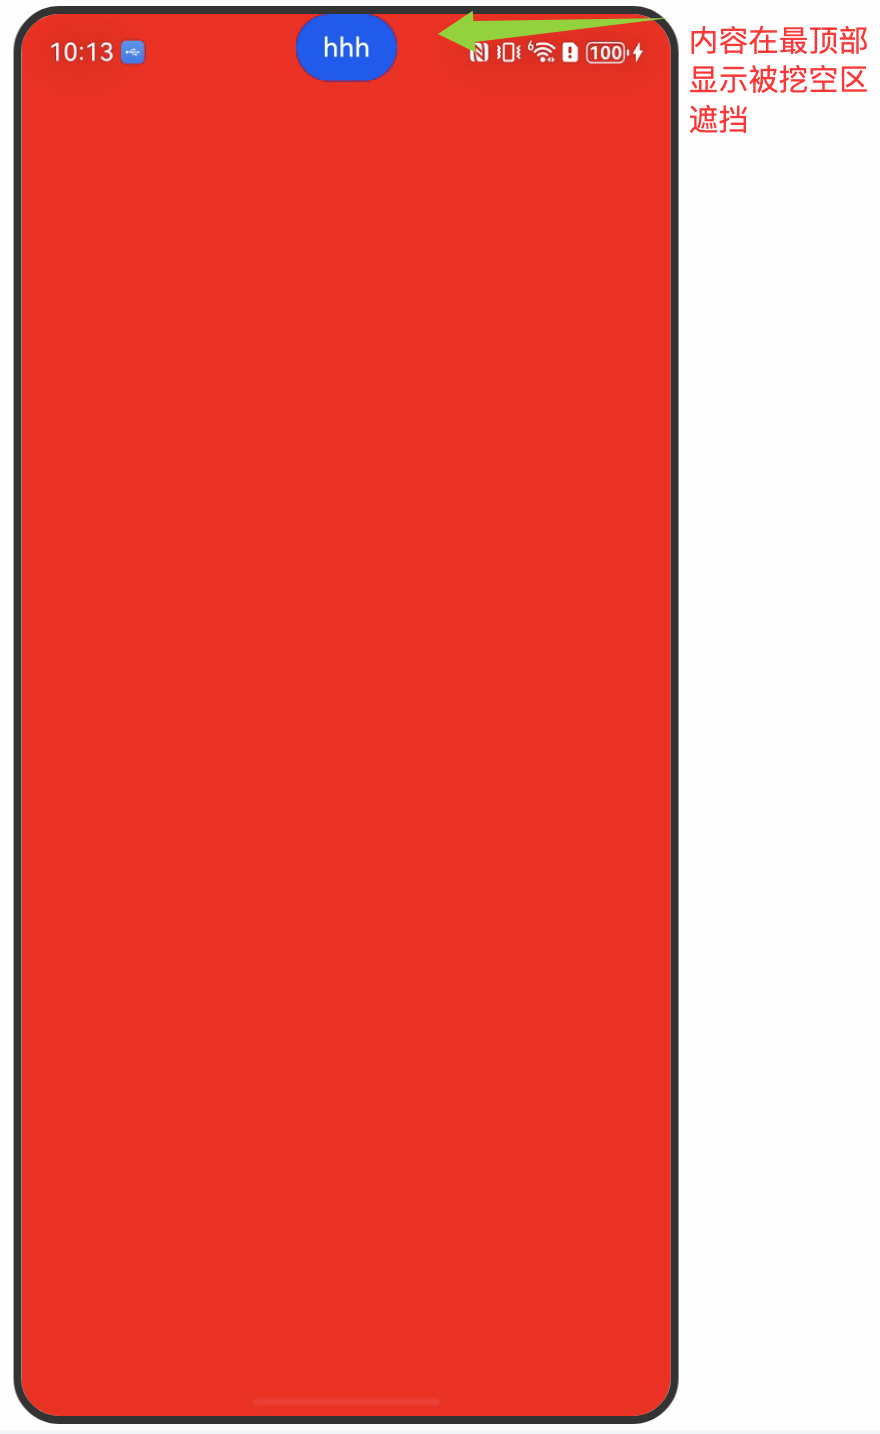
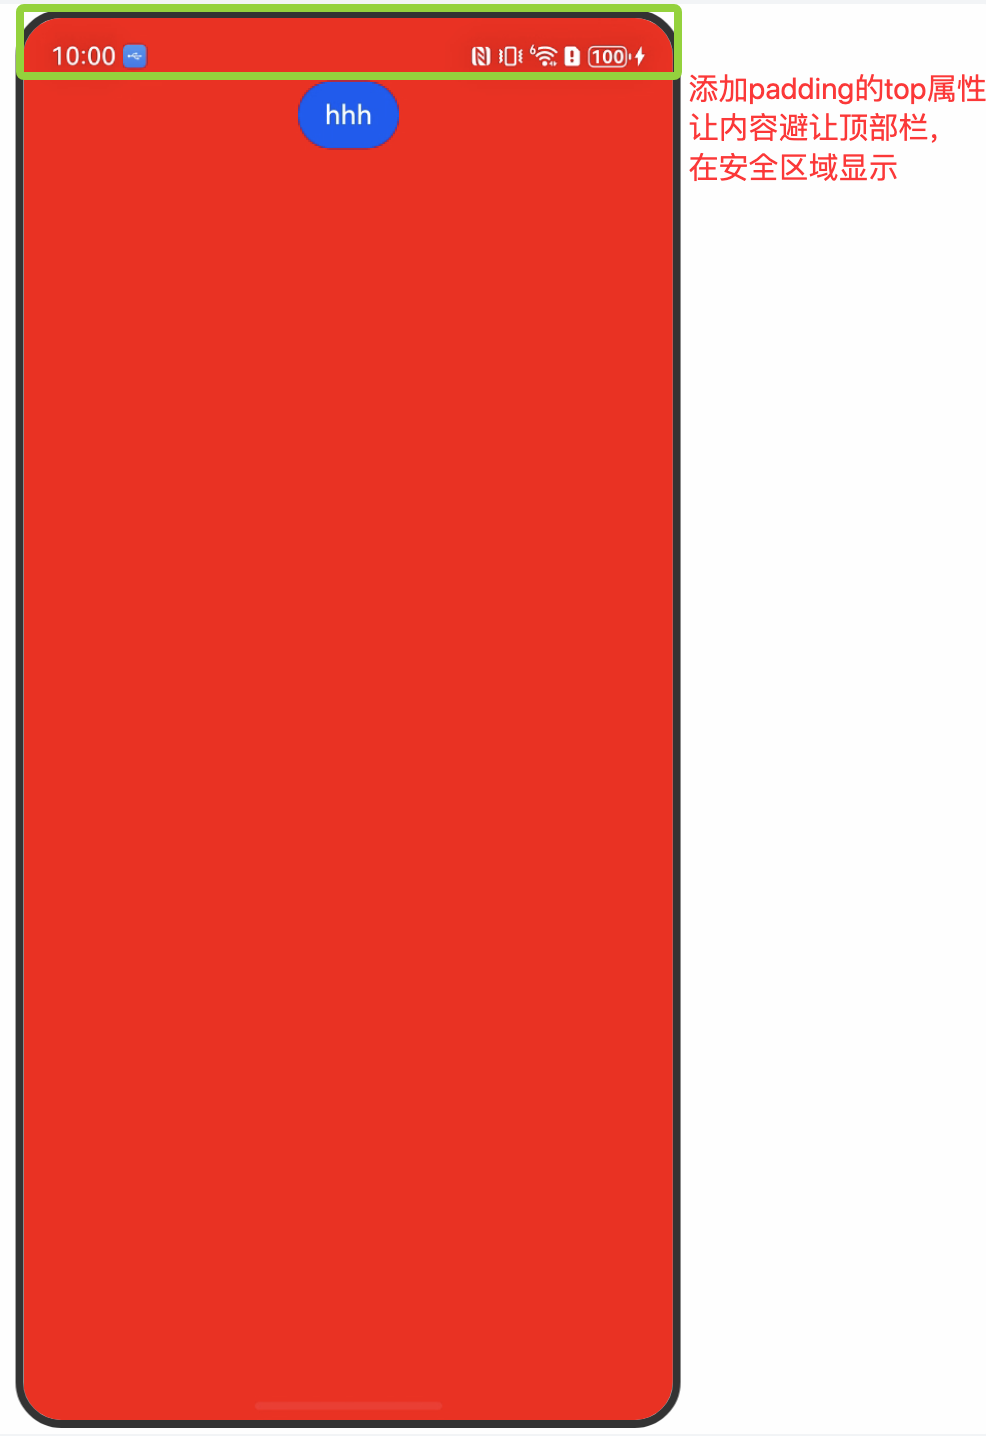
通过工具类读取全局存储的高度,用padding避开状态栏,让内容避让状态栏,仅在安全区域显示。:
import { ScreenUtils } from '../utils/ScreenUtils'

@Entry
@Component
struct Index {
  build() {
    Column() {
      Button('hhh')
    }
    .width('100%')
    .height('100%')
    .backgroundColor(Color.Red)
    //添加padding-top属性,让内容避开顶部烂,在安全区域显示,页面内容被挖空区遮挡
    .padding({ top: ScreenUtils.getInstance().getStatusBarHeight() })
  }
}
展示效果:
3.2、方案2:expandSafeArea自动扩展安全区域
核心逻辑:利用鸿蒙的expandSafeArea属性,将当前组件延伸到状态栏和导航栏,不影响其他组件的布局范围,其他组件仍在安全区域内进行布局
3.2.1、实现步骤
1、没添加expandSafeArea属性时的展示效果
组件布局范围只在安全区域显示,并没有扩展到顶部导航栏和底部栏
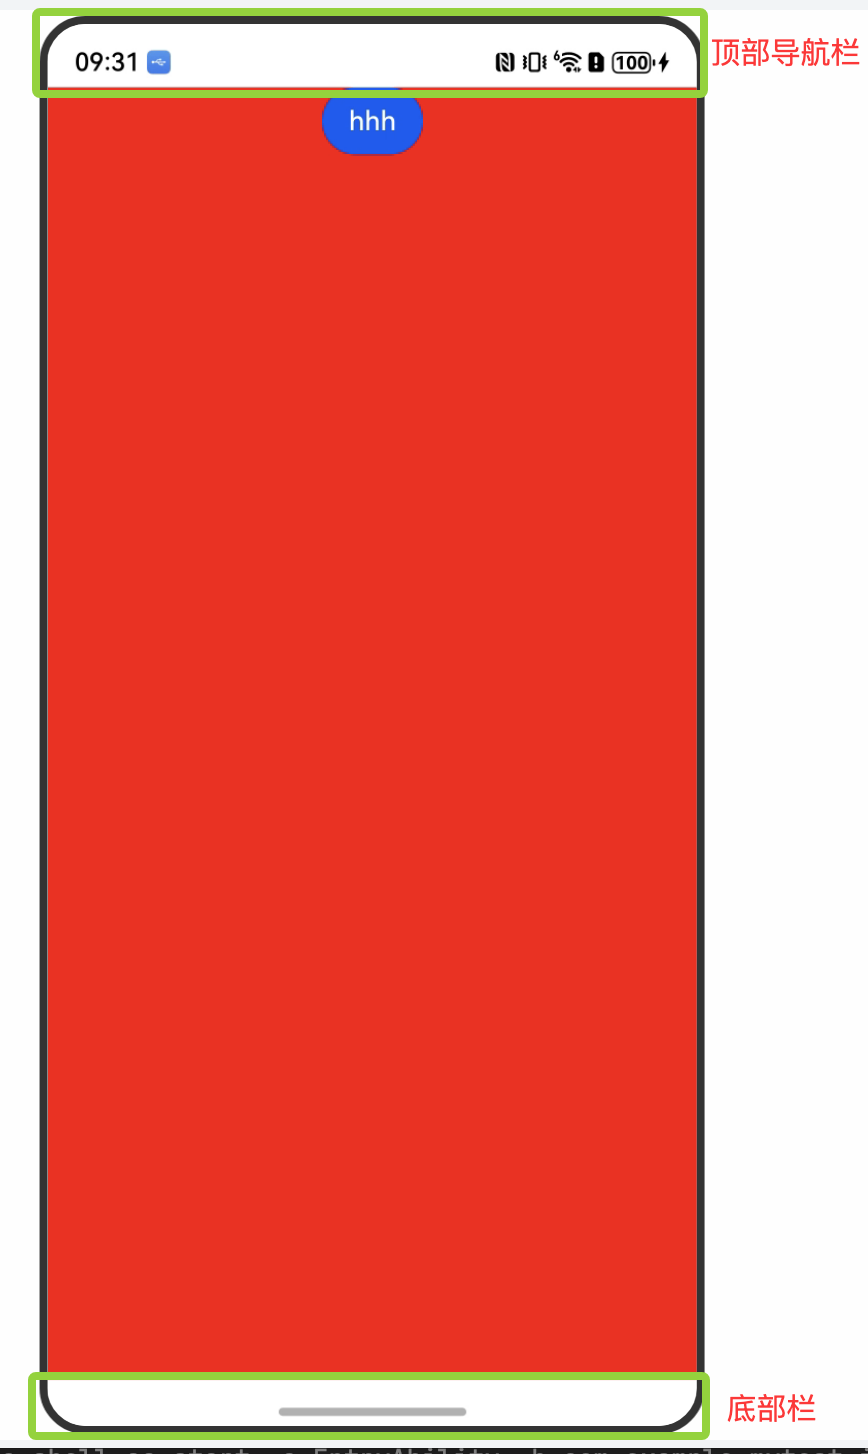
2、使用expandSafeArea属性扩展背景组件安全区域,使背景色延伸到状态栏和导航条。
@Entry
@Component
struct Index {
  @State message: string = 'Hello World';

  build() {
    Column(){
      Button('hhh')
    }
    .width('100%')
    .height('100%')
    .backgroundColor(Color.Red)
    .expandSafeArea([SafeAreaType.SYSTEM],[SafeAreaEdge.TOP,SafeAreaEdge.BOTTOM])
  }
}
展示效果:
四、两种方案核心对比
| 维度 | 方案一:窗口全屏 + 手动管理 | 方案二:expandSafeArea自动扩展 |
|---|---|---|
| 实现原理 | 窗口全屏后,手动计算安全区域高度,通过padding避开系统栏 |
组件自动延伸至安全区域,系统自动处理内容遮挡 |
| 开发成本 | 高(需手动获取高度、存储、管理布局) | 低(仅需添加一个属性) |
| 样式灵活性 | 高(可自定义状态栏 / 导航栏区域的背景、间距) | 低(组件背景与系统栏区域完全融合) |
| 设备适配性 | 需手动兼容不同设备的安全区域高度 | 系统自动适配所有设备 |
| 适用场景 | 复杂样式、独立系统栏区域设计 | 简单页面、背景融合场景 |
五、总结
我看现在的app貌似采用的都是第一种方案:全屏显示,在各个页面内再手动避开状态栏,可以实现更灵活的UI设计,针对复杂样式,每个页面内可以自己根据需求来设计顶部状态栏与底部栏的显示
所以,如果app样式比较复杂可以选择第一种方案,简单的几个页面且样式基本一致无大改动可以选择第二种方案

作为“人工智能6S店”的官方数字引擎,为AI开发者与企业提供一个覆盖软硬件全栈、一站式门户。
更多推荐

 3
3 0
0- 0


 已为社区贡献6条内容

所有评论(0)