
鸿蒙 Flutter 图像编辑:原生图像处理与滤镜开发
本文介绍了如何结合鸿蒙操作系统(HarmonyOS)与Flutter框架开发跨平台图像编辑应用。主要内容包括:1. 环境搭建与配置鸿蒙Flutter开发环境;2. 实现核心功能如图像选择、裁剪、旋转和保存,通过MethodChannel实现Flutter与鸿蒙原生API的通信;3. 开发基础滤镜(灰度、亮度)和高级滤镜(高斯模糊、马赛克);4. 性能优化方案,包括图像压缩、异步处理和内存管理。该方
欢迎大家加入[开源鸿蒙跨平台开发者社区](https://openharmonycrossplatform.csdn.net),一起共建开源鸿蒙跨平台生态。
引言:鸿蒙 + Flutter 图像编辑的价值与场景
在移动应用开发中,图像编辑功能是社交、电商、工具类 App 的核心模块之一。鸿蒙操作系统(HarmonyOS)凭借其分布式能力、原生性能优势和统一的设备生态,成为跨端应用开发的热门选择;而 Flutter 则以跨平台一致性 UI、高性能渲染和热重载特性,大幅提升开发效率。
将两者结合开发图像编辑功能,既能利用 Flutter 快速构建跨端(手机、平板、智慧屏)UI,又能通过鸿蒙原生 API 调用底层图像处理能力,兼顾 “开发效率” 与 “性能体验”。本文将从环境搭建、核心功能实现(图像选择 / 裁剪 / 保存)、滤镜开发(基础滤镜 + 自定义滤镜)、性能优化四个维度,手把手教你实现一个鸿蒙 Flutter 图像编辑 Demo,并提供完整可运行代码与官方文档链接。
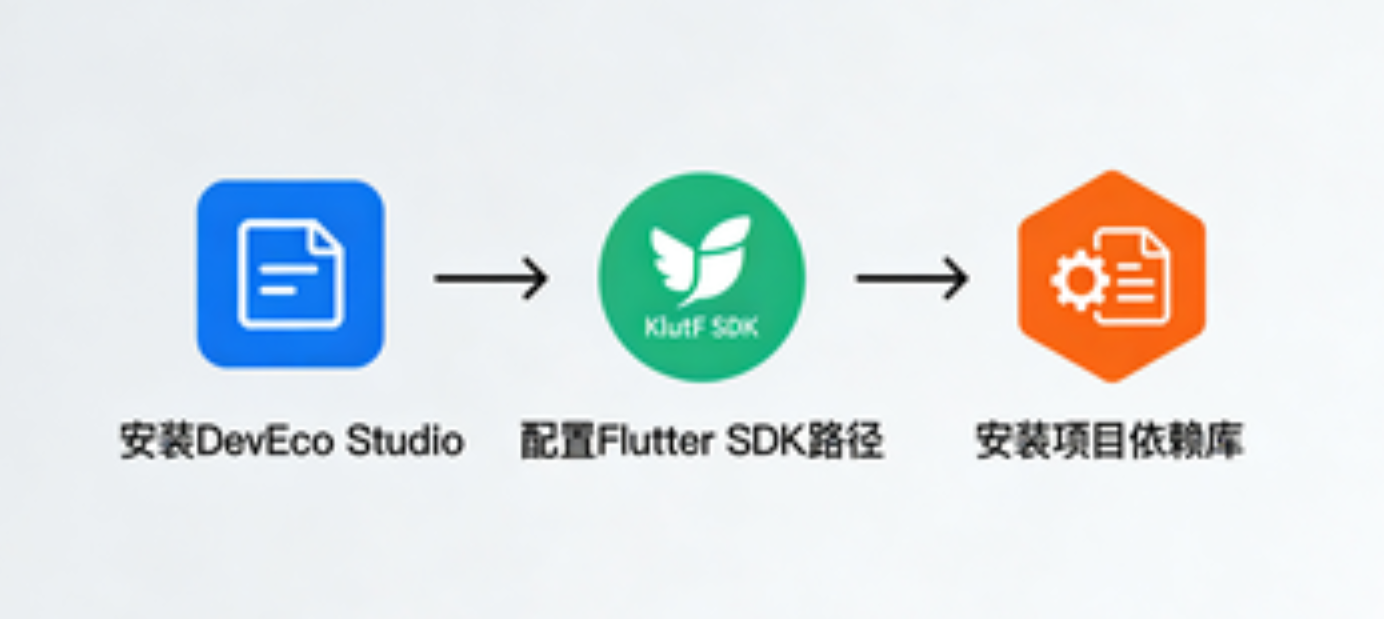
一、环境准备:搭建鸿蒙 Flutter 开发环境
在开始编码前,需完成鸿蒙开发工具、Flutter 环境及相关依赖库的配置,确保原生能力与 Flutter 层能正常通信。
1.1 必备工具与版本要求
| 工具 / 框架 | 版本要求 | 说明 | 官方链接 |
|---|---|---|---|
| DevEco Studio | 4.0+ | 鸿蒙官方开发工具,需支持 Flutter 插件 | DevEco Studio 下载 |
| Flutter | 3.10+ | 跨平台 UI 框架 | Flutter 官网 |
| HarmonyOS SDK | API Version 9+ | 鸿蒙原生 API 依赖 | 鸿蒙 SDK 配置指南 |
| Flutter 鸿蒙插件 | flutter_harmony_os 0.6+ | 桥接 Flutter 与鸿蒙原生能力 | pub: flutter_harmony_os |
1.2 依赖库配置(pubspec.yaml)
图像编辑需依赖图像处理库、原生通信库和滤镜库,在 pubspec.yaml 中添加以下依赖:
yaml
name: harmony_flutter_image_editor
description: 鸿蒙 Flutter 图像编辑 Demo
version: 1.0.0+1

environment:
  sdk: '>=3.0.0 <4.0.0'
  flutter: '>=3.10.0'

dependencies:
  flutter:
    sdk: flutter
  # 1. 鸿蒙 Flutter 原生通信桥接
  flutter_harmony_os: ^0.6.2
  # 2. 基础图像处理(裁剪、旋转、颜色调整)
  image: ^4.0.17
  # 3. 滤镜库(高斯模糊、对比度等)
  flutter_image_filters: ^0.10.0
  # 4. 图像压缩(避免内存溢出)
  flutter_image_compress: ^2.1.0
  # 5. 权限申请(文件读写、相册访问)
  permission_handler: ^11.0.1
  # 6. 缓存管理(避免重复加载图像)
  flutter_cache_manager: ^3.3.1

dev_dependencies:
  flutter_test:
    sdk: flutter
  flutter_lints: ^2.0.0

flutter:
  uses-material-design: true
添加依赖后执行 flutter pub get 安装,若遇到依赖冲突,可参考 pub 依赖解决指南。
1.3 鸿蒙原生权限配置
鸿蒙对相册访问、文件读写有严格的权限控制,需在 entry/src/main/module.json5 中声明权限(对应 Android Manifest 的角色):
json
{
  "module": {
    "package": "com.example.harmony_flutter_image_editor",
    "name": ".entry",
    "type": "entry",
    "description": "图像编辑 Demo 入口",
    "mainElement": "com.example.harmony_flutter_image_editor.MainAbility",
    "deviceTypes": ["phone", "tablet"],
    "abilities": [
      {
        "name": "com.example.harmony_flutter_image_editor.MainAbility",
        "label": "ImageEditor",
        "icon": "$media:icon",
        "description": "主能力",
        "type": "page",
        "launchType": "standard",
        "permissions": [
          "ohos.permission.READ_IMAGEVIDEO",  // 读取相册权限
          "ohos.permission.WRITE_IMAGEVIDEO", // 写入相册权限
          "ohos.permission.READ_USER_STORAGE", // 读取存储权限
          "ohos.permission.WRITE_USER_STORAGE" // 写入存储权限
        ],
        "skills": [
          {
            "entities": ["entity.system.home"],
            "actions": ["action.system.home"]
          }
        ]
      }
    ]
  }
}
权限申请需在 Flutter 层动态触发,后续章节会提供完整代码。
二、核心功能实现:鸿蒙原生与 Flutter 协同处理图像
图像编辑的核心流程是 “选图 → 处理(裁剪 / 旋转)→ 保存”,其中 “选图” 和 “保存” 需调用鸿蒙原生 API(Flutter 无直接访问鸿蒙相册 / 存储的能力),“处理” 可通过 Flutter 图像库实现。
2.1 图像选择:Flutter 调用鸿蒙原生相册
鸿蒙原生相册访问需通过 MethodChannel 实现 Flutter 与原生层(Java/Kotlin)的通信。
步骤 1:定义 MethodChannel 通信常量(Flutter 层)
在 lib/utils/channel_utils.dart 中统一管理通信通道名称和方法名:
dart
/// 鸿蒙原生通信工具类
class HarmonyChannelUtils {
  // 1. 定义通道名称(需与原生层一致)
  static const MethodChannel _imageChannel =
      MethodChannel('com.example/image_channel');

  // 2. 调用原生相册选择图像
  static Future<String?> selectImage() async {
    try {
      // 向原生层发送"select_image"指令,获取图像路径
      final String? imagePath =
          await _imageChannel.invokeMethod('select_image');
      return imagePath; // 返回选中图像的本地路径
    } on PlatformException catch (e) {
      debugPrint('选图失败:${e.message}');
      return null;
    }
  }
}
步骤 2:原生层实现相册选择(Java 层)
在鸿蒙工程的 entry/src/main/java/com/example/harmony_flutter_image_editor/MainAbility.java 中,注册 MethodChannel 并实现选图逻辑:
java
运行
import ohos.abilityshell.Environment;
import ohos.agp.window.service.WindowManager;
import ohos.app.Context;
import ohos.content.Intent;
import ohos.content.IntentParams;
import ohos.flutter.embedding.android.FlutterAbility;
import ohos.media.image.ImagePacker;
import ohos.media.image.ImageSource;
import ohos.media.photokit.metadata.AVStorage;
import ohos.media.photokit.metadata.PhotoMetadataUtils;
import io.flutter.plugin.common.MethodCall;
import io.flutter.plugin.common.MethodChannel;
import io.flutter.plugins.GeneratedPluginRegistrant;

public class MainAbility extends FlutterAbility {
    // 通道名称(需与 Flutter 层一致)
    private static final String IMAGE_CHANNEL = "com.example/image_channel";
    // 选图请求码
    private static final int SELECT_IMAGE_REQUEST = 1001;
    // 存储选中图像路径,用于回调给 Flutter
    private String selectedImagePath;

    @Override
    public void onStart(Intent intent) {
        super.onStart(intent);
        // 1. 注册 Flutter 插件
        GeneratedPluginRegistrant.registerWith(this);
        // 2. 初始化 MethodChannel
        new MethodChannel(getFlutterEngine().getDartExecutor().getBinaryMessenger(), IMAGE_CHANNEL)
                .setMethodCallHandler((call, result) -> {
                    // 处理 Flutter 发送的"select_image"指令
                    if (call.method.equals("select_image")) {
                        openPhotoGallery(result); // 打开相册
                    } else {
                        result.notImplemented(); // 未实现的方法
                    }
                });
    }

    // 打开鸿蒙原生相册
    private void openPhotoGallery(MethodChannel.Result result) {
        // 1. 构造相册选择意图
        Intent intent = new Intent();
        intent.setAction(Intent.ACTION_PICK);
        intent.setUri(AVStorage.Images.Media.EXTERNAL_CONTENT_URI); // 相册图片 URI

        // 2. 启动相册并等待结果回调
        startAbilityForResult(intent, SELECT_IMAGE_REQUEST, new AbilityResultCallback() {
            @Override
            public void onResult(int requestCode, Intent resultIntent) {
                if (requestCode == SELECT_IMAGE_REQUEST && resultIntent != null) {
                    // 3. 获取选中图像的 URI
                    String imageUri = resultIntent.getDataString();
                    if (imageUri != null) {
                        // 4. 将 URI 转换为本地路径(鸿蒙相册 URI 需解析)
                        selectedImagePath = PhotoMetadataUtils.getAbsoluteImagePath(getContext(), imageUri);
                        result.success(selectedImagePath); // 回调给 Flutter
                    } else {
                        result.error("NULL_URI", "图像 URI 为空", null);
                    }
                }
            }

            @Override
            public void onCancel(int requestCode) {
                result.error("USER_CANCEL", "用户取消选图", null);
            }
        });
    }
}
关键说明:鸿蒙相册返回的是 content:// 格式的 URI,需通过 PhotoMetadataUtils.getAbsoluteImagePath 解析为本地文件路径,Flutter 才能加载图像。参考文档:鸿蒙 PhotoKit 开发指南。
步骤 3:Flutter 层触发选图与加载
在图像编辑页面(lib/pages/image_editor_page.dart)中,通过按钮触发选图,并使用 Image.file 加载图像:
dart
import 'dart:io';
import 'package:flutter/material.dart';
import 'package:flutter/services.dart';
import 'package:harmony_flutter_image_editor/utils/channel_utils.dart';

class ImageEditorPage extends StatefulWidget {
  const ImageEditorPage({super.key});

  @override
  State<ImageEditorPage> createState() => _ImageEditorPageState();
}

class _ImageEditorPageState extends State<ImageEditorPage> {
  File? _selectedImage; // 选中的图像文件

  // 触发选图
  Future<void> _pickImage() async {
    // 1. 先申请相册权限
    final permissionStatus = await Permission.photos.request();
    if (permissionStatus.isGranted) {
      // 2. 调用原生选图
      final String? imagePath = await HarmonyChannelUtils.selectImage();
      if (imagePath != null && mounted) {
        setState(() {
          _selectedImage = File(imagePath); // 更新状态,加载图像
        });
      }
    } else {
      ScaffoldMessenger.of(context).showSnackBar(
        const SnackBar(content: Text('请授予相册访问权限')),
      );
    }
  }

  @override
  Widget build(BuildContext context) {
    return Scaffold(
      appBar: AppBar(title: const Text('鸿蒙 Flutter 图像编辑')),
      body: Center(
        child: _selectedImage == null
            ? const Text('请选择一张图像')
            : // 加载选中的图像,限制最大宽度为屏幕宽度
                Image.file(_selectedImage!, width: MediaQuery.of(context).size.width * 0.8),
      ),
      floatingActionButton: FloatingActionButton(
        onPressed: _pickImage,
        child: const Icon(Icons.photo_library),
      ),
    );
  }
}
2.2 原生图像处理:裁剪、旋转与缩放
图像裁剪、旋转等基础操作可通过 Flutter 的 image 库实现,该库支持像素级操作,且跨平台兼容性好。
2.2.1 图像裁剪(按比例裁剪)
在 lib/utils/image_utils.dart 中封装裁剪工具方法:
dart
import 'dart:io';
import 'dart:typed_data';
import 'package:image/image.dart' as img;

/// 图像处理工具类
class ImageUtils {
  // 裁剪图像(x/y:裁剪起点,width/height:裁剪尺寸)
  static Future<File?> cropImage({
    required File sourceImage,
    required int x,
    required int y,
    required int width,
    required int height,
  }) async {
    try {
      // 1. 读取图像文件为字节流
      final Uint8List imageBytes = await sourceImage.readAsBytes();
      // 2. 解码字节流为 image 库的 Image 对象
      final img.Image? sourceImg = img.decodeImage(imageBytes);
      if (sourceImg == null) return null;

      // 3. 执行裁剪(确保裁剪尺寸不超过原图)
      final img.Image croppedImg = img.copyCrop(
        sourceImg,
        x: x,
        y: y,
        width: width > sourceImg.width ? sourceImg.width : width,
        height: height > sourceImg.height ? sourceImg.height : height,
      );

      // 4. 编码裁剪后的图像为 JPEG 格式
      final Uint8List croppedBytes = img.encodeJpg(croppedImg, quality: 90);
      // 5. 保存到临时文件(返回新文件)
      final String tempPath = '${sourceImage.parent.path}/cropped_${sourceImage.name}';
      final File croppedFile = File(tempPath);
      await croppedFile.writeAsBytes(croppedBytes);
      return croppedFile;
    } catch (e) {
      debugPrint('裁剪失败:$e');
      return null;
    }
  }
}
在编辑页面中调用裁剪方法(示例:裁剪为 300x300 像素):
dart
// 裁剪按钮点击事件
Future<void> _cropImage() async {
  if (_selectedImage == null) return;
  final File? croppedFile = await ImageUtils.cropImage(
    sourceImage: _selectedImage!,
    x: 50, // 裁剪起点 X 坐标
    y: 50, // 裁剪起点 Y 坐标
    width: 300, // 裁剪宽度
    height: 300, // 裁剪高度
  );
  if (croppedFile != null && mounted) {
    setState(() {
      _selectedImage = croppedFile; // 更新为裁剪后的图像
    });
  }
}
2.2.2 图像旋转(顺时针旋转 90°)
在 ImageUtils 中添加旋转方法:
dart
// 旋转图像(angle:旋转角度,仅支持 90/180/270)
static Future<File?> rotateImage({
  required File sourceImage,
  required int angle,
}) async {
  try {
    final Uint8List imageBytes = await sourceImage.readAsBytes();
    final img.Image? sourceImg = img.decodeImage(imageBytes);
    if (sourceImg == null) return null;

    // 根据角度执行旋转
    img.Image rotatedImg;
    switch (angle) {
      case 90:
        rotatedImg = img.copyRotate(sourceImg, 90);
        break;
      case 180:
        rotatedImg = img.copyRotate(sourceImg, 180);
        break;
      case 270:
        rotatedImg = img.copyRotate(sourceImg, 270);
        break;
      default:
        return sourceImage; // 不支持的角度,返回原图
    }

    // 保存旋转后的图像
    final String tempPath = '${sourceImage.parent.path}/rotated_${sourceImage.name}';
    final File rotatedFile = File(tempPath);
    await rotatedFile.writeAsBytes(img.encodeJpg(rotatedImg, quality: 90));
    return rotatedFile;
  } catch (e) {
    debugPrint('旋转失败:$e');
    return null;
  }
}
2.3 图像保存:写入鸿蒙相册
处理后的图像需保存到鸿蒙相册,同样通过 MethodChannel 调用原生 API 实现。
步骤 1:Flutter 层添加保存方法(ChannelUtils)
dart
// 3. 调用原生保存图像到相册
static Future<bool> saveImageToGallery({required String imagePath}) async {
  try {
    // 向原生层发送"save_image"指令,传入图像路径
    final bool isSuccess = await _imageChannel.invokeMethod(
      'save_image',
      {'image_path': imagePath}, // 传参:图像路径
    );
    return isSuccess;
  } on PlatformException catch (e) {
    debugPrint('保存失败:${e.message}');
    return false;
  }
}
步骤 2:原生层实现保存逻辑(MainAbility.java)
在 MethodCallHandler 中添加 save_image 方法的处理:
java
运行
// 在 onStart 的 MethodChannel 中添加分支
if (call.method.equals("select_image")) {
    openPhotoGallery(result);
} else if (call.method.equals("save_image")) {
    // 处理"save_image"指令
    String imagePath = call.argument("image_path"); // 获取 Flutter 传入的图像路径
    if (imagePath != null) {
        boolean saveSuccess = saveToGallery(getContext(), imagePath);
        result.success(saveSuccess);
    } else {
        result.error("NULL_PATH", "图像路径为空", null);
    }
} else {
    result.notImplemented();
}

// 保存图像到鸿蒙相册
private boolean saveToGallery(Context context, String imagePath) {
    try {
        // 1. 读取图像文件
        File imageFile = new File(imagePath);
        if (!imageFile.exists()) return false;

        // 2. 构造保存到相册的意图
        Intent saveIntent = new Intent(Intent.ACTION_MEDIA_INSERT);
        saveIntent.setType("image/jpeg");
        // 设置图像路径(鸿蒙通过 URI 写入相册)
        saveIntent.setData(Uri.fromFile(imageFile));
        // 添加额外参数:显示名称
        IntentParams params = new IntentParams();
        params.setParam(AVStorage.Images.Media.DISPLAY_NAME, "edited_" + System.currentTimeMillis() + ".jpg");
        saveIntent.setParams(params);

        // 3. 发送意图,完成保存
        context.startAbility(saveIntent);
        return true;
    } catch (Exception e) {
        e.printStackTrace();
        return false;
    }
}
步骤 3:Flutter 层触发保存
在编辑页面添加保存按钮:
dart
// 保存按钮点击事件
Future<void> _saveImage() async {
  if (_selectedImage == null) return;
  // 申请写入权限
  final permissionStatus = await Permission.storage.request();
  if (permissionStatus.isGranted) {
    final bool isSuccess = await HarmonyChannelUtils.saveImageToGallery(
      imagePath: _selectedImage!.path,
    );
    ScaffoldMessenger.of(context).showSnackBar(
      SnackBar(content: Text(isSuccess ? '保存到相册成功' : '保存失败')),
    );
  } else {
    ScaffoldMessenger.of(context).showSnackBar(
      const SnackBar(content: Text('请授予文件写入权限')),
    );
  }
}
三、滤镜开发:从基础效果到自定义滤镜
滤镜本质是对图像像素的颜色、亮度、对比度等属性进行算法调整。本节将实现基础滤镜(灰度、亮度)和自定义滤镜(高斯模糊、马赛克),并提供实时预览功能。
3.1 基础滤镜:基于颜色矩阵的灰度 / 亮度调整
image 库支持通过 ColorMatrix 调整图像颜色,适合实现简单滤镜。
3.1.1 灰度滤镜(去色效果)
灰度滤镜的原理是将每个像素的 RGB 通道值统一为 “亮度值”(如 R = G = B = 0.299R + 0.587G + 0.114B)。在 ImageUtils 中添加方法:
dart
// 灰度滤镜
static Future<File?> applyGrayscaleFilter({required File sourceImage}) async {
  try {
    final Uint8List imageBytes = await sourceImage.readAsBytes();
    final img.Image? sourceImg = img.decodeImage(imageBytes);
    if (sourceImg == null) return null;

    // 遍历每个像素,转换为灰度
    for (int y = 0; y < sourceImg.height; y++) {
      for (int x = 0; x < sourceImg.width; x++) {
        final int pixel = sourceImg.getPixel(x, y);
        // 提取 RGB 通道
        final int r = img.getRed(pixel);
        final int g = img.getGreen(pixel);
        final int b = img.getBlue(pixel);
        // 计算亮度值(标准灰度公式)
        final int gray = (0.299 * r + 0.587 * g + 0.114 * b).toInt();
        // 设置新像素(RGB 统一为灰度值,透明度不变)
        sourceImg.setPixelRgba(x, y, gray, gray, gray, img.getAlpha(pixel));
      }
    }

    // 保存滤镜后的图像
    final String tempPath = '${sourceImage.parent.path}/grayscale_${sourceImage.name}';
    final File filteredFile = File(tempPath);
    await filteredFile.writeAsBytes(img.encodeJpg(sourceImg, quality: 90));
    return filteredFile;
  } catch (e) {
    debugPrint('灰度滤镜失败:$e');
    return null;
  }
}

3.1.2 亮度调整滤镜
亮度调整通过增加 / 减少每个像素的 RGB 通道值实现(需确保值在 0-255 范围内):
dart
// 亮度调整(brightness:-100~100,负值变暗,正值变亮)
static Future<File?> adjustBrightness({
  required File sourceImage,
  required int brightness,
}) async {
  try {
    final Uint8List imageBytes = await sourceImage.readAsBytes();
    final img.Image? sourceImg = img.decodeImage(imageBytes);
    if (sourceImg == null) return null;

    // 限制亮度值范围(-100~100)
    brightness = brightness.clamp(-100, 100);

    for (int y = 0; y < sourceImg.height; y++) {
      for (int x = 0; x < sourceImg.width; x++) {
        final int pixel = sourceImg.getPixel(x, y);
        // 调整每个通道的亮度
        final int r = (img.getRed(pixel) + brightness).clamp(0, 255);
        final int g = (img.getGreen(pixel) + brightness).clamp(0, 255);
        final int b = (img.getBlue(pixel) + brightness).clamp(0, 255);
        // 设置新像素
        sourceImg.setPixelRgba(x, y, r, g, b, img.getAlpha(pixel));
      }
    }

    final String tempPath = '${sourceImage.parent.path}/brightness_${sourceImage.name}';
    final File filteredFile = File(tempPath);
    await filteredFile.writeAsBytes(img.encodeJpg(sourceImg, quality: 90));
    return filteredFile;
  } catch (e) {
    debugPrint('亮度调整失败:$e');
    return null;
  }
}
3.2 自定义滤镜:高斯模糊与马赛克
复杂滤镜(如高斯模糊)需通过卷积算法实现,手动编码难度较高,推荐使用成熟库 flutter_image_filters。
3.2.1 高斯模糊滤镜(基于 flutter_image_filters)
首先在 pubspec.yaml 中确保依赖:
yaml
dependencies:
  flutter_image_filters: ^0.10.0
封装模糊滤镜方法(支持实时预览,无需提前保存文件):
dart
import 'package:flutter_image_filters/flutter_image_filters.dart';
import 'package:image/image.dart' as img;

// 高斯模糊滤镜(radius:模糊半径,0~20)
static Future<Uint8List?> applyGaussianBlur({
  required File sourceImage,
  required double radius,
}) async {
  try {
    // 1. 读取图像字节流
    final Uint8List imageBytes = await sourceImage.readAsBytes();
    // 2. 解码为 Image 对象
    final img.Image? sourceImg = img.decodeImage(imageBytes);
    if (sourceImg == null) return null;

    // 3. 配置高斯模糊参数
    final GaussianBlurShaderConfiguration configuration = GaussianBlurShaderConfiguration()
      ..radius = radius.clamp(0.0, 20.0); // 限制模糊半径

    // 4. 执行滤镜(flutter_image_filters 需传入图像尺寸和字节流)
    final FilteredImageResult result = await configuration.processImage(
      bytes: imageBytes,
      width: sourceImg.width,
      height: sourceImg.height,
    );

    return result.bytes; // 返回滤镜后的字节流(可直接用于 Image.memory 预览)
  } catch (e) {
    debugPrint('高斯模糊失败:$e');
    return null;
  }
}
在页面中实时预览模糊效果:
dart
Uint8List? _blurredImageBytes; // 模糊后的字节流

// 触发模糊并预览
Future<void> _previewBlur() async {
  if (_selectedImage == null) return;
  final Uint8List? bytes = await ImageUtils.applyGaussianBlur(
    sourceImage: _selectedImage!,
    radius: 10.0, // 模糊半径 10
  );
  if (bytes != null && mounted) {
    setState(() {
      _blurredImageBytes = bytes;
    });
  }
}

// UI 中预览模糊图像
_blurredImageBytes != null
    ? Image.memory(_blurredImageBytes!, width: 200)
    : const SizedBox.shrink(),
3.2.2 马赛克滤镜(手动实现块采样)
马赛克的原理是将图像分割为多个 “块”,每个块的颜色统一为块内某个像素的颜色(如中心点像素):
dart
// 马赛克滤镜(blockSize:块大小,1~50,值越大马赛克越明显)
static Future<File?> applyMosaic({
  required File sourceImage,
  required int blockSize,
}) async {
  try {
    final Uint8List imageBytes = await sourceImage.readAsBytes();
    final img.Image? sourceImg = img.decodeImage(imageBytes);
    if (sourceImg == null) return null;

    // 限制块大小(1~50)
    blockSize = blockSize.clamp(1, 50);

    // 遍历每个块
    for (int y = 0; y < sourceImg.height; y += blockSize) {
      for (int x = 0; x < sourceImg.width; x += blockSize) {
        // 获取块中心点像素(作为整个块的颜色)
        final int centerX = x + (blockSize ~/ 2);
        final int centerY = y + (blockSize ~/ 2);
        // 确保中心点不超出图像范围
        final int safeX = centerX.clamp(0, sourceImg.width - 1);
        final int safeY = centerY.clamp(0, sourceImg.height - 1);
        final int blockColor = sourceImg.getPixel(safeX, safeY);

        // 将块内所有像素设置为中心点颜色
        for (int dy = 0; dy < blockSize; dy++) {
          for (int dx = 0; dx < blockSize; dx++) {
            final int targetX = x + dx;
            final int targetY = y + dy;
            // 确保目标像素不超出图像范围
            if (targetX < sourceImg.width && targetY < sourceImg.height) {
              sourceImg.setPixel(targetX, targetY, blockColor);
            }
          }
        }
      }
    }

    // 保存马赛克图像
    final String tempPath = '${sourceImage.parent.path}/mosaic_${sourceImage.name}';
    final File filteredFile = File(tempPath);
    await filteredFile.writeAsBytes(img.encodeJpg(sourceImg, quality: 90));
    return filteredFile;
  } catch (e) {
    debugPrint('马赛克滤镜失败:$e');
    return null;
  }
}

四、性能优化:避免卡顿与内存溢出
图像处理(尤其是大尺寸图像和复杂滤镜)容易导致 UI 卡顿和内存溢出,需从图像压缩、异步处理、内存管理三个维度优化。
4.1 图像压缩:减少像素数量与文件大小
使用 flutter_image_compress 库在选图后立即压缩图像,降低后续处理压力:
dart
// 在 _pickImage 方法中添加压缩逻辑
final String? imagePath = await HarmonyChannelUtils.selectImage();
if (imagePath != null && mounted) {
  // 压缩图像(宽度限制为 1080px,质量 80%)
  final Uint8List? compressedBytes = await FlutterImageCompress.compressWithFile(
    imagePath,
    minWidth: 1080, // 最小宽度(超过则按比例压缩)
    minHeight: 1080, // 最小高度
    quality: 80, // 压缩质量(0~100)
  );
  if (compressedBytes != null) {
    // 保存压缩后的图像到临时文件
    final String compressedPath = '${Directory.systemTemp.path}/compressed_${DateTime.now().millisecondsSinceEpoch}.jpg';
    final File compressedFile = File(compressedPath);
    await compressedFile.writeAsBytes(compressedBytes);
    setState(() {
      _selectedImage = compressedFile; // 使用压缩后的图像
    });
  }
}
参考文档:flutter_image_compress 用法。
4.2 异步处理:耗时操作放在 Isolate 中
Flutter 是单线程模型,耗时的滤镜处理会阻塞 UI 线程,导致卡顿。需使用 Isolate 开启子线程处理:
dart
// 在 ImageUtils 中添加异步处理工具方法
import 'dart:isolate';

// 异步执行滤镜处理(使用 Isolate)
static Future<T?> runInIsolate<T>(Future<T> Function() task) async {
  // 创建通信端口
  final ReceivePort receivePort = ReceivePort();
  // 启动 Isolate,传入任务和端口
  final Isolate isolate = await Isolate.spawn(
    (Map<String, dynamic> args) async {
      final Future<T> Function() task = args['task'];
      final SendPort sendPort = args['sendPort'];
      try {
        final T result = await task();
        sendPort.send(result); // 发送成功结果
      } catch (e) {
        sendPort.send(e); // 发送异常
      }
    },
    {'task': task, 'sendPort': receivePort.sendPort},
  );

  // 等待 Isolate 执行结果
  final dynamic result = await receivePort.first;
  isolate.kill(); // 关闭 Isolate
  if (result is Exception) {
    throw result;
  }
  return result as T?;
}
调用示例(异步处理高斯模糊):
dart
final Uint8List? bytes = await ImageUtils.runInIsolate(() async {
  return ImageUtils.applyGaussianBlur(
    sourceImage: _selectedImage!,
    radius: 10.0,
  );
});
4.3 内存管理:避免重复创建与及时释放
- 复用图像对象:避免频繁创建
File或Image对象,可通过缓存(如flutter_cache_manager)管理常用图像。 - 及时释放资源:当页面销毁时,清空图像引用,帮助 GC 回收内存:
dart
@override
void dispose() {
  _selectedImage = null;
  _blurredImageBytes = null;
  super.dispose();
}
- 限制图像尺寸:通过压缩将图像宽度 / 高度限制在 2000px 以内(大多数手机屏幕分辨率低于此值),避免加载超大图像。
五、完整项目结构与运行效果
5.1 项目目录结构
plaintext
harmony_flutter_image_editor/
├─ lib/
│  ├─ pages/
│  │  └─ image_editor_page.dart  # 图像编辑主页面
│  ├─ utils/
│  │  ├─ channel_utils.dart      # MethodChannel 工具
│  │  ├─ image_utils.dart        # 图像处理与滤镜工具
│  │  └─ permission_utils.dart   # 权限申请工具(可选)
│  └─ main.dart                  # 入口文件
├─ entry/                        # 鸿蒙原生工程
│  └─ src/main/java/com/example/harmony_flutter_image_editor/
│     └─ MainAbility.java        # 原生能力实现
└─ pubspec.yaml                  # 依赖配置
5.2 运行效果
- 启动 App 后,点击 “相册” 按钮选择图像;
- 选择图像后,显示原图及操作按钮(裁剪、旋转、灰度、模糊、保存);
- 点击对应按钮,实时预览处理效果;
- 点击 “保存” 按钮,将处理后的图像写入鸿蒙相册。
六、总结与扩展方向
本文通过 “Flutter 层构建 UI + 鸿蒙原生层处理相册 / 存储 + 跨平台库实现图像处理” 的架构,完成了一个基础的鸿蒙 Flutter 图像编辑 Demo。核心亮点包括:
- 打通 Flutter 与鸿蒙原生通信,实现图像选择与保存;
- 覆盖基础图像处理(裁剪、旋转)与主流滤镜(灰度、模糊、马赛克);
- 提供性能优化方案,避免卡顿与内存溢出。
扩展方向
- 添加文字水印与贴纸:使用 Flutter 的
CustomPaint绘制文字或贴纸,叠加到图像上; - 分布式图像编辑:利用鸿蒙的分布式数据管理能力,实现多设备(手机 + 平板)协同编辑图像;
- 滤镜预设与自定义调节:提供滤镜列表(如 “复古”“清新”),并支持用户手动调节参数(如对比度、饱和度);
- 图像格式支持:扩展对 PNG、WebP 等格式的支持,通过
image库的decodePng、encodeWebP方法实现。
参考资料

作为“人工智能6S店”的官方数字引擎,为AI开发者与企业提供一个覆盖软硬件全栈、一站式门户。
更多推荐

 13
13 0
0- 0


 已为社区贡献21条内容

所有评论(0)