
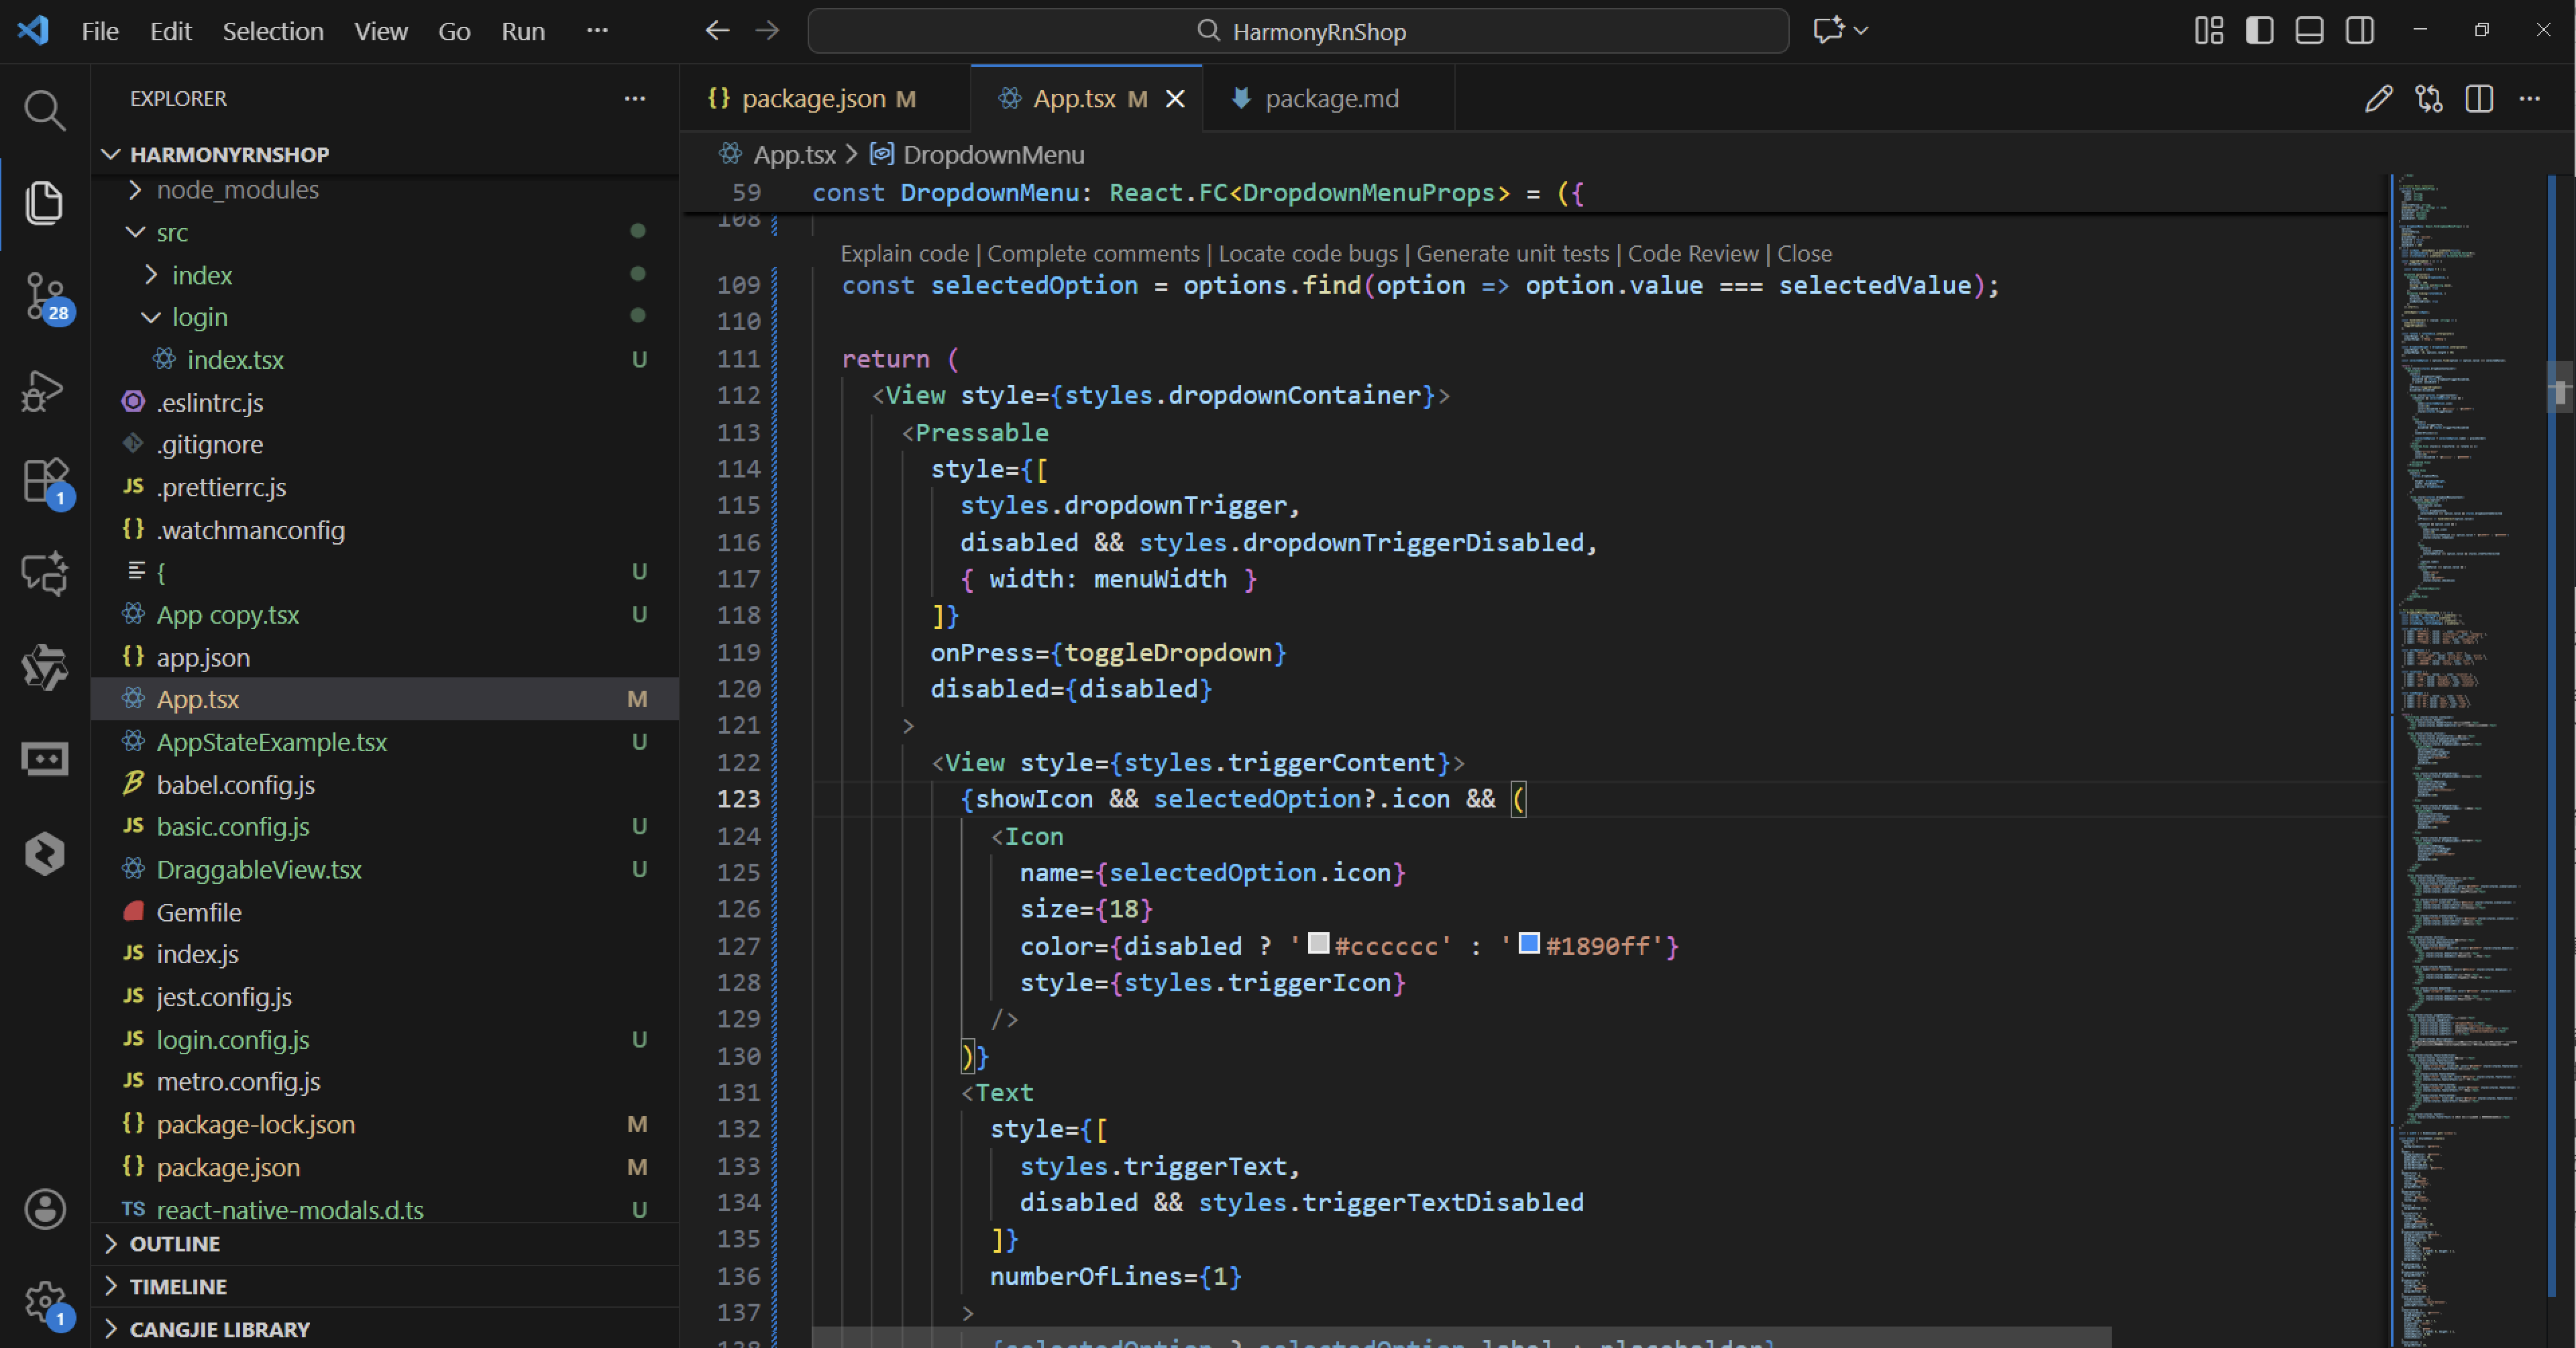
【精通篇】打造React Native鸿蒙跨平台开发高级复合组件库开发系列:DropdownMenu 下拉菜单(向下弹出的菜单列表)
在华为鸿蒙OS上开发React Native下拉菜单组件时,主要有两种实现方式:一是通过ArkTS开发原生组件并桥接到React Native,二是改造现有RN库实现兼容性。本文提供了完整的自定义DropdownMenu组件实现方案,包含以下核心功能: 纯JS实现的跨平台下拉菜单,支持鸿蒙OS 使用Unicode符号实现简易图标系统 动画效果包括展开/收起和箭头旋转 支持禁用状态、自定义宽度和图标
在华为鸿蒙(HarmonyOS)操作系统上进行React Native应用的开发,特别是涉及到下拉菜单(DropdownMenu)的实现,你需要考虑几个关键点:
-
使用原生模块或组件: 由于React Native原生组件库中没有直接支持鸿蒙OS的原生组件,你需要通过集成原生模块或自定义组件来实现。
-
使用华为的ArkTS框架: 鸿蒙OS推荐使用ArkTS(类似于React Native的JSX语法,但基于TypeScript),你可以考虑使用ArkTS来开发自定义的下拉菜单组件。
方法1:使用ArkTS开发自定义下拉菜单
-
创建一个ArkTS组件:
在ArkTS中,你可以创建一个下拉菜单组件。例如,你可以使用ArkUI库中的DropDownMenu组件。import { DropDownMenu, Text } from '@ohos.arkui'; export default class CustomDropdownMenu extends @Component { build() { return ( <DropDownMenu> <Text>选项1</Text> <Text>选项2</Text> <Text>选项3</Text> </DropDownMenu> ); } } -
在React Native中使用ArkTS组件:
你需要通过一个原生模块来桥接React Native和ArkTS。你可以使用@ohos.arkui包来创建原生模块。import { NativeModules } from 'react-native'; const { CustomDropdownMenu } = NativeModules; export default function App() { return <CustomDropdownMenu />; } -
创建原生模块:
在Android或iOS项目中创建一个原生模块,该模块将加载并渲染ArkTS组件。- Android: 创建一个新的Kotlin类,并使用
ArkUI的API加载ArkTS组件。 - iOS: 使用Objective-C或Swift创建原生视图控制器,并加载ArkTS组件。
- Android: 创建一个新的Kotlin类,并使用
方法2:使用已有的React Native库的变通方法
如果直接使用ArkTS不现实或者你希望快速实现下拉菜单,你可以考虑使用已有的React Native库,如react-native-dropdown-menu,并通过一些变通方法来实现兼容性:
-
修改库以支持鸿蒙OS: 如果你能找到源代码,可以尝试修改这些库以支持鸿蒙OS的原生组件。例如,修改其底层Android或iOS实现以使用华为的UI组件。
-
使用Web视图: 如果实在无法直接集成,可以考虑将下拉菜单作为一个Web页面,通过
WebView在React Native中加载。虽然这不是最高效的方法,但在紧急情况下可以作为临时解决方案。
结论
由于鸿蒙OS的特殊性及其对ArkTS的推广,推荐优先使用ArkTS开发自定义组件。如果需要与React Native集成,则需要通过原生模块桥接。考虑到鸿蒙OS的生态系统还在发展中,官方支持和库的适配可能需要时间,因此灵活使用现有的解决方案和创造性地解决问题将是关键。
真实案列组件演示:
import React, { useState } from 'react';
import { View, Text, StyleSheet, ScrollView, Dimensions, TouchableOpacity, Animated, Easing, Pressable } from 'react-native';

// Simple Icon Component using Unicode symbols
interface IconProps {
  name: string;
  size?: number;
  color?: string;
  style?: object;
}

const Icon: React.FC<IconProps> = ({
  name,
  size = 24,
  color = '#333333',
  style
}) => {
  const getIconSymbol = () => {
    switch (name) {
      case 'arrow-down': return '▼';
      case 'arrow-up': return '▲';
      case 'check': return '✓';
      case 'menu': return '☰';
      case 'filter': return '⚙️';
      case 'sort': return '⇅';
      case 'category': return '📂';
      case 'location': return '📍';
      case 'time': return '⏰';
      case 'price': return '💰';
      case 'more': return '⋯';
      default: return '▼';
    }
  };

  return (
    <View style={[{ width: size, height: size, justifyContent: 'center', alignItems: 'center' }, style]}>
      <Text style={{ fontSize: size * 0.7, color, includeFontPadding: false, textAlign: 'center' }}>
        {getIconSymbol()}
      </Text>
    </View>
  );
};

// Dropdown Menu Component
interface DropdownMenuProps {
  options: {
    label: string;
    value: string;
    icon?: string;
  }[];
  selectedValue: string;
  onSelect: (value: string) => void;
  placeholder?: string;
  disabled?: boolean;
  showIcon?: boolean;
  menuWidth?: number;
}

const DropdownMenu: React.FC<DropdownMenuProps> = ({
  options,
  selectedValue,
  onSelect,
  placeholder = '请选择',
  disabled = false,
  showIcon = true,
  menuWidth = 200
}) => {
  const [isOpen, setIsOpen] = useState(false);
  const [dropdownAnim] = useState(new Animated.Value(0));
  const [rotateAnim] = useState(new Animated.Value(0));

  const toggleDropdown = () => {
    if (disabled) return;

    const toValue = isOpen ? 0 : 1;

    Animated.parallel([
      Animated.timing(dropdownAnim, {
        toValue,
        duration: 200,
        easing: Easing.out(Easing.ease),
        useNativeDriver: true
      }),
      Animated.timing(rotateAnim, {
        toValue,
        duration: 200,
        useNativeDriver: true
      })
    ]).start();

    setIsOpen(!isOpen);
  };

  const handleSelect = (value: string) => {
    onSelect(value);
    toggleDropdown();
  };

  const rotate = rotateAnim.interpolate({
    inputRange: [0, 1],
    outputRange: ['0deg', '180deg']
  });

  const dropdownHeight = dropdownAnim.interpolate({
    inputRange: [0, 1],
    outputRange: [0, options.length * 50]
  });

  const selectedOption = options.find(option => option.value === selectedValue);

  return (
    <View style={styles.dropdownContainer}>
      <Pressable
        style={[
          styles.dropdownTrigger,
          disabled && styles.dropdownTriggerDisabled,
          { width: menuWidth }
        ]}
        onPress={toggleDropdown}
        disabled={disabled}
      >
        <View style={styles.triggerContent}>
          {showIcon && selectedOption?.icon && (
            <Icon
              name={selectedOption.icon}
              size={18}
              color={disabled ? '#cccccc' : '#1890ff'}
              style={styles.triggerIcon}
            />
          )}
          <Text
            style={[
              styles.triggerText,
              disabled && styles.triggerTextDisabled
            ]}
            numberOfLines={1}
          >
            {selectedOption ? selectedOption.label : placeholder}
          </Text>
        </View>
        <Animated.View style={{ transform: [{ rotate }] }}>
          <Icon
            name="arrow-down"
            size={16}
            color={disabled ? '#cccccc' : '#999999'}
          />
        </Animated.View>
      </Pressable>

      <Animated.View
        style={[
          styles.dropdownMenu,
          {
            height: dropdownHeight,
            width: menuWidth,
            opacity: dropdownAnim
          }
        ]}
      >
        <View style={styles.dropdownMenuContent}>
          {options.map((option) => (
            <TouchableOpacity
              key={option.value}
              style={[
                styles.dropdownItem,
                selectedValue === option.value && styles.dropdownItemSelected
              ]}
              onPress={() => handleSelect(option.value)}
            >
              {showIcon && option.icon && (
                <Icon
                  name={option.icon}
                  size={18}
                  color={selectedValue === option.value ? '#1890ff' : '#999999'}
                  style={styles.itemIcon}
                />
              )}
              <Text
                style={[
                  styles.itemText,
                  selectedValue === option.value && styles.itemTextSelected
                ]}
              >
                {option.label}
              </Text>
              {selectedValue === option.value && (
                <Icon
                  name="check"
                  size={16}
                  color="#1890ff"
                  style={styles.checkIcon}
                />
              )}
            </TouchableOpacity>
          ))}
        </View>
      </Animated.View>
    </View>
  );
};

// Main App Component
const DropdownMenuComponentApp = () => {
  const [category, setCategory] = useState('');
  const [sortBy, setSortBy] = useState('');
  const [location, setLocation] = useState('');
  const [timeRange, setTimeRange] = useState('');

  const categories = [
    { label: '全部分类', value: '', icon: 'category' },
    { label: '电子产品', value: 'electronics', icon: 'category' },
    { label: '服装配饰', value: 'clothing', icon: 'category' },
    { label: '家居用品', value: 'home', icon: 'category' },
    { label: '图书文具', value: 'books', icon: 'category' }
  ];

  const sortOptions = [
    { label: '默认排序', value: '', icon: 'sort' },
    { label: '价格从低到高', value: 'price_asc', icon: 'price' },
    { label: '价格从高到低', value: 'price_desc', icon: 'price' },
    { label: '销量优先', value: 'sales', icon: 'sort' },
    { label: '好评优先', value: 'rating', icon: 'sort' }
  ];

  const locations = [
    { label: '全部地区', value: '', icon: 'location' },
    { label: '北京', value: 'beijing', icon: 'location' },
    { label: '上海', value: 'shanghai', icon: 'location' },
    { label: '广州', value: 'guangzhou', icon: 'location' },
    { label: '深圳', value: 'shenzhen', icon: 'location' }
  ];

  const timeRanges = [
    { label: '全部时间', value: '', icon: 'time' },
    { label: '近一天', value: 'day', icon: 'time' },
    { label: '近一周', value: 'week', icon: 'time' },
    { label: '近一月', value: 'month', icon: 'time' },
    { label: '近一年', value: 'year', icon: 'time' }
  ];

  return (
    <ScrollView style={styles.container}>
      <View style={styles.header}>
        <Text style={styles.headerTitle}>下拉菜单组件</Text>
        <Text style={styles.headerSubtitle}>美观实用的下拉选择控件</Text>
      </View>

      <View style={styles.section}>
        <Text style={styles.sectionTitle}>基础用法</Text>
        <View style={styles.dropdownGroupsContainer}>
          <View style={styles.dropdownGroup}>
            <Text style={styles.dropdownLabel}>商品分类</Text>
            <DropdownMenu
              options={categories}
              selectedValue={category}
              onSelect={setCategory}
              placeholder="请选择分类"
              showIcon
              menuWidth={250}
            />
          </View>

          <View style={styles.dropdownGroup}>
            <Text style={styles.dropdownLabel}>排序方式</Text>
            <DropdownMenu
              options={sortOptions}
              selectedValue={sortBy}
              onSelect={setSortBy}
              placeholder="请选择排序方式"
              showIcon
              menuWidth={250}
            />
          </View>

          <View style={styles.dropdownGroup}>
            <Text style={styles.dropdownLabel}>所在地区</Text>
            <DropdownMenu
              options={locations}
              selectedValue={location}
              onSelect={setLocation}
              placeholder="请选择地区"
              showIcon
              menuWidth={250}
            />
          </View>

          <View style={styles.dropdownGroup}>
            <Text style={styles.dropdownLabel}>时间范围</Text>
            <DropdownMenu
              options={timeRanges}
              selectedValue={timeRange}
              onSelect={setTimeRange}
              placeholder="请选择时间范围"
              showIcon
              menuWidth={250}
            />
          </View>
        </View>
      </View>

      <View style={styles.section}>
        <Text style={styles.sectionTitle}>应用场景</Text>
        <View style={styles.scenariosContainer}>
          <View style={styles.scenarioCard}>
            <Icon name="category" size={32} color="#1890ff" style={styles.scenarioIcon} />
            <Text style={styles.scenarioTitle}>分类筛选</Text>
            <Text style={styles.scenarioDesc}>商品分类选择</Text>
          </View>

          <View style={styles.scenarioCard}>
            <Icon name="sort" size={32} color="#52c41a" style={styles.scenarioIcon} />
            <Text style={styles.scenarioTitle}>排序筛选</Text>
            <Text style={styles.scenarioDesc}>结果排序方式</Text>
          </View>

          <View style={styles.scenarioCard}>
            <Icon name="filter" size={32} color="#722ed1" style={styles.scenarioIcon} />
            <Text style={styles.scenarioTitle}>综合筛选</Text>
            <Text style={styles.scenarioDesc}>多条件筛选</Text>
          </View>
        </View>
      </View>

      <View style={styles.section}>
        <Text style={styles.sectionTitle}>功能演示</Text>
        <View style={styles.demosContainer}>
          <View style={styles.demoItem}>
            <Icon name="arrow-down" size={24} color="#1890ff" style={styles.demoIcon} />
            <View>
              <Text style={styles.demoTitle}>下拉选择</Text>
              <Text style={styles.demoDesc}>支持下拉展开和收起</Text>
            </View>
          </View>

          <View style={styles.demoItem}>
            <Icon name="check" size={24} color="#52c41a" style={styles.demoIcon} />
            <View>
              <Text style={styles.demoTitle}>选中状态</Text>
              <Text style={styles.demoDesc}>清晰的选中状态标识</Text>
            </View>
          </View>

          <View style={styles.demoItem}>
            <Icon name="category" size={24} color="#722ed1" style={styles.demoIcon} />
            <View>
              <Text style={styles.demoTitle}>图标支持</Text>
              <Text style={styles.demoDesc}>支持自定义图标显示</Text>
            </View>
          </View>
        </View>
      </View>

      <View style={styles.usageSection}>
        <Text style={styles.sectionTitle}>使用方法</Text>
        <View style={styles.codeBlock}>
          <Text style={styles.codeText}>{'<DropdownMenu'}</Text>
          <Text style={styles.codeText}>  options={'{options}'}</Text>
          <Text style={styles.codeText}>  selectedValue={'{selectedValue}'}</Text>
          <Text style={styles.codeText}>  onSelect={'{setSelectedValue}'}</Text>
          <Text style={styles.codeText}>{'/>'}</Text>
        </View>
        <Text style={styles.description}>
          DropdownMenu组件提供了完整的下拉菜单功能,包括下拉展开、选项选择、图标显示等。
          通过options定义选项列表,selectedValue控制选中项,onSelect处理选择事件。
        </Text>
      </View>

      <View style={styles.featuresSection}>
        <Text style={styles.sectionTitle}>功能特性</Text>
        <View style={styles.featuresList}>
          <View style={styles.featureItem}>
            <Icon name="arrow-down" size={20} color="#1890ff" style={styles.featureIcon} />
            <Text style={styles.featureText}>下拉选择</Text>
          </View>
          <View style={styles.featureItem}>
            <Icon name="check" size={20} color="#52c41a" style={styles.featureIcon} />
            <Text style={styles.featureText}>选中标识</Text>
          </View>
          <View style={styles.featureItem}>
            <Icon name="category" size={20} color="#722ed1" style={styles.featureIcon} />
            <Text style={styles.featureText}>图标支持</Text>
          </View>
          <View style={styles.featureItem}>
            <Icon name="filter" size={20} color="#fa8c16" style={styles.featureIcon} />
            <Text style={styles.featureText}>状态控制</Text>
          </View>
        </View>
      </View>

      <View style={styles.footer}>
        <Text style={styles.footerText}>© 2023 下拉菜单组件 | 现代化UI组件库</Text>
      </View>
    </ScrollView>
  );
};

const { width } = Dimensions.get('window');

const styles = StyleSheet.create({
  container: {
    flex: 1,
    backgroundColor: '#f0fffb',
  },
  header: {
    backgroundColor: '#ffffff',
    paddingVertical: 30,
    paddingHorizontal: 20,
    marginBottom: 10,
    borderBottomWidth: 1,
    borderBottomColor: '#e6f7f3',
  },
  headerTitle: {
    fontSize: 28,
    fontWeight: '700',
    color: '#006d5b',
    textAlign: 'center',
    marginBottom: 5,
  },
  headerSubtitle: {
    fontSize: 16,
    color: '#2ab094',
    textAlign: 'center',
  },
  section: {
    marginBottom: 25,
  },
  sectionTitle: {
    fontSize: 20,
    fontWeight: '700',
    color: '#006d5b',
    paddingHorizontal: 20,
    paddingBottom: 15,
  },
  dropdownGroupsContainer: {
    backgroundColor: '#ffffff',
    marginHorizontal: 15,
    borderRadius: 12,
    padding: 20,
    elevation: 3,
    shadowColor: '#000',
    shadowOffset: { width: 0, height: 2 },
    shadowOpacity: 0.08,
    shadowRadius: 4,
    marginBottom: 10,
  },
  dropdownGroup: {
    marginBottom: 20,
  },
  dropdownGroupLast: {
    marginBottom: 0,
  },
  dropdownLabel: {
    fontSize: 16,
    fontWeight: '500',
    color: '#006d5b',
    marginBottom: 10,
  },
  scenariosContainer: {
    flexDirection: 'row',
    justifyContent: 'space-between',
    paddingHorizontal: 15,
  },
  scenarioCard: {
    backgroundColor: '#ffffff',
    borderRadius: 12,
    padding: 20,
    width: (width - 60) / 3,
    alignItems: 'center',
    elevation: 3,
    shadowColor: '#000',
    shadowOffset: { width: 0, height: 2 },
    shadowOpacity: 0.08,
    shadowRadius: 4,
  },
  scenarioIcon: {
    marginBottom: 15,
  },
  scenarioTitle: {
    fontSize: 16,
    fontWeight: '600',
    color: '#006d5b',
    marginBottom: 5,
  },
  scenarioDesc: {
    fontSize: 14,
    color: '#2ab094',
    textAlign: 'center',
  },
  demosContainer: {
    backgroundColor: '#ffffff',
    marginHorizontal: 15,
    borderRadius: 15,
    padding: 20,
    elevation: 3,
    shadowColor: '#000',
    shadowOffset: { width: 0, height: 2 },
    shadowOpacity: 0.08,
    shadowRadius: 4,
  },
  demoItem: {
    flexDirection: 'row',
    alignItems: 'center',
    marginBottom: 20,
  },
  demoItemLast: {
    marginBottom: 0,
  },
  demoIcon: {
    marginRight: 15,
  },
  demoTitle: {
    fontSize: 16,
    fontWeight: '600',
    color: '#006d5b',
    marginBottom: 3,
  },
  demoDesc: {
    fontSize: 14,
    color: '#2ab094',
  },
  usageSection: {
    backgroundColor: '#ffffff',
    marginHorizontal: 15,
    borderRadius: 15,
    padding: 20,
    marginBottom: 20,
    elevation: 3,
    shadowColor: '#000',
    shadowOffset: { width: 0, height: 2 },
    shadowOpacity: 0.08,
    shadowRadius: 4,
  },
  codeBlock: {
    backgroundColor: '#004d40',
    borderRadius: 8,
    padding: 15,
    marginBottom: 15,
  },
  codeText: {
    fontFamily: 'monospace',
    color: '#b2dfdb',
    fontSize: 14,
    lineHeight: 22,
  },
  description: {
    fontSize: 15,
    color: '#2ab094',
    lineHeight: 22,
  },
  featuresSection: {
    backgroundColor: '#ffffff',
    marginHorizontal: 15,
    borderRadius: 15,
    padding: 20,
    marginBottom: 20,
    elevation: 3,
    shadowColor: '#000',
    shadowOffset: { width: 0, height: 2 },
    shadowOpacity: 0.08,
    shadowRadius: 4,
  },
  featuresList: {
    paddingLeft: 10,
  },
  featureItem: {
    flexDirection: 'row',
    alignItems: 'center',
    marginBottom: 15,
  },
  featureIcon: {
    marginRight: 15,
  },
  featureText: {
    fontSize: 16,
    color: '#006d5b',
  },
  footer: {
    paddingVertical: 20,
    alignItems: 'center',
  },
  footerText: {
    color: '#80cbc4',
    fontSize: 14,
  },
  // Dropdown Styles
  dropdownContainer: {
    zIndex: 100,
  },
  dropdownTrigger: {
    flexDirection: 'row',
    alignItems: 'center',
    justifyContent: 'space-between',
    borderWidth: 1,
    borderColor: '#b2dfdb',
    borderRadius: 8,
    paddingHorizontal: 15,
    paddingVertical: 12,
    backgroundColor: '#f8fdfc',
  },
  dropdownTriggerDisabled: {
    backgroundColor: '#f5f5f5',
    borderColor: '#e0e0e0',
  },
  triggerContent: {
    flexDirection: 'row',
    alignItems: 'center',
  },
  triggerIcon: {
    marginRight: 10,
  },
  triggerText: {
    fontSize: 16,
    color: '#006d5b',
    flex: 1,
  },
  triggerTextDisabled: {
    color: '#999999',
  },
  dropdownMenu: {
    position: 'absolute',
    top: 50,
    left: 0,
    right: 0,
    backgroundColor: '#ffffff',
    borderRadius: 8,
    borderWidth: 1,
    borderColor: '#b2dfdb',
    elevation: 5,
    shadowColor: '#000',
    shadowOffset: { width: 0, height: 2 },
    shadowOpacity: 0.1,
    shadowRadius: 4,
    overflow: 'hidden',
    zIndex: 1000,
  },
  dropdownMenuContent: {
    paddingVertical: 5,
  },
  dropdownItem: {
    flexDirection: 'row',
    alignItems: 'center',
    paddingHorizontal: 15,
    paddingVertical: 15,
  },
  dropdownItemSelected: {
    backgroundColor: '#e6f7f3',
  },
  itemIcon: {
    marginRight: 10,
  },
  itemText: {
    fontSize: 16,
    color: '#006d5b',
    flex: 1,
  },
  itemTextSelected: {
    fontWeight: '600',
    color: '#1890ff',
  },
  checkIcon: {
    marginLeft: 10,
  },
});

export default DropdownMenuComponentApp;
从鸿蒙ArkUI开发角度分析,这段React Native下拉菜单组件的代码逻辑体现了鸿蒙声明式UI架构的核心设计理念。
DropdownMenu组件的状态管理通过useState钩子维护isOpen状态来控制菜单的展开与收起,这与鸿蒙的@State装饰器实现响应式状态更新的机制高度相似。当用户点击Pressable触发toggleDropdown时,组件通过Animated.parallel同时执行两个动画序列:dropdownAnim控制菜单内容区域的高度和透明度变化,rotateAnim控制箭头图标的旋转效果。
动画系统采用interpolate插值器实现平滑过渡,rotate插值器将0-1的动画值映射为0-180度的旋转角度,实现箭头图标的翻转动画。dropdownHeight插值器根据选项数量动态计算菜单容器的高度,确保每个选项都能正确显示。这种插值机制对应鸿蒙动画系统中的插值曲线配置。
事件处理机制通过handleSelect函数封装选择逻辑,当用户选择某个选项时,首先调用onSelect回调传递选中值,然后自动收起下拉菜单。这种设计确保了交互的完整性和状态的一致性。
组件结构采用Pressable作为触发区域,内部包含当前选中项的显示内容和箭头图标。Animated.View作为菜单容器,通过transform样式属性绑定旋转动画,实现视觉反馈。选项列表通过map方法遍历渲染,每个TouchableOpacity绑定点击事件,支持图标和文本的复合显示。
在鸿蒙开发中,这种下拉选择器通常通过Select组件实现,支持类似的options数据结构和onSelect回调机制。图标显示逻辑通过Symbol组件实现,支持系统图标和自定义图标资源。状态控制通过enabled属性管理组件可用性,与disabled状态对应。
布局系统采用条件渲染策略,根据isOpen状态决定是否显示下拉菜单。样式系统通过StyleSheet集中管理,对应鸿蒙的@Styles装饰器和Resource资源管理。尺寸适配通过menuWidth参数控制,支持自定义宽度设置。
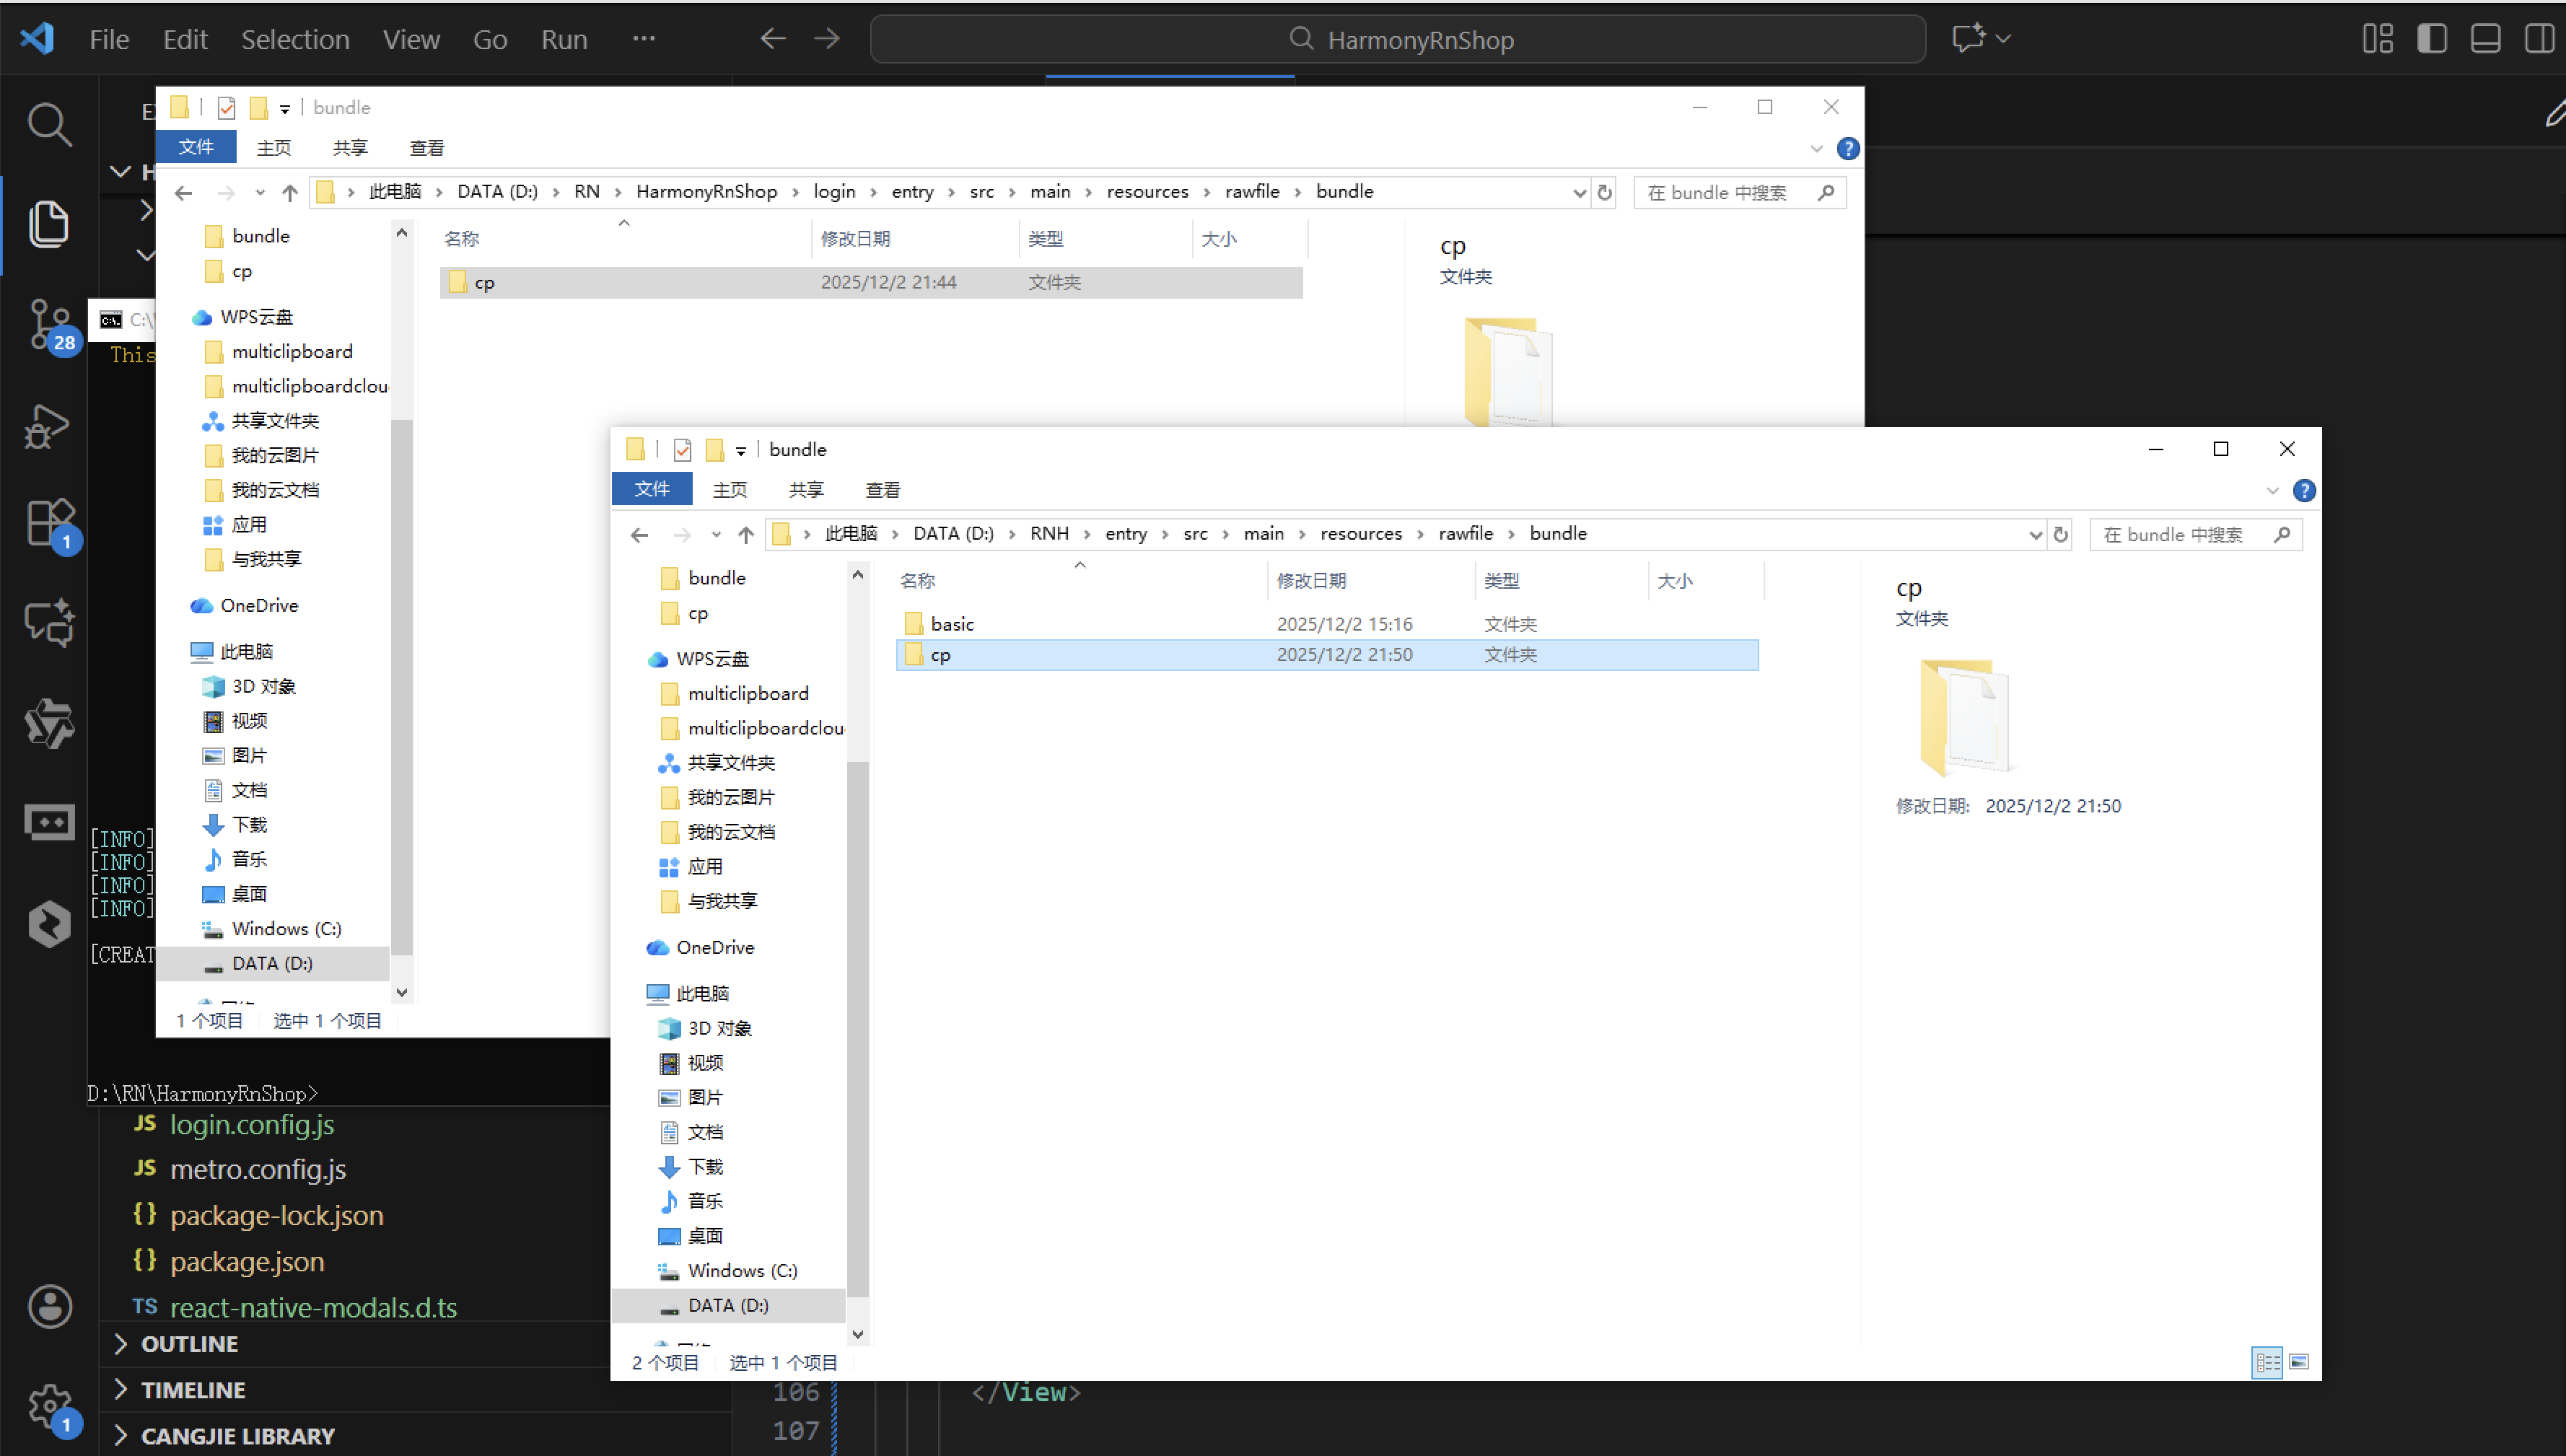
打包
接下来通过打包命令npn run harmony将reactNative的代码打包成为bundle,这样可以进行在开源鸿蒙OpenHarmony中进行使用。

打包之后再将打包后的鸿蒙OpenHarmony文件拷贝到鸿蒙的DevEco-Studio工程目录去:
最后运行效果图如下显示:

作为“人工智能6S店”的官方数字引擎,为AI开发者与企业提供一个覆盖软硬件全栈、一站式门户。
更多推荐


 11
11 0
0- 0


 已为社区贡献11条内容

所有评论(0)